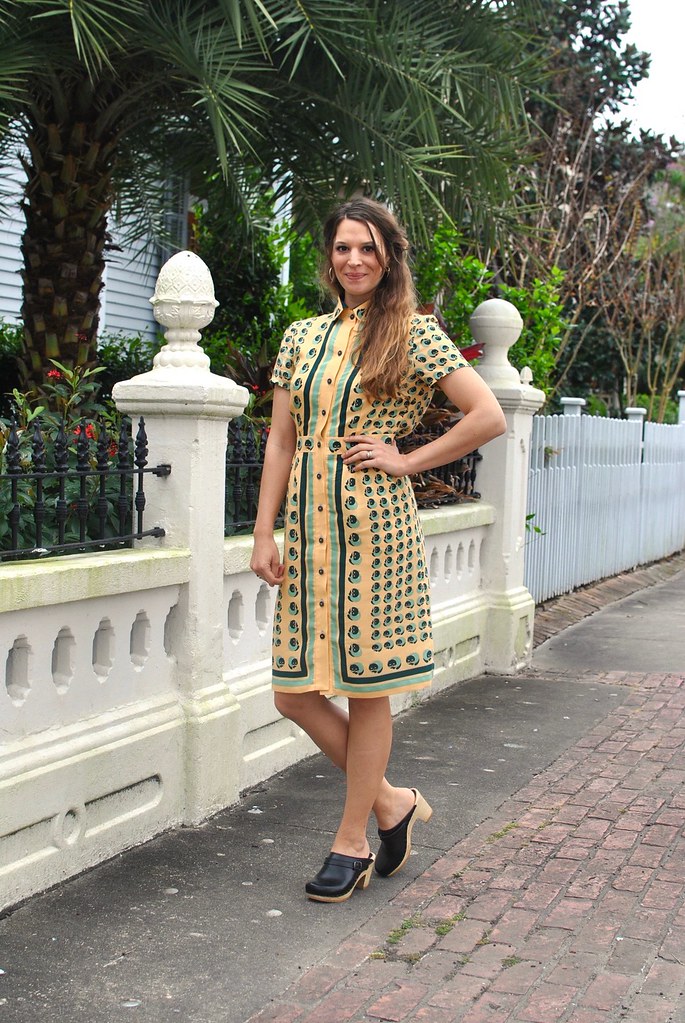
Hellooooo friends!! Please excuse my frizzy hair and general unkempt-ness in these photos. The week I took these photos the weather was truly the worst - mild, but sticky, overcast, and permanently threatening rain, but never delivering – like living inside a cloud. Good for the plants, but not so great for looking polished and put-together! Of course since then the sun has decided to come back out and I feel like all is right with the world again! I don't know how you northeners do it, my tolerance for lack of sunshine has definitely gotten worse since living in Texas! A few weeks of cloudy weather and I'm alternately whining and throwing a tantrum, shaking my fists at the sky, or else despondent and unable to move, because what's the point of moving if you can't see your own shadow?
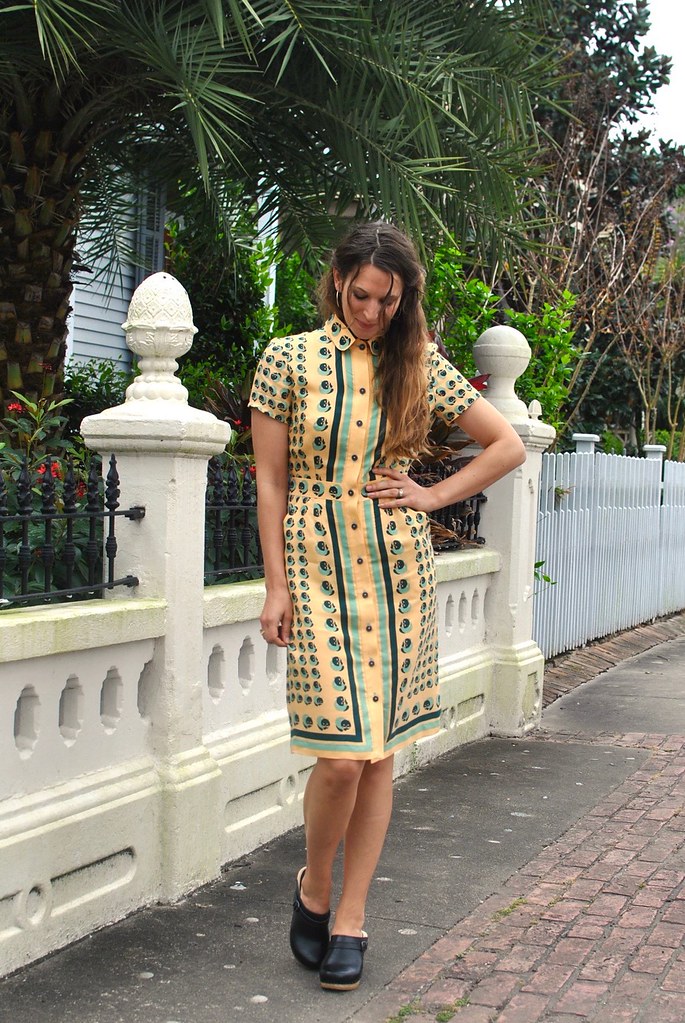
I was actually half tempted to re-shoot these photos in this glorious, sparkly sunshine, but then I figured I'd probably never get this post up and you'd all think I had abandoned this space, and no one wants that! So you'll have to deal with Soggy Sallie. And anyway, frizzy hair and melting makeup can’t put a damper on my enthusiasm for this new dress! Those of you that follow me on Instagram have probably seen sneak peeks of this buddy coming slowly together this past month. March is my birthday month and I always like to work on something a little extra special as a bit of a gift to myself. So this month for the Mood Sewing Network I put together this little puzzle of a dress in Mood Fabric’s Famous Designer Yellow/Green Kitty Cat Border Printed Bamboo Twill Panel. That’s right, there are fat little kitty cats marching all over this dress!
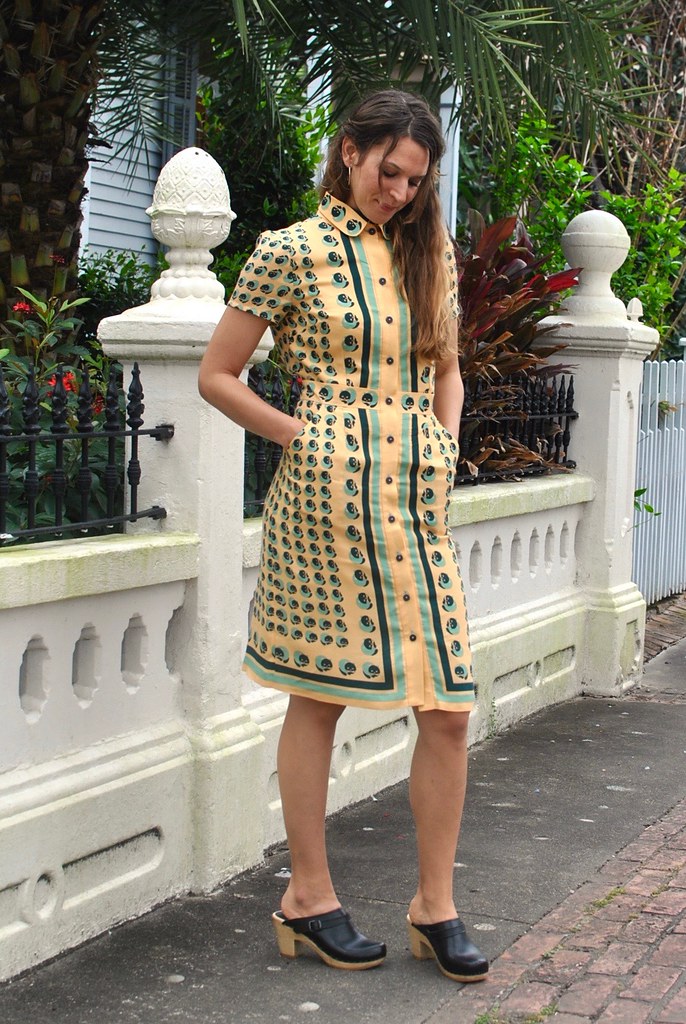
This fabric was pretty much too cute for me to resist (there’s even a purple colorway that I’m thinking of snatching up so I can make an identical twin dress!) But I have to confess that when it arrived I really had to give it some thought as to what I could turn this fabric into. I don’t really have any experience working with border prints, so that alone was a bit of a headscratcher. However this print is also a panel print, with the printed areas being fairly narrow rectangles. It’s not a whole lot of real-estate, print-wise, to work with, so I knew whatever I decided to make would have to have lots of pieces.
Sometimes when I’m feeling really stumped about one of these designer prints I like to try to hunt down the fabric online and see how the designer originally intended to use it. Luckily for me, I knew the designer – Anna Sui – because the name is printed all along the selvedge. Some quick googling gave me a few clues, most notably this:
It was the last image which gave me the idea for a shirtdress. I had bought 4 yards of this fabric, so I had a decent amount to play around with, which was good, because I certainly made some mistakes along the way! This was one of those projects where cutting took almost twice as long as sewing! Not only did I have to consider print placement, and how best to utilize all the parts of the print – the small, closely spaced cats, the larger border cats, and the solid stripes of color – but I also had to attempt to print match as best as I could, which was no easy feat! See, these kitties like to change direction throughout the print, making something as simple as cutting out a left and right bodice front a brain tease! And, just to really up the ante, the bamboo twill is deliciously lightweight, and devilishly shifty, not to mention it wrinkles up if you simply look at it! So it’s no exaggeration when I say that I spent three separate weekends simply cutting and puzzle-piecing this dress together!
this...
and perhaps most intriguing to me...
It was the last image which gave me the idea for a shirtdress. I had bought 4 yards of this fabric, so I had a decent amount to play around with, which was good, because I certainly made some mistakes along the way! This was one of those projects where cutting took almost twice as long as sewing! Not only did I have to consider print placement, and how best to utilize all the parts of the print – the small, closely spaced cats, the larger border cats, and the solid stripes of color – but I also had to attempt to print match as best as I could, which was no easy feat! See, these kitties like to change direction throughout the print, making something as simple as cutting out a left and right bodice front a brain tease! And, just to really up the ante, the bamboo twill is deliciously lightweight, and devilishly shifty, not to mention it wrinkles up if you simply look at it! So it’s no exaggeration when I say that I spent three separate weekends simply cutting and puzzle-piecing this dress together!
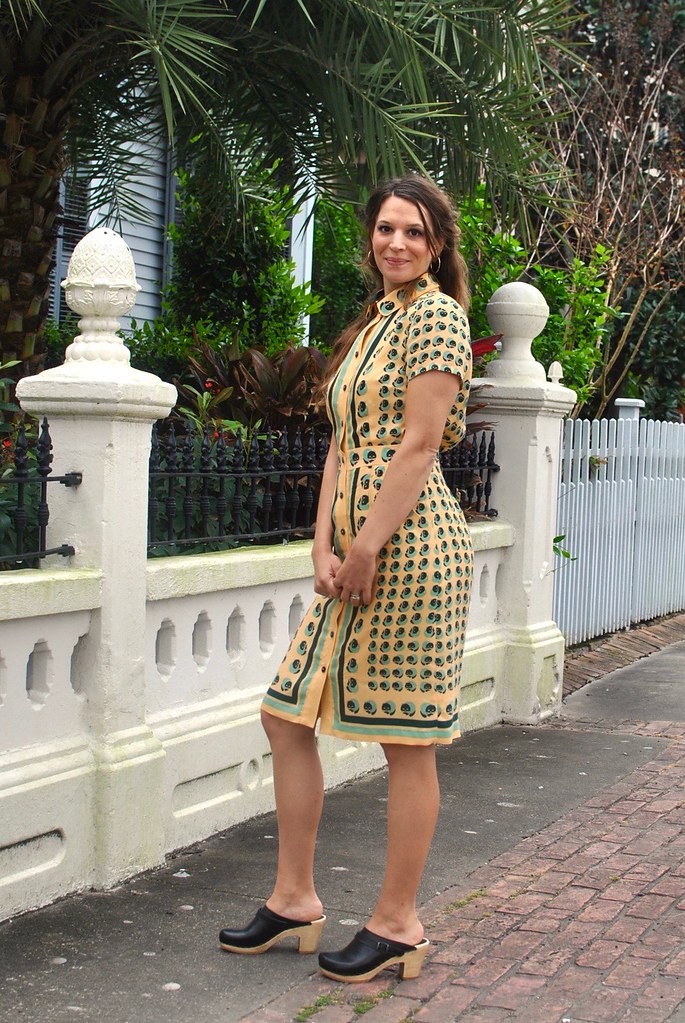
For the pattern I used McCall’s 6696 – a most beloved pattern among the sewing community. I’ve had this in my stash for awhile and was glad to have a reason to finally pull it out and give it a go. I ended up cutting my size based on the finished garment measurements rather than the size chart, because as we all know, Big 4 patterns loooove their excess ease! So I cut a 10 (with a B cup) at the shoulders and bust, tapering to an 8 at the waist, and a 12 at the hips. Having sewn my fair number of shirts, and, for that matter, dresses, I didn’t really follow the instructions, but rather used my own method of construction. I’m very happy with how the dress fits, however if I do make the dress again I might make a few small adjustments. The biggest thing I would change is how full the back is. I’ve read this about this pattern before, but thought I’d try sewing it up as is to see the results, and, sure enough, the back is indeed poofy! So I’d probably try to either reduce the gathering at the waist or convert it to darts.
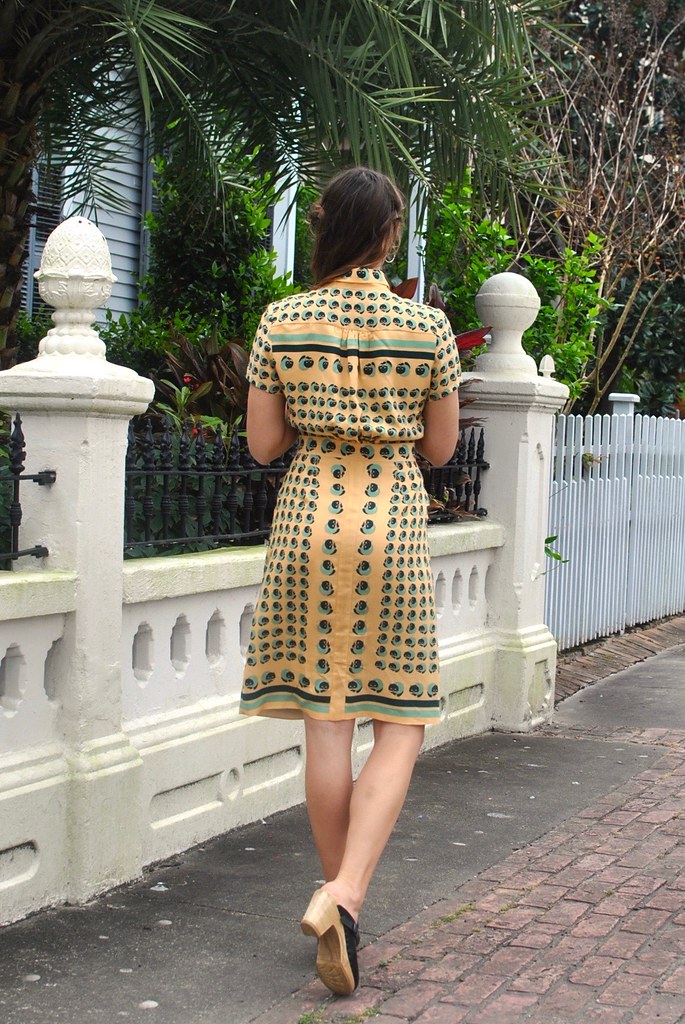
It was pretty much inevitable that I would need to do some creative piecing somewhere on this dress, and the back of the skirt ended up getting the treatment, but more as the result of a mistake than actual planning and consideration! See the back skirt is supposed to be cut on the fold, but the print panels are much too narrow to allow for that, so I intended to add a center back seam. Of course once it came time to cut the back I completely forgot to add a seam allowance and decided to make up for it by sewing a strip of plain yellow down the center to make up for the missing width. The sad thing is, I actually made this mistake twice! I cut one skirt panel, realized I forgot to add a seam allowance, then proceeded to cut another skirt panel, and promptly forgot again to add the seam allowance! *head slap* Such a waste of good fabric! But of course, it all worked out in the end.
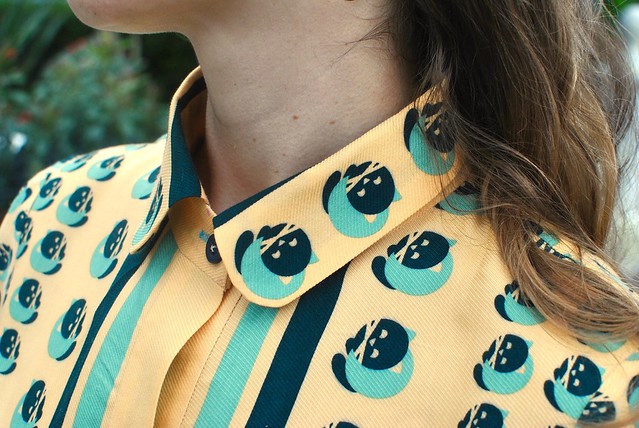
Another change I made was to round the collar, simply because I thought these kitties suited a rounded collar more than a pointed one!
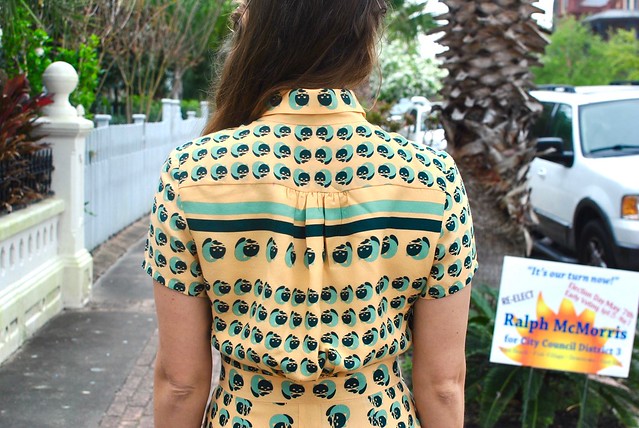
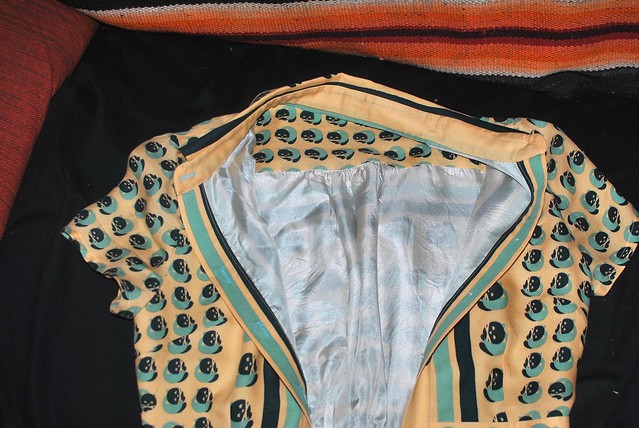
Apologies for the bad indoor lighting (my apartment has the worst light for photos!) but I had to get a shot of the innards because I lined the bodice and skirt in ivory silk habotai which is, in my opinion, one of the loveliest fabrics to wear next to the skin. It’s truly like having an air conditioner installed inside your dress! Which is important when your climate is akin to a damp dishrag. This was also necessary for modesty, as the kitty cat print was a bit on the sheer side.
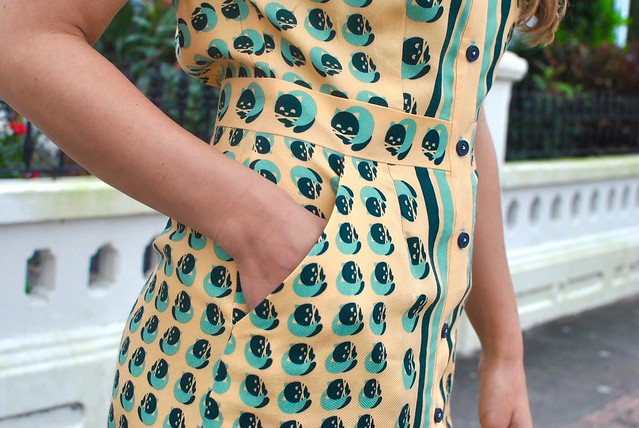
Because this fabric is so lightweight and shifty I made sure to interface areas that I felt would need a little help in order to hold their shape, like the pocket openings. This really helps them from stretching out and looking droopy.
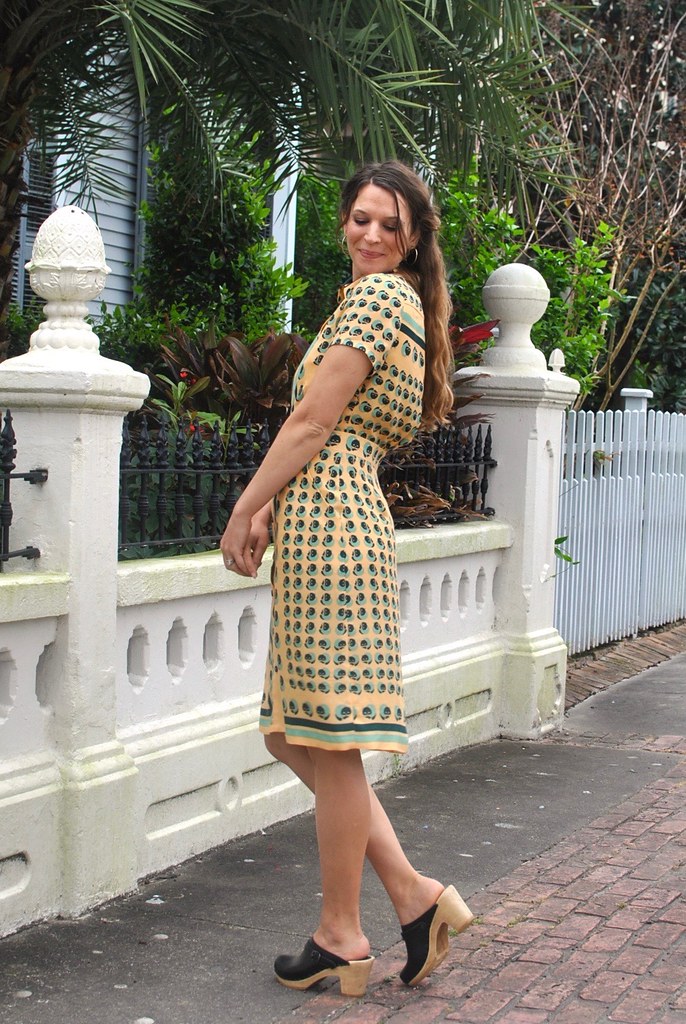
I’m really happy with my new shirtdress! The kitty cats are such a cute surprise when you notice what they are, and I’m really happy with the way I used all areas of this tricky border print panel throughout the dress to enhance the design elements. Do you guys have any tips for working with border prints?
xx


No comments:
Post a Comment