Wow. Does anyone else fall into a well of old Christmas cookies, prolonged sleep and shuffling around in bathrobes post New Year? Sometimes I feel like it's the pressure of "New Year, New You" jargon, or perhaps its the fact that I'm suddenly staring down all the things that I put off right before the holidays, but I often find myself feeling supremely unmotivated come January. I know all the tricks to help me out of such funks - chip away at the to-do list, exercise, don't neglect self-care, etc. - but sometimes holing up with the heating pad and shooting resentful looks at the dog because she can't take herself for walks comes more naturally to me!
So it is in this spirit that I bring you this long-overdue post, which I totally intended to write before we jetted off for our East Coast Family Holiday Bonanza. Hopefully it's not too anticlimactic!
Even though I posted many pictures of my finished historical costume on Instagram, and even wrote about it for my December Mood post, I really wanted to give it its full due with a proper, long, overly wordy post here on my home turf. This costume was many months in the making, and I'm quite proud of it. If you're new here, or are reading this post without much context, I suggest reading the post on my historical undergarments first, as I explain why I ventured into historical costume making to begin with!
Even though I posted many pictures of my finished historical costume on Instagram, and even wrote about it for my December Mood post, I really wanted to give it its full due with a proper, long, overly wordy post here on my home turf. This costume was many months in the making, and I'm quite proud of it. If you're new here, or are reading this post without much context, I suggest reading the post on my historical undergarments first, as I explain why I ventured into historical costume making to begin with!
As I mentioned before, the Victorian era was an extremely long one, spanning Queen Victoria's reign in England from 1837-1901, and within that features some truly spectacular fashion movements. In trying to decide what era I wanted to "personify" with my historical costume I took my personal tastes into account, but I also wanted to consider the time period itself and what it signifies. I completely agree that playing historical dress-up should, first and foremost, be fun. It's about indulging in fantasy, because we can't, after all, go back in time. However I also think it's important to observe that, in doing so, we are romanticizing a past which often doesn't deserve romanticization.
One of the most recognizable silhouettes in Victorian fashion is the giant hoop skirts of the 1850's and 60's. In other areas of the world, this look may not seem very loaded, but here in America it defines the Civil War era, and there is something about dressing in Civil War era clothing as a white woman living in a previously slave-owning state that does not sit right with me. That is not a past I have any interest in romanticizing.
The other most iconic silhouette of the Victorian era is the bustle gown of the 1880's. These fashions are beautiful, elaborate, and extremely feminine. They also remind me of curtains. And sofas. In fact, call me crazy, but doesn't it seem as if the well-to-do Victorian lady practically became a piece of furniture herself during this time period?
All politics aside, my other, more pragmatic reason for eschewing these two iconic Victorian looks was that they are very well represented at the event I was making this costume for, and I wanted to give a nod to a lesser appreciated fashion era, and, let's be real, stand out from the crowd. Show Pony wins again!
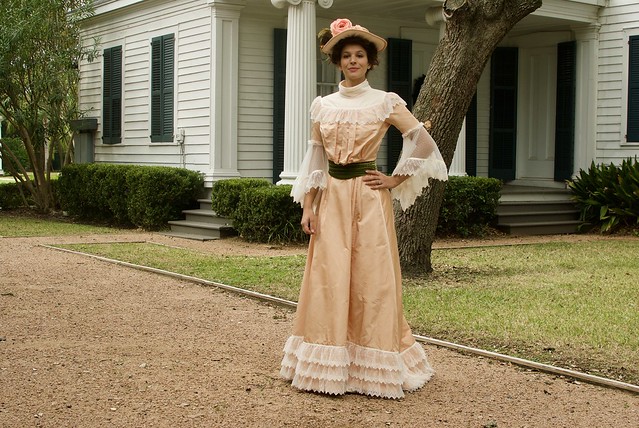
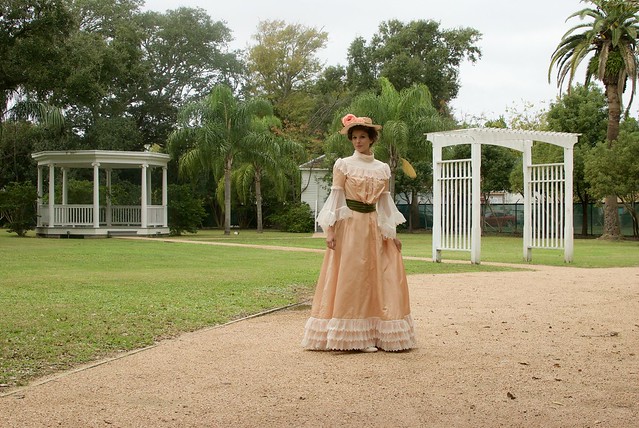
And so, I turned my attention instead to the later Victorian era. I've always had a soft spot for this era. Honestly, my true love is Edwardian fashion. So I attempted to get as close to the Edwardian era while still keeping a toe in the Victorian. For my gown I used Butterick 5970 from their "Making History" line. Since this was my first time attempting a historical costume, and I really didn't give myself a lot of time to make it before the deadline, I decided to go with a Big 4 pattern to have the comfort of modern instructions and sizing to work from. I also just thought this dress was very pretty.
In general, this pattern was pretty easy to work with. It was a crap-ton of pattern pieces, and sourcing all the fabrics and trims and bits and bobs was time consuming, but once I actually started motoring along with the construction it wasn't anything too foreign to me.
No, my one main complaint with this pattern - and, I'm assuming, all the "Making History" patterns - is their smudgy historical accuracy. They do not date their patterns, nor even give them a general name like "Edwardian Dress" or "Flapper" or "Regency Era gown and jacket" or whatever... I know, I know! If I am going to be such a stickler about historical accuracy why didn't I go with a pattern company, like Truly Victorian, or Past Patterns, that prides themselves on their historical accuracy? Well, I didn't know that I would be so bothered by the smudgy time period of this dress when I set out to make it! As I got deeper and deeper into this project my interest in historical fashion grew, and the more research I did, the more I wished I had been more rigid in my choice of costume. Does that make sense? So while I think this dress is lovely, and is general enough to fit into my murky vision of "Late Victorian/Early Edwardian" - it is precisely that generalness that bothers me.
Because I'm a nerd, I attempted to find fashion illustrations and historical examples that would help me date details of this dress.

I was able to find examples of the full, gathered bodice as early as 1893, however many of the 1890's silhouettes are defined by the large sleeve or shoulder, which the Butterick pattern does not have quite as pronounced.

The skirt, with it's slimmer front and full, pleated back, with minimal trim and adornment definitely seemed accurate for the 1890's.

Here is an example of a day dress from the late 1890's which features a similar skirt style, as well as the more narrow sleeve and lacy shoulder adornment of the Butterick pattern.


However the droop of the gathered bodice - the "pouter pigeon" breast - is really iconic of the early 20th century Edwardian look.
One detail that seemed to elude me was the ruffled sleeve. I was ready to write it off as just a pretty detail that the pattern designer, Nancy Farris-Theé, thought looked nice, rather than having a real root in fashion history. But then (Oh you guys... how deep into the rabbit hole I did delve!) my husband gifted me with this book - Costume in Detail 1730-1930 - for Christmas. This book is fascinating! It is full of illustrations of actual garments, detailing how they were made, what type of closures they use, measurements, etc. And lo and behold! What should I find, but this:


Look out, Nancy Farris-Theé! Your secret is out!! This illustration details the exact sleeve pattern - dimensions and all - from the Butterick pattern! And looking at the gown as a whole, it would seem that Butterick 5970 is really just a simplified version of this gown from 1903-07 belonging to a certain Miss Nora Hawker!
And a detail of that sleeve, as recreated by yours truly...

Of course this kind of bungles my whole "Late Victorian" thing I was trying to go for, as these dates place this gown firmly in the Edwardian era, but hey who's counting?!?! Just me, you guys, just me.
Okay, let's get back to my dress...
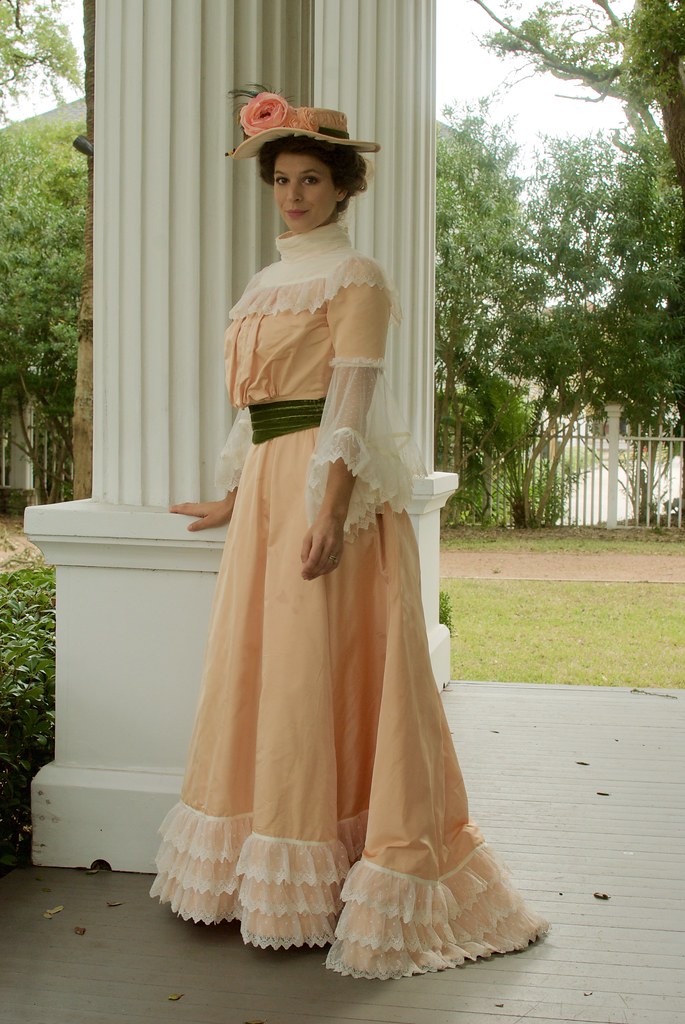
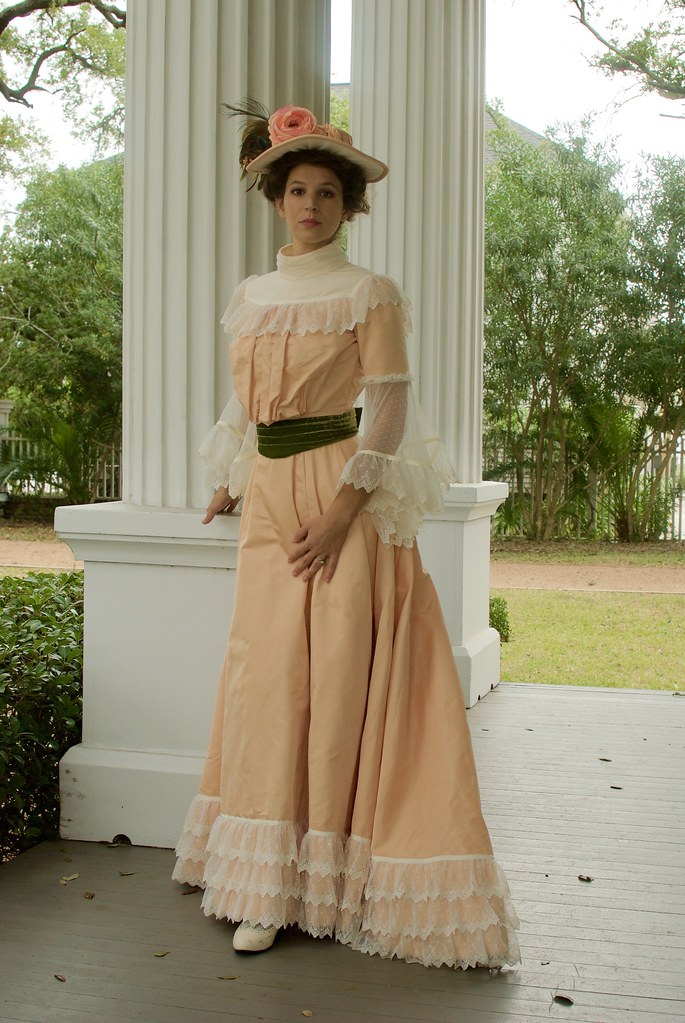
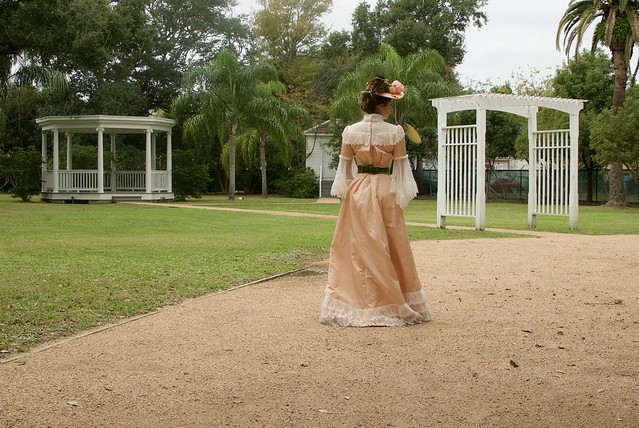
The fashion fabric for this dress is a beautiful peachy-pink silk taffeta from Mood Fabrics. It's no secret that historical costumes are fabric hogs. I desperately didn't want to break the bank with this project, so I tried to limit myself to fabrics I could get through my partnership with Mood. I really lucked out with this silk taffeta, which is both lovely, and was a really great price for such wide yardage of silk. I've never worked with taffeta before, but I really enjoyed the crisp, dry, almost papery hand it had. It made constructing this dress feel almost sculptural.
The taffeta bodice is built on top of a fitted and boned lining, made out of cotton lawn in a similar peach colorway. Most women's clothing from this time period - even robes - were constructed on top of a boned inner structure, no matter how loose the outer silhouette. This reflected women's preference for clothing that shaped the body into the fashionable look of the time, but it also gave the clothes a structural integrity that is rarely seen in contemporary clothes.
The skirt is completely underlined with the same cotton lawn, and about two feet or so, around the hem, is interlined with cotton flannel. This gives the hem a really nice structure and also supports the weight of the lace trim. As I mentioned in my post on my undergarments, I didn't create any petticoats to wear with this costume, and I think I was able to get away with it because of the natural sculptural hand of the taffeta, the additional support of the underlining, and the added weight of the flannel interlining.
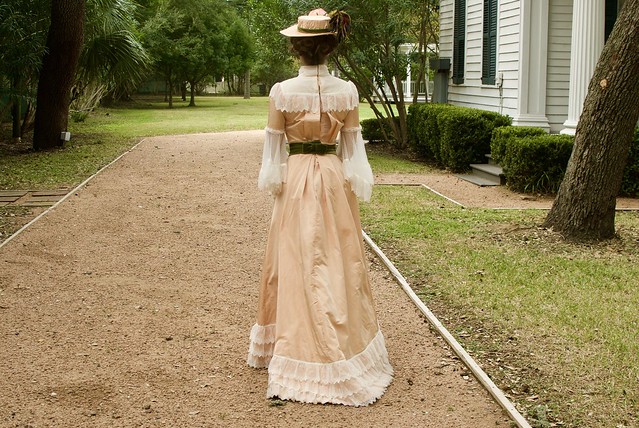
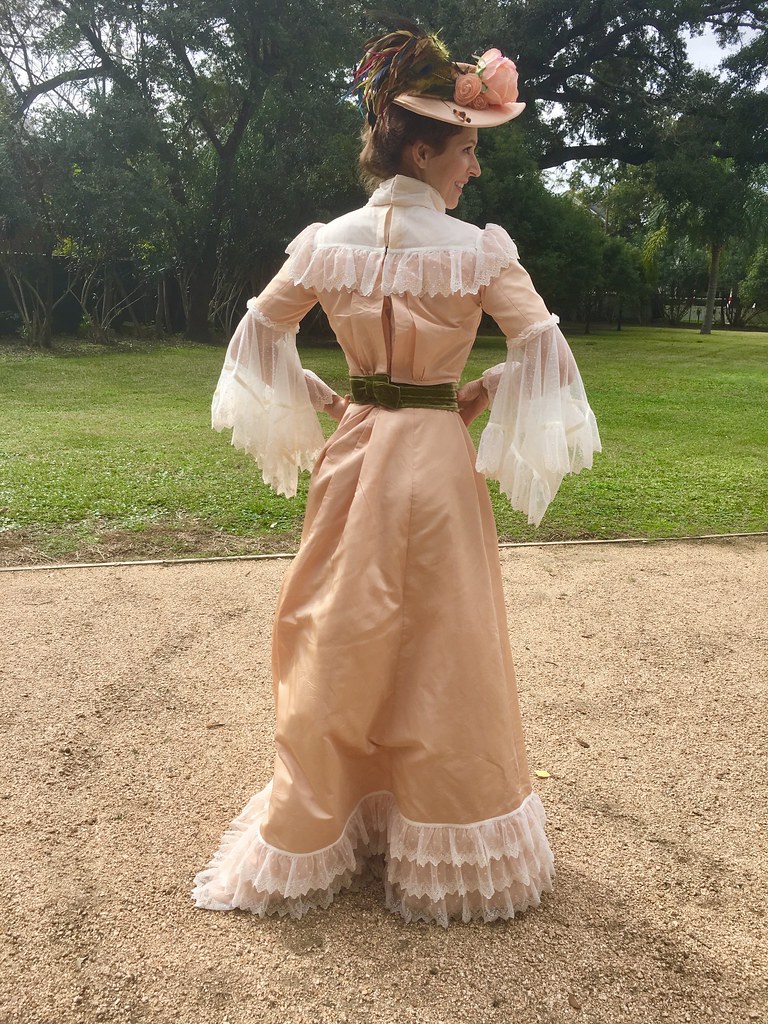
The bodice closes up the back with hooks and eyes on the inner layer. Much to my annoyance, it wasn't until I saw these photos that I realized the flaw in this design was that, if I wasn't careful, the outer, taffeta layer would gape open to reveal the lining. How unladylike!
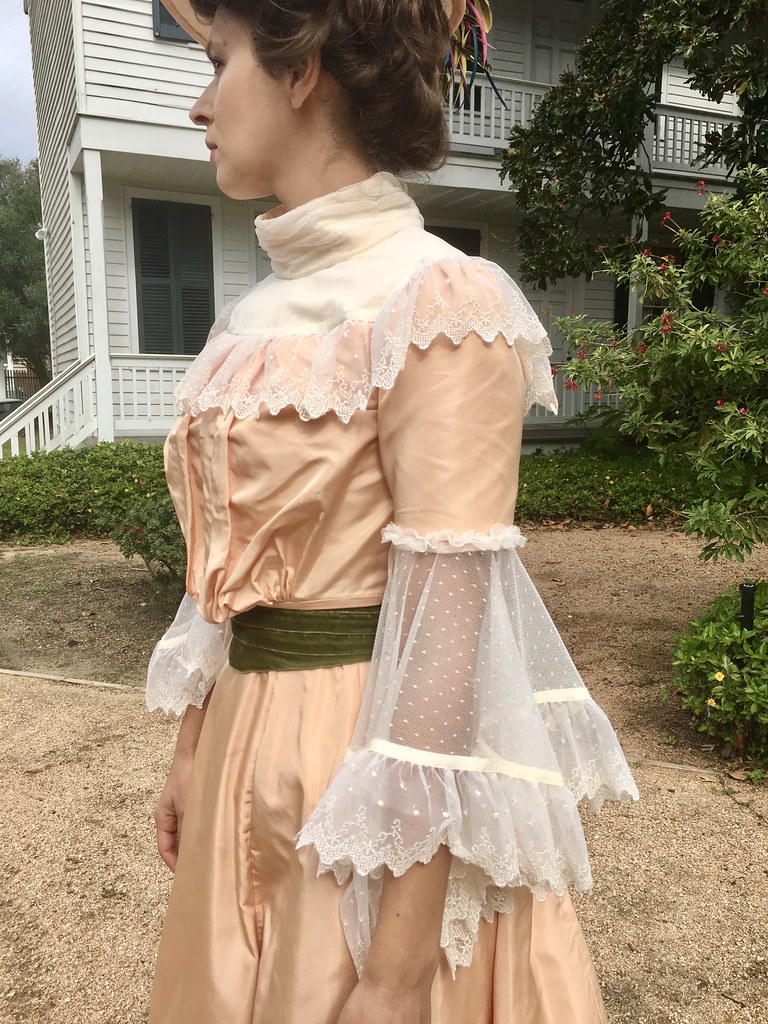
The cream overlay on the yoke and the sleeve flounce is point d' esprit that I picked up locally. It is actually a stretch fabric, most likely used for dance costumes, but it was the softest, and drapiest of this type of netting I could find. The gathered lace trim is from Cheeptrims. Finding the right kind of lace was actually the most difficult thing for me to source. I wanted a netted lace with embroidered details, and it had to be gathered, preferably with a pointed edge, and I needed almost 11 yards of it! I admit that I ordered a few duds before I found one I liked. The machine gathered edge of all the lace trim had to be concealed with more trim and for this I used cream petersham ribbon.
One of my biggest pet peeves with the way this costume turned out is actually the collar. For some reason the circumference of the neckline ended up much larger than the collar piece. It would be easy to assume that my neckline stretched with sewing, but I actually had this problem with a lot of the pattern pieces where I was attaching two circumferences - like the waistbands.Which leads me to believe it's a drafting problem with the actual pattern. I even measured the pattern pieces and they don't match up. Anyway, I redrafted the collar to fit the neckline opening, and I'm not a fan of how big it is. When you look at fashions from this time the collars were quite tight, so my loose collar makes me feel like a dork.
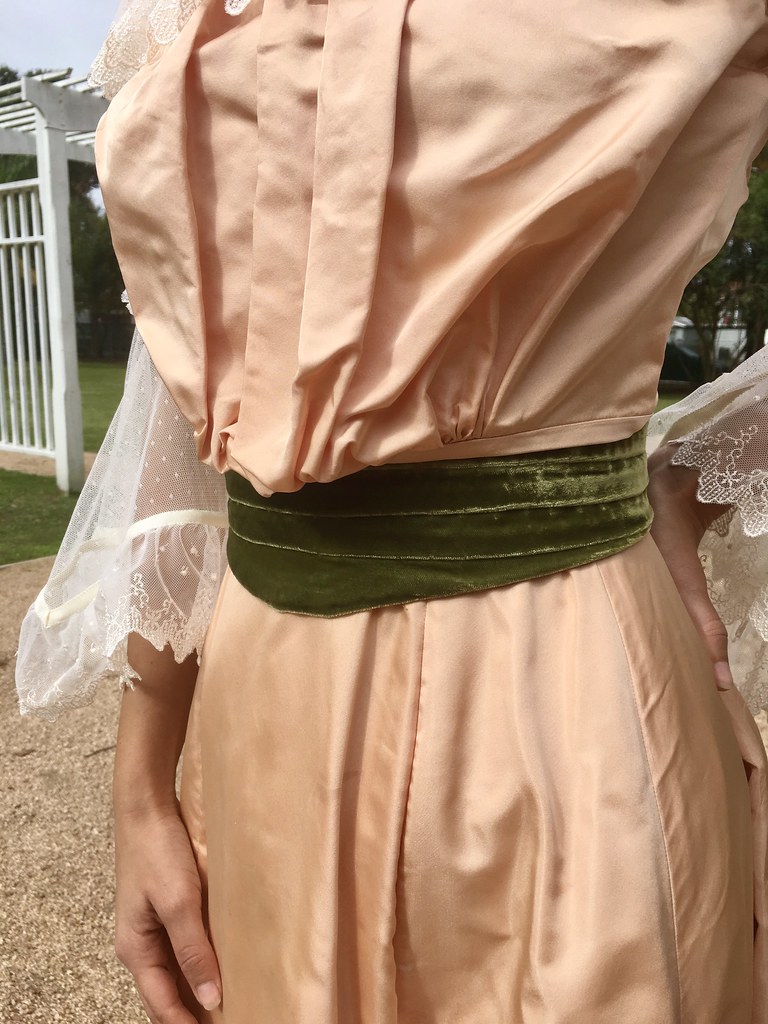
The belt was made with pleated, avocado green rayon velvet that I interfaced with horsehair canvas to give it structure. I've never worked with velvet before either and, oof! What a bear! This fabric shifted around like no one's business under my presser foot, and I got so annoyed (it was also one of the last things I worked on, right before the deadline) that I ended up just sewing the whole thing by hand! Here's some details of my questionable process. My backstiching leaves much to be desired...


Oh! And let's not forget the hat!! Completed at the eleventh hour...
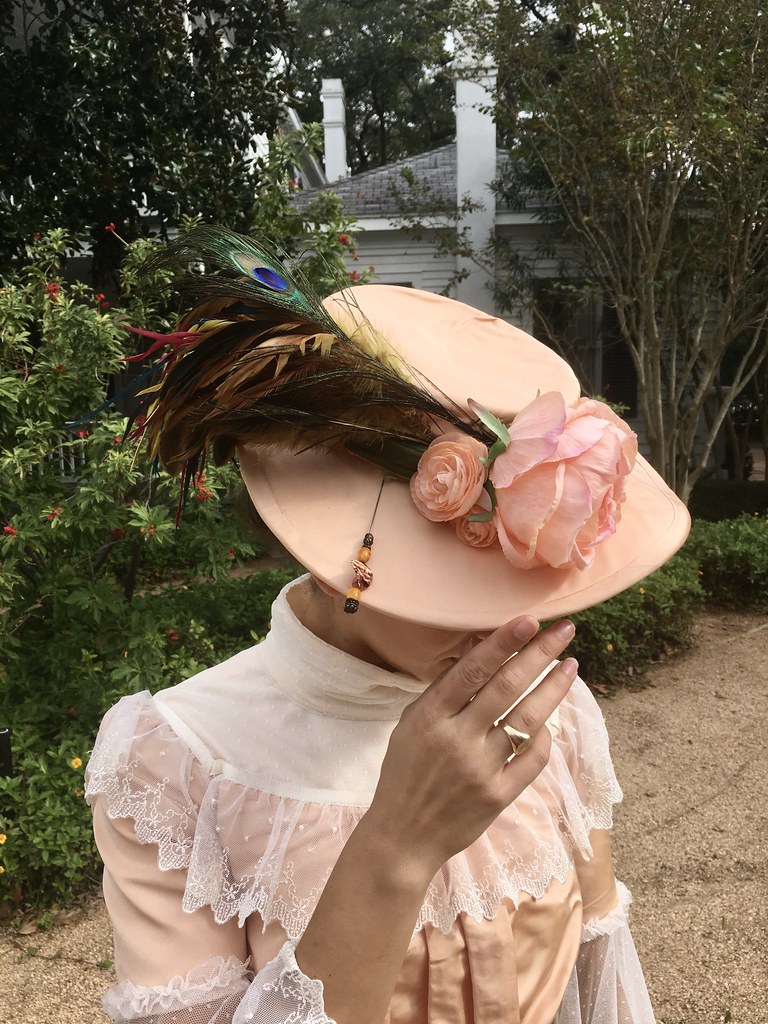
For this I used the La Belle Epoque hat pattern by Lynn McMasters. This hat uses a double buckram for the structure. I could only find single buckram from my local Joann's so I fused together two layers with iron-on adhesive. The brim, crown and tip were all wired, then covered in flannel, then covered in the fashion fabric. I used the taffeta for the outer brim, crown and tip, and the peach cotton lawn covered in gathered point d' esprit for the underside of the brim.
Here's some photos of the hat, in progress:

Attaching the crown and tip by hand, after the wire was sewn on all the edges by machine.

The wired buckram form, waiting to be covered in flannel.
I've never made a hat before, so all this was learning on the job. It wasn't nearly as difficult as I anticipated. It was more crafty than anything else. Of course the real fun was decorating the hat. I had lots of inspiration ready for my hat decoration:


But as it turns out, decorating a hat is hard!! Also, I was feeling incredibly burnt out by this point, so unfortunately, I don't think my hat turned out quite as fabulous as I would have liked.
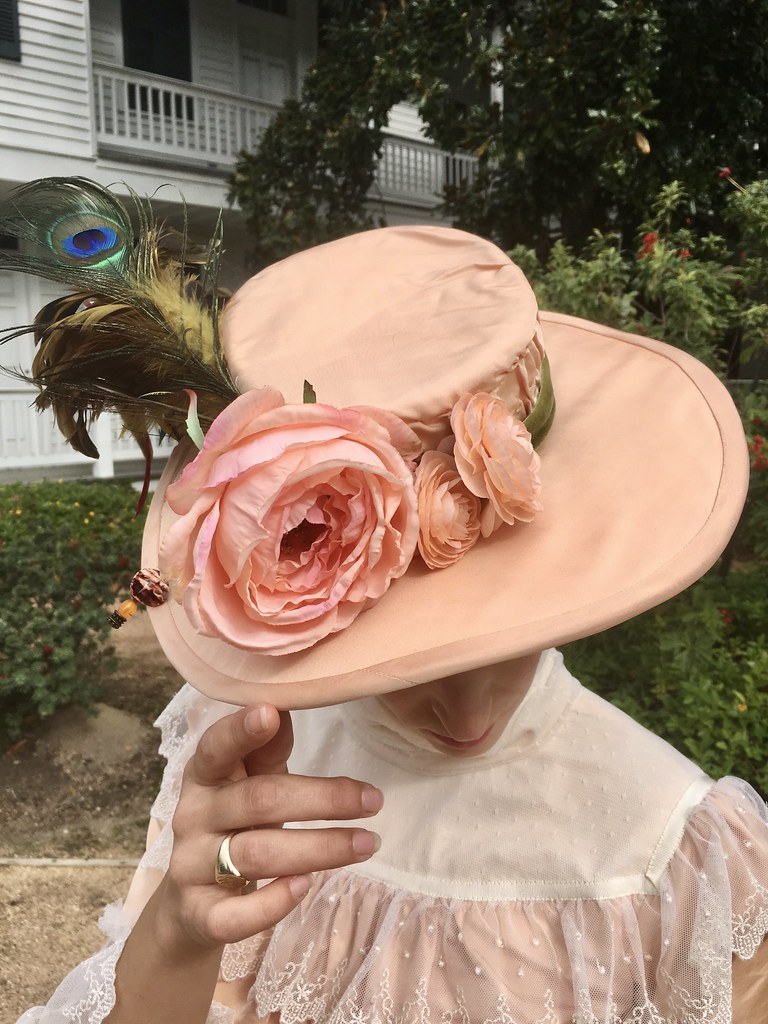
But still! I made a hat!!
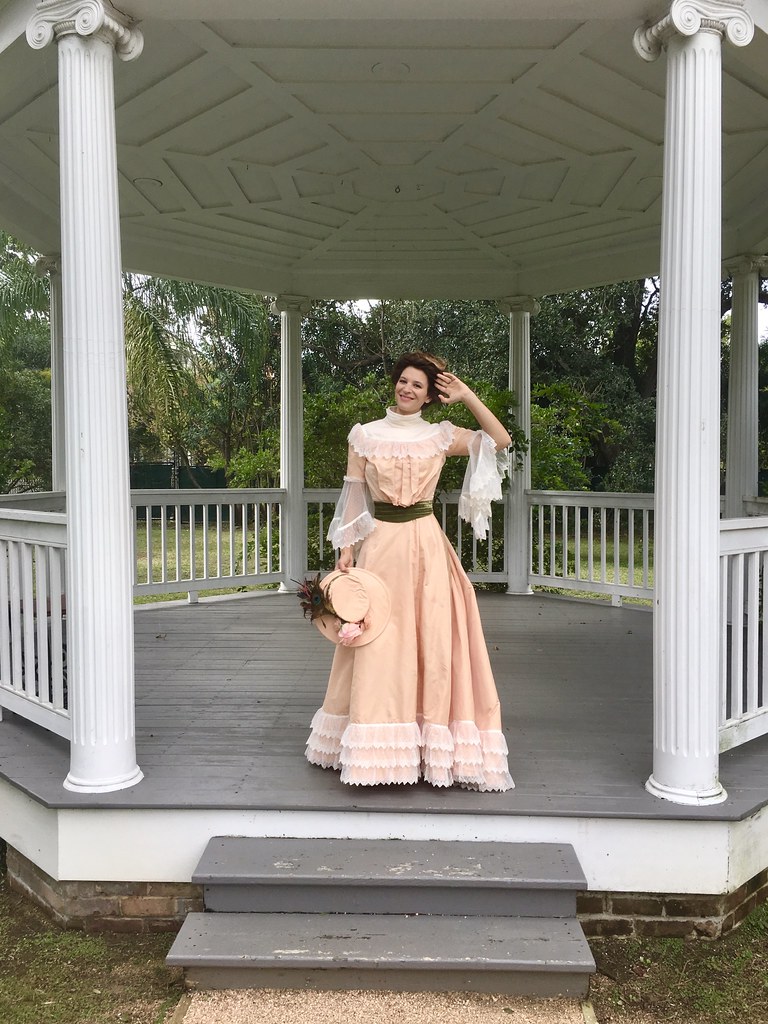
Working on this project was such a wonderful challenge, and wearing it was beyond fun! As I said in my post on my undergarments, I tend to think of myself as a thoroughly practical sewist, but it was a wonderful adventure to make something purely for the fun and imagination of it. This whole project, from start to finish, took me three months to create. Three months for just a few days of wear! I know many of you will say, but you can wear it next year!
... You guys... you should know me better than that! Yeah, I am already scheming a totally new costume for next year! I'm really feeling gigantic sleeves... what do you think?
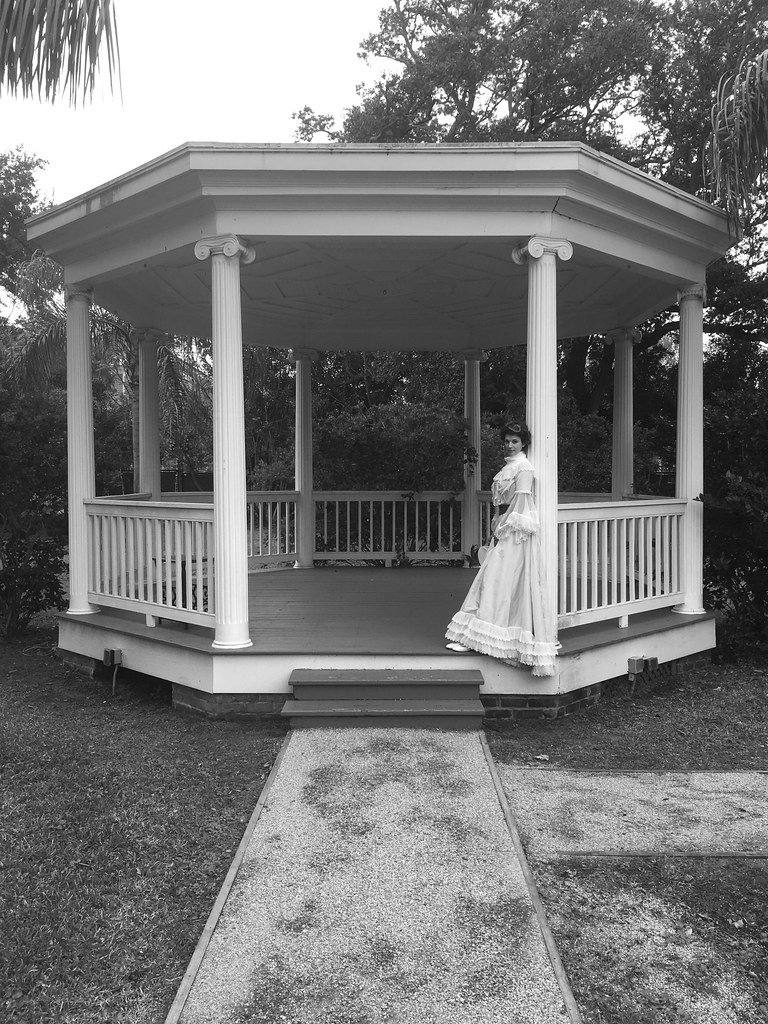
And now, I'm going to photo dump all the pictures that I put old-timey filters on, because it's my blog and I say so.
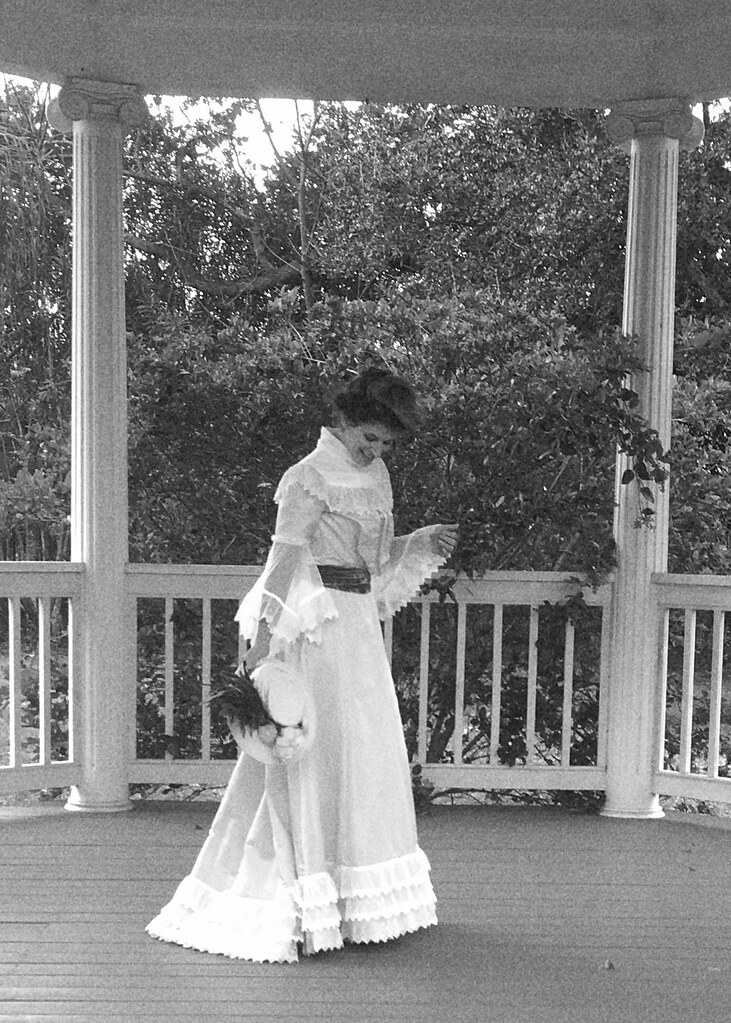
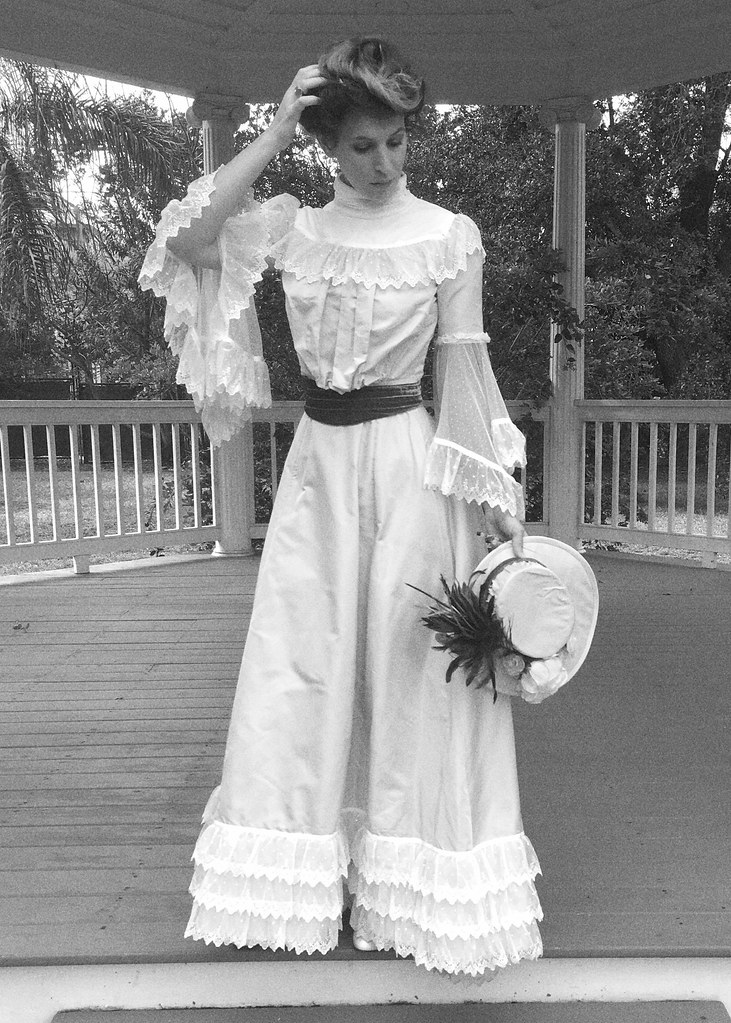
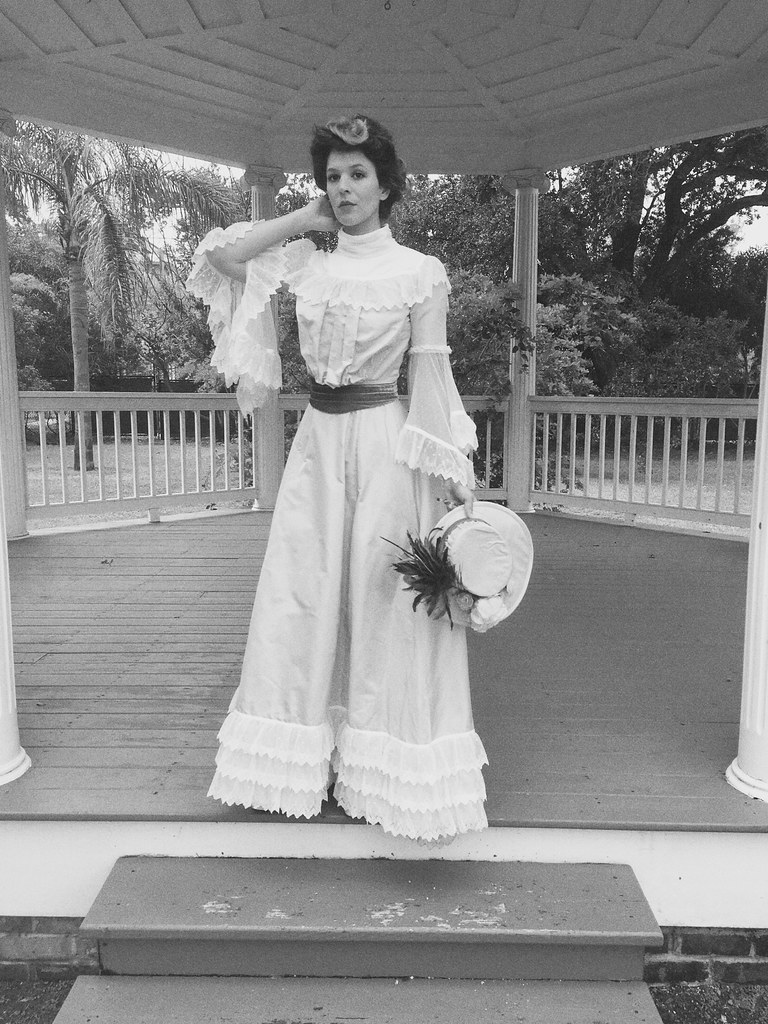
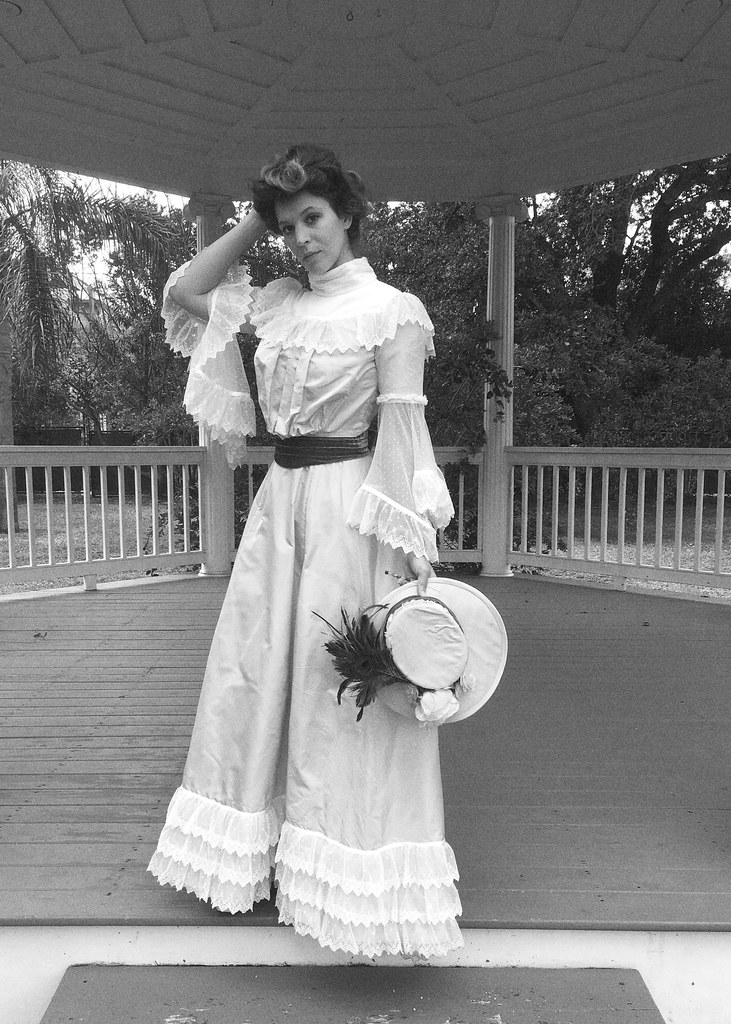
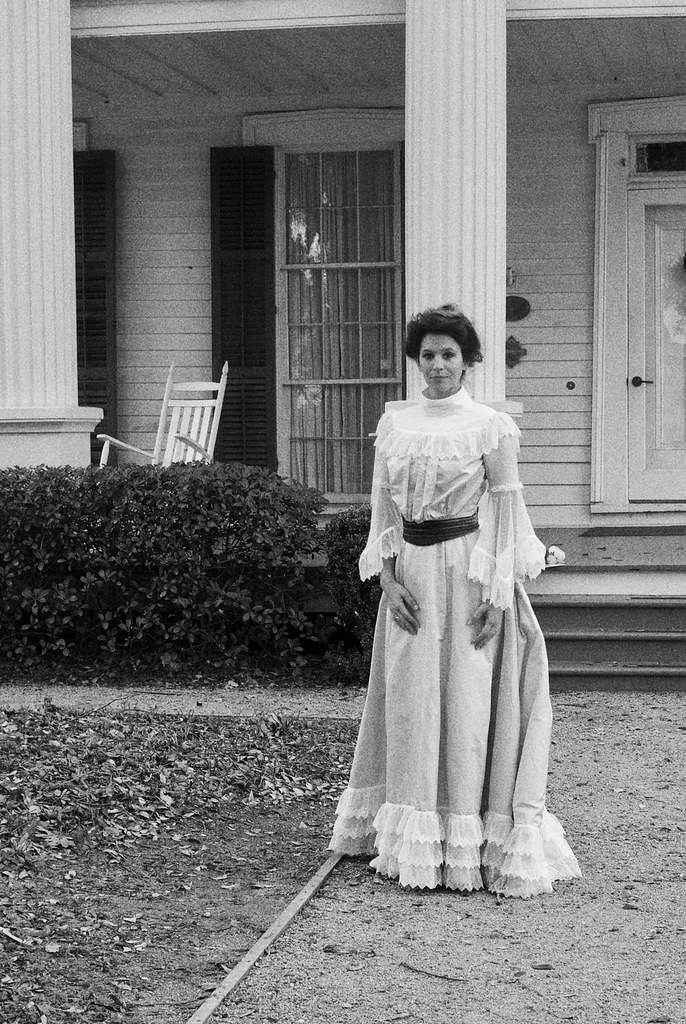
Many thank you's to Nick, for being my photographer and putting up with my Victorian airs. Many thank you's to everyone over at the Galveston Historical Foundation for putting on such a great event and giving me an excuse to indulge my fantasies. And many thank you's to you, my sewing friends, for following along and supporting me with all your kind comments on Instagram and the blog. You guys are the best!
Happy 2017, everyone!
xx