Showing posts with label handstitching. Show all posts

3.26.2015

30!

Mood Fabrics | RL Blue Polka Dot Silk Crepe | BHL Holly

Hi Guys! As you can see, the sun has decided to come out and play, and I've basically been walking around like this in a sun-drunk haze. It gets very awkward when you're constantly running into things, but Igottasoakupdatsun!

But, hey! Yesterday was my birthday! I haven't done a proper birthday post in... gosh... years. Not since I turned 27 (I still love that dress, btw. So pretty). But seeing as I turned 30, some fanfare seemed in order. 

Mood Fabrics | RL Blue Polka Dot Silk Crepe | BHL Holly

I'm not sure if I'm supposed to be feeling existential or what, but I'm actually quite happy to see the back of my 20's! Don't get me wrong, a lot of wonderful things happened in my 20's - I got my BFA and MFA in Painting, I met Nick, got married, taught myself how to sew, started this here blog, and got to know all of you wonderful people. But it was also a decade of a lot of uncertainty and, well, growing up. I'd be perfectly fine if my 30's were a little less momentous! I know a lot of people have anxiety about getting older, but I think with each passing year I get closer to my internal age. You know how some people are 'young at heart'? Well, I'm the opposite of that.  I'm not joking when I say my true age is, oh, somewhere between 65 and 85, but firmly planted in the senior citizen zone. Which is good! I've got awhile before I peak!

Mood Fabrics | RL Blue Polka Dot Silk Crepe | BHL HollyMood Fabrics | RL Blue Polka Dot Silk Crepe | BHL Holly

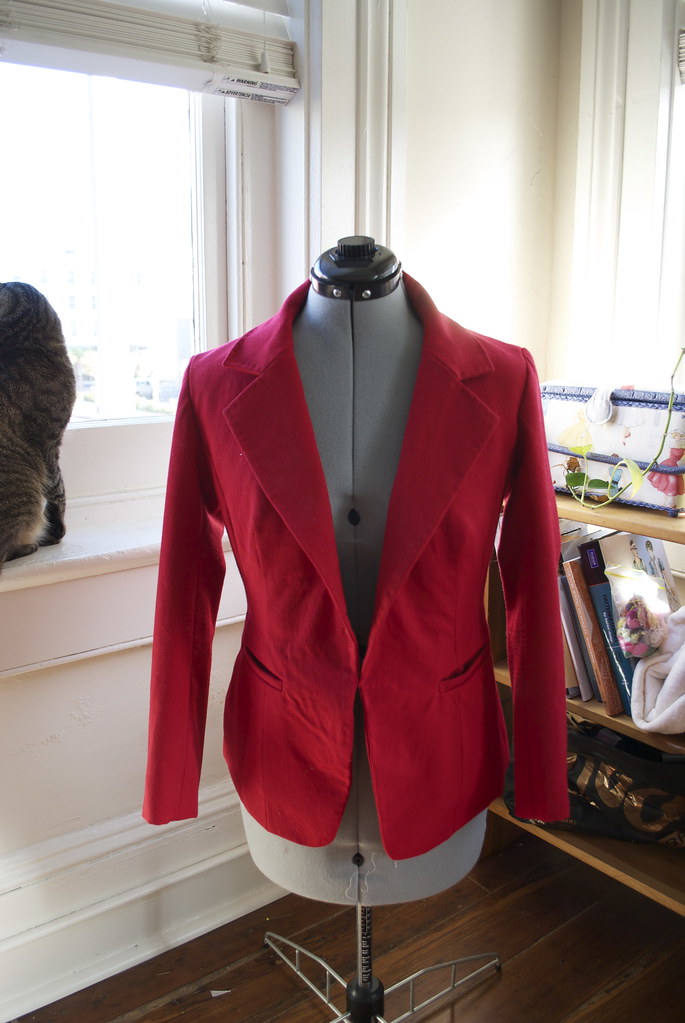
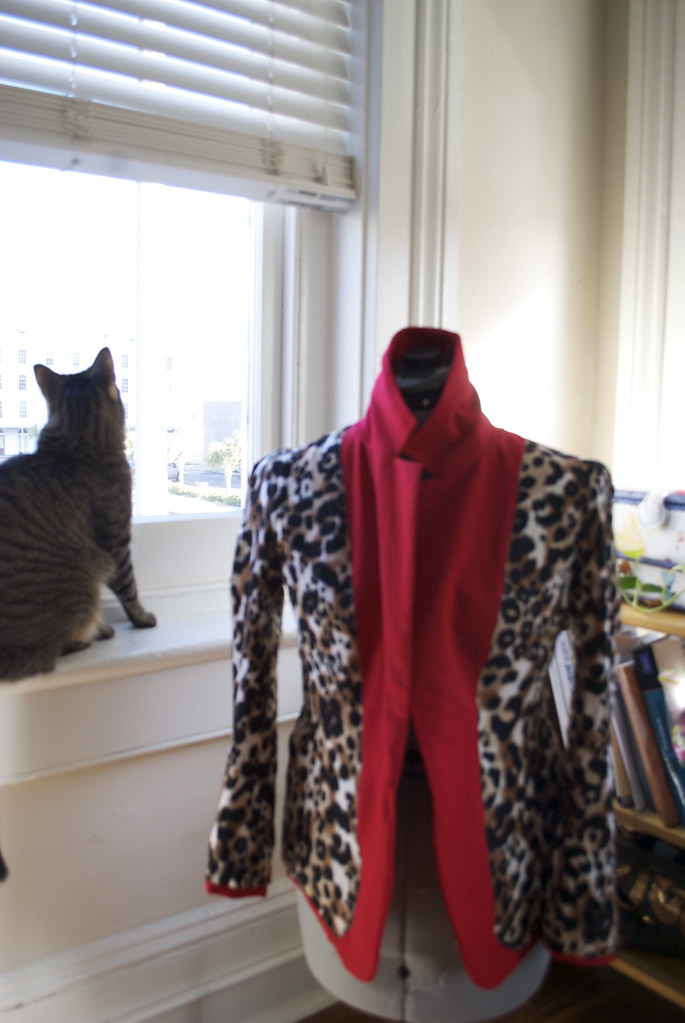
But enough navel-gazing! I don't care how old you are, birthdays should always be at least a little bit about having fun and feeling great, and nothing makes me feel better than a new dress. After the sewing extravaganza that was my jacket I needed a palate cleanser.  So for my March contribution to the Mood Sewing Network I turned to some of my sewing favorites - my comfort food of sewing.  In this case it was a combination of gorgeous silk crepe de chine, a tried-and-tested pattern for the bodice, a circle skirt, and straightforward construction. From start to finish this dress took me two days, which is about as instant gratification as my sewing gets!

Mood Fabrics | RL Blue Polka Dot Silk Crepe | BHL HollyMood Fabrics | RL Blue Polka Dot Silk Crepe | BHL Holly

A few months ago I snatched up this Ralph Lauren Dark Blue Polka Dotted Silk Crepe from Mood Fabrics online with the intention of turning it into a sundress as soon as the weather warmed up.  As any fabric enthusiast knows, a good polka dot is hard to find! So when I spot one, I jump! And this is a good one.  The blue is one of my favorite shades to wear – a brilliant deep cobalt – and the scale of the polka dot is perfect.  Plus, silk crepe is one of my all-time favorite fabrics to sew with.  If you’ve ever been intimidated by silk, do yourself a favor and pick up some silk crepe de chine.  It has all the luxuriousness of silk with none of the finicky handling.

This silk is pretty lightweight, but still very opaque, which might mean it's, like, the unicorn of silk fabric. It also meant that I decided to skip the lining on this one, making this the simplest, slinkiest little slip of a dress in the history of dresses. I did use a one-inch strip of fusible interfacing to reinforce the opening for the invisible zipper, which makes inserting a zip into lightweight fabric like this much more manageable. But other than that, when I'm wearing this dress, there's nothing between me and the world besides a little shimmy of brilliant blue, polka-dotted silk! Just the way I like it!

Mood Fabrics | RL Blue Polka Dot Silk Crepe | BHL HollyMood Fabrics | RL Blue Polka Dot Silk Crepe | BHL Holly

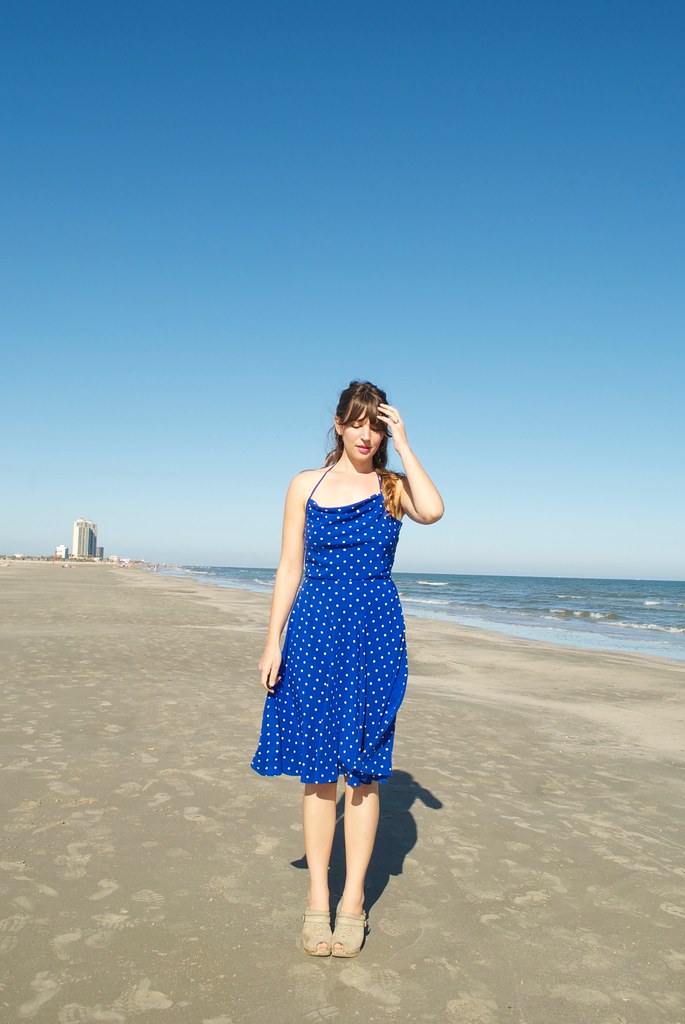
I wanted to pair this fabric with a pattern that would be simple, timeless, feminine, and flirty.  For the bodice I used By Hand London’s Holly jumpsuit bodice, variation 2, which I made once before. I love the disco-vibe of the cowl neck paired with the skinny strap. For the skirt I just used a half-circle skirt, my favorite of all the circle skirts.  I think it has the perfect balance of volume and swish and   also body-skimming sensualness (can skirts be sensual? I think half-circle skirts can). After letting the skirt hang overnight I hemmed this skirt at my preferred midi-length using a narrow folded hem.  Overall I think the look is classic, and slightly retro without being overt.

Mood Fabrics | RL Blue Polka Dot Silk Crepe | BHL HollyMood Fabrics | RL Blue Polka Dot Silk Crepe | BHL Holly

For such a fast sew, I actually did a surprising amount of hand stitching on this dress.  The entire neckline and all the bias-binding was slipstitched in place (just ignore that bit of staystitching that you can see peeking out near the straps... Ignore it I say!). I happen to really hate sewing bias-binding by machine, I can never get it to look neat! So this time I didn’t even attempt it, I just stitched the binding to the bodice right sides together, then folded over and slipstitched to the wrong side, including the straps.  It was way more time-consuming than tackling it by machine, but it was also much less of a headache. And I don't know, there's something about hand stitching that always feels very zen to me.  And in the end I actually really love how it turned out! So much neater than my awkward attempts at the machine.
And speaking of those straps – the original Holly bodice has a regular spaghetti strap, attached at the back bodice.  I had intended to do this, but when I put the dress on mid-construction to do a test fit I just quickly tied them around my neck to keep them out of the way.  I ended up really loving the way the neckline looked as a halter so I decided to keep it like that. I can always tack them down later if I change my mind.  For now though I just folded over the raw ends of the bias binding and stitched them in place.
Mood Fabrics | RL Blue Polka Dot Silk Crepe | BHL Holly

I wore my new dress all day yesterday on my birthday and it really helped me feel great, like a modern day Sophia Loren. And really, what more can a girl ask for on her 30th birthday? Of course I also ended up enjoying so many sweets and drinks and decadent meals that by the end of the day I was more than ready to unzip and give up all pretense of any sort of ladylike or sensual airs. And my birthday ended as all good birthdays should - by washing my face, dotting myself with zit cream, putting on my ratty robe, popping a couple of ibuprofen and heading to bed!

So here's to new decades, new dresses, and sewing something that makes you feel great! Hope you're all having a great March! And if you're not, try sewing yourself something you love. 

I'll be back in the next couple of weeks with a tutorial for the Minoru pattern, so stay tuned!

xx

2.26.2014

a winter coat just in time for spring

Mood Fabrics wool & leather coat

Hi Ya'll! I'm very excited to show you my newest make for the Mood Sewing Network! I know everyone is clamoring for spring, and the last thing you want to look at is another reminder that it's still, alas, winter, but bear with me here because I'm really excited about this coat! Get ready for a looonnng post and picture overload! (P.S. if you want the short version, head on over to the MSN post!)

DSC_0009

I know I didn't do a big post about my goals for 2014, but that doesn't mean that I didn't make any goals! For instance: learn to knit in 2014. check! make better use of your time and be more productive in 2014.... erm.... check minus?? Anyway. You get the point. Well on that list of goals was "make a coat in 2014". (check!!) This wasn't so much an aspirational goal as much as it was a 'this-is-getting-ridiculous' kind of necessity goal. See, when I moved to Texas I got rid of all my winter coats. A bit drastic, I know, but you gotta understand, for a girl from the northeast, Texas winters felt like a joke. At first. Then they started to feel cold again. Also, I bike to and from work everyday.  The past two years or so I have started collecting an odd assortment of winter weather layers, that consist primarily of a $10, thin, unlined, nylon, rain jacket procured from the local sporting goods store (the kind that folds up into a tiny pouch), an aztec print poncho/blanket type thing (shown here) from some cheap, trendy store (this was pre-sewing days) that I tend to wrap around myself like a giant muffler, an array of hoodies, some gloves picked up from the drugstore for $1.99, and now, my hand knitted hats. As you might imagine... it's not the most flattering look.

This year, I decided it was time to step up my outermost layer of clothing. No more being confused for a homeless person! (Although I will miss all the extra change people throw at me... just kidding... that never happened...)

Mood Fabrics wool and leather coat

This is one of those makes where I'm not really sure which came first, the fabric or the pattern. Or perhaps it all just miraculously happened in one, giant, big-bang-like, divine-intervention-esque, stroke of inspiration. But for the sake of keeping things coherent, let's start with the fabric. I actually spotted and fell in love with this Oscar de la Renta wool coating from Mood Fabrics' online store before I became a Mood Sewing Network blogger.  I even asked for, and received, the necessary yardage to make a coat as a Christmas present (thanks Mom and Dad!!) It's basically my dream coat fabric. It's double faced, so it has a gorgeous weight to it, and it's plenty warm for the southern winters I'm dealing with.  And I just think the large-scale, salt and pepper herringbone has such a luxurious texture to it.

Mood Fabrics wool and leather coat
DSC_0013

I really wanted to use this fabric to make a coat that felt both architectural and soft. I know that seems like a contradiction - but trust me, it can exist! I decided to use Vogue 8933 for the pattern, because I loved the large, dramatic collar, and the asymmetrical front.  Also, this was a relatively un-fussy pattern, perfect for my first go at making a coat. I made a size 10 based on the finished garment dimensions (always wise to use the finished garment dimensions when working with a Big Four pattern company!) The one thing that I was sort of bummed about when it came to this pattern was the sleeves. The pattern uses a regular, straight, one-piece sleeve. Since I wanted this coat to feel softly tailored I felt like a two-piece sleeve would just be a more elegant option. So I used the one-piece sleeve as a base to draft a two-piece sleeve. I used this Threads tutorial.  It worked pretty well, although if you do this, I strongly recommend making a muslin (or two, or three) just to be sure that all your markings line up and the sleeve hangs correctly.  I ended up having to move where my seamlines fell, and taking out an odd little chunk of fabric out of the underarm. Drafting sleeves are basically my nightmare, but in the end I think these turned out all right.

DSC_0029

And speaking of sleeves, since this Oscar de la Renta wool has such a gorgeous texture, I thought it would be fun to really highlight it with an opposing texture for the sleeves. You can disagree, but I'm pretty certain that this nubby wool paired with this buttery soft black leather is like the 'chocolate & peanut butter' of the textile world - tactile soul mates. I bought this leather hide, and let me tell you, it was a bargain! I feel like the quality was great and I got a great amount of square footage for the price. I still have a nice, hefty amount left over (hmm... what to use it for....?) plus, shipping was fast. After working with leather a few times now I'm starting to get a nice feel for it. It really isn't a complicated material to work into your sewing, and I, obviously, highly recommend it. I was thinking of putting together a post of a few of my 'tips' (if you want to call them that... it's definitely not anything official) for working with leather... would anyone be interested in that?

DSC_0028

Since I was on a roll with making this coat as much of a sensory delight as one can make a coat, I decided to throw another oh-my-god-I-can't-stop-touching-it fabric into the mix: silk charmeuse.  I'm not going to lie, I completely stole this idea from some other brilliant and fabulous sewists (namely Lauren and Erica). It just looked so incredibly ... what's the word ... rich! And since it's always fun to add a bit of 'over the top-ness' with linings, I opted for this lovely magenta silk charmeuse - although I might call it fuchsia rather than magenta. I like that it adds just a touch of "Dynasty" to the coat, without  going full blown Joan Collins.

DSC_0004DSC_0001

It's been awhile since I made a garment that required so much hand stitching.  I had to brush off my technique from my red jacket days (remember those days.... oh how time does fly...) Granted, I didn't go to nearly the extent that I went to on that red jacket, but there was still a nice amount of fell stitching and catch stitching involved.  And, hence, lots of getting caught up on the most recent season of 'Downton Abbey' (is it just me, or is that show getting even more ridiculous plot-wise?) Anyway, I attached the lining to the collar by hand, because that pivot point was driving me insane on my machine, and also attached the sleeve lining to the coat lining by hand because... well I just wanted to.  The bottom hem of the coat and the lining hang free from each other, so each raw edge was finished separately, pressed up and catch stitched in place. There are little thread bars that hold the lining in place at the side seams. You can also see my little leather hanging loop that I threw into the collar of the coat. I'm so pleased with this little touch! 

Mood Fabrics wool and leather coat

I debated adding a back vent to the jacket. At first I thought this might be a nice 'tailored touch', like the two-piece sleeve. However in the end I decided against it. Since the front has such a wide split, the coat doesn't need it functionally, and visually I felt like a back vent might break up the bottom hem too much. And since it didn't meet the criteria for form or function that idea got ousted. I think this was a good call.

DSC_0038

Since I was trying to maintain some softness with the fabric, I didn't go full tilt with the tailoring. I used fusible horse hair canvas in the facings, and to reinforce the pocket openings, and underlined the leather sleeves with cotton batiste. I also constructed a back stay from the cotton batiste... aaanndd.. that's really it! I think because this wool is double faced it already has a bit more heft than single ply fabrics and I didn't want the coat to get too bulky, or stiff and lose the drape of the collar.

DSC_0003

The coat is closed by a series of coat snaps, sewn on in the very last step. In a world where we go all swoony over a perfectly executed bound buttonhole, this is certainly not the sexiest of coat closures, however it is very functional, and I even sort of dig the final look. A little additional hardware never goes amiss in my book. And while we're on the subject of hardware - am I not-so-secretly regretting not adding  some tough zippers to the underarm seam of my leather sleeves?  Yes. Yes I am. Hindsight you guys...

IMG_1124

I realized that I didn't get a great picture of the coat all buttoned up when I did my photo shoot, so I had Nick quick snap this iphone photo of me.  As you can tell from the majority of my photos, I love the way this coat looks open with the oversize collar doing it's own dramatic thing, but it's nice to know that should I feel a chill creeping at my neck I can button myself, literally, all the way up to my eyeballs!

DSC_0021

Phew!! Long post, you guys! Thanks for sticking with me all the way to the end! In conclusion: I'm incredibly excited about this coat! It feels great to finally have some outerwear that reflects my personal style.  Truthfully, I probably won't get a chance to wear it this year, since spring is already making itself felt down here in the south.  However, I know I will be immensely grateful for this coat come next winter! Is anyone else doing a little 'out of season' sewing?

And how pretty is this fog we've been getting in Galveston? So moody... Can anyone spot the little orange kitty that was keeping me company while I was shooting these photos?

xx

9.08.2013

after the storm

DSC_0031

An aptly named post (if I do say so myself) referencing both the fact that these photos were, literally, taken after an entire day of thunderstorms, and also that this is my first post after my self-imposed hiatus during the month of August - a month which was quite the emotional roller-coaster (hence the likening to a storm...) Aaaand now you know the secret behind my enigmatic blog-post-titles... I'm sure you've been waiting with bated breath for that little nugget of Sallie gold... (sarcasm).

It feels wonderful to be back in this space again after the month I've had! Not that it was all bad, it truly wasn't. For instance, my parents came to visit for a nice long weekend, which was absolutely lovely (miss you guys!!) and I discovered the joys of Agatha Christie's Miss Marple on Netflix (laugh all you want... that shit is tight). But I did have more on my plate than I'm generally used to, which usually turns me into an emotional wreck - or, as my husband so shrewdly noted - I just don't handle extra stress well. Too true, my friends. Too. True.

DSC_0040 DSC_0041

Early on, in the beginning of last month, I started working on this dress.  I was making excellent progress, but then I had to set it aside to work on the project for my friend I mentioned in my last post. I picked it up again last weekend and was utterly thrilled to be working on sewing clothes again.  I guess that elation was a bit premature since I ended up making a pretty major snafu on this pretty little number.  But let's not jump right into the negatives... why don't we relish the good stuff for a bit, eh?

This is Victory Patterns' Chloe dress, made out of some absolutely delightful metallic coated linen from Tessuti fabrics, and entirely lined in rayon bemberg. This is basically the same stuff I used to make my moss mini skirt (here) except in a different color-way.  The linen has a very subtle, 'natural linen' color with a pretty silver sheen.  It's probably best suited for when I have a bit of a summer 'glow', otherwise I might look like a zombie, and I promised to put my brain-eating ways behind me for good (this time). 

DSC_0044

I really wanted to use a pattern that would just let this fabric shine (pun intended). Despite the fact that this may not be my most flattering color, I still wanted a whole garment made out of it.  I thought the Chloe dress, with it's 60's, modish look, might compliment the fabric well (even give it a slightly space-y vibe... much nicer than zombies...) And so I went with it! Plus, I really don't have anything like this in my closet, to date, and I'm always looking to diversify my stock (p.s. I had to ask my husband what that meant, that's how much I know about owning stock!) In the end, I don't know if I ended up with quite the mod/space-y look I had in my head, or more of a ladies-who-lunch type thing, but either way, I'm digging it.

I cut Version 1 of this dress in a straight size 6, but then had to take it in at the underarms by about 5/8 of an inch on either side, tapering to nothing at the waist.  In retrospect, I probably could have gotten away with making a size down, but I was feeling a bit big when I measured myself for this.  Does anyone else make this mistake when you begin a project right before your period? I always end up being a bit generous with my sizing when I do that! Regardless, even if it isn't the most form-fitting (and I don't think this dress is supposed to be) I'm really happy with the overall look.  I chose to use the button placement of Version 2 to add some visual interest to what would otherwise be a very plain dress. The faux welt-pocket-button magic that's going on there is pretty clever, with a little snap hid underneath the button to keep that flap closed. 

DSC_0046 DSC_0052

So perhaps at this point you are wondering to yourself, "what is this snafu she mentioned..." well feast your eyes on this!!!

DSC_0027

GAH!!! Horror of horrors! What is that THING??!?! 

That, my friends, is an exquisitely inserted invisible zipper - from the outside - and some serious gnashing of teeth on the inside! You see, since there was such a long gap of time between when I started this dress and when I finished it, I mistakenly skipped the clever instructions for machine stitching the lining to the zipper tape.  As a consequence I was forced to slip stitch the lining to the zipper. No biggee, I've done this before. The first side went in beautifully (as you can see) but the second side - egads! The zipper just wanted to eat that shit up. As you can see, chaos ensued, I had to rip out all my sweet little hand stitches and since then it's just been hanging out like that. Really, it works just fine as it is, and since the center back seam of the lining was cut on the selvedge I'm not terribly worried about fraying. I'm usually a huge subscriber to the 'beautiful inside and out' line of sewing thought... but this time... I might just let it go. At least until my rage passes...

And with that, friends, I leave you! May you all have a lovely start to your weeks!

xo

4.29.2012

the girl from ipanema


the colors of this outfit make me feel very tropical! where's my umbrella drink??

i worked on this blouse veerrry verrry slowly over my blog break. its my third (and final) of the rachel comey patterns i bought back in october, v1170. i'm not really sure why i didn't buy the fourth pattern from her that was available at the time. i think its because i really don't have much use for dresses in all reality. and also because those crazy style lines got totally lost on me in the leopard print. looking at it again, i actually think its quite cute. much more so than the new one - which is a bit unfortunate - but who knows! maybe that one will grow on me too! weirder things have happened...


this is another fabric from tessuti that i bought a while back. its a silk habutai called summer in italy and it was like sewing with butterfly wings. no seriously! this stuff seriously is so delicate and has no weight at all that i'd be holding it in my hands and i seriously couldn't feel it!  its very sheer, and very beautiful, i think. all the edges are  painstakingly hand rolled - which was no small feat because those sleeve ties are veeery curvy! i'll admit that my curved hand rolled hem started out pretty frightful - but by the last tie i got it looking pretty neat. the front of this blouse is cut on the bias, which added an extra element of delicate flimsiness! i was actually thinking of doing a post on my tips for working with extra delicate fabric like this - would anyone be interested?


i'm not going to sugar coat this - this is a bit of a strange blouse. i know a lot of you are on the fence about these rachel comey patterns, and i do understand why. this one was my least favorite of the bunch. its just a bit awkward to wear. there's a lot of fabric in odd places - like the armpits. actually the fullness of this top is controlled by gathers in the underarm which i find a bit strange. i actually played around trying to put pleats and gathers in other areas to reign in some of the fabric but it just made it worse. this top works best the way it was designed.

that being said - i'm actually quite surprised how much i like the way it looks in the pictures! maybe it was just worse in my head? if any of you were tinkering with the idea of sewing this blouse up, here are a few of my tips:

  • use a very very flimsy, drapey, droopy fabric (like my beautiful silk habutai!!). when i made my muslin of this top out of cotton it was really truly ugly. like, really. no exaggeration. a fabric with any stiffness will make the drapey bits stand away from your body in a really unflattering way. if silk scares you, something like a cotton voile would work too.
  • follow the gathering guides precisely for the underarm gathers. too much gathering and you won't be able to tie your sleeves. too little gathering and you get weirdly saggy armpits. and not in like a cool, dolman sleeve way. trust me.
  • fyi - this blouse is loose and boxy. making it from a sheer drapey fabric helps it seem not as much so. but regardless of that, it looks best tucked in.


just some views of the back button placket and the hand rolled hem - which will never see the light of day **sniff**

this top will probably not get a ton of wear. not because i don't like it, because i really do think its a pretty blouse (and it looks great with this oddly colored anthropologie skirt i've had forever and had no idea what to pair it with!) but because its actually very very delicate. between the sheer fabric and the hand sewing i'm a bit afraid that this blouse might not hold up too well with too many washes and wears. so it'll just get paraded out for the more special occasions! no harm with that...

this was the final make from my spring wardrobe. i'm pretty excited to get started on my summer wardrobe - especially since the humidity decided to set in today! hello texas summer! come on in, stay awhile (i know you will)...

xx

1.17.2012

and now...

time for some gratuitous construction shots!


views of the single welt pockets, (invisible) draw stitched collars with pick stitching along the edge, and fell stitched neckline.


so. much. fell stitching! plus little thread bars to hold the back pleat in the lining in place.

i would be a liar if i said this jacket is perfect. its not. not even close. but that doesn't stop me from being pleased as punch with the final outcome! it has plenty of little kinks to it - places where i may have been a bit overzealous with the steam, areas where i fudged my way through the finer details of tailoring, or got so caught up in the details i wasn't seeing their effect on the garment as a whole. does this ever happen to you?

i tell you this now, because it is with some trepidation that i show you these rather intimate images of my jacket, an object that few of you will ever examine in real life. i feel as if i'm laying it bare. exposing all my wonky little stitches - my fumbling with the fabric.

and i remind myself that it's all a process of learning - something i hate! why can't i skip over the learning part and just be an expert already?!? but it doesn't work like that, does it?

i had to laugh a bit when i was reading claire's instructions on how to attach the sleeve lining to the coat lining by hand. She says that because of the excess fullness - the lining should be smooth, but it won't be as neat as a machine stitched lining. She calls this "a true sign of a hand-made garment".

it reminds me of what my husband says when i'm freaking out over some detail thats just not quite right. He says, "honey, thats how you know its handmade"...


xx

1.15.2012

let's hear it for the boy


friends... meet the red jacket.

and prepare for photo overload.

that self-satisfied smirk is totally justified. i finally finished it! to be perfectly frank, i sort of feel like i just gave birth! (i totally reserve the right, should my future self ever actually give birth, to come back and give my present self a good slap for that comment) but really - there were times there when i thought this lovely lady would never be finished!

and she is a beauty, isn't she? this red jacket was just the thing to perk up a chilly, dreary winter day (by texas standards, ya'll).


i spent the past evenings and weekend hand stitching all the finishing touches. the upper collar was fell stitched along the neckline and draw stitched at the gorge line. the lining was fell stitched in place at the shoulders, neckline, armholes and along the front edge - all, of course, as per claire's instructions. sometimes i have serious doubts about wearing a garment hard that has predominate hand stitching, but have you ever tried to rip out fell stitches or back stitches? they are far more resilient than machine stitching! i will be posting some construction shots shortly - it was just far too dark to get decent pictures once we got home from our photo session this afternoon.


and, of course, there is that leopard print lining! the print is a bit louder than what i originally had in mind, but it was also $8 a yard, rather than the (far more tasteful) $36 a yard silks. and truthfully, its kind of grown on me. in fact, i bought extra yardage - so you'll be seeing this print pop up in a, how shall we say, less subtle way in the near future.

i used burda's 07/2011 sweatshirt sports coat for the pattern, however i redrafted the upper collar to get rid of the collar stand. the actual coat is made from wool gabardine. its underlined in white cotton batiste and then interfaced with goat hair canvas along the upper part, lower edge, lapels, collar, and sleeve caps. the lining is rayon challis - not a very typical lining fabric, but it was soo soft, and, as i mentioned - cheap(er)!

i made the executive decision at the last minute to leave out my self-made shoulder pads. while they looked nice, they gave the jacket more of a structured, formal look, and i sort of had a slightly slouchier look in mind. the difference is almost insignificant, but i feel it was the right decision. i did, however, leave the sleeve heads in, to support my dimpled sleeve caps!


here i am testing the fit of the back and shoulders. the ironclad test? weird lunge-y moves on the pier (what? thats not what you do?) there were no popped stitches, so i gave it a gold star, and moved on before i start getting real nit-picky, because, lordy, i could pick and tweak until i'm blue in the face!

my inspiration for this outfit came from one of my favorite style blogs, calivintage, who first introduced me to the term "teddy girls". i was going for a sort of mid-century, boy-meets-girl look (thus the title of this post - and also this song - a favorite from yesterday my youth). my red jacket inspires such things in me.

i would be seriously remiss if i didn't thank my husband for these photos today. and for putting up with my farting about deciding where to take them. and for making the executive decision for me to not reset the sleeves on this jacket for the 10th time, and just let them be. husband, thank you. you are the wisest of them all, and i don't know where i'd be without you.

outfit details:
jacket - self made
shirt - american apparel
jeans - j brand
shoes - urban outfitters from a long long time ago
scarf - not sure. a thrift store perhaps?

xx