Hey Guys! So... do you ever have those projects that once you finish it's like you've unclogged the pipes? All of a sudden everything starts flowing again, you just had to push through that one last barrier? And, no, I'm not talking about my digestive track (or maybe I am??) I'm talking about sewing, and sewjo (or a lack thereof) and feeling stuck, and getting going again. I think we've all been there.
Well. This jacket was that project for me.
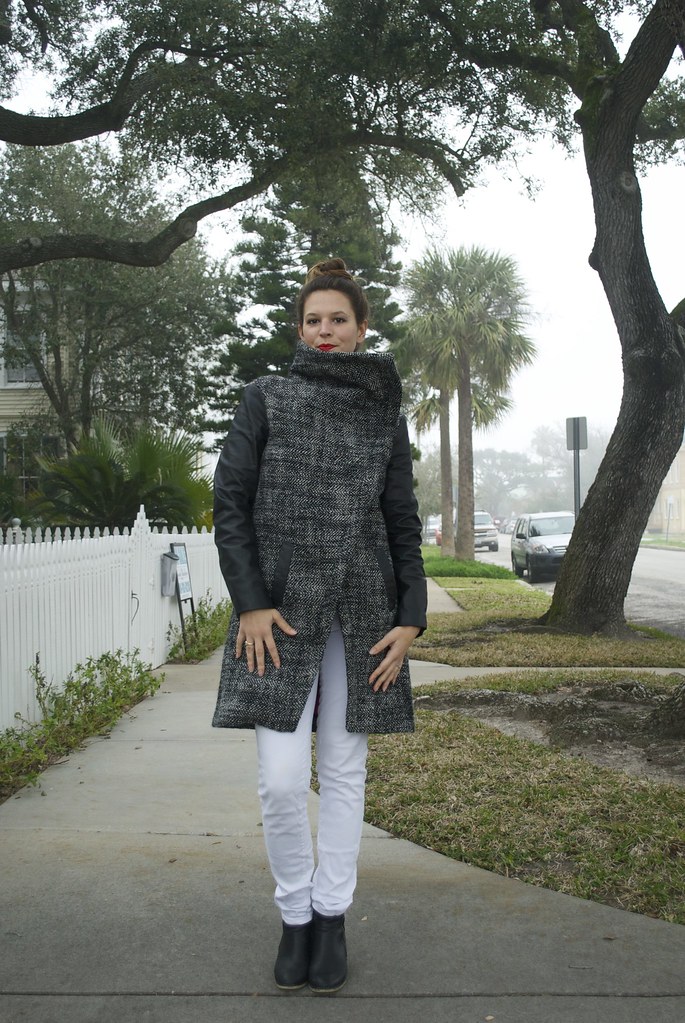
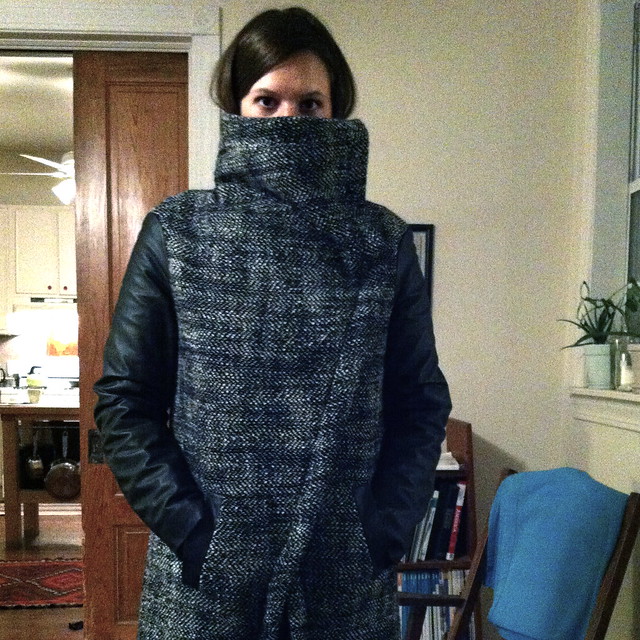
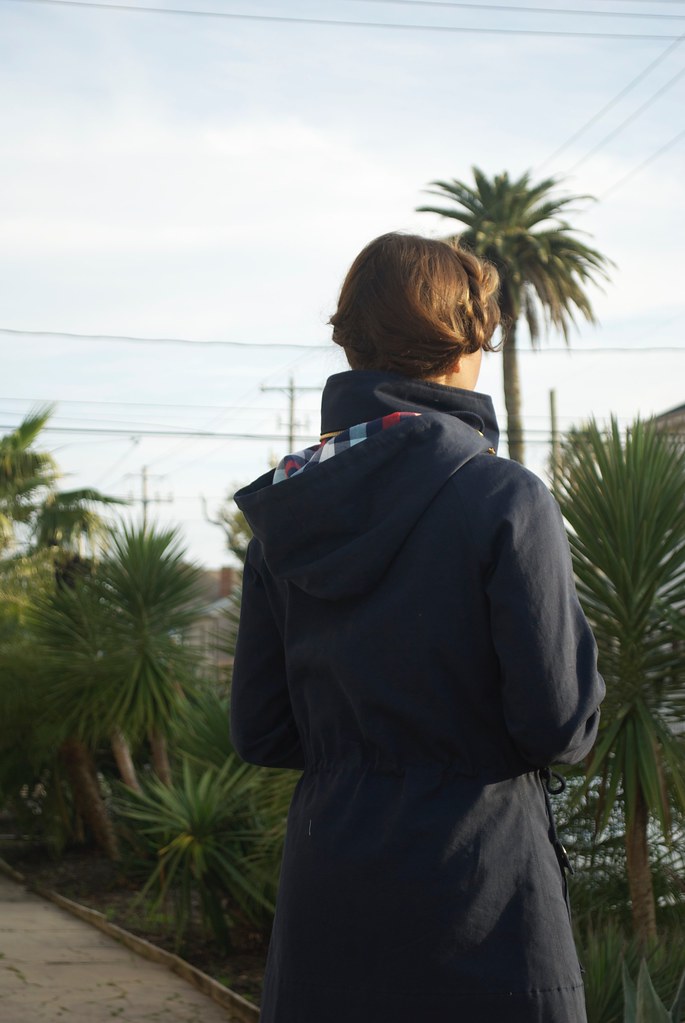
Meet my new, much needed, rain jacket. This project was born out of desperate desperate need. And I fought it every step of the way. It's no news that I live in Texas and that, while we do get a stretch of legitimately cold weather we like to call "winter" the majority of the months that make up a North American winter are spent in that weird, not-quite-cold-not-quite-warm, drizzly, damp, miserable, in-between state. There are days that I'm very grateful I own a winter coat and some handmade wooly goodness to keep me warm, but there are even more days when I step outside and think "what the hell am I supposed to do with this??!?"
And, lo, it became clear that what was missing from my life was a nice, mid-weight jacket that could withstand some precipitation. Something that I could wear on my bike commute. Something I could throw on with leggings and sneakers and not look like a clown. And above all, something classic that would never go out of style so I never ever have to make one again!
I think I've known for at least two years that I've needed such a practical garment, but I just couldn't ever quite find a pattern that had everything I wanted. They were either too anorak, or too duffle coat, or too military, or they didn't have a hood... Where was that perfect in-between pattern to match my in-between weather?
Then, a little over a year ago my blog feed delivered up this gem from none other than Kelly from Cut Cut Sew and I became obsessed. Kelly's jacket had so many of the elements I had been looking for! And it was a Minoru!! Of course I had seen Sewaholic's Minoru Jacket pop up on blogs many many times (it is a well loved pattern) and I always thought that it was very cute, but not quite me. It wasn't until seeing Kelly's riff on the Minoru that I saw this patterns potential: it has good bones.
What I mean is, this is a pattern that lends itself to customization. You can add to it, subtract from it, but what it is at it's core, it's bones, is good stuff.
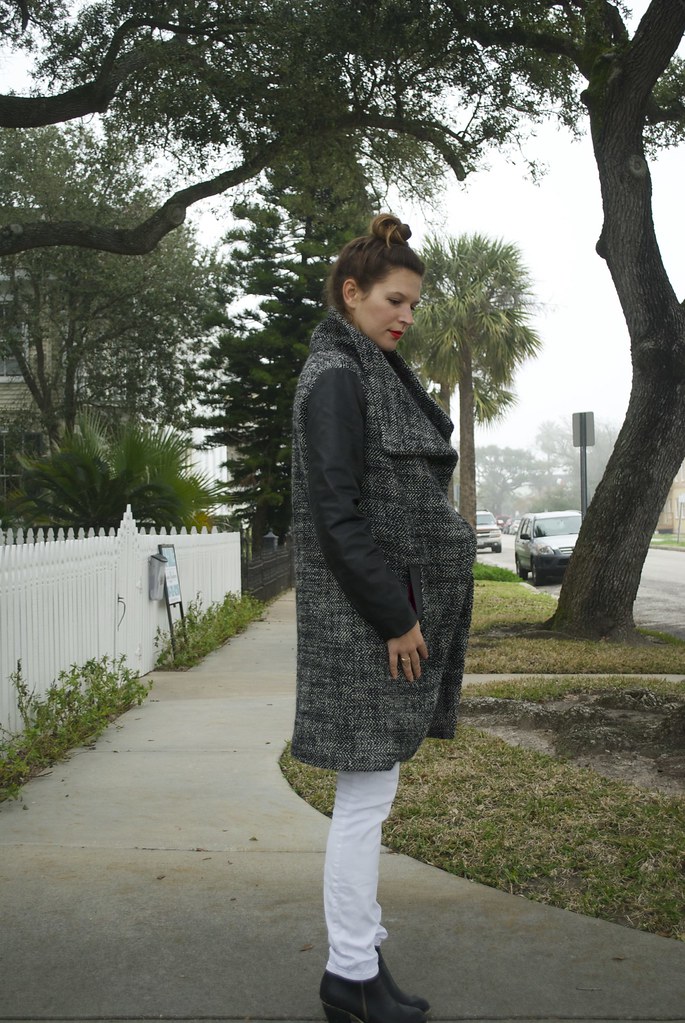
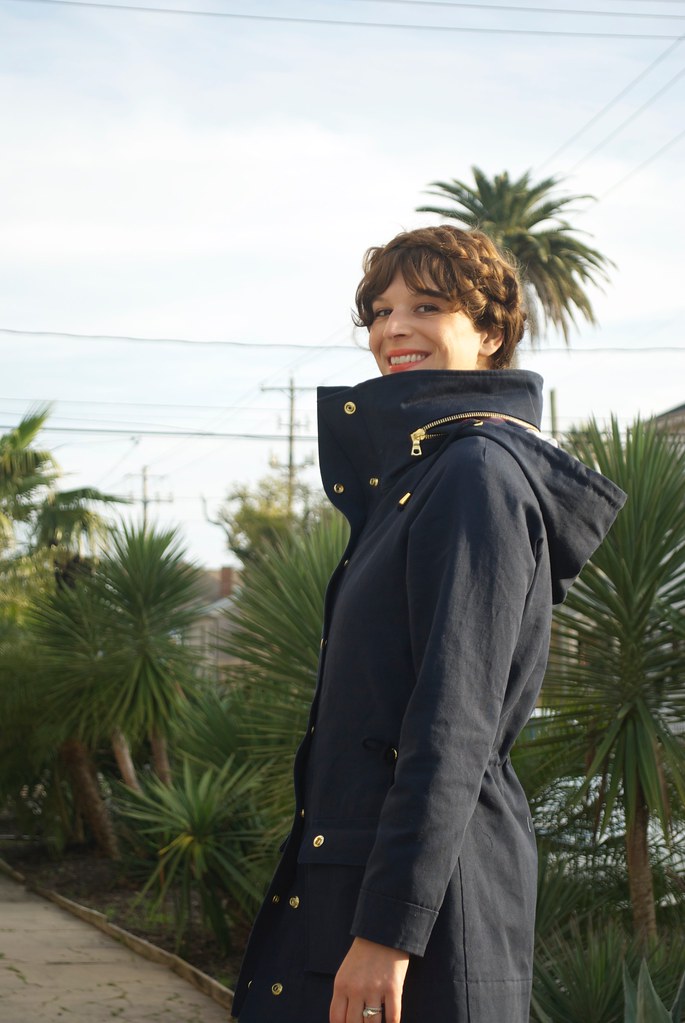
I made a lot of changes to this pattern. Many were stolen inspired by Kelly's Military Style Minoru, and some were my own. The biggest change I made was to get rid of the gathers at the neck. I feel like this is one of the cute details that makes a Minoru a Minoru, but it also just wasn't for me. I wanted a much more streamlined look for my jacket. As far as I can tell (at least according to my endless google searching) I think I'm the only person to make a Minoru without the neck gathers. I was really hoping someone else had done it before me so they could tell me what to do, but no joy.
I think I might do a separate tutorial on this since it might come in handy for future sewists, so I won't go into super detail here. But basically I treated the gathers like darts and rotated them into the waistline, blending into the hip, and essentially making them disappear. For the sleeves I ended up converting the gathers into a dart which ends just past my shoulder tip.
(Update: you can check out the tutorial for removing the neckline gathers here!)
(Update: you can check out the tutorial for removing the neckline gathers here!)
It took me two muslins to get this right. This was definitely the low point of this whole jacket making business. Guys, I'm not a pattern maker. I hate having to use the maths. I hate even more sewing things up in stupid, boring, white muslin only to have it end all balled up in the corner of my sewing room. I kid you not that I spent months trudging my way through this part of the process. And every time I went into my sewing room to work on it I felt like our friend, Paul Rudd here:
But let's get list-y here! All in all these were the changes/additions I made to the Minoru pattern (as I said, many of these are the same as Kelly's changes, because her version is magnificent):
- Removed gathers from neck at front and back and converted shoulder gathers to dart
- Graded between sizes based on my measurements - an 8 at the shoulders/bust, 6 at the waist, and 4 at the hips. This was because I'm not the 'pear shape' that Sewaholic patterns are sized for, and it also helped remove some of the flare of the overall shape.
- Narrowed the zipper placket by 5/8" and added that onto the center front of the jacket pieces.
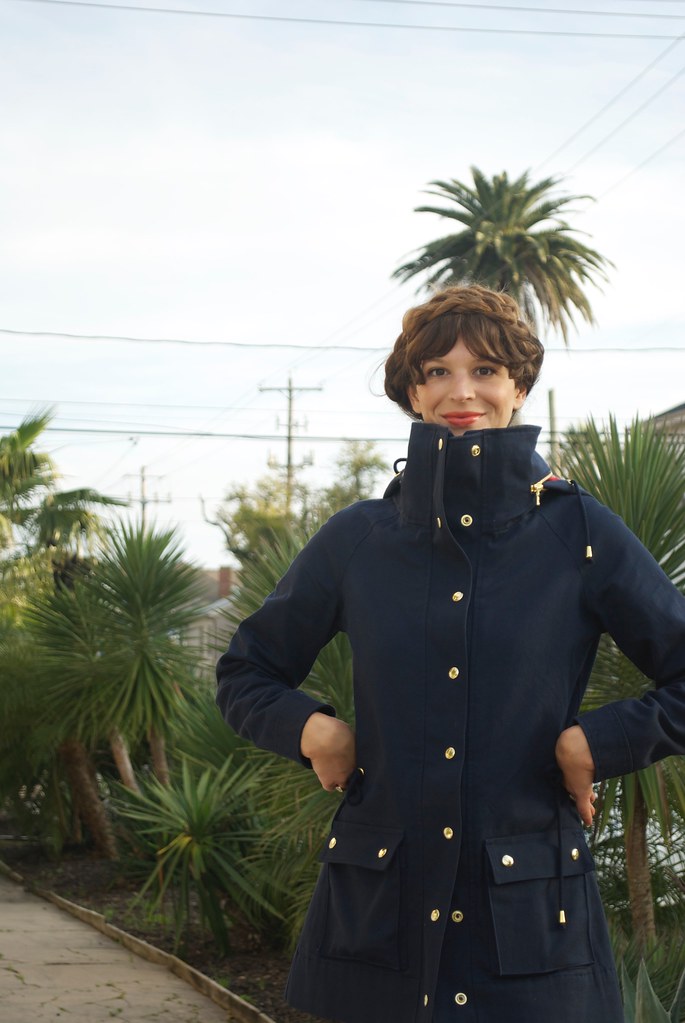
- Added bands for snaps.
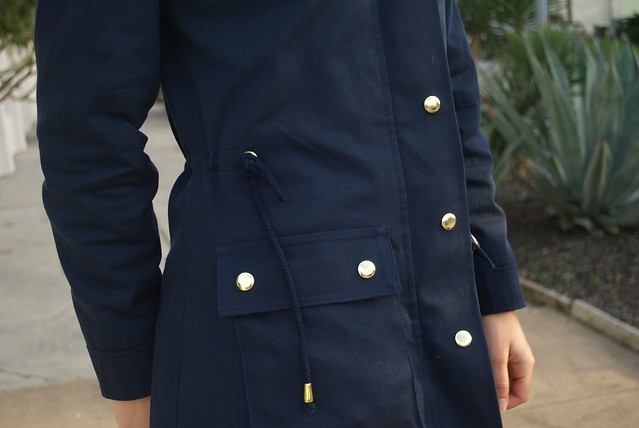
- Added bellows pockets and pocket flaps.
- Changed the wide elastic at the waist to a draw string.
- Shortened the sleeves and drafted my own cuffs.
- Drafted a facing for the hood and inserted a draw string.

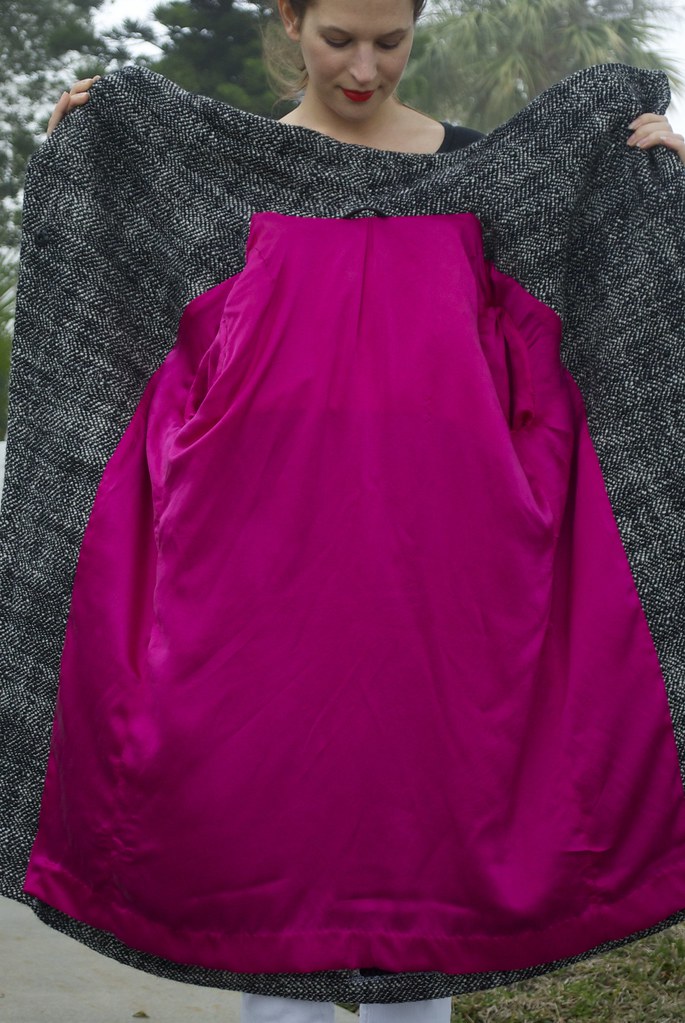
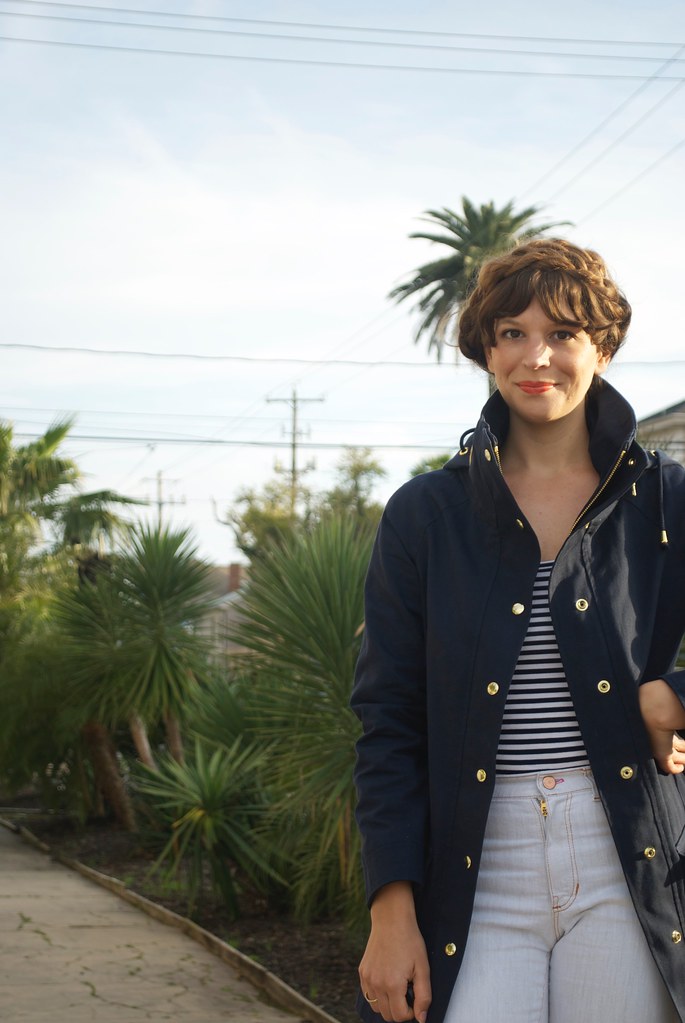
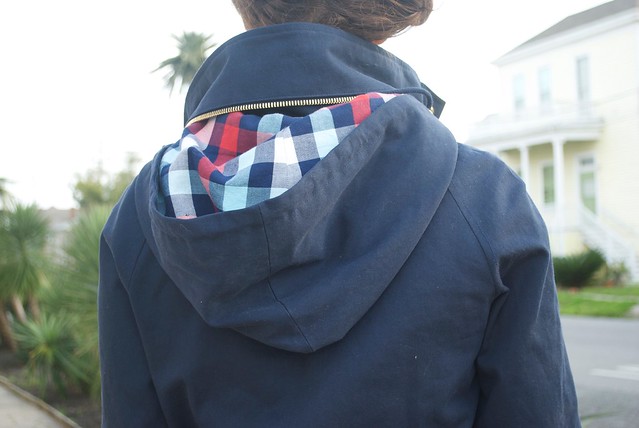
I had actually been collecting all the fabrics and bits and bobs for this project since November. All the fabrics were sourced using my monthly Mood fabric allowance. The navy outer shell is a nice, heavy weight cotton twill. The lining for the body is a very soft brushed cotton twill (in a very classic plaid) and the sleeves are lined with navy acetate. Nothing too fancy. I actually had originally intended on interlining the jacket with cotton flannel for extra warmth, but the longer I waited to make the jacket, the more the weather began to warm up, and the less need I saw for an extra layer of warmth. In the end I think this was a good decision. Any more and this would be less of a mid-weight jacket, and more of a winter-weight jacket.
(Update: I just wanted to add a quick note here - none of these fabrics are technically waterproof in any way. However I already own a lightweight waterproof shell that I wear on extremely rainy days, which, incidentally, most often occur here during the warmer months. This jacket is really particular to my climate and the kind of cool, damp, foggy, humid, and drizzly winters we have here. I debated waxing this jacket after I finished it, but that would change the texture and can sometimes create splotchy colors, and I was too in love with the finished product to risk doing something I might regret. If you think you'd like to make something similar, but with more water resistant capabilities, you'd be better off using a pre-waxed canvas, or doing some research into waterproof fabrics.)
(Update: I just wanted to add a quick note here - none of these fabrics are technically waterproof in any way. However I already own a lightweight waterproof shell that I wear on extremely rainy days, which, incidentally, most often occur here during the warmer months. This jacket is really particular to my climate and the kind of cool, damp, foggy, humid, and drizzly winters we have here. I debated waxing this jacket after I finished it, but that would change the texture and can sometimes create splotchy colors, and I was too in love with the finished product to risk doing something I might regret. If you think you'd like to make something similar, but with more water resistant capabilities, you'd be better off using a pre-waxed canvas, or doing some research into waterproof fabrics.)
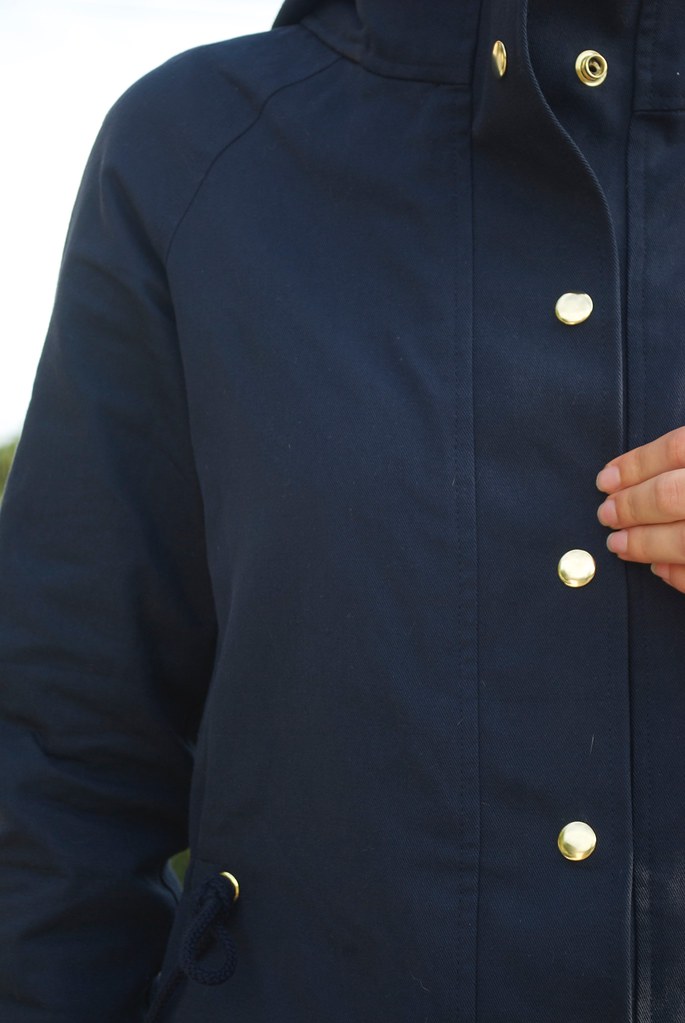
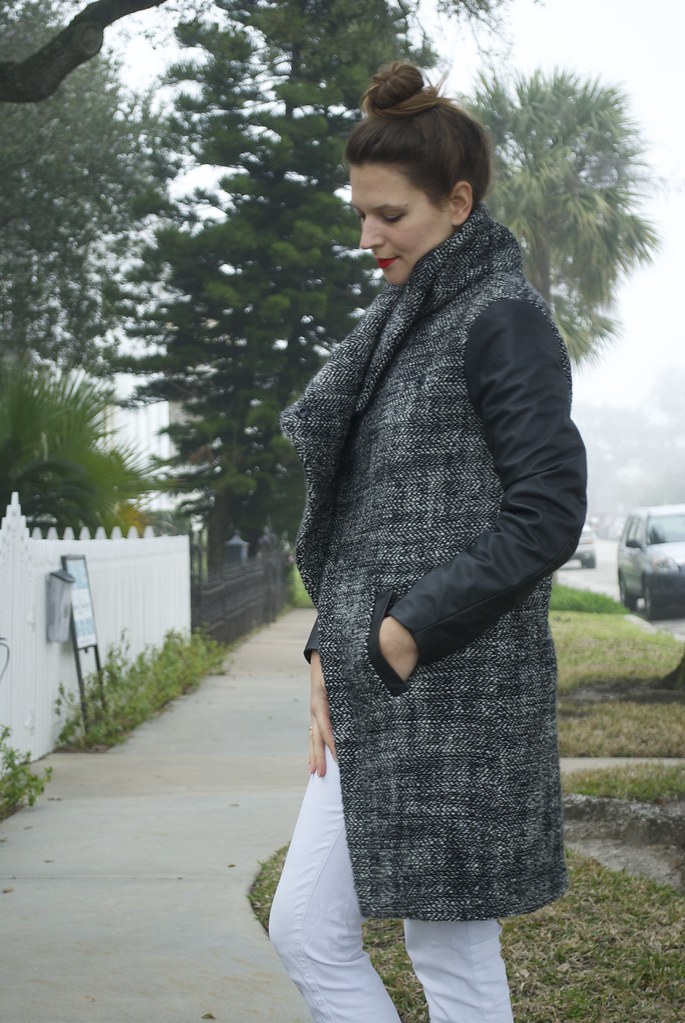
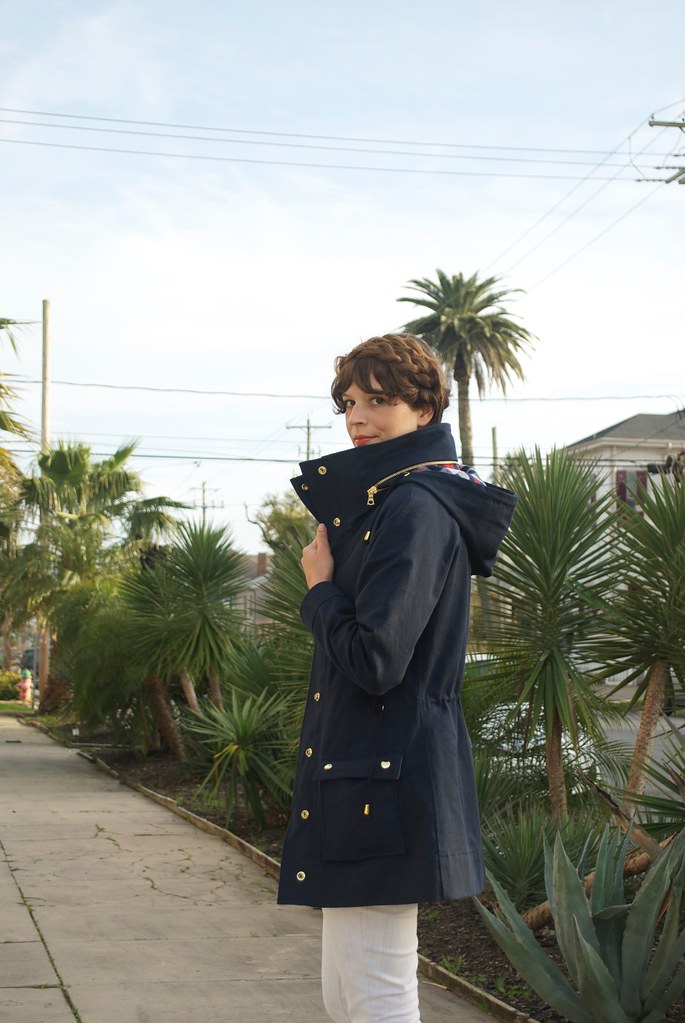
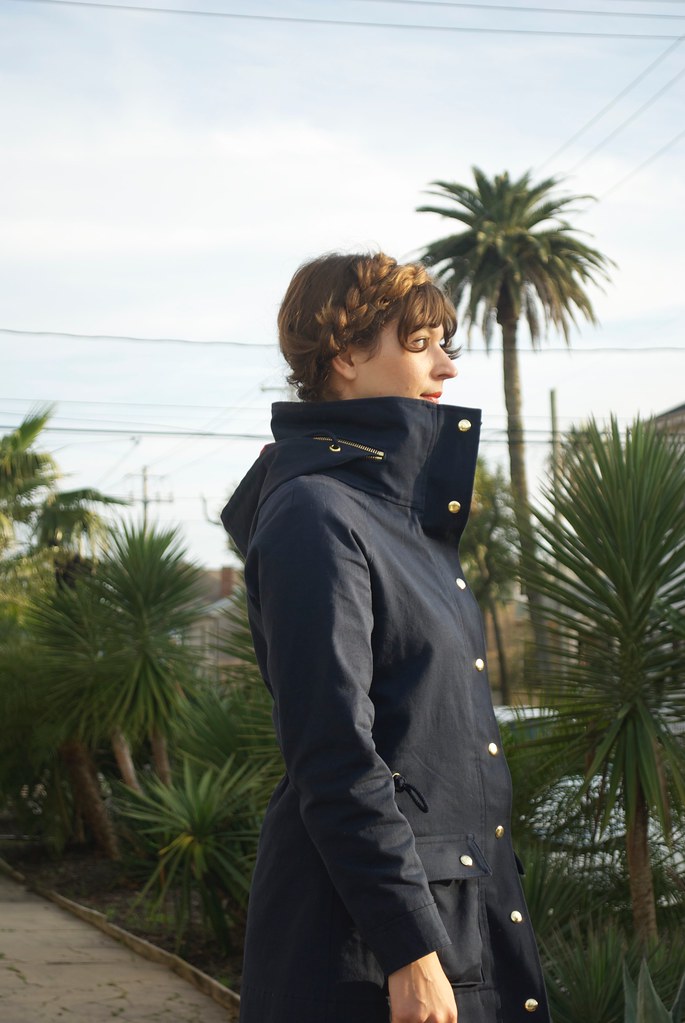
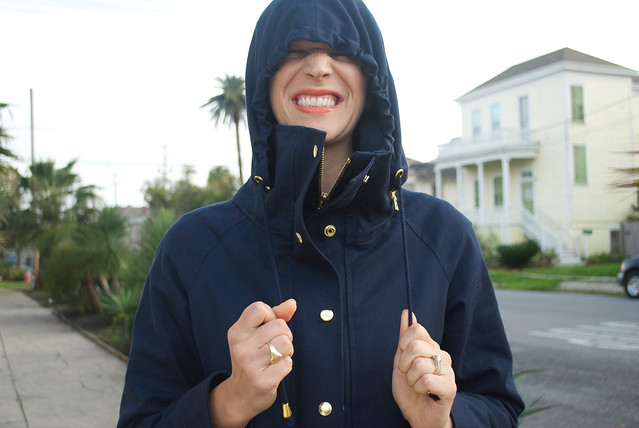
My favorite thing about this jacket, by far, is all the details: the topstitching, snaps, grommets, cord stops, zippers... sigh. I can get pretty swoony over hardware! I decided to go with gold-tone brass for all my hardware because I think navy and bright, shiny gold is always a classic, slightly nautical look. Also, gold-tone brass is much easier to find and match than, say, antiqued brass. The snaps and grommets/eyelets are both Dritz that I picked up at the nearest JoAnn's. The grommets were pretty easy to install. I backed the area with interfacing and a little scrap of self fabric so it was three layers thick, then cut a little hole in the fabric (be still my heart!). The grommets came with a little hammer-setting tool so all I had to do was position the grommet over the hole then pound away! I love breaking out the hammer for sewing projects. The snaps were a bit trickier. They were the very last step. I had to buy one of those Dritz snap-setting pliers, but when I tested it out on a single layer scrap of fabric I had a really hard time getting them in. It ended up being a two-person job with me positioning the snaps and Nick using his brute strength to pop them into place. Thank goodness one of us has muscles!
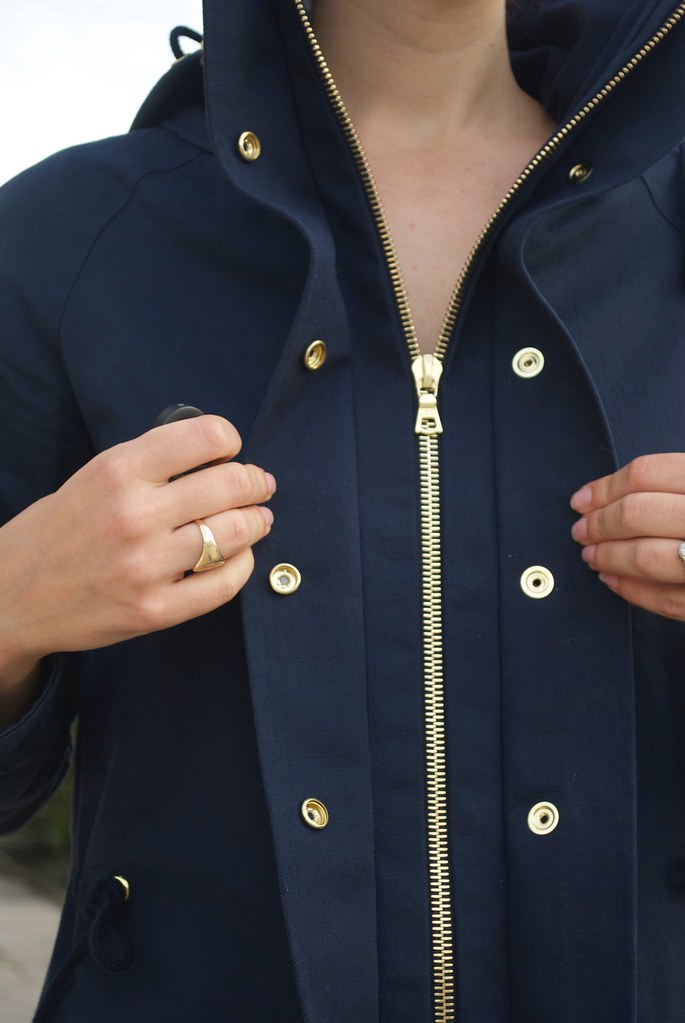
I'm perhaps most excited about these zippers! Finding the right length, color and type of zipper for this jacket proved to be no joke. I made two separate trips to Houston specifically for zippers, only to come back empty handed each time. Eventually I turned to the internet. I was able to find a long, open ended zipper for the front from a zipper supplier, but they didn't have the same zipper as a closed ended option, and when the long zipper came it just didn't thrill me. It wasn't until I was shopping for some of the other doo-dads (cording and cord stoppers) that I discovered Pacific Trimming has an online store and all the RiRi zippers you could dream of!! I ended up buying two M8 RiRi zippers for this coat, cut to size, which were not cheap (for zippers) at $24 a pop, but I do not regret this purchase. These zippers are so wonderfully hefty, and weighty, and the zipper tape is a sturdy but flexible, and soft, cotton twill instead of that weird plasticky polyester. And the slightly fancy zipper pull doesn't hurt things either. I wouldn't normally spring for fancy zippers, but this is a garment that I want to last and love for as long as it fits me, and splurging on a high quality zipper seemed like the right move. I might be a little delusional, but I kind of feel like the zippers make this jacket, ya know?
The cording was another adventure. I ended up buying some from Pacific Trimming and I thought I bought navy, however when it arrived it was a lovely shade of pale aquamarine. Lovely, but not gonna work. However I was very impressed with the quality, it didn't seem to have that stiff center that I find a lot of the cording I can find locally has. This stuff was completely pliable, washed well, and seemed soft but strong. It was just the wrong color. I decided the easiest solution was to dye it. It took two dye baths to get a perfect color match (straight 'navy' ended up too blue so I overdyed it with 'hot black' and just a dash of 'navy' to keep it in the blue realm) but in the end I'm so pleased with it! I don't think I could have gotten such a great color match from a store bought navy.
My little gold cord stoppers are also from Pacific Trimming. I ordered a few types to see which ones I liked best and these little elongated bells were the winners.
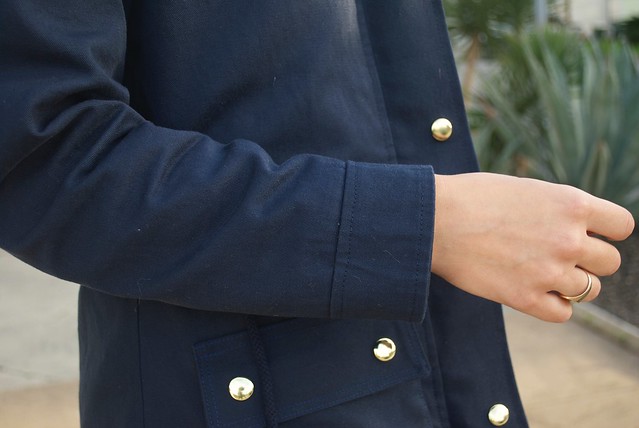
I drafted my own cuffs for the jacket. They're nothing fancy, but I did accidentally make them too narrow to fit around my free arm on my sewing machine. I'm not even going to try to describe the crazy maneuvering I did to not only get these sewn in place, but then topstitched to boot! But trust me, it took all my clever sewing manhandling to finagle these things!
The bellows pockets were also a little bit questionable in terms of construction. I'd never made this type of pocket before, and the internet wasn't coughing up the most thorough of tutorials, so I went into my bellows pockets a bit blind. Overall I'm pretty happy with how they turned out, although Self-Critical-Sallie thinks they could be more precise, but she's never happy with anything I do, so we won't listen to her!
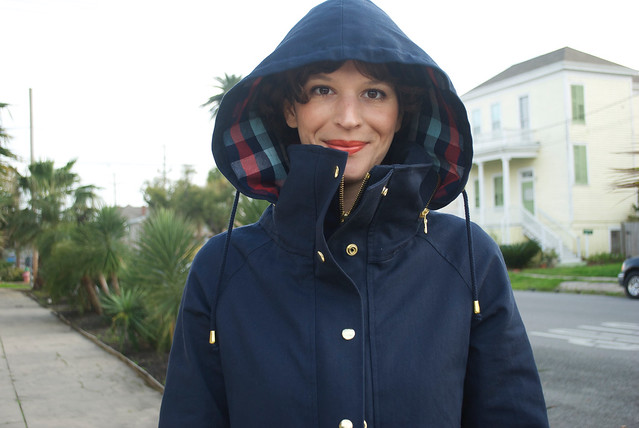
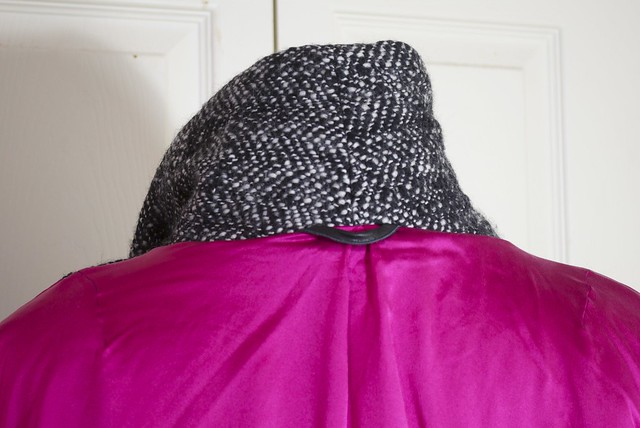
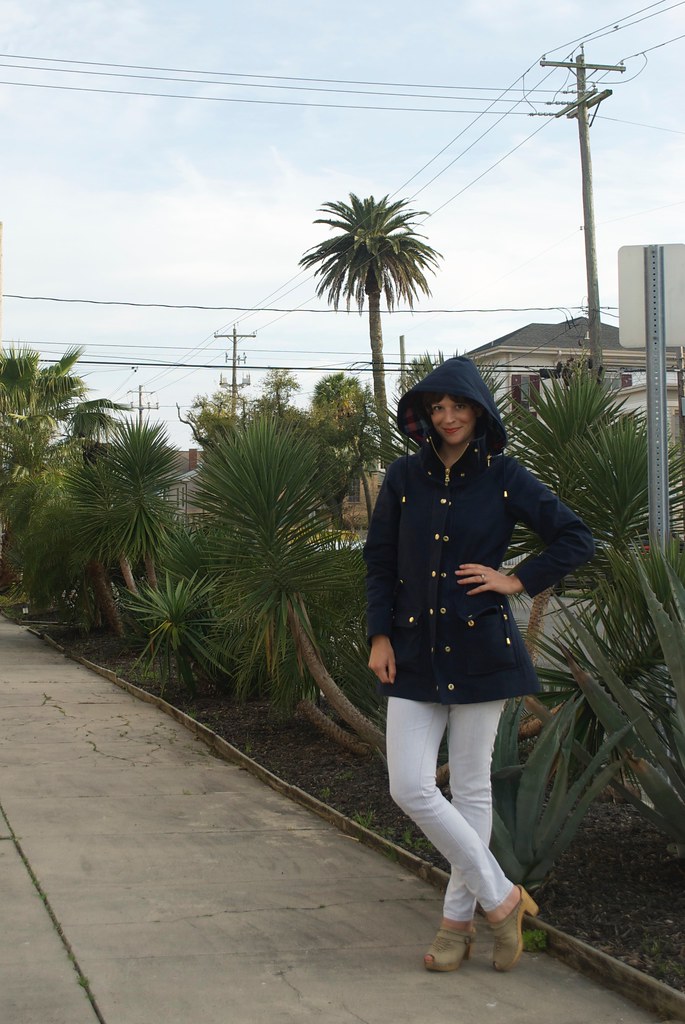
As I mentioned, a hood was a necessity on this jacket. I get caught in the rain far too often for my liking! Equally as important was a hood that could be drawn tight about my face because I'm not sure how useful a hood that keeps getting blown off really is. And it is constantly windy here! My big goof up here was that I never included the hood on any of my muslins, so I didn't really have a clear idea of how it attached until I went to sew the whole thing on. So when I initially placed my grommets for the draw string I just measured about 1.5" up from the seam allowance, forgetting that a good portion of the bottom of the hood sits inside the collar! This didn't end up being a huge disaster, I just installed a second set of grommets about 3 inches higher, but if you peek inside my hood you can still see the first pair of grommets. Shhh, don't tell anyone! No one knows they're there...
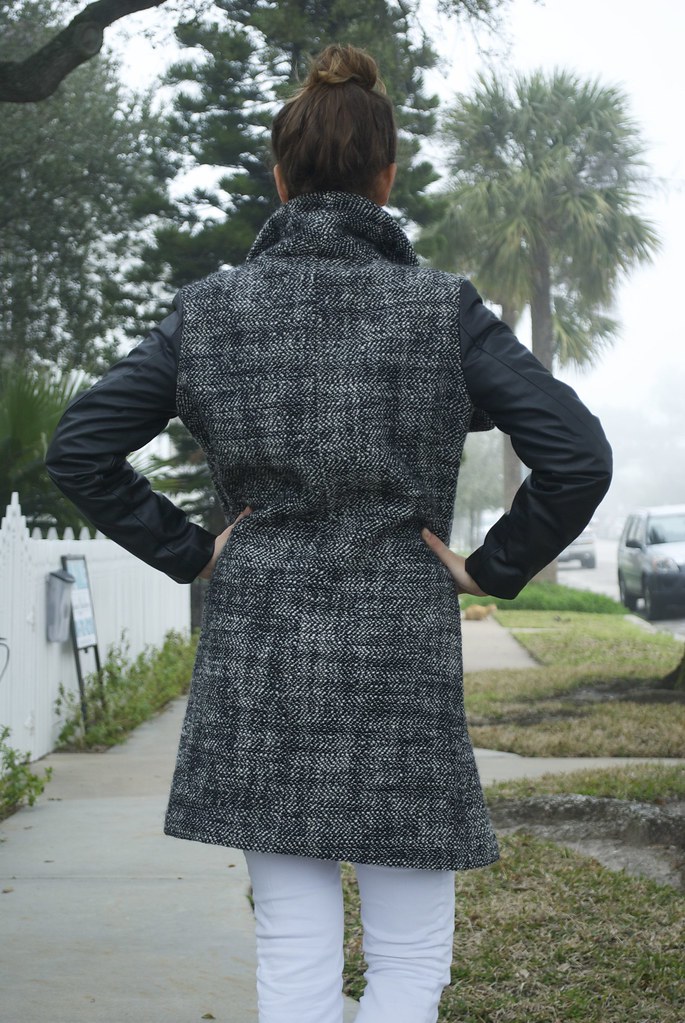
I love my new jacket. It was a true pain in my arse from beginning to end, but I'm so happy to finally have it a reality - if for no other reason than now I can move on with my sewing life! And having a practical, but stylish, lighter-weight jacket like this is just going to come in so so handy. Sadly, it probably won't come in handy until next fall because, no joke, it's already too warm for jackets around here! Somehow I knew it was going to decide it was summer spring as soon as I finished my rain jacket! And, lo and behold, it did! I took these photos across the street from a playground and I was getting some serious side-eye from all the kids and parents frolicking about in their shorts and t-shirts! However I've still been dragging it out with me every day this week on the off chance it decides to sprinkle, or, you know, there's a cool breeze...
And with that, my friends, ends another year of winter sewing in the life of Sallie! From here on out it's nothing but all sundresses all the time. Just kidding. I have no idea what I'm going to sew next, but it's not going to be outerwear, that's for sure!
What are you working on? Anyone trying to sneak some cold weather sewing in before we blink and it's summer? Or does that only happen where I live?
xx