Showing posts sorted by date for query sew u. Sort by relevance Show all posts

7.15.2013

a new pair

DSC_0047

Hey there! I'm back! I'm so pleased so many of you found the fabric dyeing tutorial instructive, and I do hope to see some hand-painted goodies popping up in my blog reader in the future! If any of you do decide to tackle some fabric dyeing yourself, please send me some pictures! I'd love to steal your ideas wait... that's not right... I mean, suck your creative juices... no... not that either... hmm... let's just go with see what you come up with! Kidding.. kidding...
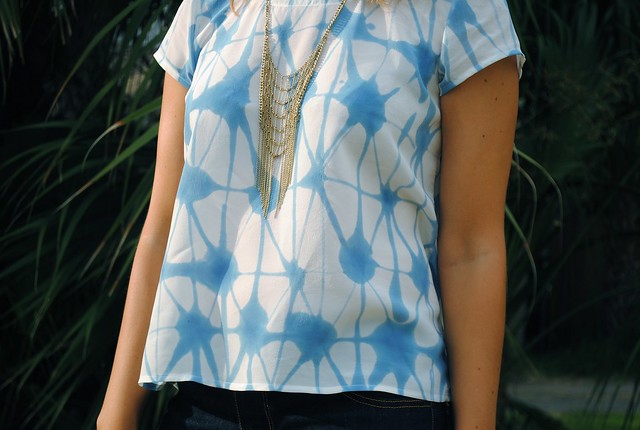
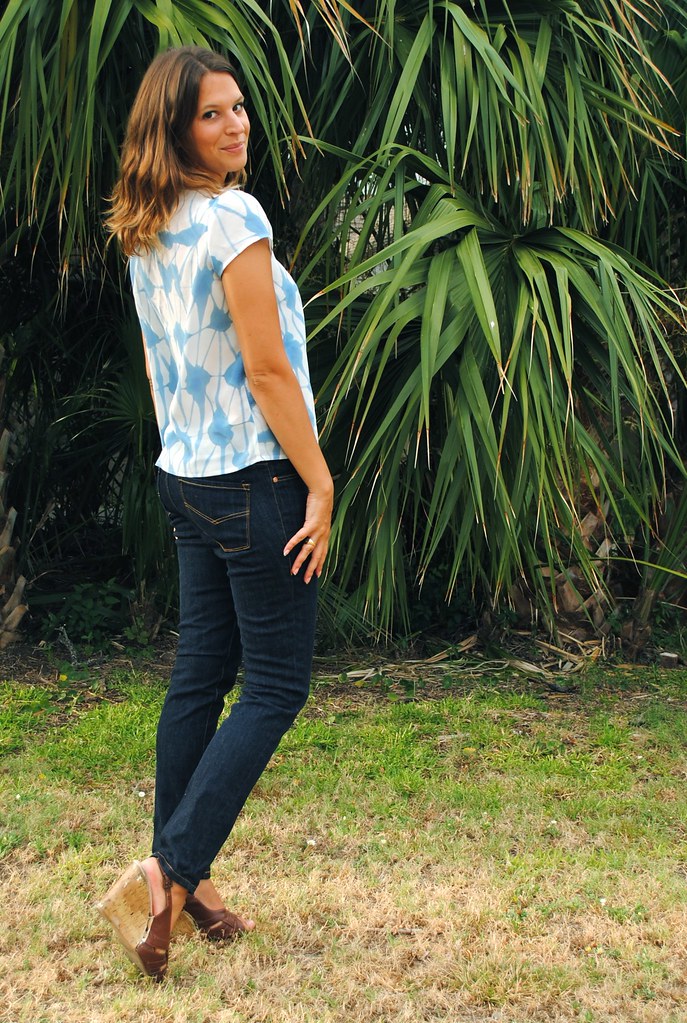
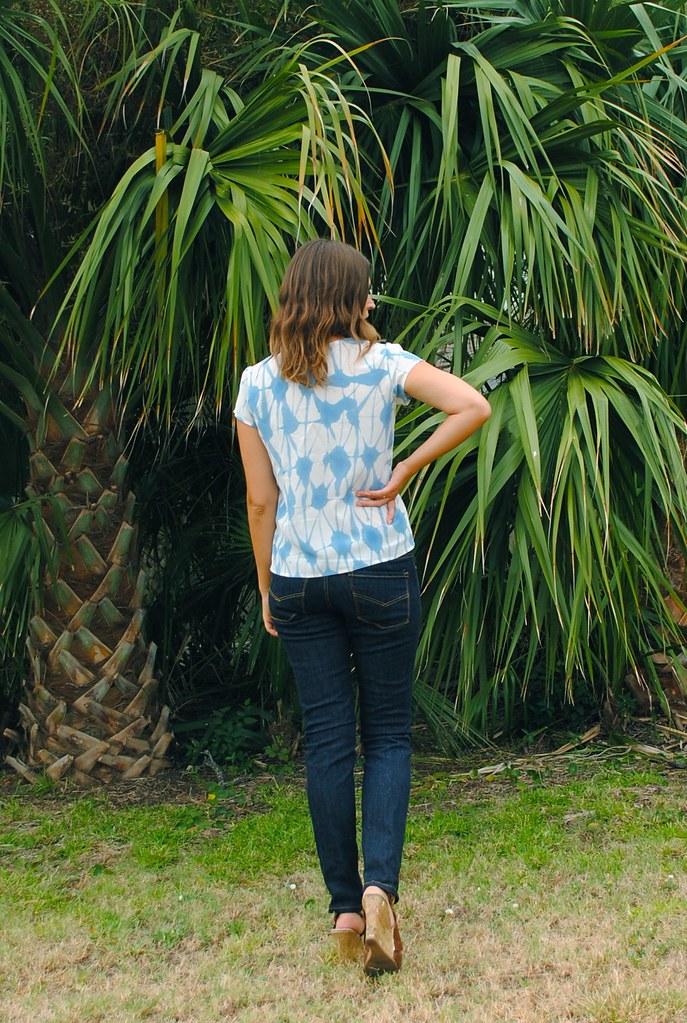
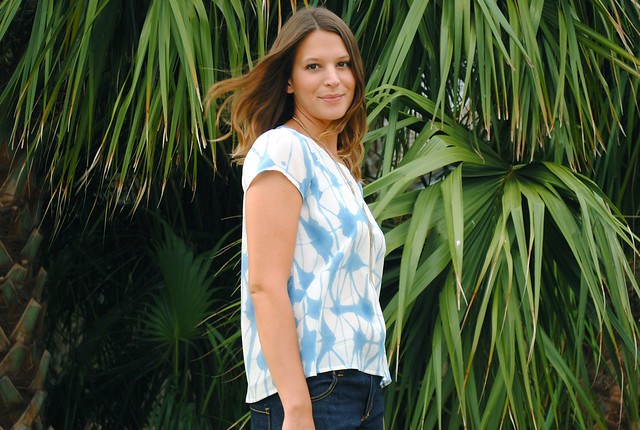
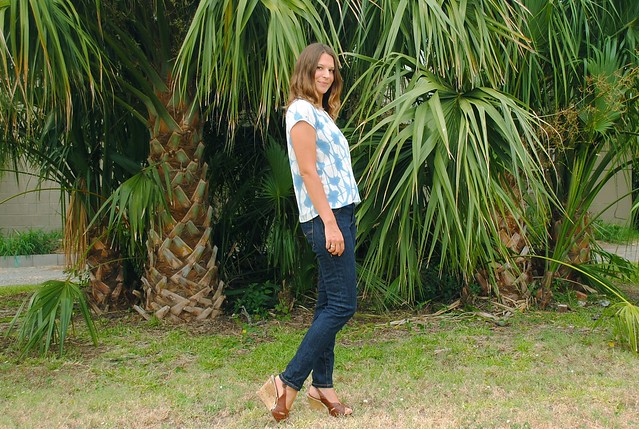
So what brings me to this rambunctious crop of palmettos on this overcast summer day? I wanted to show off my two latest makes, of course! You might recognize the fabric for this top as the sample that I dyed in my tutorial.  Although the camera was being a bit silly with color - the blue dye is a deeper hue than it appears in these pictures.

DSC_0112

I dyed just under two yards of this white silk crepe de chine - just enough to make a Scout tee! I've been craving some easy, basic summer staples this season, and the Scout definitely fit the bill. I also felt like the pattern lends itself really well to using fun fabrics, like this hand dyed number.  And I'd be lying if I said that I wasn't especially tempted to whip up a Scout as part of that awesome Kollabora contest, but in true Sallie fashion I just didn't get my shit together in time to meet the deadline! Which is a damn shame, because I love prizes. I love prizes almost as much as I hate deadlines! So, as you can see, I am doomed to a life of no prizes and dissatisfaction... woe is me.

DSC_0137DSC_0053

All joking aside here (hehe... I never put the joking aside) I was destined to make this Scout sooner or later as part of my systematic attempt to have my wardrobe littered with Grainline patterns.  Jen, do you make these patterns specifically for me?? I just have to ask. And if so, have you been getting those brain waves I've been sending you? Great, thanks - I'll expect to see sketches on my table by next week then? 

Omigod, I just can't stop the kidding today. What's with me?? Alright. Serious face. Just the facts m'am. I made this top in a size 4, no adjustments.  While this size matches my measurements (exactly - I mean... she's gotta be making these just for me! Right... sorry... back to business...) I could also see me sizing up in the future to get an even slouchier fit for optimum cool-itude. And, as literally everyone everywhere has said about this pattern, it was a breeze to sew up, even in silk, making it a great project for a long afternoon.  I finished all the seams with french seams, not because I'm particularly partial to the, admittedly, pretty finish, but because I was too lazy to change my serger thread from black to white. Ahh yes... you know you have a problem when your laziness induces more work...

DSC_0088

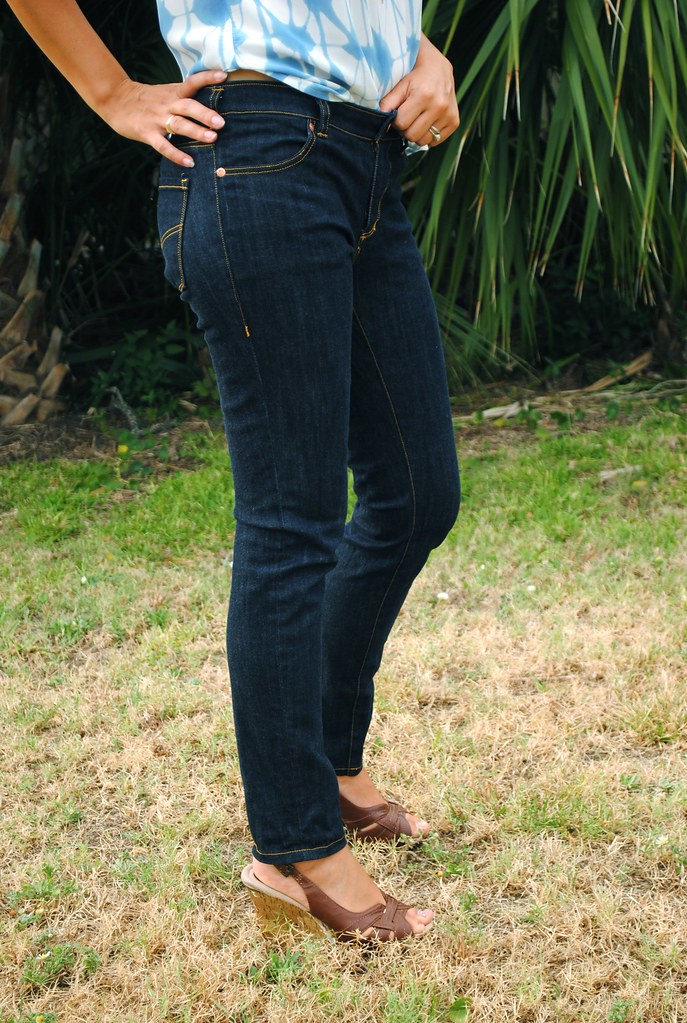
And on to project number two! This past spring I decided it was time for a new pair of jeans.  It had been about a year since I made my first pair - and then commenced to wear them every. single. day of the following 365 days. Funny that it took me an entire year to realize that I should really have more than one pair of jeans in my wardrobe! But after a year of hard wear, my first pair of jeans were no longer looking like my 'nice' jeans - but rather like my 'work' jeans.  Several gallery installs and deinstalls had resulted in paint stains - a years worth of bike commutes meant a few grease stains and the odd snag or two - and countless washings and dryings had meant faded color and tarnished buttons.

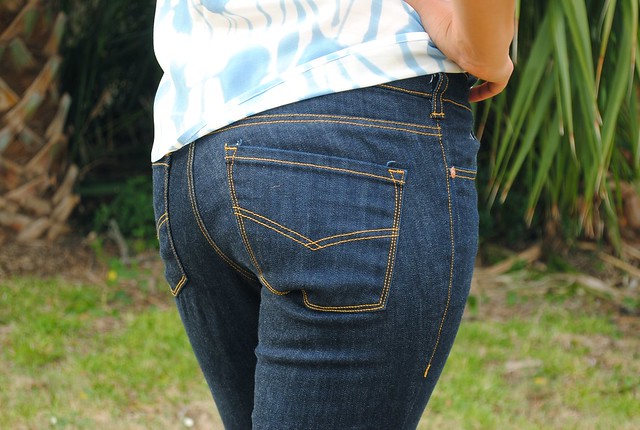
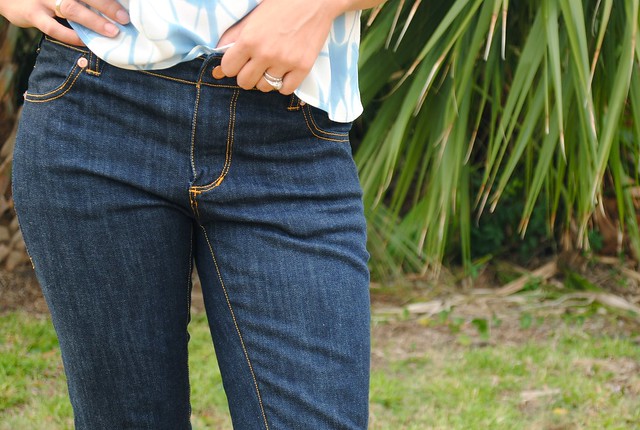
It was time.  This was also a great opportunity for me to refine the Built By Wendy pattern (only available in the Sew U book) I've been using as my base for pants. (Question: at what point does a commercial pattern become your own?) Gotta hand it to a years worth of wear 'n tear to show me where a pattern could be improved! Don't get me wrong, I was incredibly happy with my first pair of jeans. Obviously. But there were some small adjustments I wanted to make on this pair - like the depth of the front pocket opening and the overall width of the front pockets.  My first pair's zipper also had a tendency to show a teensy amount, so I used a different insertion method for the fly (Grainline's, in fact!)  But perhaps the biggest adjustment's happened with the fit.  I loved the fit of my first pair of jeans - at first. But over time I noticed that the grain was off on the legs and it really bothered me.  I knew this happened because I took the outer seam in to get them to fit after I sewed up the inseam.  I really needed to adjust the fit overall, and redraw the grainline. So that's what I did with this pair.

DSC_0096DSC_0107

I measured an old pair of Levi's to determine a few style points on this pair.  One interesting thing that I found in doing this is that the pants front were significantly narrower than the pants back.  I think this creates an optical illusion of being curvier in the back, and leaner in the front - and it also makes anatomical sense - since the muscles in the back of our legs tend to be much fuller than our front.  I also decided to have these jeans be a bit less 'skinny' in the ankle than my first pair, so they are cut a bit straighter from the knee down, and I hemmed them shorter.  I like to think of this as a gentle transition from my hipster art school days to a more 'mature' look. Ha!!

I used a Marc Jacobs denim from Mood, with just a hint of stretch along the cross-wise grain.  I know some people are anti-stretch denim, but me? I loves it.  I have to say, I'm really happy with this denim.  Definitely quality stuff. It has the color and feel of old school denim, and it didn't bleed nearly as much as the denim I used on my last pair. Which I take as a good sign. I get a lot of questions about where to buy jeans supplies, and I always recommend Mood for their denim. I order a couple of swatches and choose from there.  My buttons and rivets are from Taylor Tailor (who has a whole store full of really great looking jeans supplies, including some drool-worthy selvedge, non-stretch, denim that I think I might use to make my husband some jeans) and my thread is just Gutterman topstitching thread - though Taylor Tailor has some really gorgeous topstitching thread I might splurge on for my next pair!

DSC_0067

Well that's all for now! I literally have a 'to sew' list a mile long... anyone else have this problem? I swear, all these gorgeous indie pattern companies keep releasing winners this season. I'm having a hard time saying 'no'!

xx

5.19.2012

mmmay week three!!

high five for the weekend! i plan on spending my two free days thusly: 

spend one day at the beach. spend one day sewing. mix and match. mornings and evenings for cleaning, laundry, grocery shopping et cetera, et cetera, and so forth, and so on.

will you support me in this? good. i thought so.

i kind of felt like i was kicking this me-made-may's butt this week - until today. something happened and every single thing i put on this morning felt like someone else's clothes. i think this was because it was sunshine-y and warm and the only thing that would have felt comfortable was a bathing suit, wide-brimmed hat, and sunscreen. accessorize with sandy feet and salty hair. but apparently thats not appropriate work attire. or so they tell me. jk. i've never shown up to work in my swimmies. yet.

okay! enough chit chat - let the me-made-may week three parade begin!

5/13 and 5/14 not pictured but i wore some combination of my new(ish) stove-pipe skinny jeans, that mint green t-shirt, or some other t-shirt and blue shorts. mix and match. match and mix.

5/15

MMMAY 5/15

lets go from the top down, shall we?

hat: random beach store here in galveston
necklace: so old i don't remember
bra strap: you really don't want to know
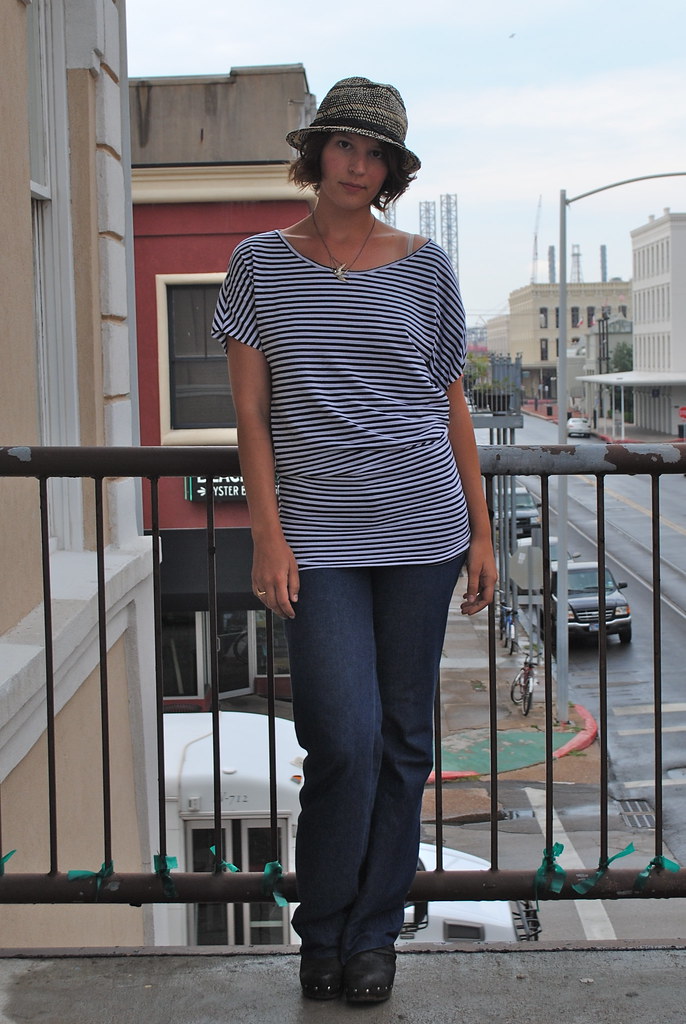
top: self-made burdastyle, blogged here but i cut the sleeves off (the ties never laid right and i just felt i'd get more wear out of it this way)
jeans: emersonmade
clogs: frye
where: to work. obviously.

5/16

MMMAY 5/16

topknot: so silly with my short hair
braided thingamabobby: american apparel from many moons ago
jacket: draped leather jacket - blogged here - i've seriously been getting my money's worth out of this jacket!
shirt: self-made from the drape-drape 2 book, never blogged
jeans: emersonmade
shoes: shoemint - not gonna lie, i didn't wear these all day. i just got them in the mail this day and thought they might spruce up my look
where: i might stop doing this, because i don't go anywhere other than work and home! so there. done. not doing this anymore!

5/17

MMMAY 5/17

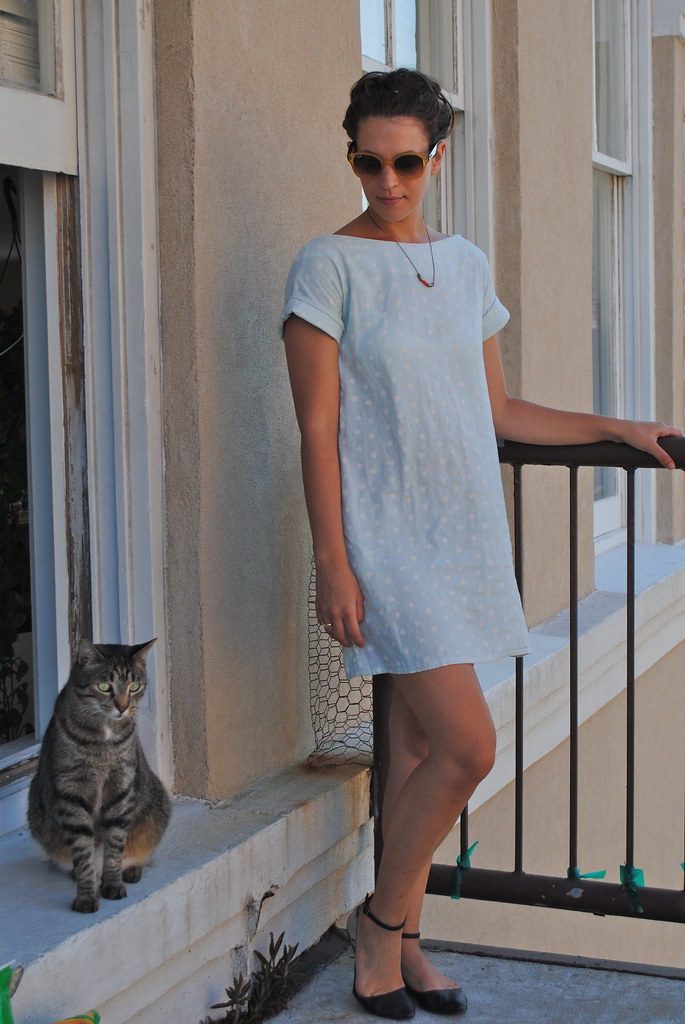
sunnies: rayban!
necklace: madewell from last year
dress: self-made, self-drafted, super soft nani-iro double gauze fabric. made about a year ago, never blogged
shoes: shoemint

5/18


MMMAY 5/18

necklace: same old one from 5/15
tshirt: altered built-by-wendy pattern from sew u home stretch, blogged here
belt: jcrew
skirt: self-made, blogged here - this skirt has also been another all-star in my spring wardrobe...
shoes: shoemint, and this time i actually wore them all day

i felt totally awesome in this outfit! i suppose this is me taking part in the "colorblocking" trend but i sort of hate that word and i'd much rather prefer to think of it as "three differently colored things that i happen to be loving right now and i'm gonna wear them all together just for shits"! i gave a little talk in the morning to some middle school kids and one of the girls came up to me and said "i'm loving all of (waves her hand around in the air) this" yeah. thats right, my look was 12 year old girl approved!


5/19


MMMAY 5/19

sunnies: rayban
top: urban outfitters, self-altered
tank top: jcrew
jeans: stovepipe skinnies, blogged here
shoes: frye

and i think i used up all my good-outfit mojo on friday because today it just wasn't working. i don't usually do the whole thing where i change outfits 50 times in the morning, but this was one of those mornings. nothing seemed to be working, so i just kind of defaulted to my jeans. it seems almost like cheating, but hey - they are the most wearable self-made article of clothing i've ever made!

and thats it for this week! now if you'll excuse me, i have about 4 yards of beautiful ikat fabric that needs my attention

DSC_0001

jealous?

xx

5.07.2012

basic uniform


in my heart of hearts and in my soul of souls i am a jeans and tee kind of girl. who isn't? unfortunately, its not always easy to find a good pair of jeans. until this recent pair of jeans, i owned two pairs that i wore in heavy-ish rotation. one was my colette clovers, which i don't think really count as jeans since the styling is more trouser-like. the second was a pair of high-waisted skinny jeans from jbrand that i bought a bit big and the waist has a habit of scooching down from its high-rise heights which leaves me with a saggy crotch problem. not very comfortable! 

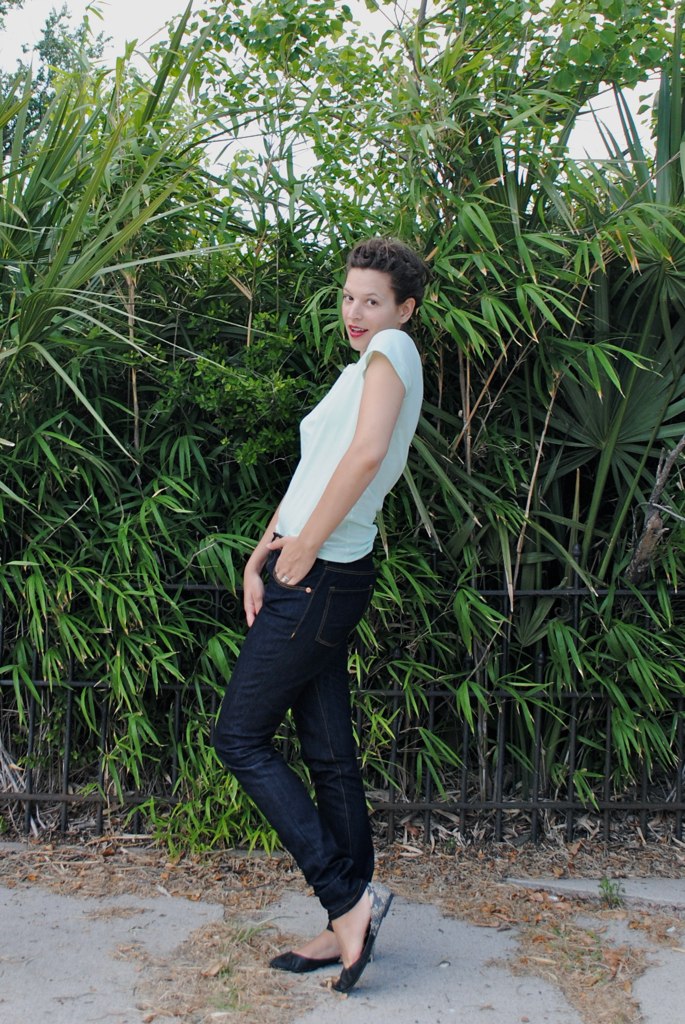
so it was time to make a new pair of jeans. not the most glamorous sewing - but necessary! i had this stretch denim from mood leftover from my denim clovers. it was just enough to eek out this pair of jeans! i used the simplicity built by wendy pattern that came with the book, sew u (it looks like the pattern is now out of print, but maybe it still comes with the book?) i've had this book since i was a teenager, but this is the only pattern i've ever made from it.


i cut these in a straight size 6 but after sewing up the inseam and basting the rest of the legs together i had to take them in a whole lot. i think the 4 would have fit better, although i may still have had to take it in a bit. the jeans look a bit baggy in these pictures because, well i've been wearing them non-stop since i made them! time for a washing!! 

this pattern has a really modern fit. a low (but not too low, no butt-cracks please!) waist and a very straight-through-the-hip cut. which is great for me since i'm also kind of straight-through-the-hip! i obviously changed the leg, narrowing them to the knee and then keeping 'em straight and skinny to the ankle, leaving the length long so they bunch up at my foot. 

the built by wendy pattern isn't necessarily a jeans pattern. as a matter of fact, you don't really need a specific "jeans" pattern to make jeans! because when it comes to jeans, the devil is in the details.  when i sat down to sew these i had my pair of jbrands by my side and another super old pair of levi's. i kept opening up both pairs and checking out how the fly was inserted, where were the bar tacks, how the belt loops were attached, and most importantly, what was topstitched and what wasn't.


the topstitching (and perhaps also the pocket shape) are really what says "jeans" on a pair of pants. i've noticed that the "fancier" the jean, the less topstitching it has, and the more casual the jean the more topstitching it has. but almost all jeans have some sort of topstitching around the fly, pockets (back and front) and waistband. some have two lines down the inseam, my jbrand pair has none. i made this pair with a single line of topstitching down the inseam. my double needle broke after using it once around the fly when i tried to ease it over the zipper teeth (woops!) and so i was left to eyeball the rest of the topstitching with more or less accuracy!

and speaking of details - what's a jean without the rivets! again, this is a totally optional detail - some jeans have them, some don't. i bought my small rivets and rivet button for the waistband from taylor tailor - who makes some pretty awesome jeans! i'm not gonna lie - they were a tad bit harder for me to get in than taylor makes it out to be in his tutorial! I did a lot of pounding to get them to stay put... but i think it was worth it because it is those little details that makes these look a bit more professional.


since i was on a built by wendy kick i decided to open her other book, sew u home stretch, and make up the crew neck tshirt from the pattern provided. i compared the paper pattern to a favorite tshirt of mine from american apparel and saw that my shirt was about an inch narrower than the smallest size on the pattern. i made the necessary adjustments and what seriously seemed like two seconds later, i had this new mint green tshirt! the fabric is the minted cream organic cotton knit from tessuti that i bought on a whim with my last purchase. it sort of looks like i bought it at american apparel...go figure... 

also! i replaced my twin needle aaandd... twin needles for finishing knits! who knew, right?!?! oh...everyone but me? oh. ok then. well i'm happy to be joining the club!


xx

1.27.2012

tutorial: fun with clovers - part three


well here we are again - with the third installment of clover adaptation! and, friends, we are in the home stretch. but before its smooth sailing - its time to sew your fly.

sewing a fly front on your pants isn't hard - but it does involve a number of steps and some finnicky small parts. the first (well first few, really) times i sewed a zip fly it went woefully wrong. i cut holes in my pants in places where you don't want holes. i was following the instructions in the built by wendy sew u book, which, while they are relatively straightforward, were a bit confusing for a beginner.

when i sewed my denim clovers i sat down with the built by wendy book and a pair of ready to wear jeans and really examined them, going back and forth between the instructions in the book and really inspecting a ready-to-wear fly. as a result, the instructions i'm going to give are a bit of an amalgamation of the built by wendy instructions, and my own observations.

i'm no fly expert - by any means - just some chick who's sewn a fly front or two, and made plenty of mistakes, in my time. but hopefully these instructions will be clear enough to help anyone who's been suffering from some fly front phobia.

now - down to bweez-nezz! (thats business to you folks...)

sewing your fly will be the first thing you do to your pants. so gather together your materials:
  • your cut and marked clover pants fronts
  • a 5 inch jeans zip (or another short zipper)
  • your right fly extension piece - cut on the fold
  • scissors and pins
  • topstitching thread (optional - not pictured)
i, obviously, am making myself some red pants. this is leftover wool gabardine from my red jacket. i underlined it in silky cotton voile and machine basted the two layers together (because, to be perfectly frank, i needed a break from hand sewing!) all my little interior pieces - like the pocket bags and waistband facing and right fly are cut from that stripy cotton canvas.

i won't be doing the traditional "jeans" style topstitching on my trousers because of my fabric choices - but i will tell you throughout the instructions when to add topstitching. if you are using a heavy fabric, like denim, your topstitching will look best if its done in topstitching thread. you can choose a contrasting color like yellow or orange for a nice "pop".

1. pin your pants fronts together along the CF (center front) line. stitch, using a long basting stitch from the top of the pants to the circle on your CF line (the blue pen is pointing to it below). then continue stitching using a short stitch length from the circle to the end of the crotch curve.


2. spread your pants front on a table, right side facing down. spread open the fly and locate the right fly piece. trim just the fly piece down 3/4 of a an inch.


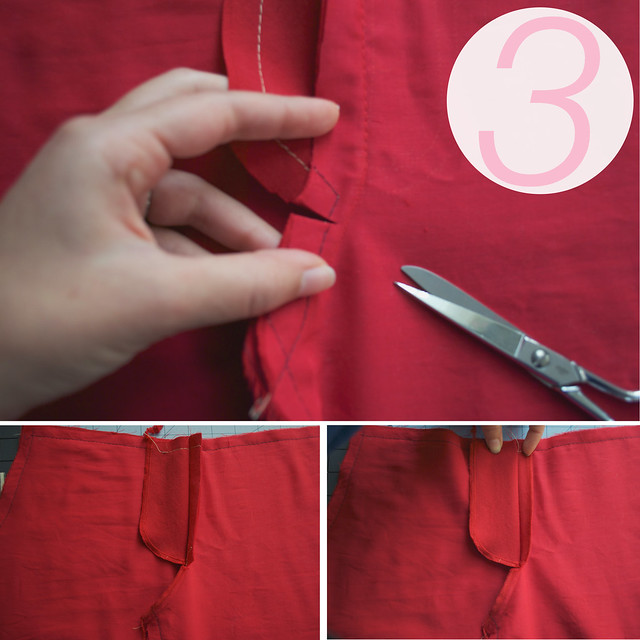
3. hold both the left fly and the trimmed right fly together and make a clip in the front rise - right up to your stitching - just at the bottom of the fly curve. finish your left fly edge, your crotch seam, and the trimmed right fly using an overlock stitch, a zig-zag stitch or pinking shears. i will be finishing all my seams with my serger. i recommend that you finish each of these edges separately, holding back the rest of the pant as you do. this is especially true if you are using a serger. i also recommend lowering (or disabling) the knife blade on your serger when you sew around the bottom of the left fly extension and the crotch seam. i learned this from experience - the second time i tried to sew a fly - when my serger's knife hungrily chomped a hole right into the crotch of my pants! unrepairable!


4. fold your right fly extension piece with right sides together. stitch along the curved bottom. turn it right side out and press. finish the long, open edge by overlocking, zig-zag, or pinking (alternately you can sew down the long edge and the bottom curve all together, turn it right side out and press if you prefer).


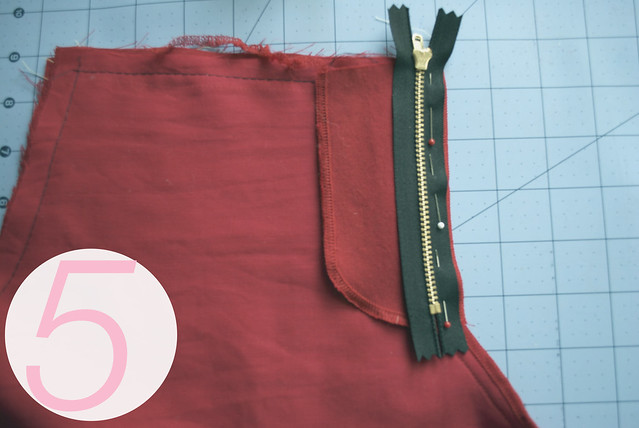
5. fold your pants fronts with right sides together. lay your zipper upside down over your CF seam - aligning the teeth with the basted CF seam. pin the zipper tape to the trimmed right fly. the bottom stopper of your zipper should fall to the bottom of your fly pieces. if your zipper is long - let the extra length go off the top.


6. with the zipper foot on your sewing machine, stitch the zipper tape to the trimmed right fly. make your line of stitching about 1/8 of an inch away from the zipper teeth. reverse stitch at the top and bottom.


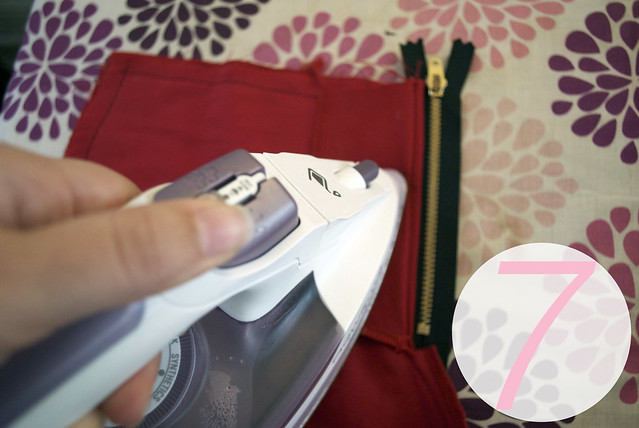
7. press the fly away from the zipper teeth.


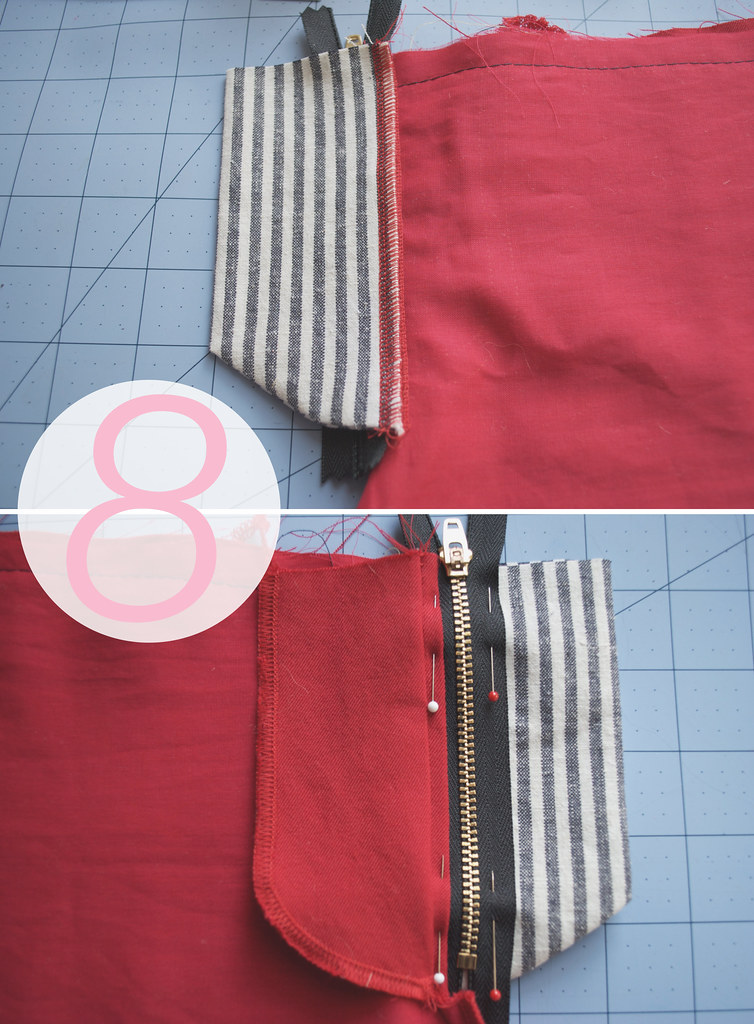
8. fold your pants right sides together and lay them so that the trimmed right fly is against the body of the pants and the back of the zipper is up. align the finished (in my case, serged) edged of the right fly extension with the finished edged of the trimmed right fly - sandwiching the zipper tape in between. with the zipper tape right side up, pin the tape to the right fly extension on both sides of the zipper teeth. this will keep your zipper tape and fly extension from shifting while you stitch.


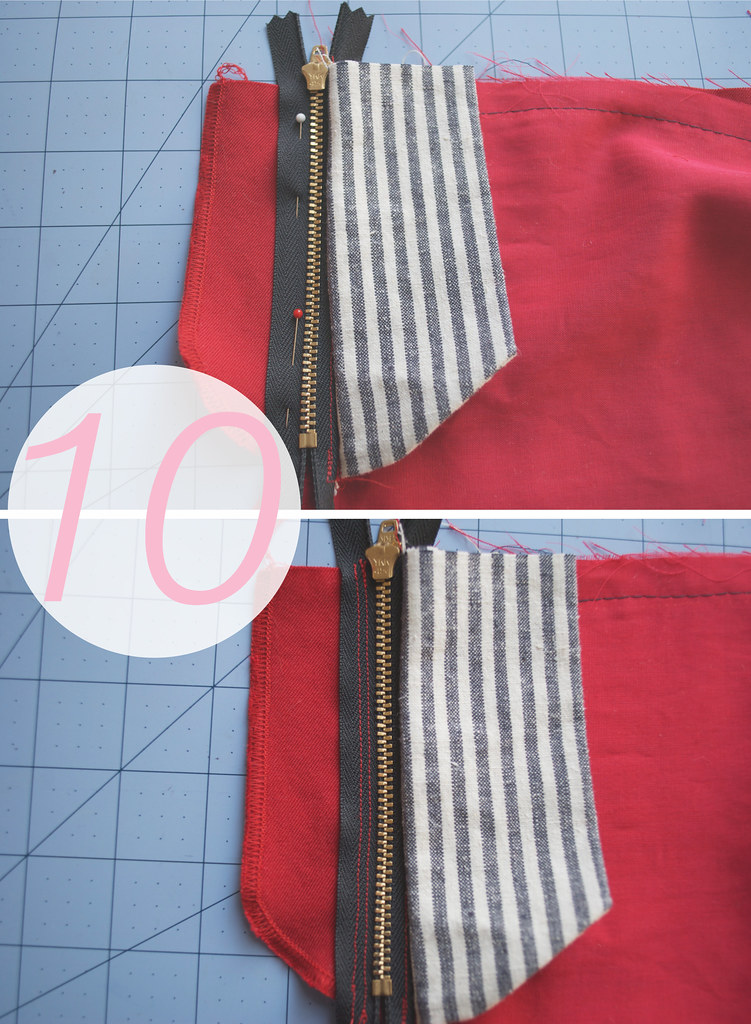
9. with your zipper foot on your machine, edgestitch along the right fly (which should be pressed back away from the zipper) as close to the zipper tape as you can get. stitch through the right fly, the zipper tape, and the right fly extension - but not through the body of the pants! if you are doing topstitching this should be done in your topstitching thread.


10. hold the body of the pants away from the left fly. spread the fly open and lay the other side of the zipper tape against the left fly. the zipper should be upside down with the teeth even with the CF seam. hold the right fly extension back and pin the zipper tape to the left fly. with your zipper foot on your machine, stitch the zipper tape to the left fly. make one row about 1/8 of an inch away from the zipper teeth and a second row 1/8 of an inch away from the first. backstitch at both ends.


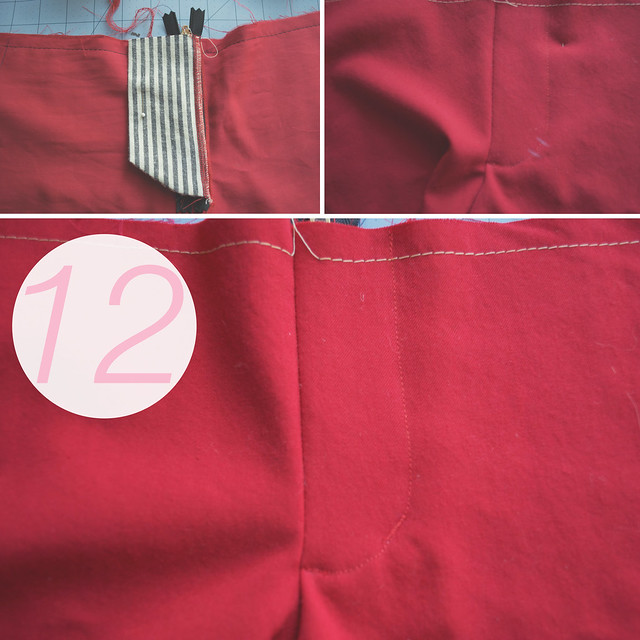
11. lay your pants face down over a sheet of carbon paper or chalk paper. hold the whole fly apparatus over to the right, and using a tracing wheel, trace over the topstitching lines you should have marked on your pants from drafting your fly. these lines should follow the shape of the fly. flip your pants over so they are face up and pin the left fly (the red fly on my pants) to your pants front. hold the right fly (the striped fly on my pants) out of the way and topstitch along your traced lines - securing the left fly to the body of your pants. if you want a more "jeans" styling to your fly - do a second row of topstitching 1/4 inch in from the first. as you get close to the CF seam you will probably be sewing over your zipper teeth. if your machine is anything like mine, it won't like this very much. just go slow, and use the hand wheel if needed.

at this point - if you are doing the full shebang with the topstitching - you can add a row of topstitching about 1/16 of an inch (in other words, edgestitched) down the CF seam - on the same side as you just topstitched.


12. with your pants face down, lay the right fly extension over the left fly and pin in place. on the right side of the pants mark the placement for a bar tack. the bar tack will go through all layers of your pants and hold your right fly against the left. typically it falls along the front topstitching, right where the curve begins to straighten out. your bar tack should be about 1/4 inch long. to make a bar tack choose a zig zag stitch on your machine and set it to a small stitch length. go back and forth over the same 1/4 inch about 3 times.

tip: if your machine has an automatic buttonhole feature you may want to use that selection since most machine buttonholes will feature a close set zig zag.


13. make a mark along the CF seam for a second bar tack. this tack should fall about 1/2 inch above the point where your fly topstitching meets the CF line. again, the bar tack should be about 1/4 inch long and fall perpendicular to the CF seam - it can even cross the seam just a smidgen. use the same zig zag stitching to make this bar tack - sew through all layers. this might be a bit tougher because you will be going over the zipper teeth, but again, just take it slow and use the handwheel if things get rough.


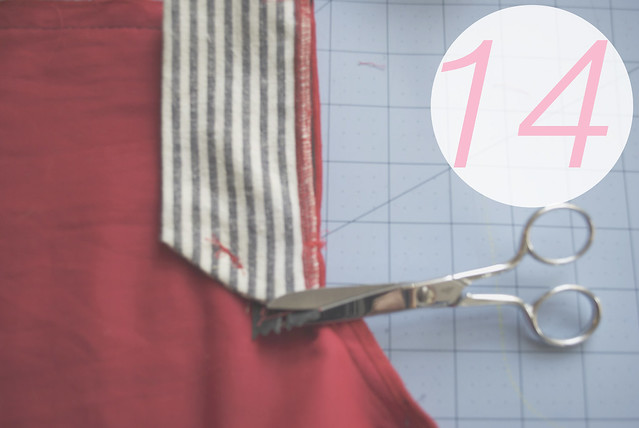
14. your entire fly apparatus should now lie neatly to the left. from the back, trim the bottom of the zipper tape so its not hanging below the fly.

to give you an idea of how your fly might look with all the topstitching bells and whistles - here is a close up of my (already well worn) denim pair.


aaaaaaaaand! your done!!!!


use your seam ripper to undo the basted CF seam and give that zip fly a few good zips! friends - you just sewed a zip fly! fly-phobics, that wasn't too bad was it? any holes in the crotch? any completely unrepairable mistakes? i hope not.

the next thing you will want to do is sew in your pockets - but that, gentles and ladymen, will be one of the subjects for our next, and final, clover trouser tutorial.

for the first two tutorials in this series:

xx