2.28.2012

wildcat


mee. yow.

so i may have spent a good chunk of this past weekend watching cleopatra on netflix instant. which is basically like spending four hours of your life being seduced by elizabeth taylor. not a bad way to spend a sunday, i'd say. her eyes are largely responsible for the seducing in that film. okay, well her eyes are, like, 5% responsible and the rest goes to her cleavage - which is outstanding! i mean, all perviness aside, her cleavage deserves a mention... as does the costuming which did such a fabulous job enhancing her... assets.

so minus the cleavage, my look today was somewhat influenced by liz taylor circa cleopatra. i may have achieved more of a mrs. robinson look, but oh well... must be something in the air...


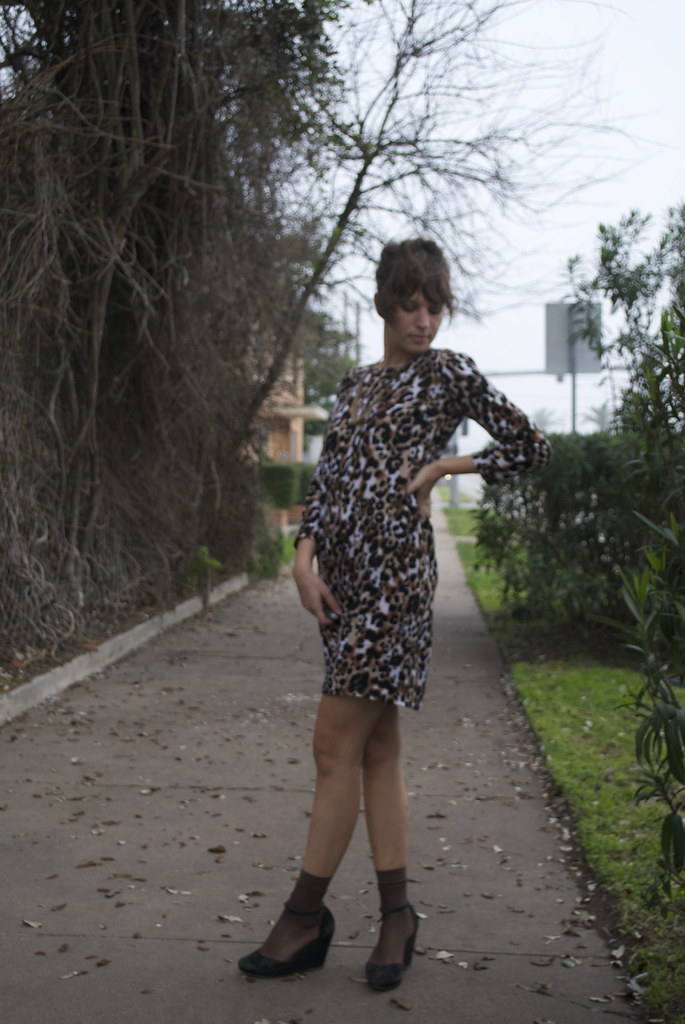
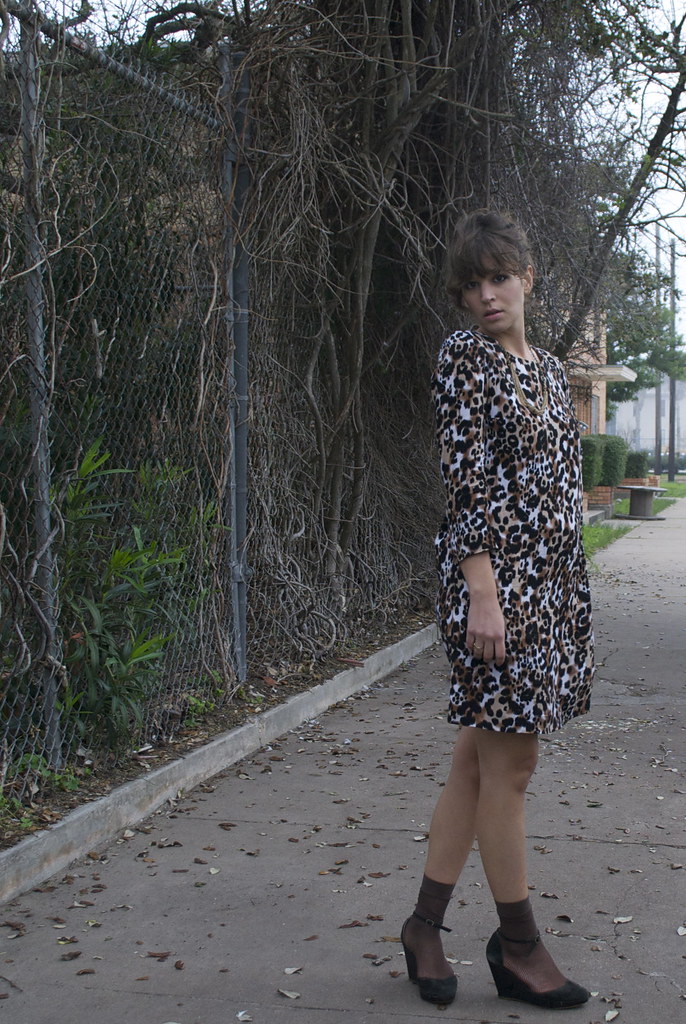
you probably wouldn't believe it from looking at it, but this little box dress took me the better part of two weeks to make. two weeks?!? good god, sallie, what did you do? weave the damn fabric?! no. no i did not. in fact if you think you saw this fabric before on this blog - you did. this is the same rayon challis i used to line my red jacket. i liked it so much i bought extra yardage to make a dress. actually, now might be a good time to tell you that this print is not actually leopard print (gasp!! the lies!!) according to the roll at the fabric store, its jaguar print... duh.


okay, so why did it take me so long to sew three seams and stick some sleeves on 'em? because this was the result of my first experimentation in drafting a pattern based off of my sloper (which is still a work in progress, but more on that later). really, it was the sleeves that was the major hold up. my first draft revealed some unforeseen problems with the armholes of my bodice. the second go around had too much sleeve cap ease. i'd like to say that i was just having a case of the goldilocks and that the third try was just right, but thats not the case. i went from too much ease, to too little ease, to a forward thrusting sleeve, to a tight bicep, to not enough cap height... i am so sick of sleeves!

the version that finally made it onto this dress is still far from perfect. the armholes are a bit tight and, though you can't see it in the pictures, the sleeves swing forward a bit and there is an annoying little "puff" right at the shoulder line. between the sleeves and the fact that the muslin for this dress was so very very unflattering (think amish) its amazing this dress even got made! but i had a hunch that the busyness of the jaguar print and the drapey quality of the rayon challis would cure most evils. and lo and behold - it did!

pattern drafting = fail!

fabric choice = win!


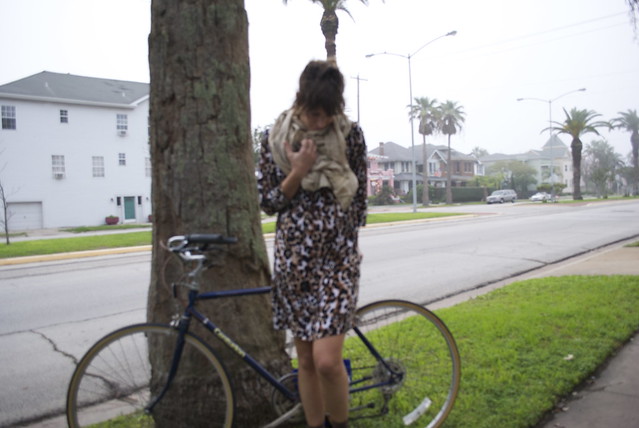
here i am with my trusty steed. believe it or not, but this little dress passed the biking test. meaning i can physically bike in this dress. whether or not it passed the public decency test is another story...

i had a lot of fun with the camera today. we've been getting these crazy fogs that roll in around 4pm that are so thick and heavy and give such an ominous feeling to the place. i tried playing around with my depth of focus and settings, trying to capture that. mostly i just ended up with some blurry pictures, but hey, i'll take what i can get!


i was particularly fond of this picture. it looks like a still from some b horror film! something bad is definitely about to happen! what do you think? abducted by aliens? i seem kind of okay with that...

well, friends, this was my last and final hurrah for winter-ish sewing. from here on out i will have my nose to the grindstone with one thing in mind: spring!

xx

2.23.2012

lightening bolts in my eyes

oh hello there blogland.

after a fight with a stomach bug this past week (i won) i've been left feeling a bit like a wet rag. when i become couch ridden its very easy for me to stay that way - well past my recuperation. when illness hits its like all my desire to be a normal, functioning human bean (because it sounds so much more fun than "human being") just drains out of me. so in order to kick my butt into gear i've decided i need to get organized and get inspired. it is with this impetus that i now turn my attention to my plans for spring/summer sewing.

spring in texas usually comes early (technically we've been having "spring" since january) and is generally quite lovely - and short lived. its merely the veil behind which the evil beast that is summer hides. our summers are like winter to all you northeners. its a marathon season which you hunker down for, pool your resources, and get ready for endless months of blinding heat and suffocating humidity.

sure, the weather might waffle back and forth a bit longer in my part of texas, but its undeniable that hot weather is around the corner, and when it hits, it hits hard. and if you're not ready for it you may find yourself a miserable hot mess. well, you'll still be a miserable hot mess regardless, but having a wardrobe full of sunny colors and easy breezy shapes helps to make one feel pretty regardless of the boob sweat (ooooooohhhhh the boob sweat!)


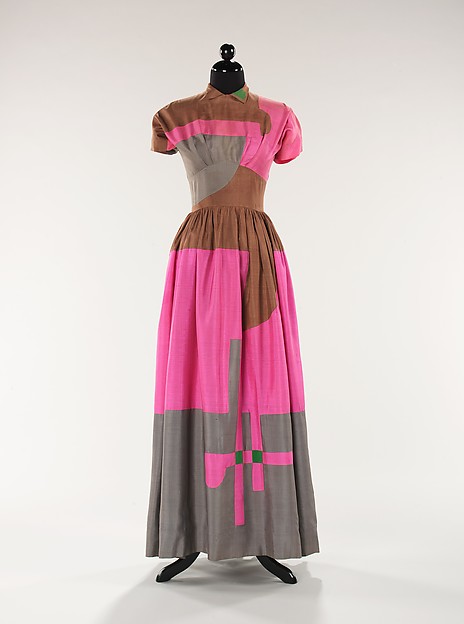
i've really been feeling these punchy pink hues paired with earthy browns, greys and olives.


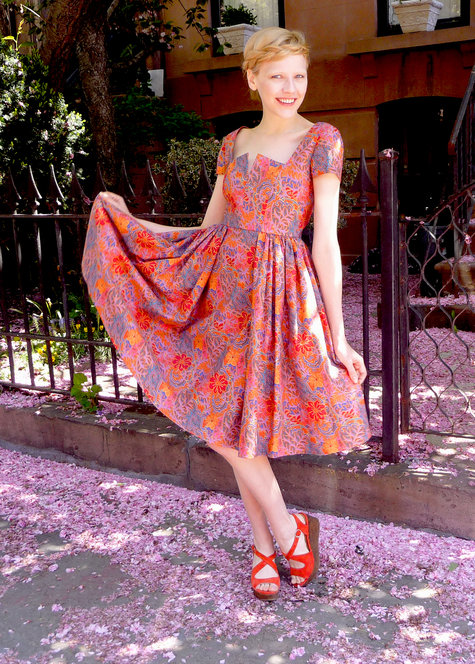
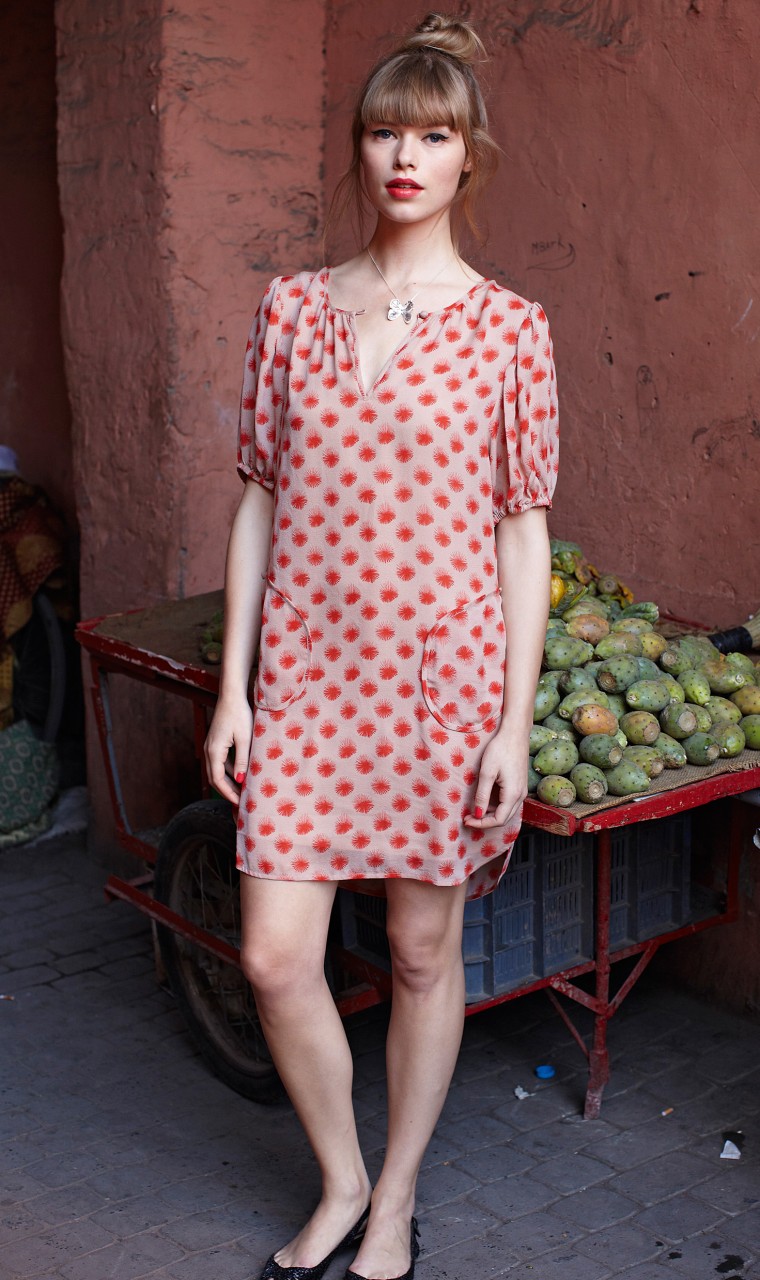
i always find myself drawn to these loose, easy shapes at this time of the year. particularly when made up in a light silk, these types of dresses are perfect for allowing a breeze to pass through, and there is just something magical about silk blowing against your skin - its like a built in air-conditioner! i also love that last image - that picture has been implanted in my brain every time i imagine my summer wardrobe.


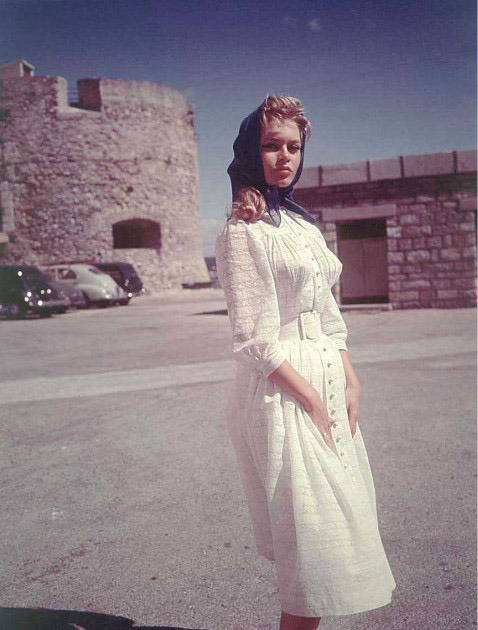
hot summer + white dresses = perfection. need i say more? yes. yes i do. because that picture of frida, like the lovely lady in chambray standing in the surf above, has also been burned into my minds eye in association with summer. i've never cared for her paintings much (just a personal preference) but every time i see a photo of frida kahlo i'm always blown away by her beauty and personal style.


by hook or by crook - this summer i will be making one of these pairs of shoes mine! about once a season i like to make a major shoe purchase, and shoes are one of those things that i generally feel okay spending a bit more one because, well, my feet are no laughing matter. also i feel that one great pair of shoes can be worn practically daily for an entire season and no matter what, they'll take your outfit up a notch. and i just really like shoes. i mean, lets call a spade a spade here...

in conclusion - friends, do you ever get the sewing blahs? oh, didn't i say i have the sewing blahs? well i do, despite my convalescence, i've been feeling a bit uninspired behind the sewing machine the past week. this post from mpb and this fabulous chart from oona are definitely hitting home for me! this is funny because i'm actually making something - something i hope to have finished and ready to photograph for you this weekend. anyway, if you do get the sewing blahs - what usually gets you out of it?

xx

2.14.2012

champagne tastes : beer budget


my poor dad used to always lament that i could walk into a store filled with racks of things that all look the same, and somehow i'd pick out the most expensive item.

this trait didn't really end when i started paying for things myself. in fact for a time it got worse. my money - i buy what i want, right? i admit i may have spent my food money on a new sweater more often than i care to say. or, more accurately, bought the food and the sweater and overdrew my bank account. thankfully, this habit didn't carry itself too far into adulthood. at some point, i learned that for every extravagance there needs to be a sacrifice.

i don't make a lot of money. making a lot of money is not a priority in my life. but that doesn't change the fact that i have an appetite for nice things - namely clothes. this is one of the reasons i began to sew. no. this is the one reason i began to sew. my mother doesn't sew. i didn't grow up around it. my love for sewing is directly and inextricably linked to my love for beautiful clothes. garments that are often outstandingly out of my price range.

but when it comes to sewing - my habits really haven't changed. i have a weakness for expensive fabric. no lie. i have endless amounts of admiration for all the sewing bloggers that pillage their fabric from thrift stores, or swaps. whose total cost for a garment is $2 (sew weekly ladies, i'm looking at you!) and look amazing! but thats just not me! ever wonder why i don't post the total cost of my garments? because most of the time, i'm too embarrassed to say!

full disclosure: i probably spent $150 - 180 total on supplies for my red jacket. the bulk of that was the wool gabardine i used for the shell. $180 dollars is a lot of money to me. but out of those materials i got a jacket, a pair of pants, and now i'm working on a dress from the leftover lining fabric. so three items for $180 doesn't seem so bad anymore! especially three items that could retail for $180 each at a store like jcrew. true, i opted for the rayon lining over the silk, but that wool was... well... gorgeous, and do you know how hard it is to find a good red?

so how do i manage this expensive fabric habit? well for starters - i may be the one and only sewista out there that doesn't have a stash (or has a very very very small, extremely manageable one). i don't really buy fabric without a plan. and i try to be as exact as possible with my yardage. secondly, i sew slow (as we know) so i'm not really making tons of clothes. and finally, i skimp in other areas of my life. i take a savage pleasure in a low grocery bill. i have the bare minimum health insurance. i make, cook, concoct or grow what i can. i'd take low rent over new appliances (or structural soundness) any day. i don't have cable (or own a tv). because for every extravagance - there are sacrifices.

sloper update: i decided i really needed to draft sleeves. if i ever get over my disgust with this whole endeavor perhaps i'll post the results. the title for the post will probably be something like "slopers: the many headed hydra"...

xx

2.11.2012

sloping and revelry


you guys. its mardi gras.

fun fact: galveston has the second largest mardi gras celebration in the u.s. after new orleans, of course. i'm pretty sure its a distant second, but still...

not so fun fact: mardi gras is happening right outside of my window. and it goes on for twelve freaking days! wtf!! so. much. revelry! truthfully we don't get the revelers-in-the-midst-of-revelry outside of our window as much as we get the revelers-stumbling-to-their-hotels-and-cars. so. much. broken. glass. if you live anywhere near the downtown galveston area you will find your daily routine... impeded.


i think the world might be divided into mardi gras-ers and curmudgeons. i fall into the second camp. i've found myself putzing around my apartment and muttering to myself "don't these people have jobs?" more often than i care to admit. and yes - i realize that is the same thing that the grumpy 90 year old ww2 vet is doing too. i may also sigh and say "kids these days..." under my breath too. i always did feel a kinship with the over 60 crowd...

so to drown out the sound of blaring classic rock and drunken raucousness i've been doing what any sane sewista would do. i've buried myself up to my eyeballs in my patternmaking book, surrounded myself with measuring tape and pattern paper and colored pencils and erasers and rulers and muslin, in an effort to draft a sloper.


fellow sewers, do you slope? do you find it helpful to have this basic, made-to-your-measurement pattern on hand?

i am curious because i've always somehow felt that if i actually sit down and draft a sloper (or pattern block, whichever term you prefer - i don't really know if one is more correct than the other...) that it would magically open the door of designing to me. like all i needed was this flat pattern and then the world would be my oyster (sartorially speaking).

but the actual drafting of the sloper seemed so.... boring to me. first, you take your measurements. and these measurements aren't for the faint of heart. we measure things like bust arc and shoulder slope and new strap length (whatever the hell that is - i certainly don't know - but i measured it). you need these measurements for your front AND back. and this is where it gets tricky. unless you are skilled in the ways of dislocating your shoulders - getting accurate back measurements is impossible to do on your own. i asked my husband to help take my back measurements as i stood as naturally as possible while still craning my head in the mirror to see if he was doing it right.

then you do a little magic with your pencil and ruler and a little while later - you have a flat pattern of your upper torso. or so you think. i had to fudge some of my back measurements a bit because somehow my across waist measurement was bigger than my across back. i may not have the sveltest of waists, but even i was pretty sure this was a measuring error and not some quasimodo like proportions.


and this is where it gets deathly dull. because even though you thought you were all careful with your measurements and stuff - you have to test it. so you sew your sloper up in muslin. this is, without a doubt, the most boring garment sewing ever. but whatever, at least it goes fast. then you try on your sloper to see how it fits.

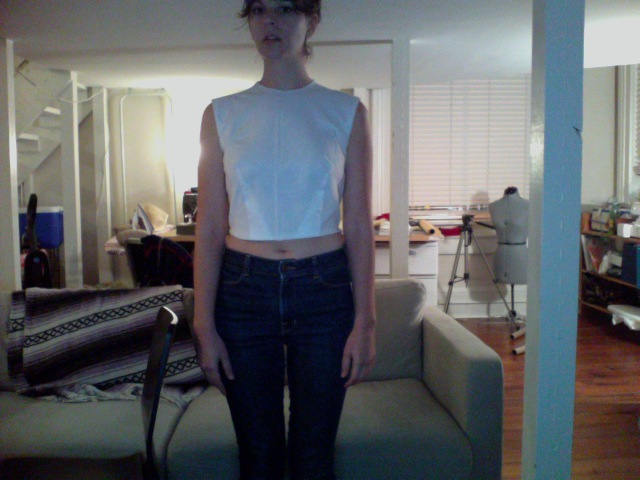
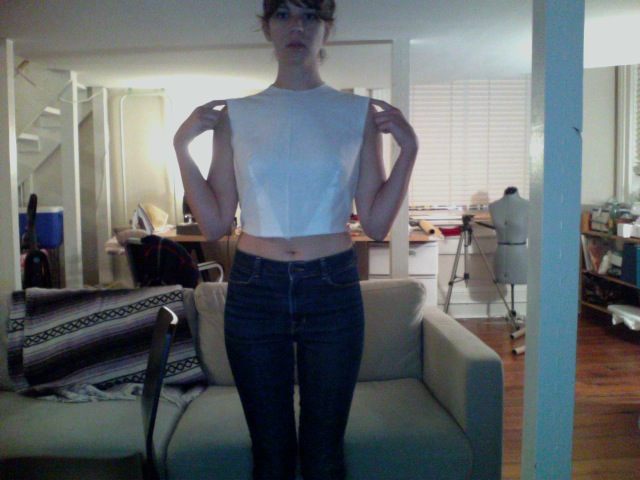
prepare yourself for awful photo booth pictures (and say hi to my messy apartment and winter belly - hi!)


this is my second test fit. the first was a good 2 inches too big all around. not sure how that happened - but rather than remeasure and redraft i just pinched and tucked out the excess then transferred those markings back to my flat pattern.


i'm pretty happy with the fit of the front. i may trim off a teensy amount in the shoulders to fit the slope of my shoulders more accurately. you can see the little bit of drag lines from the neck to the armpit in the first photo. when i lifted the shoulders just a smidgen (we're talking maybe 1/4 inch) the drag lines disappeared.

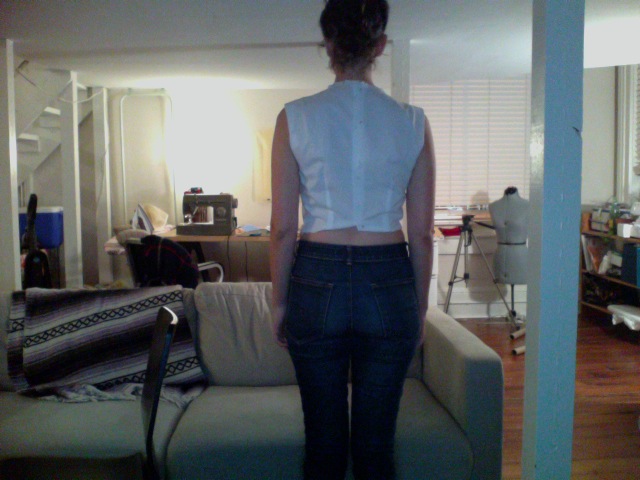
but this...

edit: perhaps you can see the wrinkles better in this equally bad photo?

is the back... i mean... whats going on back there? ignore the weird flipped up bottom. i'm running into the same problems fitting my back as i did trying to get measurements. unfortunately, my husband (bless him) isn't really much help in this matter. last night i thought perhaps i could talk him through helping me fit the back. it didn't go so well.

me: can you see where the big wrinkles are?
him: yes.
me: can you maybe locate where they are the worst?
i got an impromptu back scratch. perhaps to signify they were everywhere?
me: can you maybe find the big ones and pinch them out?
he pinched my butt.

well fine. this is why i have the internet. fellow sewinas (i just made that up) can you help me figure out whats wrong with the back of my sloper? is it too long back there? is it just too big all over? how do you fit the back of your garments? and most importantly - does anyone else use photo booth to help them assess fit?

if you're into mardi gras - may you have a fun filled and safe twelve days - and for gods sake keep it down!

xx

2.06.2012

red to the nth degree


lets just get one thing straight: i didn't, but i probably should have failed every mathematics class i ever took after the point where it wasn't just numbers anymore. you know, like when they decided to throw in letters too (because, what? numbers aren't abstract enough??!?). so the fact that i pulled that math reference out for the title of this post is testament to the surfacing of some deep seeded memory i have long been trying to repress...

good. glad i got that off my chest.

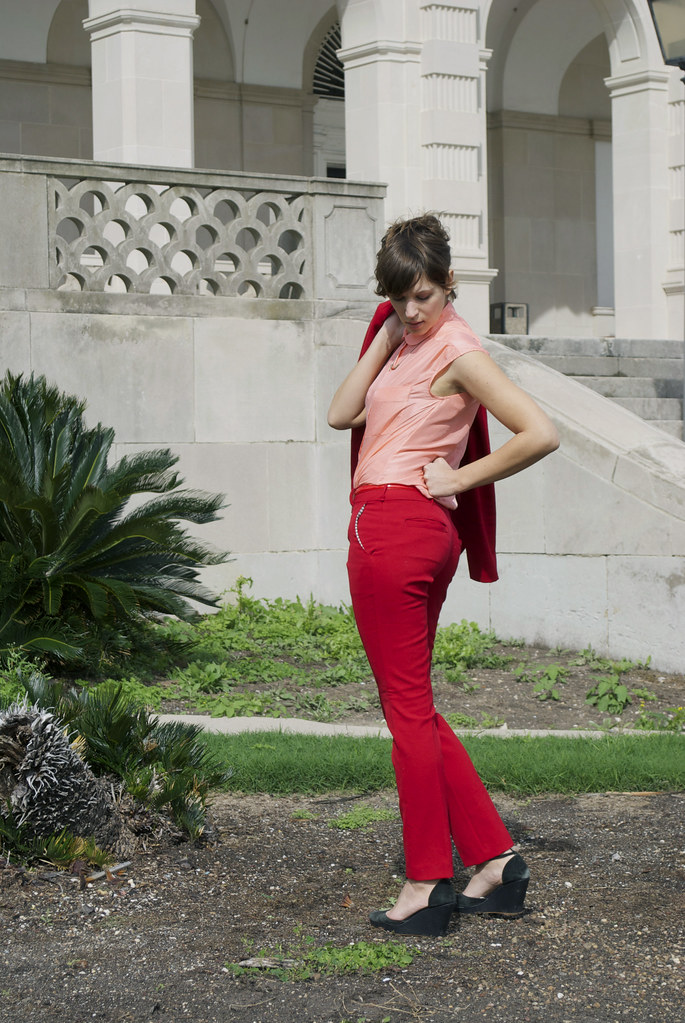
now where was i? oh yes! heeeyyyy look at these red pannntttssss!!! pretty shmancy eh?

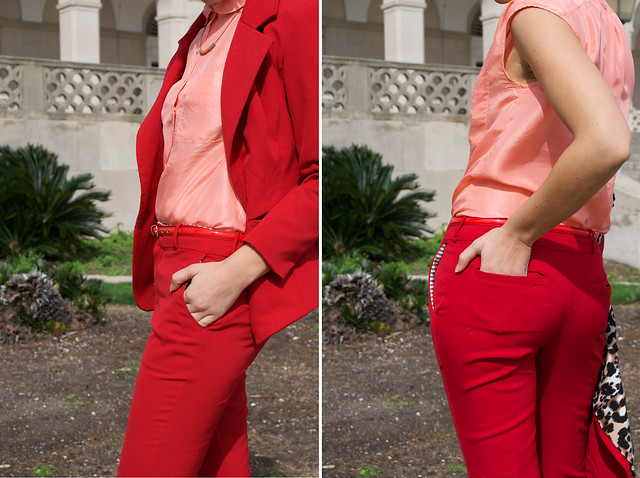
these bad boys are the result of all my clover tutorials and my second pair of pants made using the colette clover pattern. in the tutorials i showed you some of the changes i made to the pattern to give them more of a trouser look. this included giving them a front zip fly, side pockets and back welt pockets. i may have accidentally reshaped the leg of these while i was sewing them up, too.

i may or may not have been about to fall when this picture was taken...

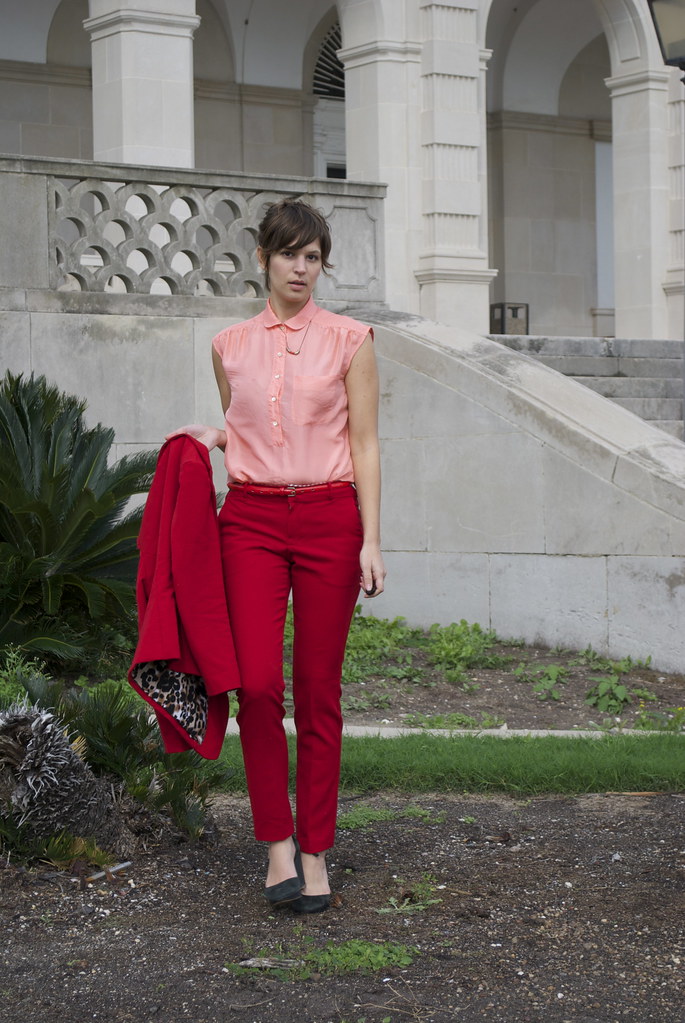
so i probably won't ever wear my red jacket and my red pants together in real life, but it was just too good of a photo opportunity to pass up. especially considering that, you know, valentine's day (shhhh) is creeping up on us.

i always feel a little bad for valentine's day because for the most part, once you're an adult, its like, expected for you to hate valentine's day (but i think maybe secretly we all sort of love it - ha!) i've never actually celebrated valentine's day - except with my parents (love you!) but i always think about doing something. does anyone have any suggestions for some non-cheesy but still maybe goofy and fun things to do on valentine's day?


one of the changes i made to this pair of clovers was to cut all my waistband pieces, including my interfacing and facing, on the bias. one of my readers, elle, left a comment on one of my tutorials advising me against this. i seriously considered not doing it (i take the advise of more experienced sewers veerrrryyy seriously) but it was something i have seen on many ready to wear pants and so i was pretty curious (plus i had plenty of extra fabric should something go wrong). it must work somehow. well i'm very happy to report that my bias cut waistband went in without a hitch! and i am so glad i did it! the little bit of extra stretch compensates for my muffin top quite comfortably, thankyouverymuch!

cutting and sewing things on the bias makes me quite nervous - so i'm a bit reticent to give any advise on sewing a bias waistband - but i will say that checking the direction of your bias matters. make sure all your seams are sewn with the bias going in opposite directions. i also think it helped that i was using a really sturdy sew in interfacing (hair canvas) and a really sturdy cotton for the facing - which didn't have much give, even on the bias.


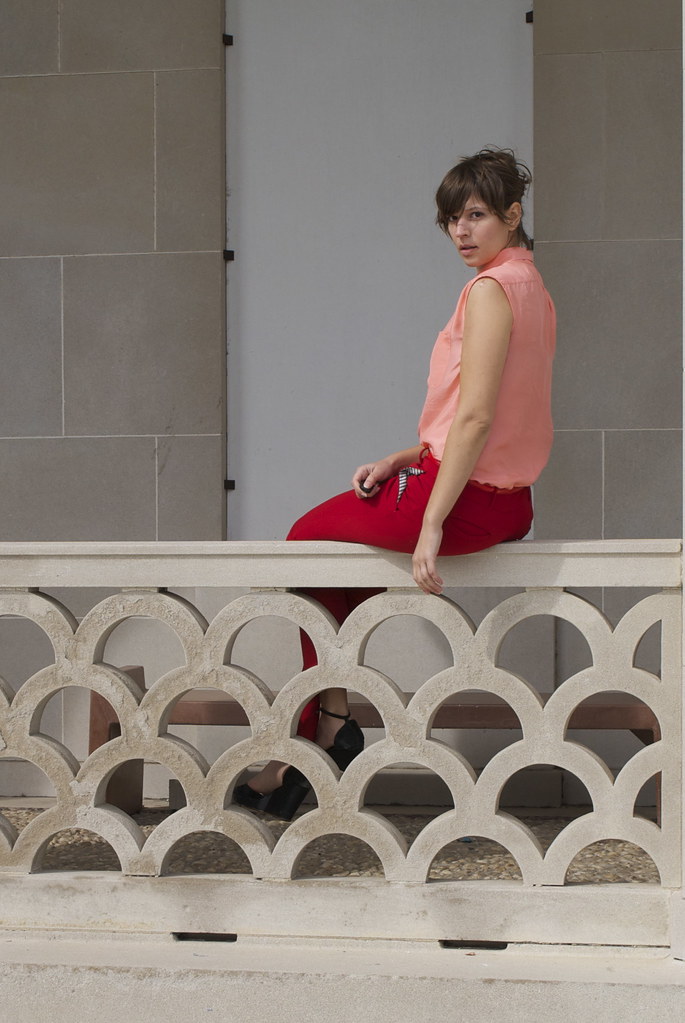
i know it seems slightly crazy that i'm wearing a sleeveless shirt at the beginning of february - even i thought it was too cold to take off my jacket when i set off to take these pictures today. but then i heard on the radio that it was 65 degrees (F)! and i felt silly for being cold and wondered where my northeast blood went to!

i really wanted to pair this coral shirt with my red pants. its the sort of color combination that seems like it shouldn't work - but when you actually put them together its quite lovely. the pairing makes me feel very modern yet feminine - and maybe a touch springy?

i finally feel like i might be at the end of my rope with my "fall/winter" sewing. i'll be spending the next few days gathering some inspiration for future projects, and though i can't quite believe it, gearing my thoughts towards warm hot weather dressing.

if you'd like to check out my clover tutorials - you can find them all on my tutorial page.

xx


2.02.2012

tutorial: fun with clovers - part four


well hey there! my sincerest apologies on the delay in getting this last leg of the clover tutorials up - but i assure you i have perfectly good reasons. this past weekend was a rather momentous one at work and i spent the early part of this week just recovering. then once i finally got my sewing pants back on - wouldn't you know - i ran out of thread!! now this may not seem like a crisis to anyone else but, i live on an island people. the closest joanne's is 30 minutes away and my husband and i are a one car household. picking up sewing supplies isn't just something you do on your way home from work. it requires planning and strategizing...

okay, now i got my excuses out of the way... lets get back into our clover adaptation. as promised, i have the final installment of the clover metamorphosis ready for you. today i will cover how to sew your pockets and finish your waistband to complete your stylish and svelte trouser look.

enough with the dilly-dallying! lets begin with the pockets!

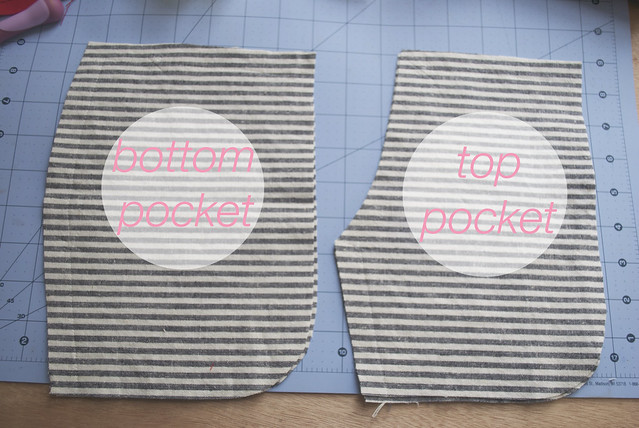
you should have four pocket pieces - two that follow the line of your pocket opening and two that follow the curve of the hip. for this tutorial's sake, we are going to call these two pocket pieces the "top pocket" and the "bottom pocket" . i'm sure they have some official term - like "pocket bag" and "pocket facing" or something but since i'm not totally sure what those terms are i just made up my own - you hip to my jive? picking up what i'm putting down? smelling what this rock is cooking? good. let's move on.


1. isolate your bottom pocket pieces. if your pockets are made from a different fabric than the body of your pants you may want to create patches for the bottom pocket pieces so the contrasting fabric doesn't show. or you can make the contrasting fabric part of your design - in which case skip this step. but if you don't want your pocket fabric to show - make a patch out of your fashion fabric that is longer and wider than your marks for where your pants will line up with the pockets. finish the edges of the patches by zig zagging, pinking, or overlocking. all my seam finishes will be done with my overlocker (serger). sew the patches onto the bottom pockets, lining up the outer edges and top corner.


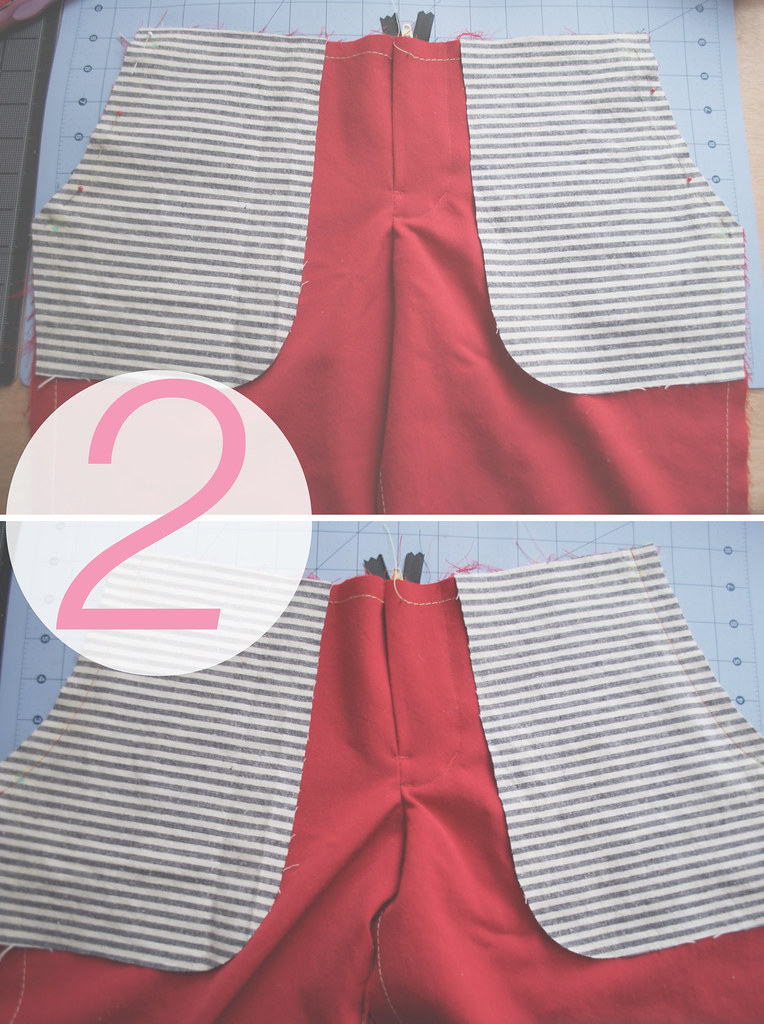
2. lay your top pocket pieces, right sides together, on top of your pants. align the pocket opening and match up the dots. pin in place and stitch.


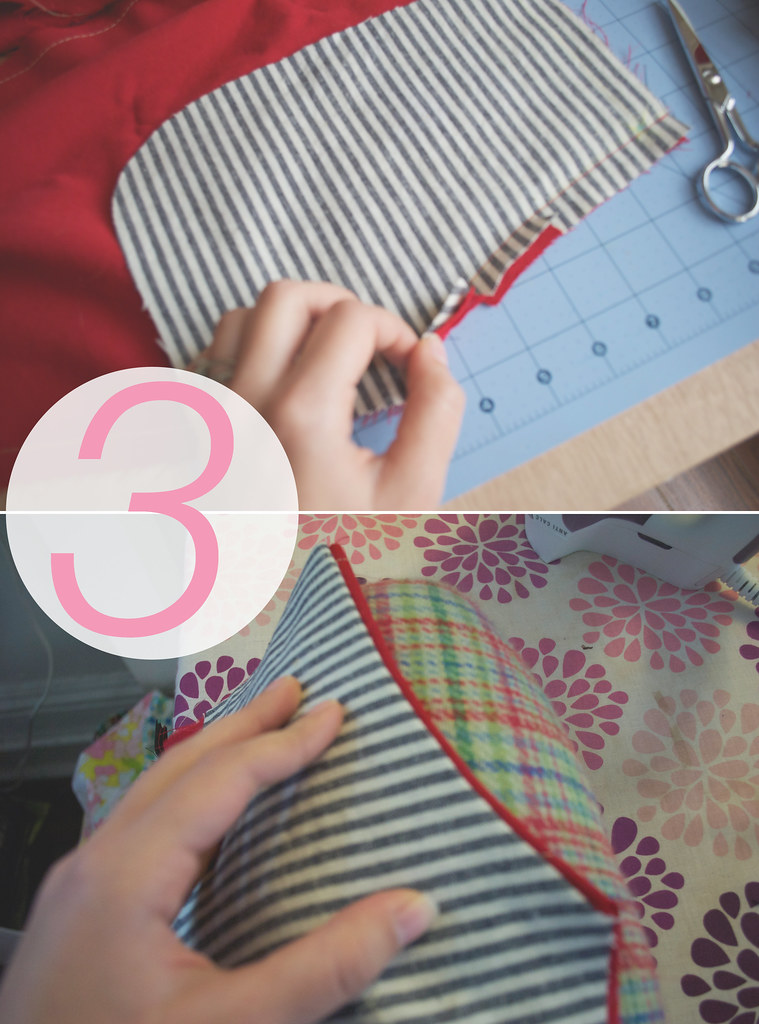
3. clip the curve of your seam allowance (if applicable) turn the top pocket to the inside of your pants and press. when you turn the top pocket, pull it so about 1/8 of an inch of the pants fabric pulls to the inside, this will make the pocket fabric less obvious when/if your pockets pull when you sit/walk etc.


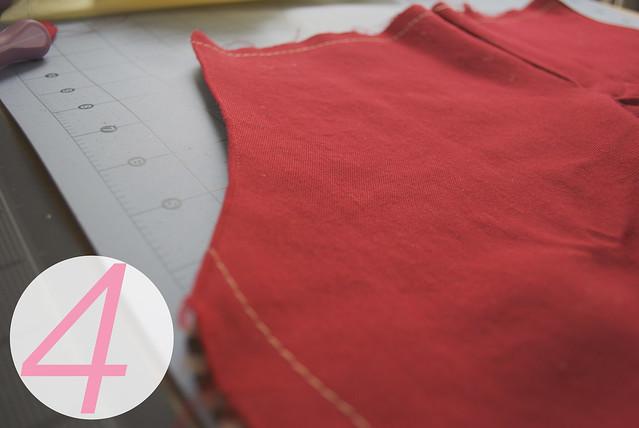
4. topstitch your pocket opening about 1/8 of an inch away from the edge. for a more "jeans" look, topstitch again 1/4 inch away from your first row of stitching.


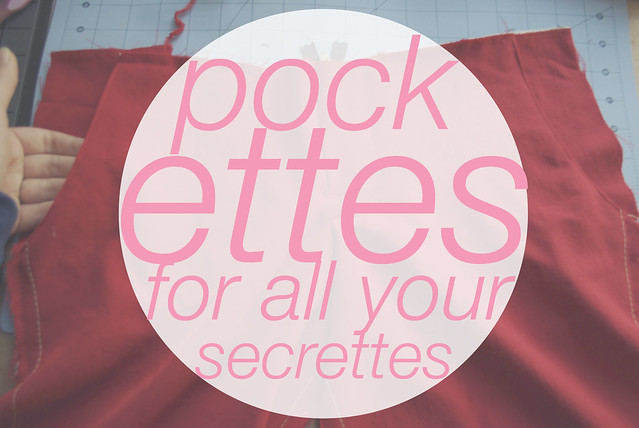
5. with your pants facedown, pin your bottom pocket to your top pocket, aligning all edges and marks. its super important that you accurately line up your marks along the hip and waist because this will affect the fit of your pants. stitch the pockets together along the inner edges and finish the edge. there's no need to finish the top or side edges since those will get encased in the seams. baste along the top and side to hold your pockets in place during the rest of construction.

note: if you don't have a serger and are looking for a more professional looking way to finish your pockets, tasia did a great tutorial a while back on finishing your pockets with a french seam. this tutorial also gives some great thoughts on other pocket related matters - like reinforcing your pocket opening.


and there you go! you totally have pockets on your pants! from here you will want to continue constructing your pants, sewing your pants backs together and sewing your inseam and outerseam. something to note at this point - because we sewed the front pieces together when we constructed our fly, you may want to construct your pants a little differently than the instructions in the clover pattern. i think its easiest to proceed as follows:
  • sew your pants backs together at the center crotch seam
  • if you're putting in welt pockets or any sort of back pocket, do it now
  • sew your pants fronts to the backs at the inseam - starting at the center of the crotch and working down each leg separately. for a more casual look - topstitch this seam.
  • if you are going for the jeans look you may want to topstitch your crotch seam
  • sew your pants fronts to the back at the outerseam.
lets pickup at the waistband.


materials you will need:
  • your almost completed clover trousers
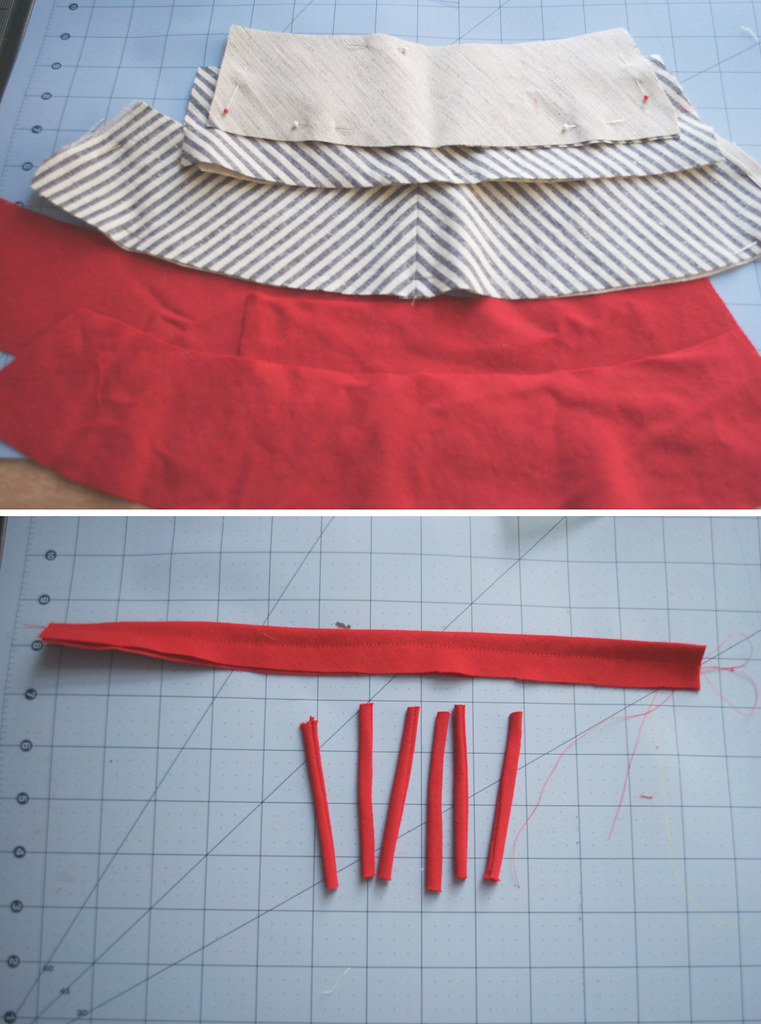
  • all your waistband pieces - one back piece and two front pieces plus facing pieces that should be interfaced (i'm using hair canvas that was left over from my red jacket)
  • a hook and bar closure
  • a button (optional)
  • scissors, thread, etc.
  • your belt loops (optional).
i made my belt loops by folding a piece of bias cut fabric in half and sewing about 1/4 inch from the folded edge. then i trimmed the seam allowance and turned it and cut it into six 3 inch long pieces. there are so many different ways to make belt loops - this is just how i did it this time - i did it differently on my denim trousers - but this worked pretty well for me.


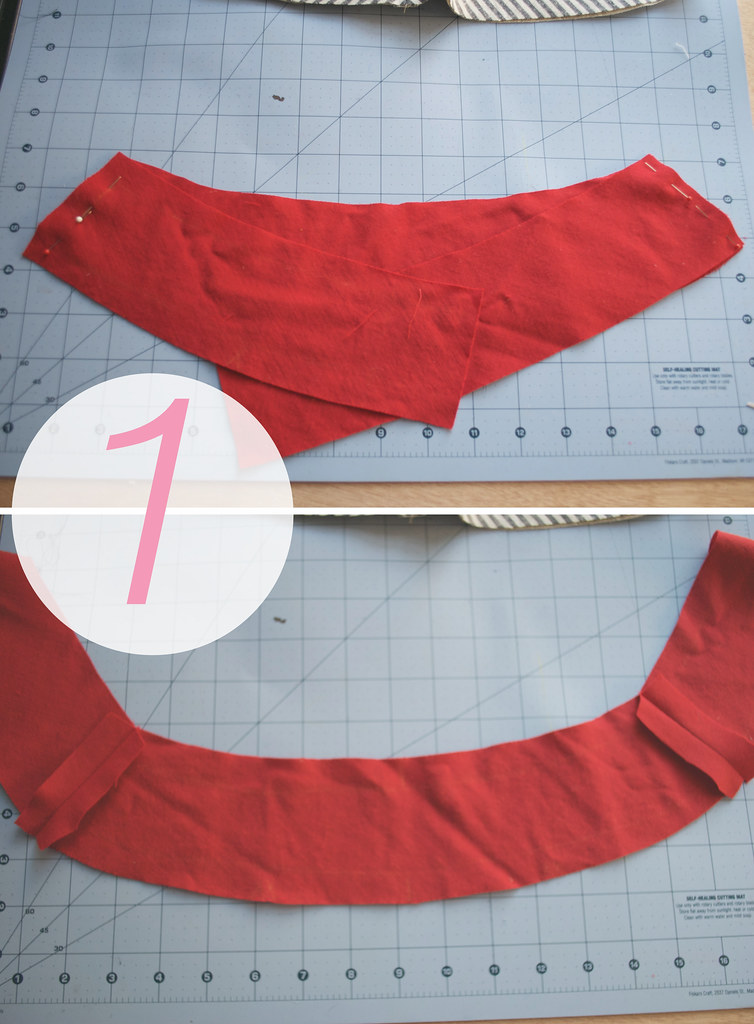
1. lay your waistband pieces right sides together. pin together at the side seams and stitch. press seams open.


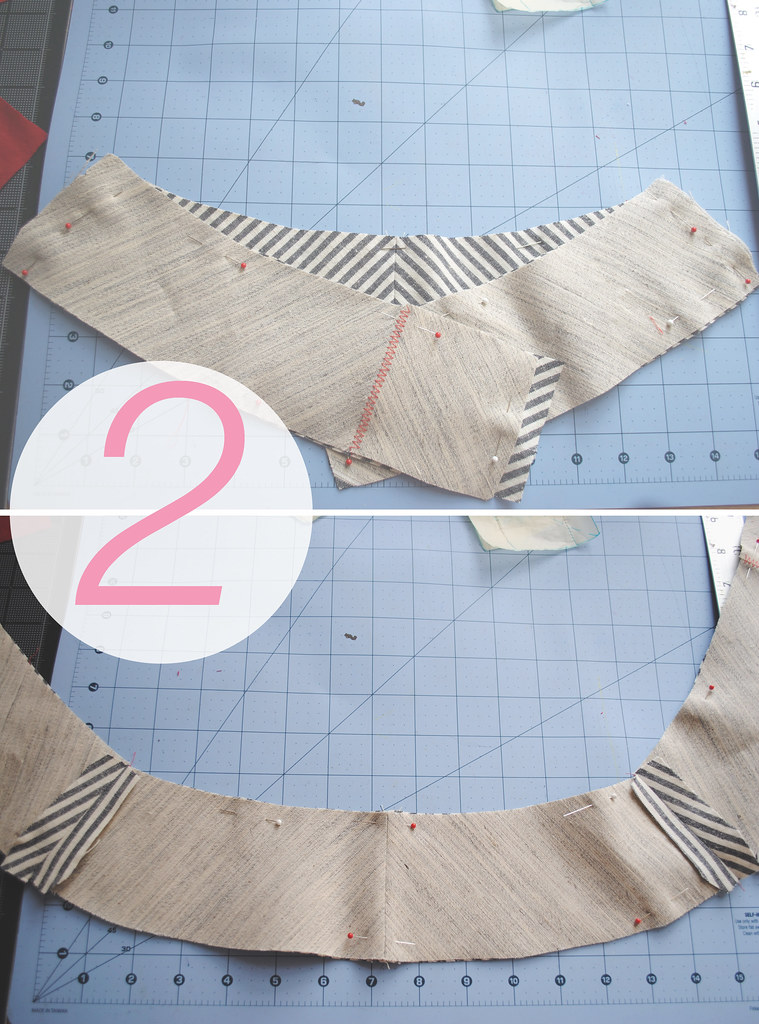
2. lay your waistband facing pieces (with interfacing) right sides together. pin at the side seams and stitch. press the seams open.


3. lay your waistband facing pieces right side up. lay your belt loop pieces on top of the facing pieces at even intervals, measuring the spaces in between to make sure they are evenly spaced. lay your waistband right side down on top of the facing, sandwiching the belt loops in between. pin in place along the top edge and stitch.


4. trim down and grade the bulk in the seam allowances. turn right side out and press. either understitch the facing or topstitch the waistband 1/4 inch from the edge. i decided to topstitch my waistband - i don't really have real a reason for this, i just liked the way it looked! i also felt that it stabilized my bias cut waistband (more on that later).


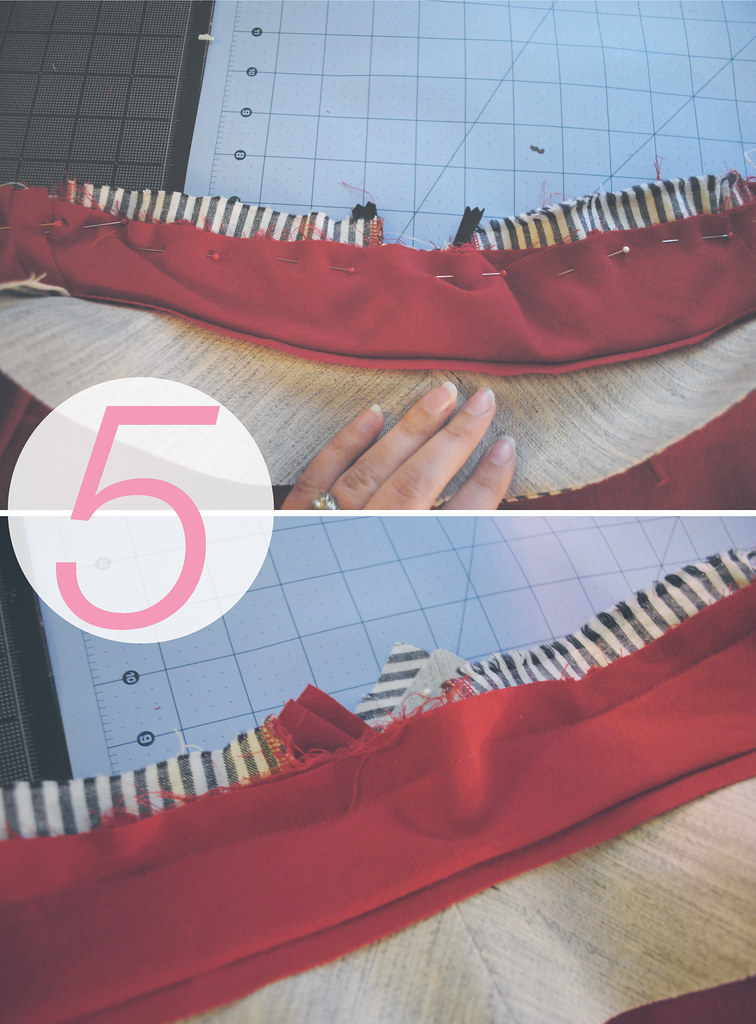
5. hold your waistband facing and belt loops out of the way and pin just your waistband to your pants, right sides together. match up all points - but especially the side seams. stitch.


6. trim down and grade the seam allowances in the waistband. trim down your extra zipper tape at this time. you can just cut through the zipper teeth. press your seam allowance towards the waistband.


7. okay. this is where my instructions get a bit vague. i ended up doing things very differently this time than i did the first time so i was sort of figuring it out as i went along. sorry!

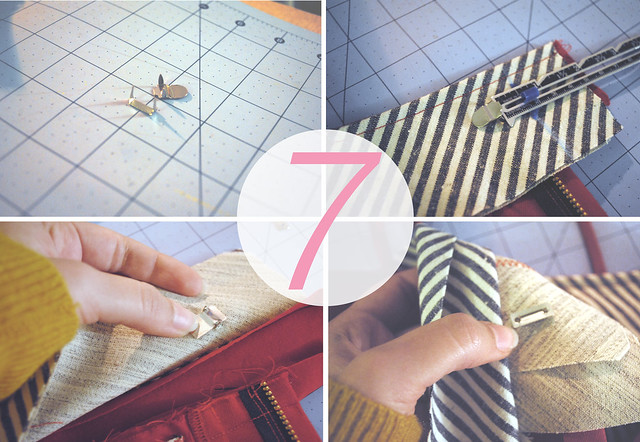
anyway. find your hook and bar pieces. i'm using the kind that you push through your fabric rather than the sew on kind just because i think they are sturdier. i decided not to do an extended tab closure on these pants just because i wanted a cleaner front - but you can make an extended tab closure by simply... well... extending your waistband! wherever you want your tab to stop - measure in 1/2 inch from there and that will be where you will put your hook. the hook will go on the overlap of the waistband. the bar will go on the underlap. follow the instructions on your hook and bar packaging to insert them correctly.
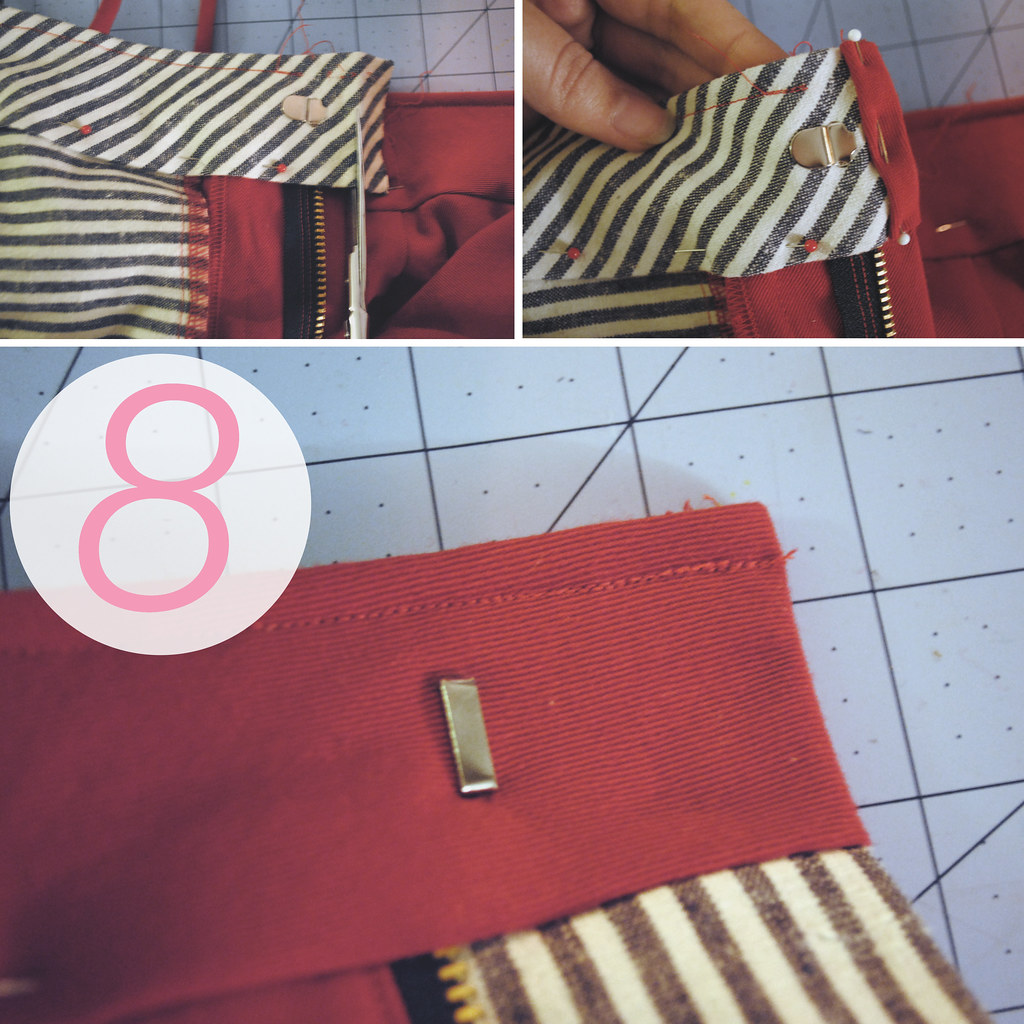

8. finish each edge of your waistband by trimming your waistband facing down (either even with your fly edge, or where you've extended your waistband tab to). fold the extra waistband fabric around the cut edge of the facing. pin in place. you can either topstitch this fabric down - or i prefer to finish this bit by hand, using a draw stitch or fell stitch for a nice clean edge.

note: if you've topstitched your waistband - like i did - you may find yourself ripping out a few of your stitches. its no biggee, just re-topstitch once you get everything into place. or do as i say and not as i do and leave about an inch unstitched at either end of your waistband and just finish the topstitching after this step.


9. finish the inside of your waistband facing. there are a lot of great ways to do this. you can turn the edge under and topstitch it down, or "stitch in the ditch". one finish i've always admired was a bias trimmed edge. it always looks fantastic - though i've never quite got the knack down. my preferred method - because i might be a crazy person - is to finish the waistband by hand. i turn the edge under and fellstitch it in place. i did this on my denim pair as well, which have got a lot of washing, drying, and wearing, and the handstitching has held in place beautifully.

here is a tutorial on the colette website where sarai shows you how to finish the clover waistband with bias binding. you will have to adapt it a bit since we're dealing with a front fly, not a side invisible zip.


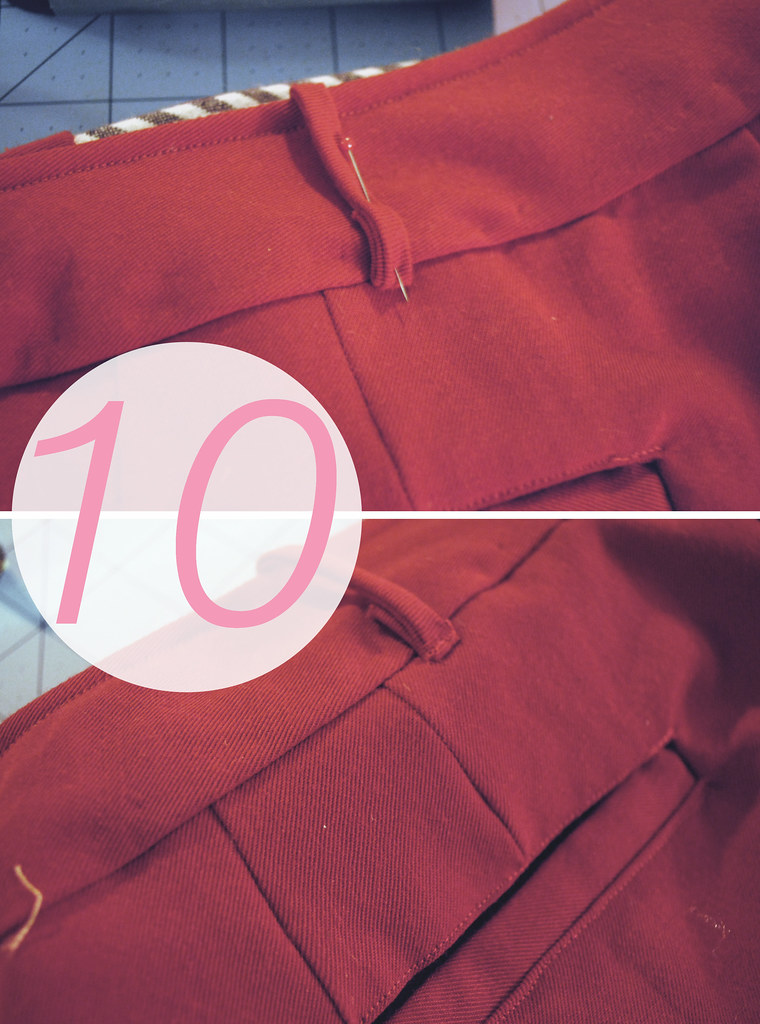
10. final step! press everything in place and fold your belt loops over your waistband. pin them firmly in place and bar tack them in place. this is easiest if you extend your belt loop just past your waistband, so you're actually sewing your belt loop onto the body of your pants. you can trim down the extra bit on the inside if you want.

on my denim clovers i actually sewed the belt loops into the waistband when i attached the waistband to the pants - but honestly, while this seems like it would work well - they kind of pulled weird at my waistband and i wasn't totally happy with the result. so i did it this way this time and i like the results much better.


and there you have it! fully refashioned clovers! phew! is anyone else exhausted?

i want to point out a few things before we're done - just some lessons learned that i'd like to pass on:

first, i didn't do a button and buttonhole on these pants because i didn't have enough room - but typically if you are doing an extended tab closure you'll want to do a button on the opposite side to hold everything nice and neat.

second, i only did the one hook and bar on my closure - this works quite well, but i wish i had put two hook and bars, one on top of the other.

now all you have to do is hem your pants - and of course model them! it might just be me, but i kind of think the clover pattern gives good butt....

if you missed the earlier clover tutorials you can find them here:

xx