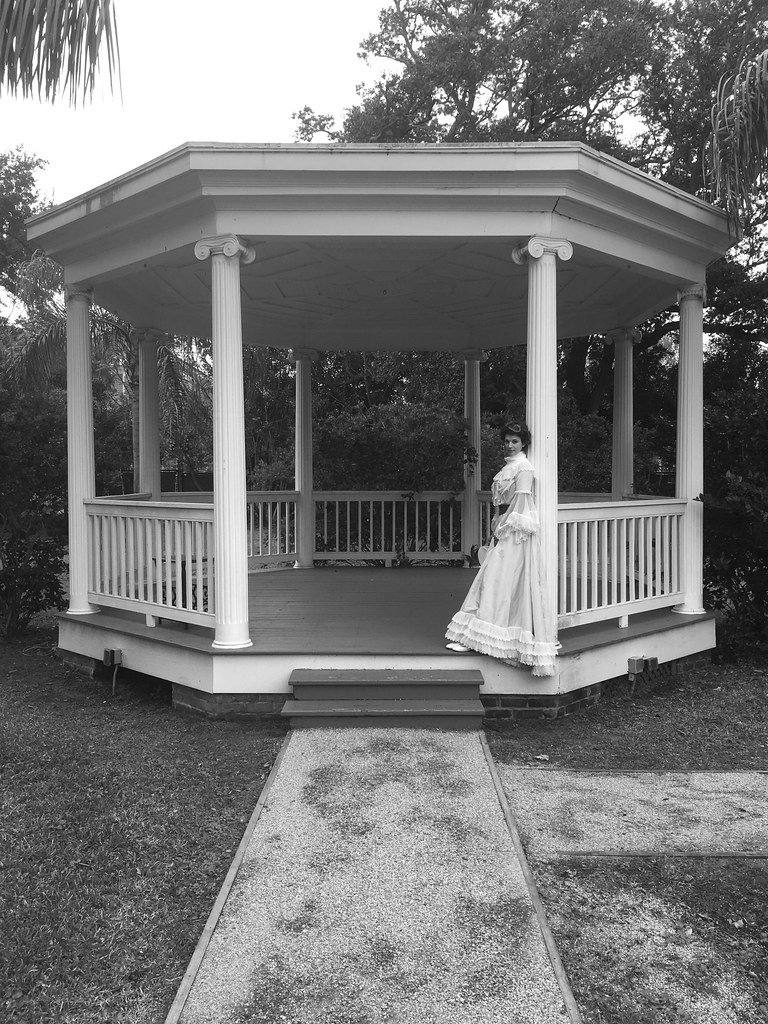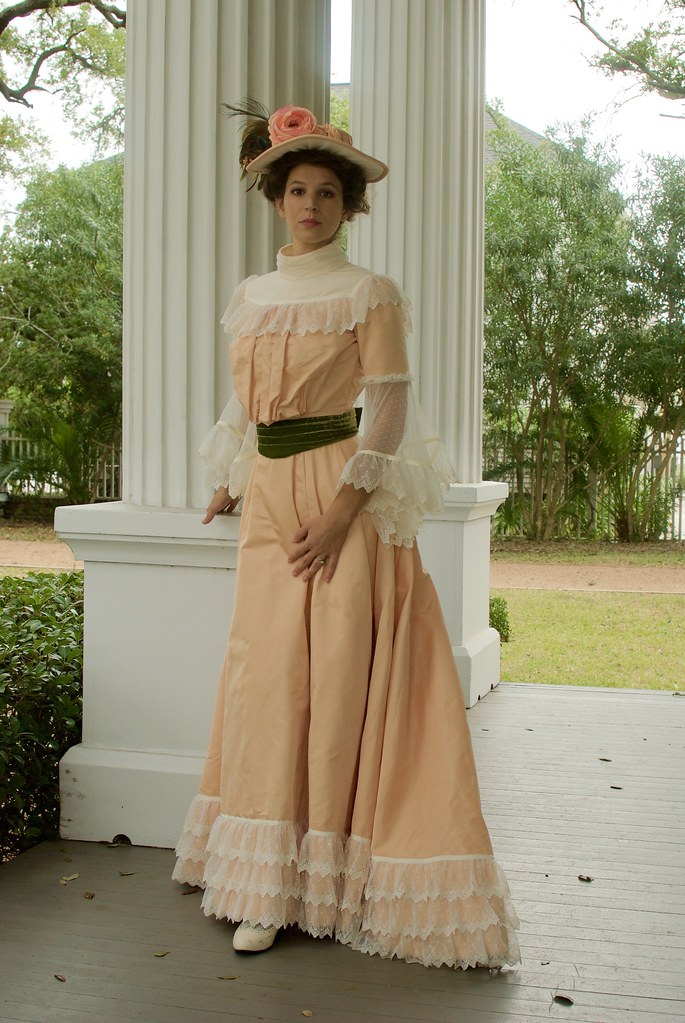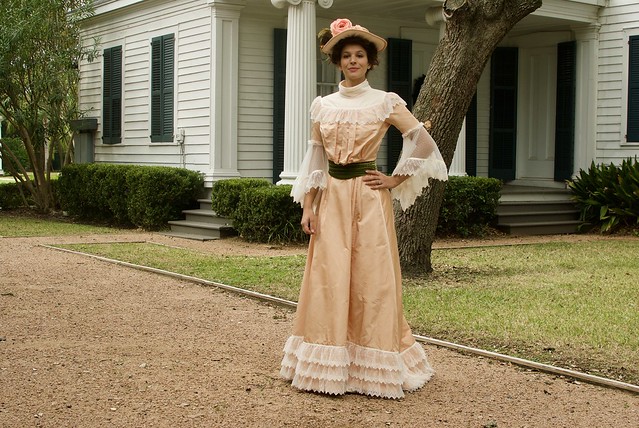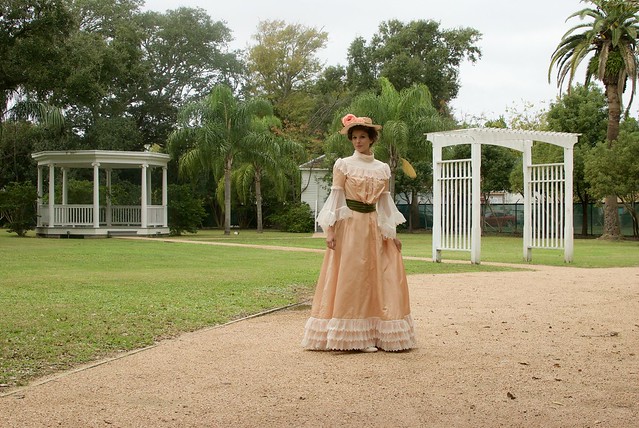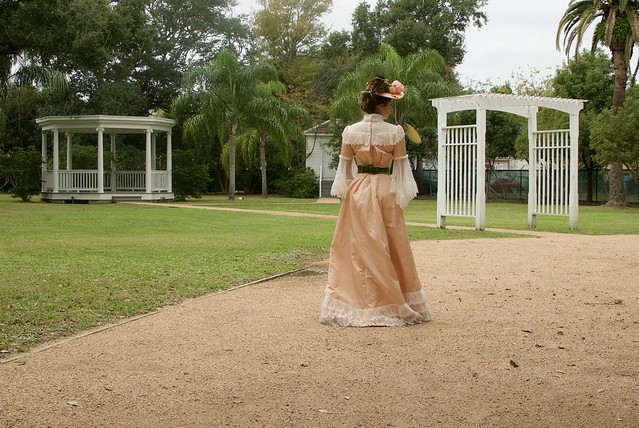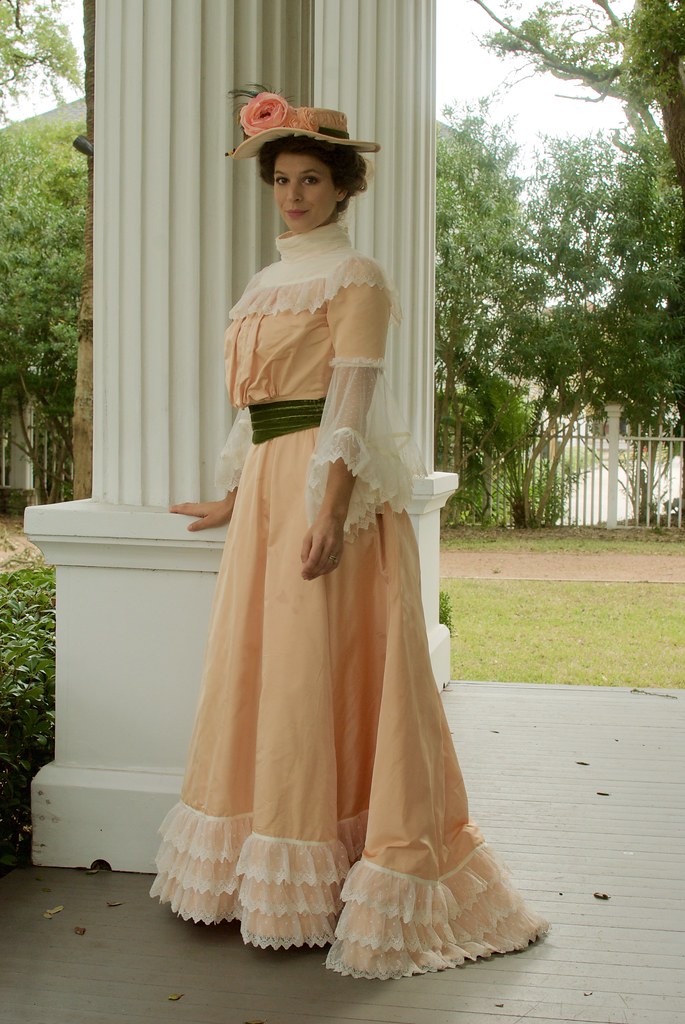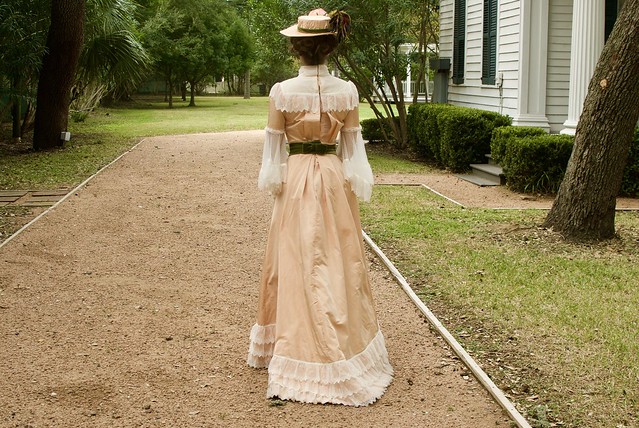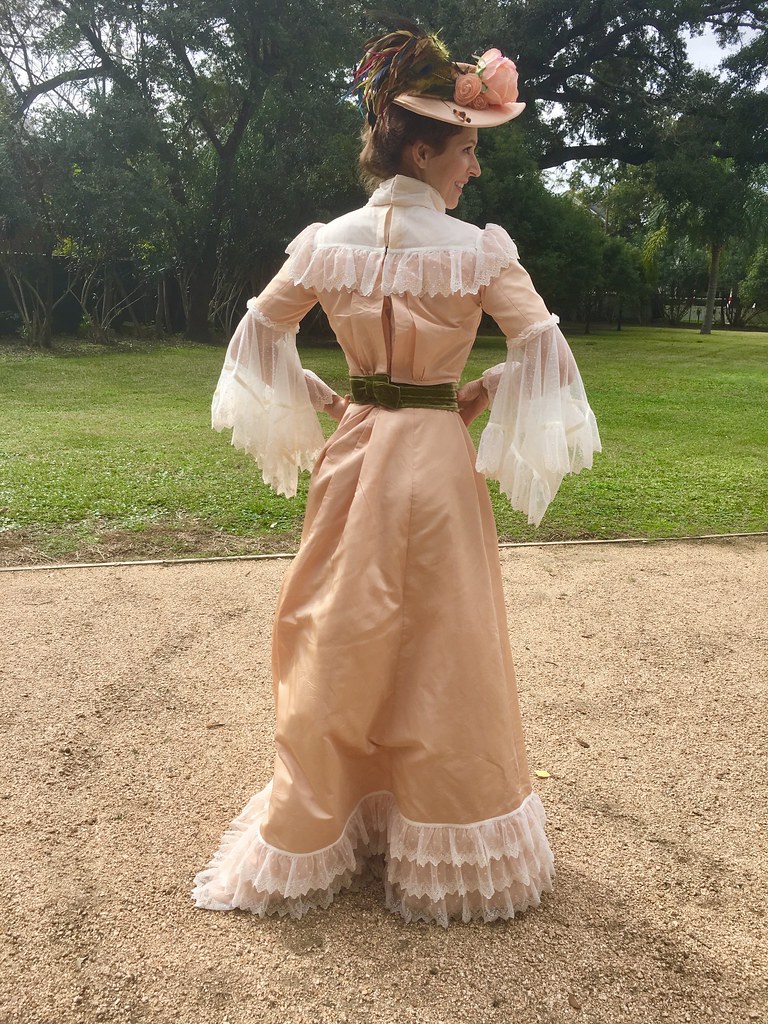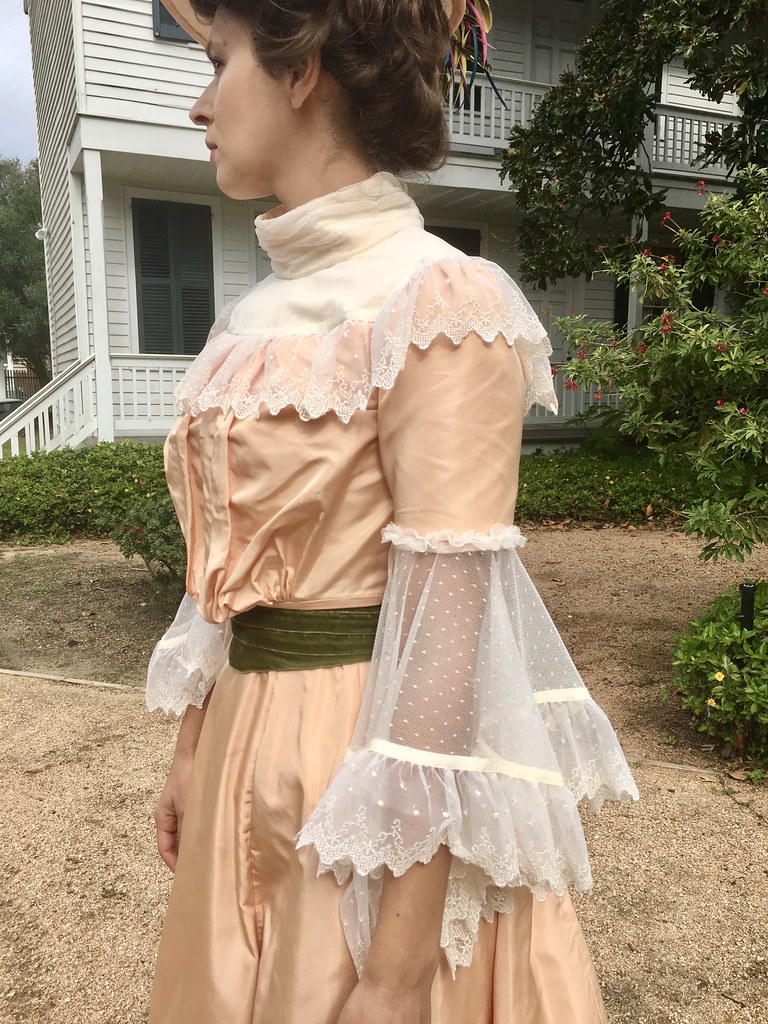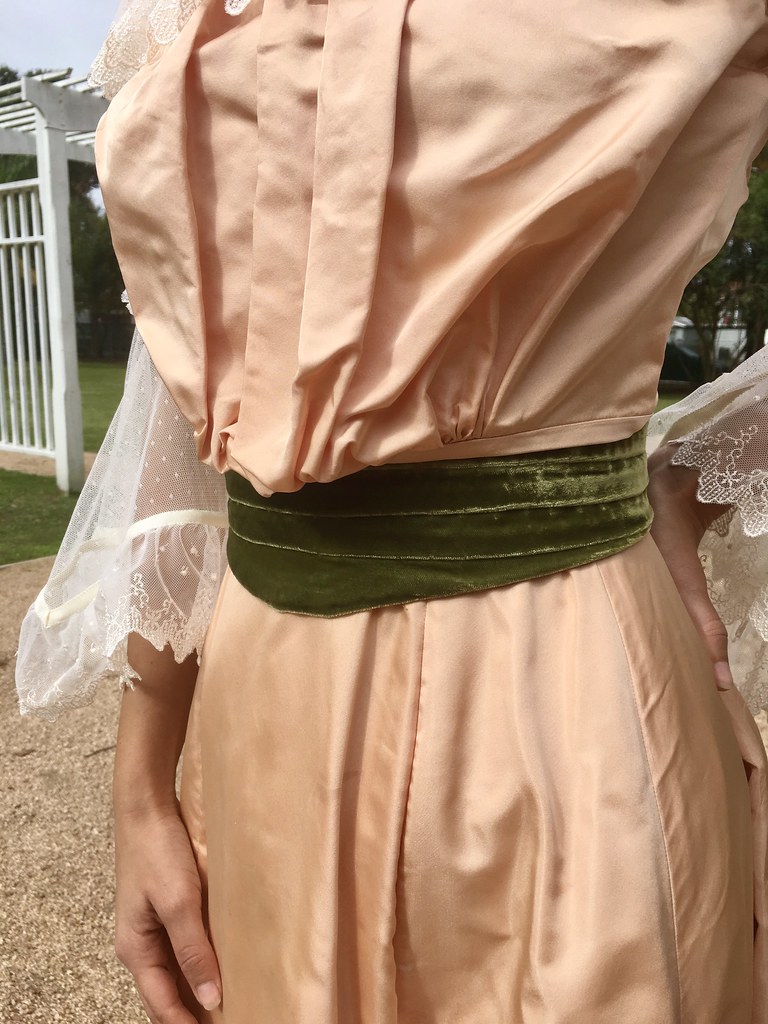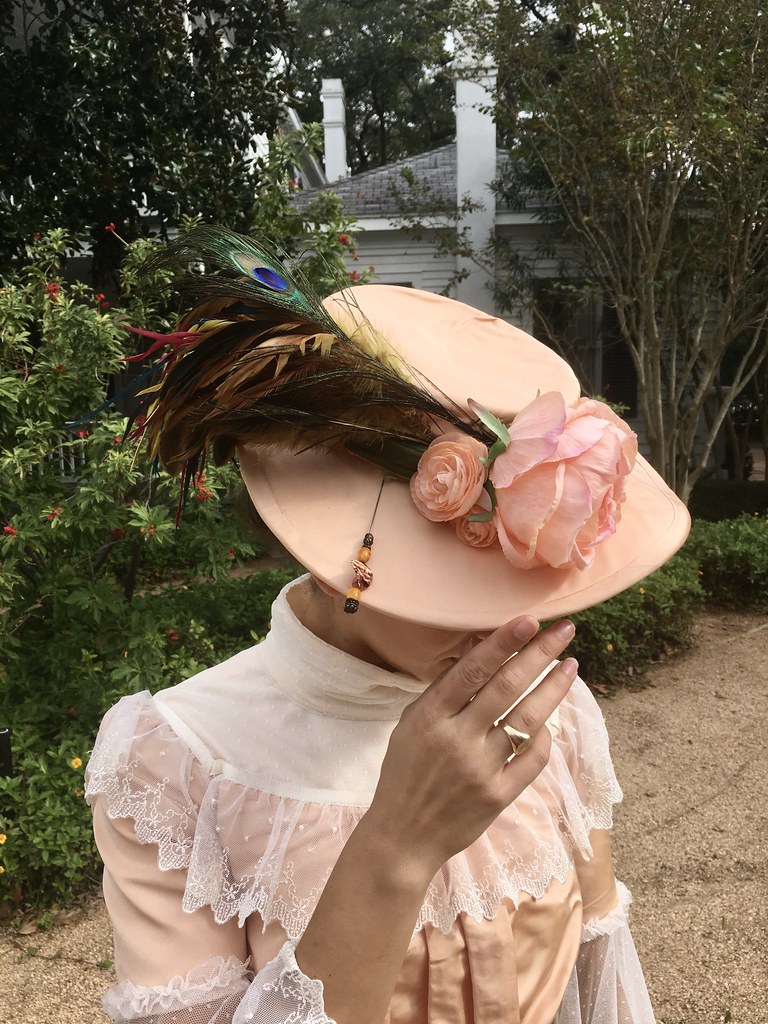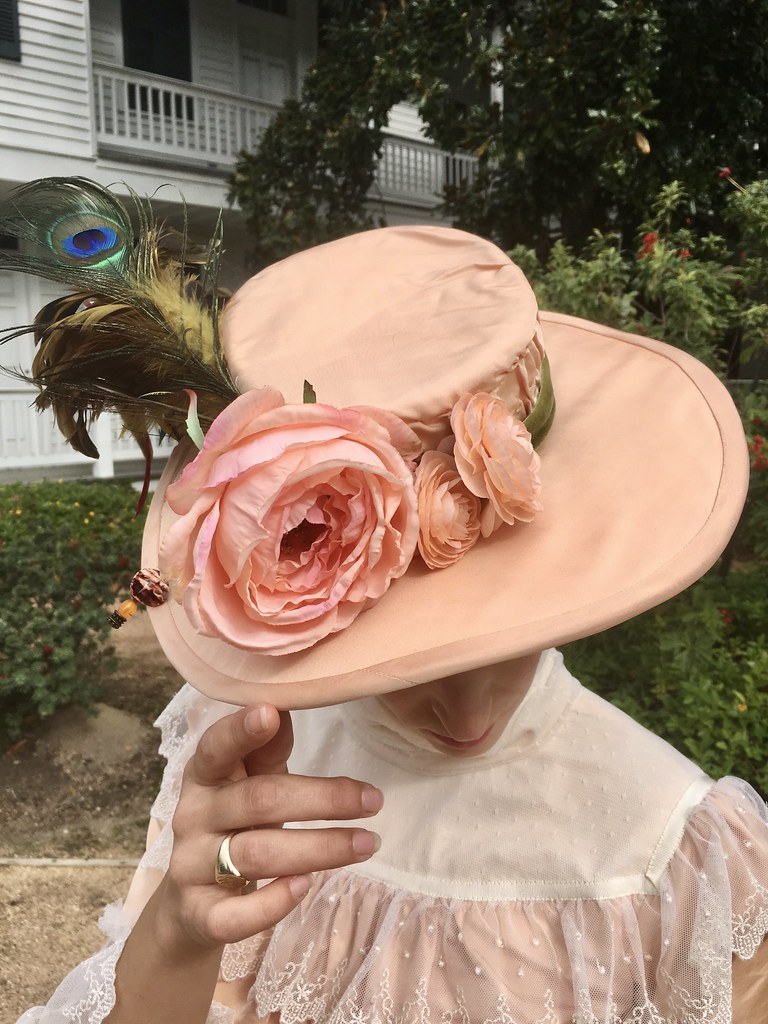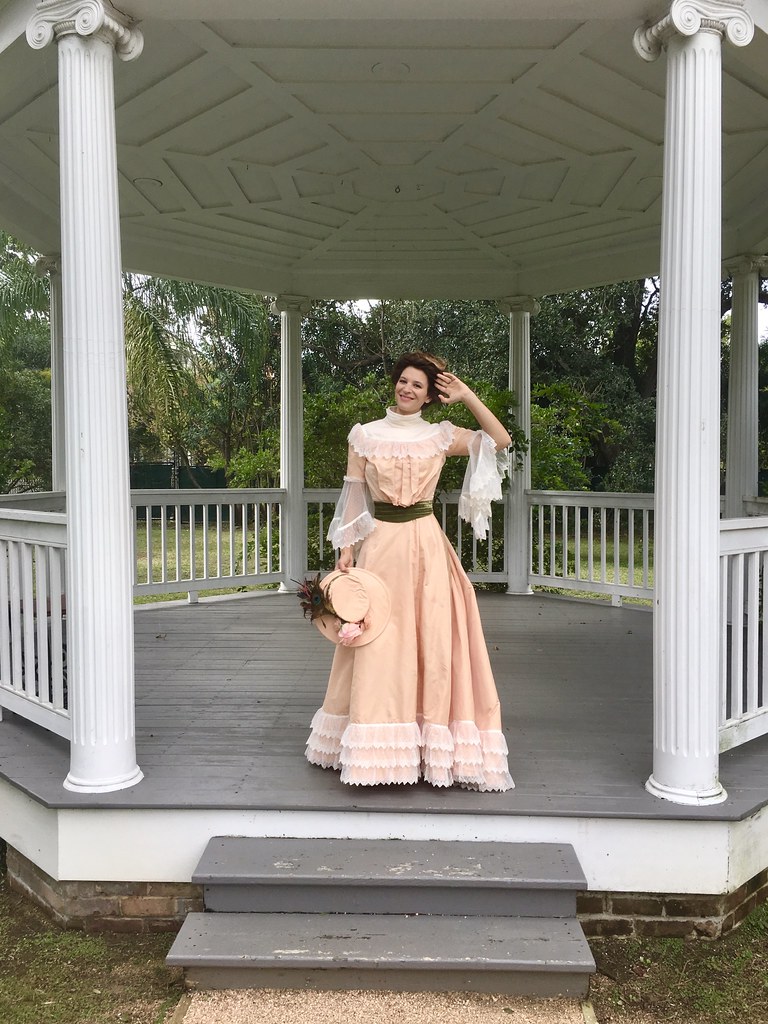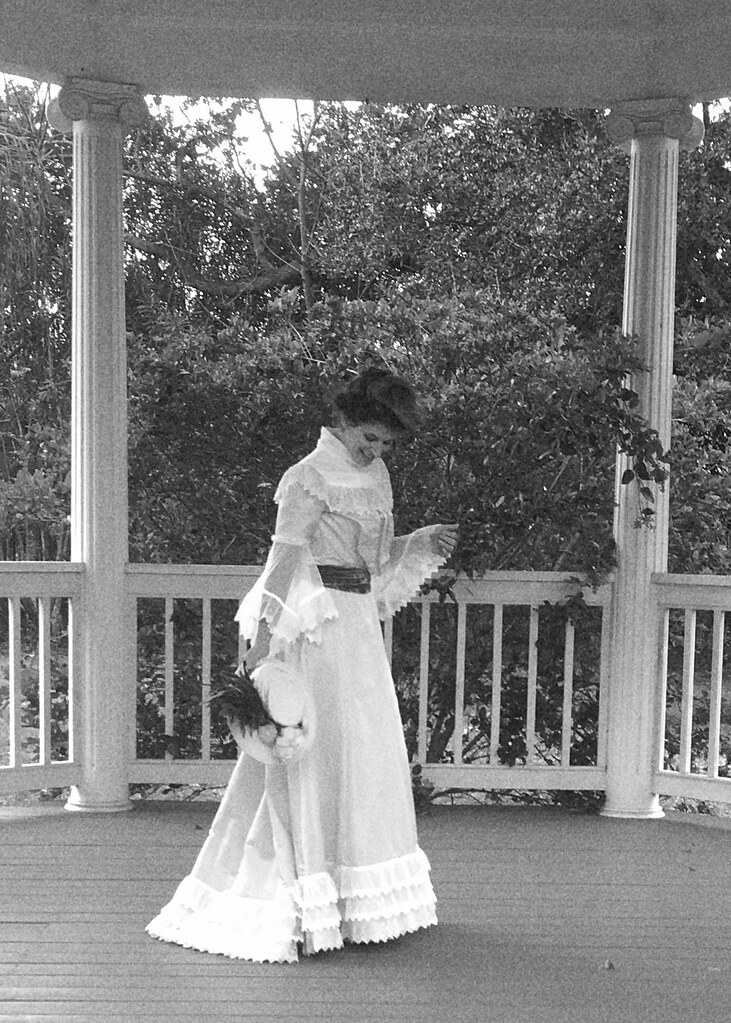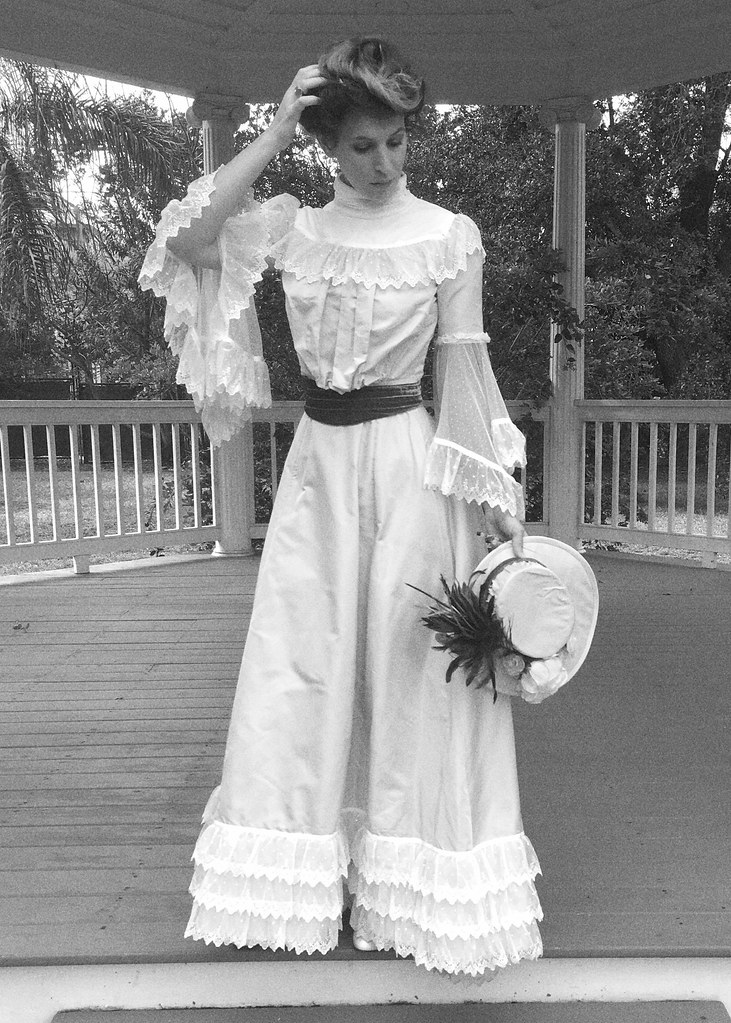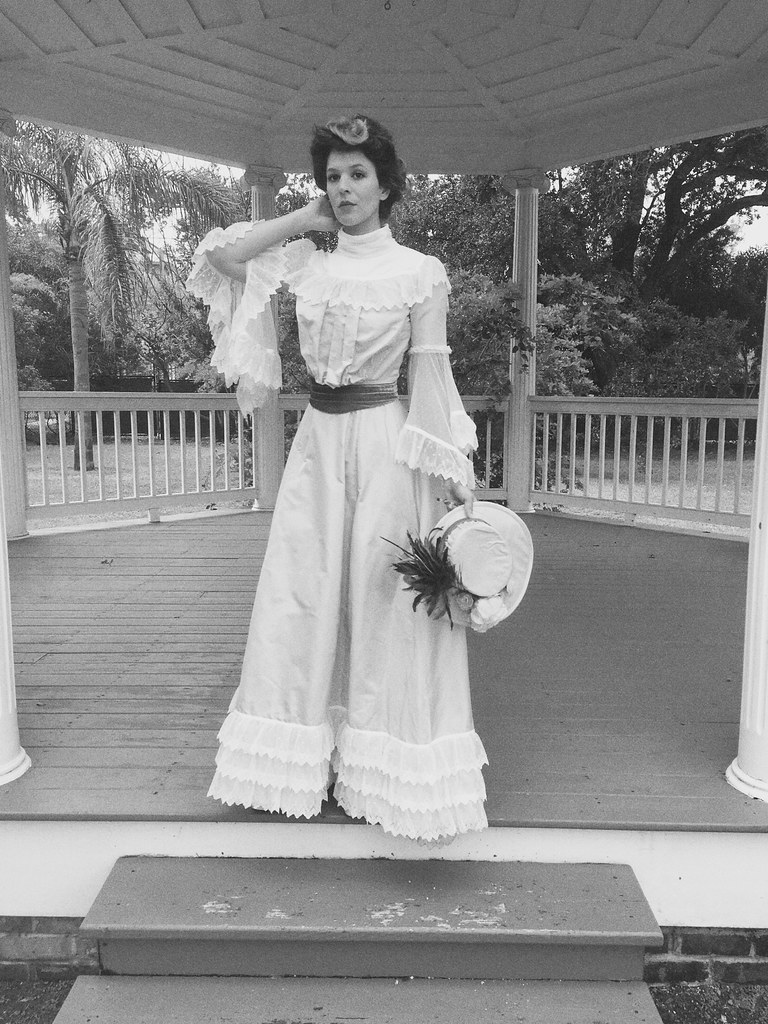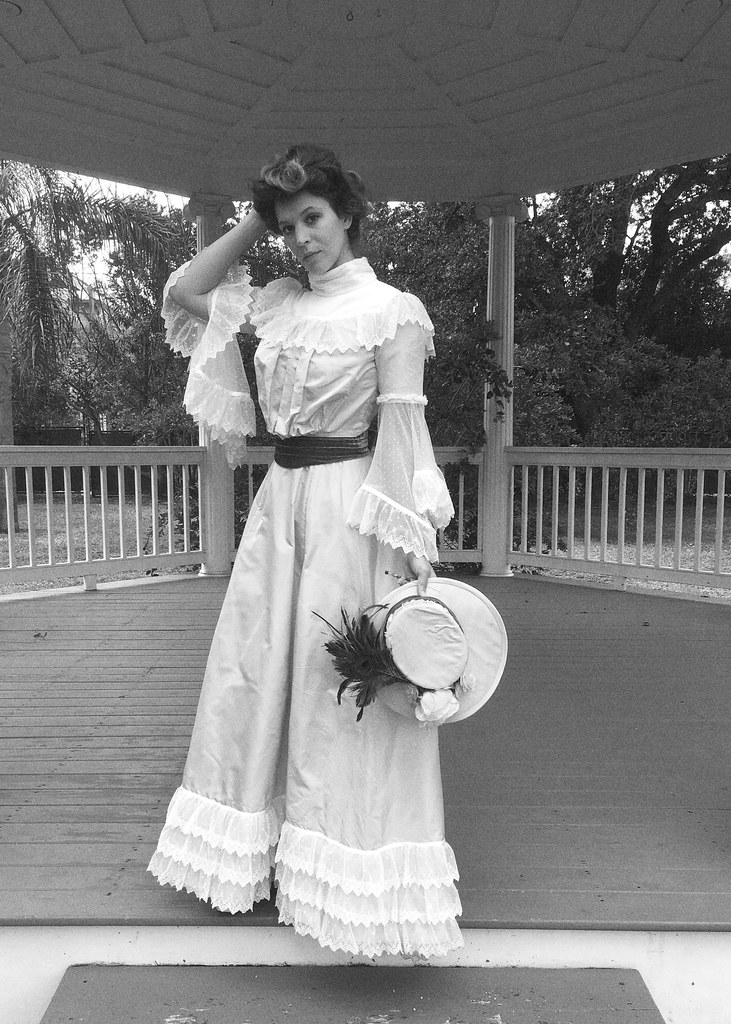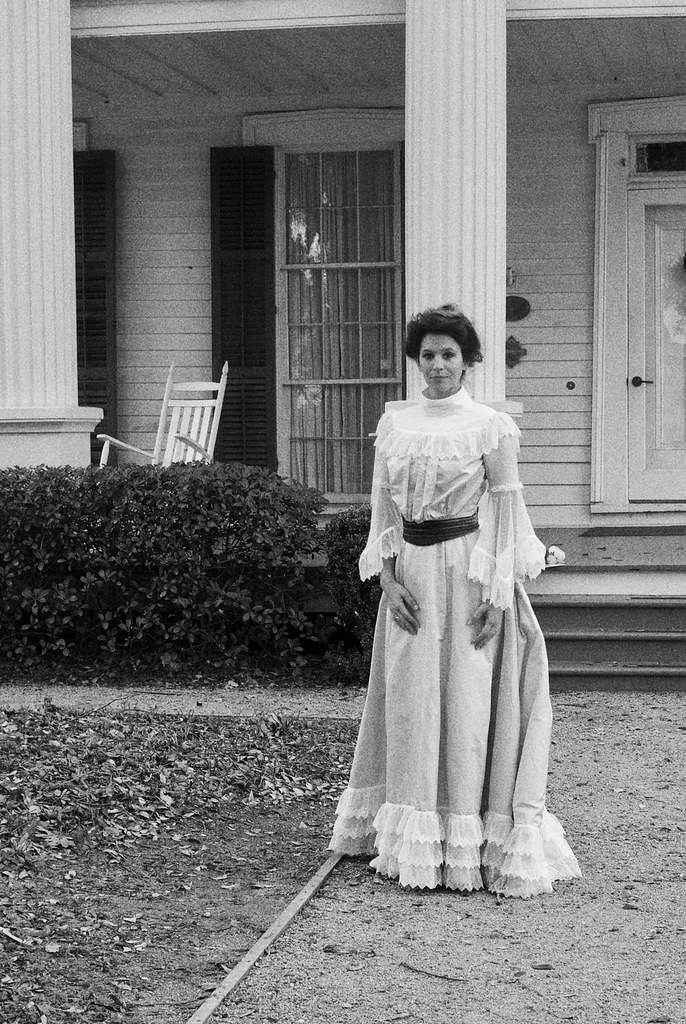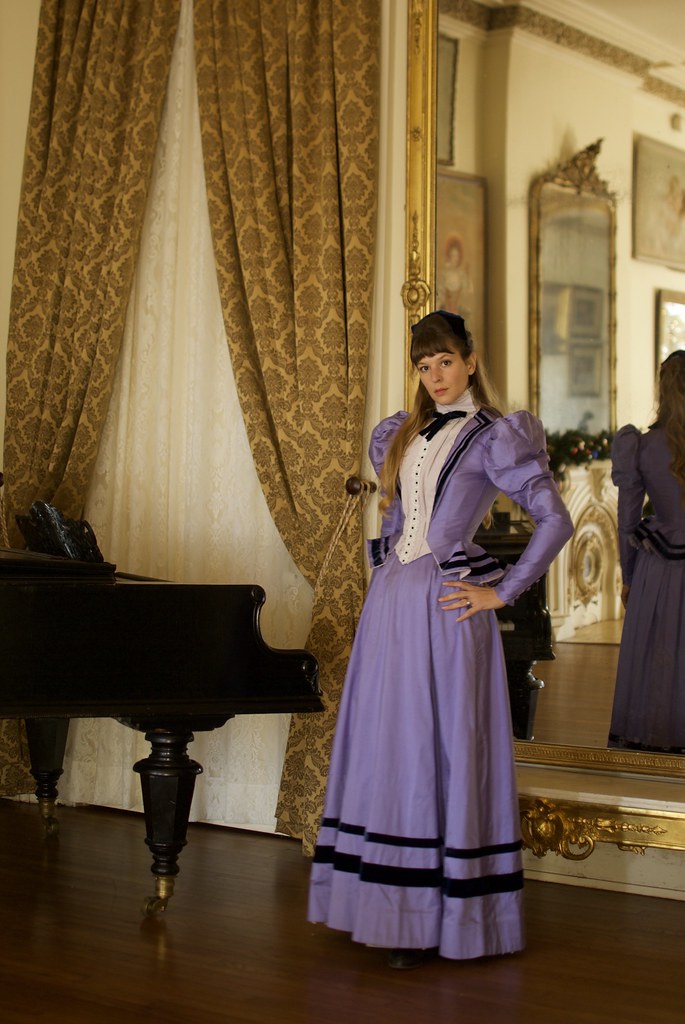
Well hello there, friends! Long time, no blog! I've got to be honest, I've got a lot I'm excited to write about in this post, and making apologies for my blog absence is pretty darn low on that list! Also, my resolution for 2017 was to apologize less, especially for things like going AWOL on my own stupid blog! So! Ignore the cobwebs and dust bunnies that have collected in this space, shoo the raccoons out of the attic, flick the daddy-long-legs out of the dishware, grab yourself a beverage and get ready for a loooooooong post!
I may have been silent on the blog front, but I have been more than active on the Instagram front, so for many of you, this post is no surprise. For the past several months (really since August) I've been working on my second - ever - historical costume. Like last year, this costume was made for Dickens on the Strand, a Victorian themed Christmas festival here in Galveston, put on each year by the Galveston Historical Foundation to celebrate and honor the historic architecture on the island, much of which dates from the Victorian era (1837 - 1901, the years of Queen Victoria's reign in England). For the past three years I've been asked to be one of the judges for the historical costume contest (which is honestly the most fun thing ever, and I'm simply tickled that I get asked!) so I'm really on a quest to up my Victorian dress-up game!
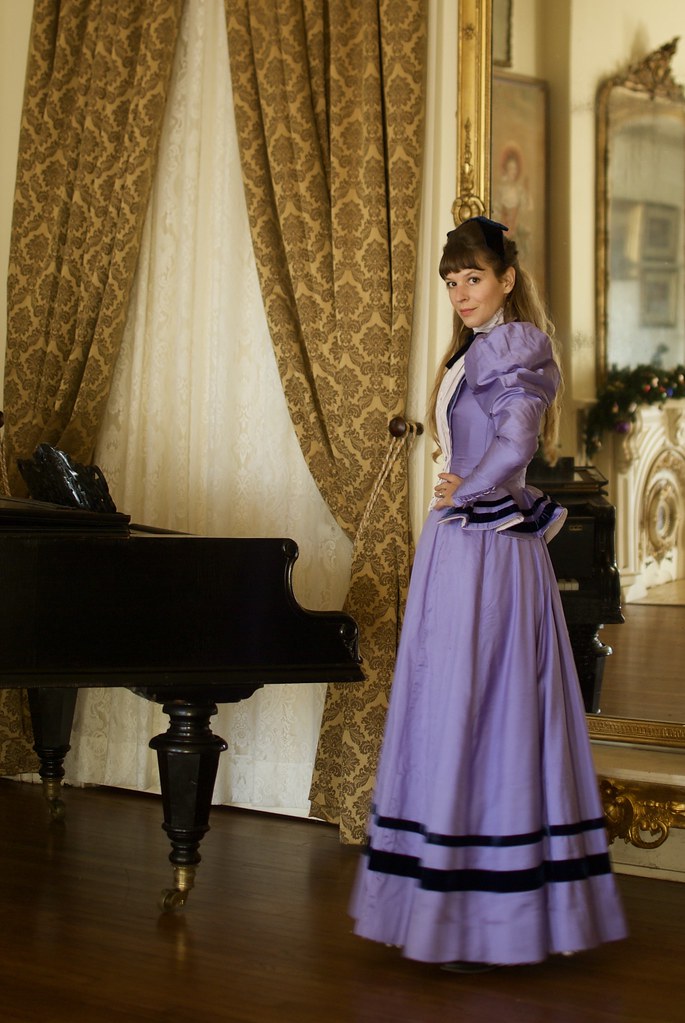
Like last year, I was mostly drawn to the Late Victorian styles for my dress - specifically the 1890's. I'm not totally sure why I like the 1890's so much! I think part of it has to do with the fact that, at least the Dickens event here in Galveston, no one wears the 1890's! No one wears the 1830's or 40's for that matter, either, which, if we're being picky, is more appropriate for Charles Dickens. No, nearly everyone in historic costume wears the 1850's through the 1880's. Well, really most people wear steampunk, the rest dress as pirates (pirates! I ask you...) a good number are in shorts and t-shirts, and then the rest are 1850's - 1880's. So I guess I have a bit of a soft spot for 1890s simply because no one else seems to care for it!
It's not just that though - some of my favorite literary and cinematic heroines are from the late victorian years, like Anne of Green Gables (puff sleeves, Anne?!) Also, some of my favorite guilty pleasure artists, like John Singer Sargent, and Edouard Vuillard. It's also the decade when the women's suffrage movement really took off. I see it as a bit of a transitional time period in fashion - gone are the stuffy, frou-frou looks of the "true" Victorian era, but we haven't yet ushered in the elegant, femininity of the Edwardian era. There's a sense of practicality to the clothes (as practical as one can be in a long gown, 3 dozen petticoats and a corset!) Skirts you can walk in. Separates. Suits. For the first time in history tailoring methods are being used in women's wear, and the smart jackets and masculine details are representative of a new kind of woman - a woman who leaves the house, who goes and gets things done, who (gasp) works!
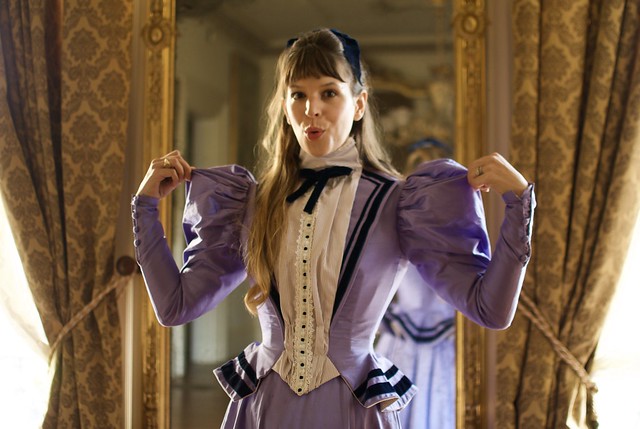
Oh yeah! There's also those sleeves! I freaking love a good sleeve! Historical fashion that features a strong shoulder line are always some of my favorites (1830's, 1890's, 1940's, 1980's...) And, 2017 has been called "the year of the sleeve" by... whoever says those kinds of things.
I could probably write a whole blog post on my personal and cultural fondness for the turn-of-the-(last)-century, but as I said earlier, I've got a lot to write, and I suspect some of you might be interested in the actual making of this baby. So I'll move on!
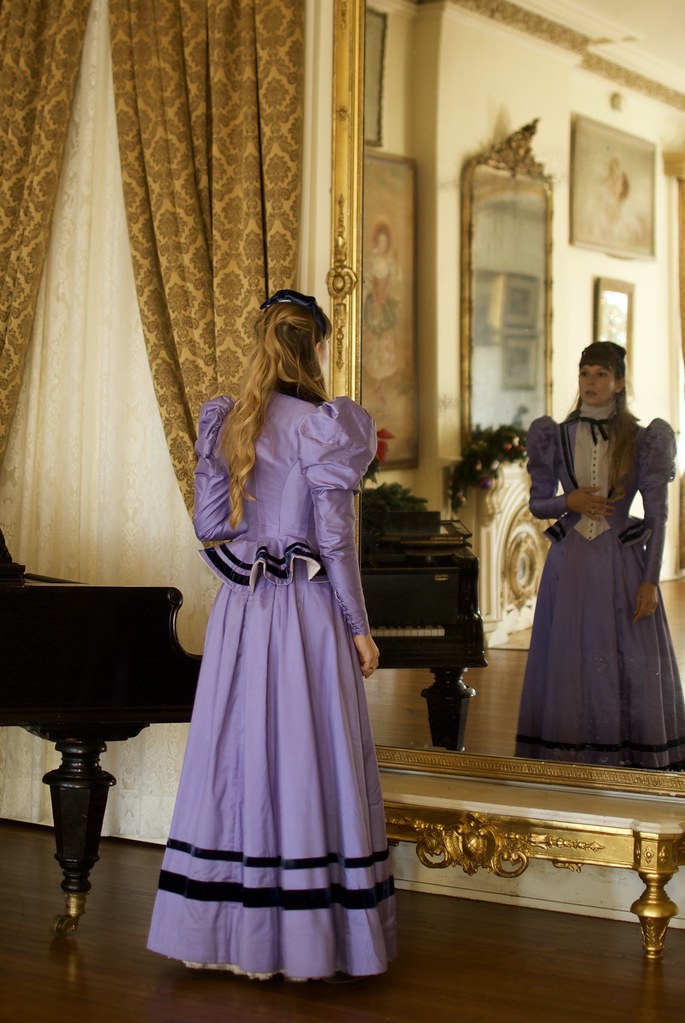
After settling on the 1890's I set out to find some patterns to work with. I had an idea of what I wanted in my head, and even made a few sketches early on, but definitely did not feel confident enough to draft something from scratch - despite the numerous books on historical costuming I've pored over in the last year. One of my little disappointments with my costume last year is that the time period is somewhat vague - it takes a little from the early 1900's, a little from the 1890's, but it doesn't feel firmly rooted in one particular style. Not being a particularly confident historical costumer (it was my first time making one, after all) I simply followed the Butterick pattern and crossed my fingers it would come out looking like the pattern envelope, and it did! (I'm not dissing on that pattern, or my dress, I'm simply saying that I learned from it, and I wanted to grow). This year I wanted something that felt firmly historically accurate, and perhaps reflected more of my own vision. And I knew to get that I was going to have to frankenpattern.
I used Simplicity 4156 (OOP) as my starting point. This pattern seems to be rather beloved in the historic costuming world, perhaps because it so unabashedly screams EIGHTEEN NINETY FIVE!! With its beach ball sized gigot-sleeves and standing Dracula collar. But I think the real reason is that it has good bones. Change the collar, change the sleeves, change the waist shaping, and this bodice could work for a wide variety of eras.


I'm not going to lie, the version on the pattern envelope left a lot to be desired for me personally. In fact, the only thing I was really down with even in the line drawing is that chick's hair! But I had seen versions online of people doing wonderful things with this pattern, so I had hope!
I knew right off the bat I wasn't going to use the gigot sleeve. While I know nothing says 1890's like a ridiculous poof ball of a sleeve, I felt like there were other sleeve options out there with similar silly proportions that would look better and feel more balanced. Like the leg o' mutton sleeve! You can quote me on this: Leg o' mutton trumps gigot any day of the week! For my sleeve I purchased the Truly Victorian 1898 Eton Jacket (I had considered making this jacket early on in my costume plans, so the pattern purchase wasn't just for the sleeve, though it did come in handy).
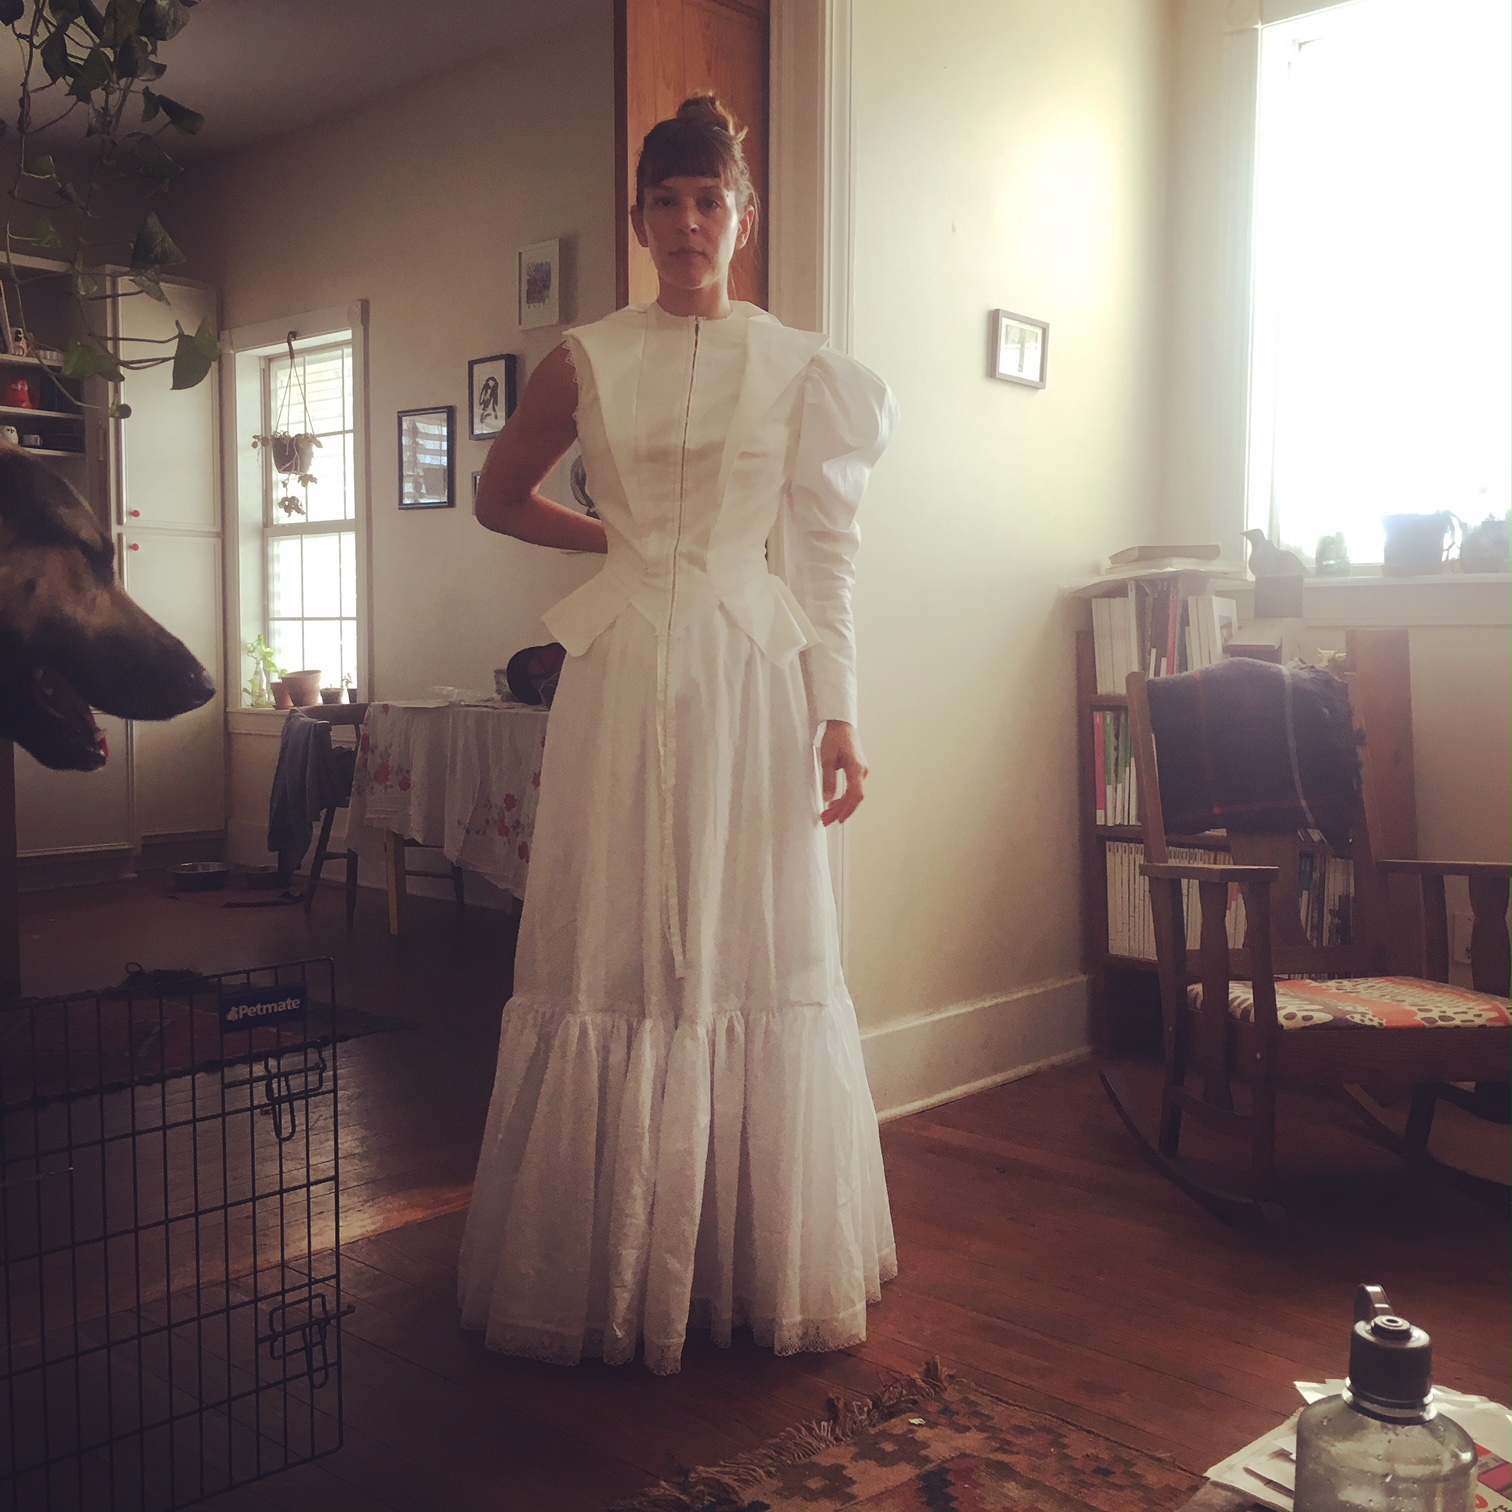
After finishing my Victorian corset (more on that later) and petticoat to get a sense of the skirt girth, I set about muslining the Simplicity pattern with the Truly Victorian sleeve, and boy am I glad I did! (Please excuse the quality of these photos, many of the 'in-progress' pictures were taken with my, or my husbands, cell phones).
 |
| Spot the Molly photobomb! |
In order to get the bodice to fit my boulder shoulders I had to cut the largest pattern size in the envelope - which was a 12 (it was one of those patterns that grouped sizes into two different patterns). This pattern definitely suffered from the tell-tale Big Four excessive pattern ease. According to the pattern measurements I shouldn't even be able to fit in a size 12. Instead, the 12 fit my shoulders, chest and back perfectly, and had somewhere between 4-6 inches of excess from my bust to my waist. Granted, I was wearing a corset, which reduced my waist measurement by 2 inches, but still! In the picture I'm pulling back the waist to get a sense of how it will fit once I take it in. So I set about pinning out the excess (with the help of Nick) evenly around the bodice. I was also unhappy with the sleeve fit. It's hard to tell here but the forearm was very loose and I felt it looked kind of frumpy. I pinned out the excess from the elbow down to the wrist, and basically ended up redrafting the sleeve entirely. I also completely redrafted both collar pieces.

I marked all my changes on the muslin, removed the pins and resewed the seams and this was what I ended up with. Much better! I had to true up some seams, and make a few more changes before I unpicked half the muslin, ironed the pieces and traced them to make my pattern pieces.
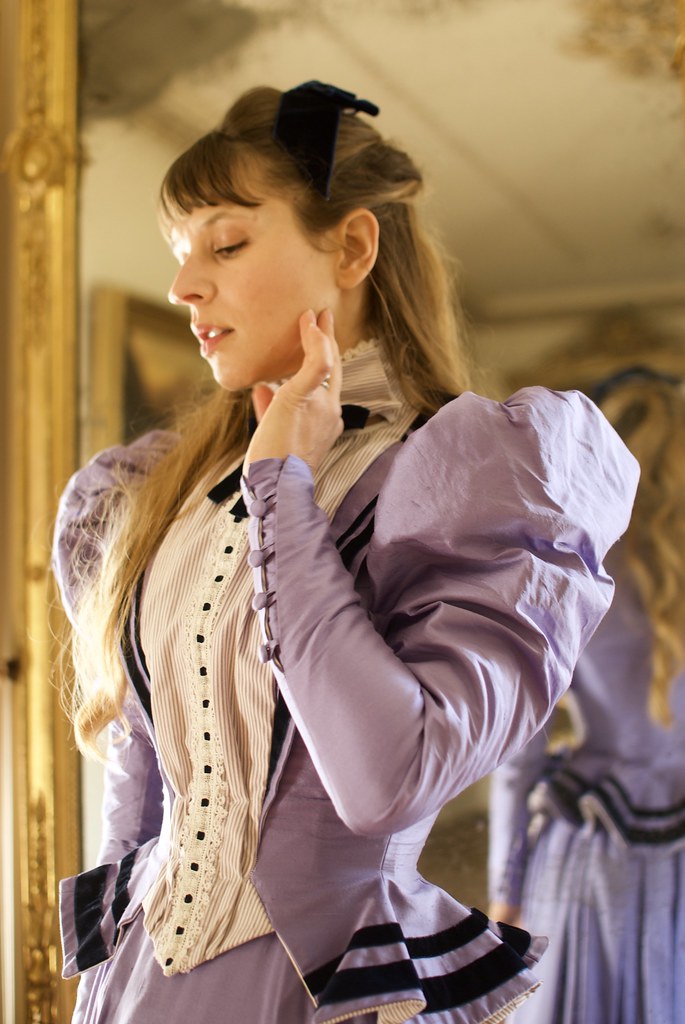
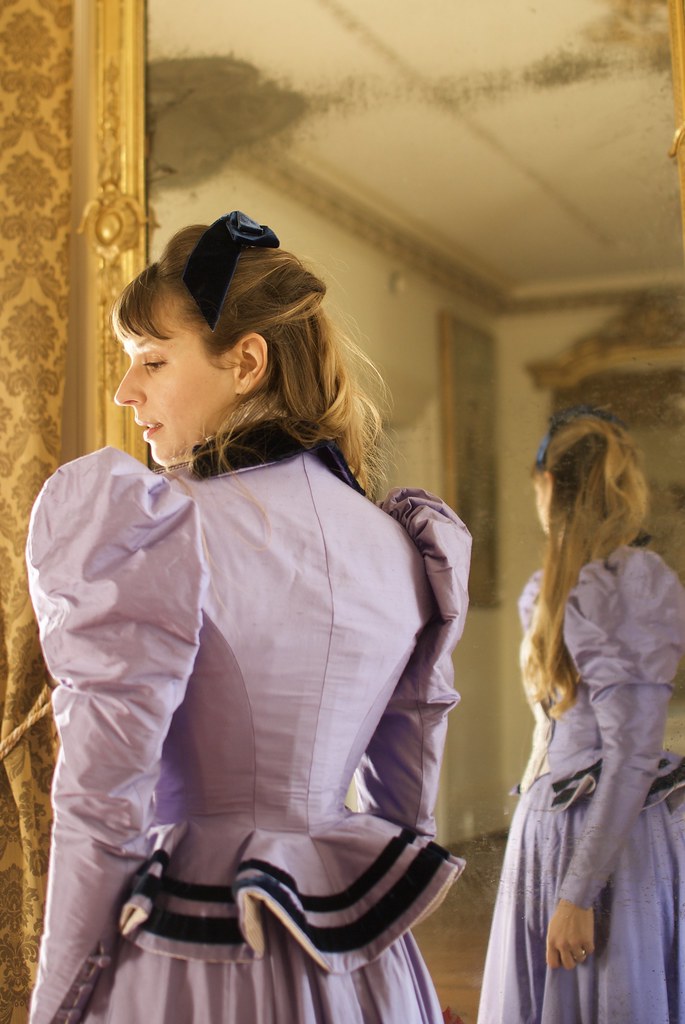
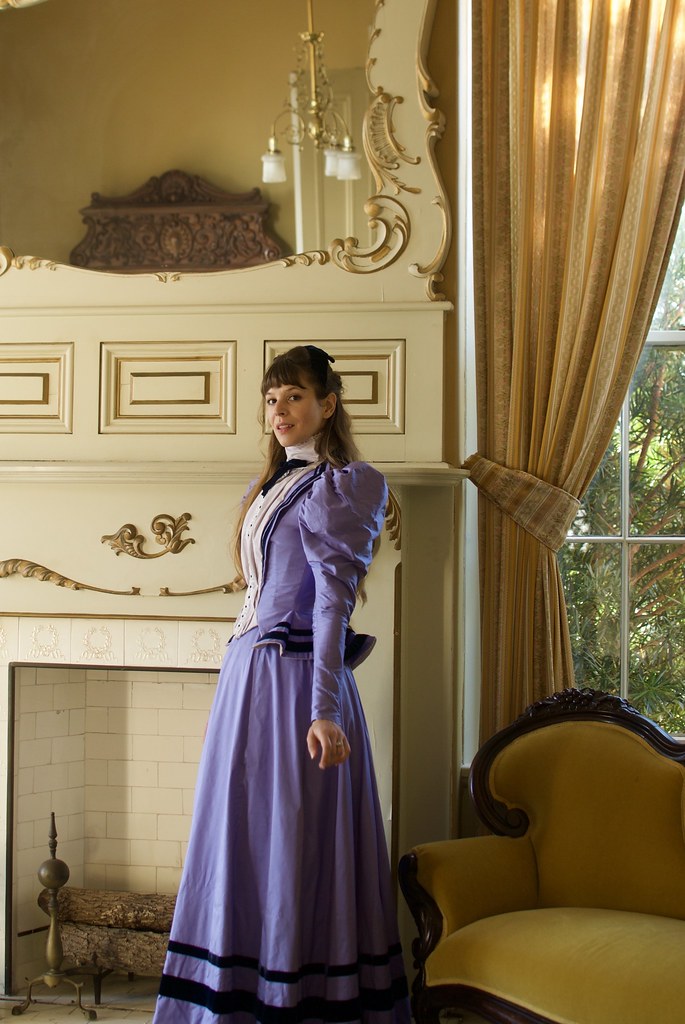
The majority of the bodice is constructed from 4 layers of fabric, with spiral steel boning in every panel. For my fashion fabric I used this beautiful periwinkle silk dupioni from Mood Fabrics. I was drawn to this fabric because I wanted something light and crisp enough to hold the sleeve shape without needing some kind of internal support, and silk dupioni with its dry, papery hand is perfect for that! The color is also really special, and changes depending on the light - sometimes more purple-y, sometimes more blue. For the underlining I used white cotton lawn I bought in bulk from Dharma Trading company. And for the lining and center front insert I used this orchid and cream striped shirting fabric, also from Mood.
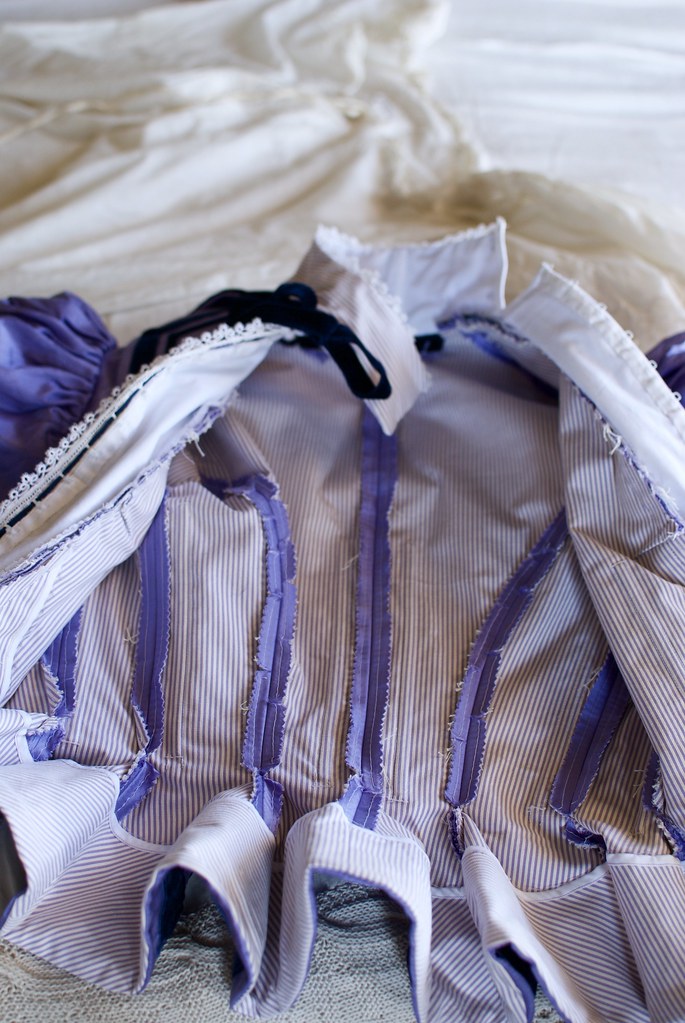
For each section of the bodice I basted a layer of the silk to a piece of cotton lawn, then a layer of the striped shirting fabric to a piece of cotton lawn, with a channel sewn in for the boning. I then basted these 2 sections (4 pieces of fabric thick) to each other and treated the whole thing as one, sewing all major seams with right sides facing. The raw edges were stitched and pinked, which is both historically accurate, and expedient. I also happen to love the way a pinked seam looks! One of my favorite things to come across when I was researching historical garments was documentation of the interior. As a sewist, these are the things we live for - sure it looks great on the outside, but what does it look like on the inside?! Many Victorian garments are surprisingly messy on the inside, with the main reason being that since women owned so few gowns they were meant to last a lifetime. Seams are easily accessible so they can be let out and taken in frequently (which they were), and there is often evidence of visible mending, sweat stains, and extreme wear. Another thing to take into account is that women in the 19th century (and earlier, and even well into the 20th century) wore much more substantial undergarments than we do today, so lining clothing for comfort really wasn't as much of a thing.
After handstitching the velvet ribbon trim to the peplum (which was purchased locally - and a freaking pain in the ass to sew on to such a curved area (can you put a parenthesis inside a parenthesis? Probably not, but I've never been a die-hard grammar fanatic (as you can probably tell) Anyway, my digression within my digression is this: hot tip for sewing annoyingly straight trim onto a curved section of fabric - gather the one long edge with a basting stitch and use small slipstitches to evenly distribute the excess) End digression...) I faced the peplum with more of the striped fabric. That's it. That's all that paragraph was about. I'm a freaking fantastic writer!!! Is anyone still reading this?
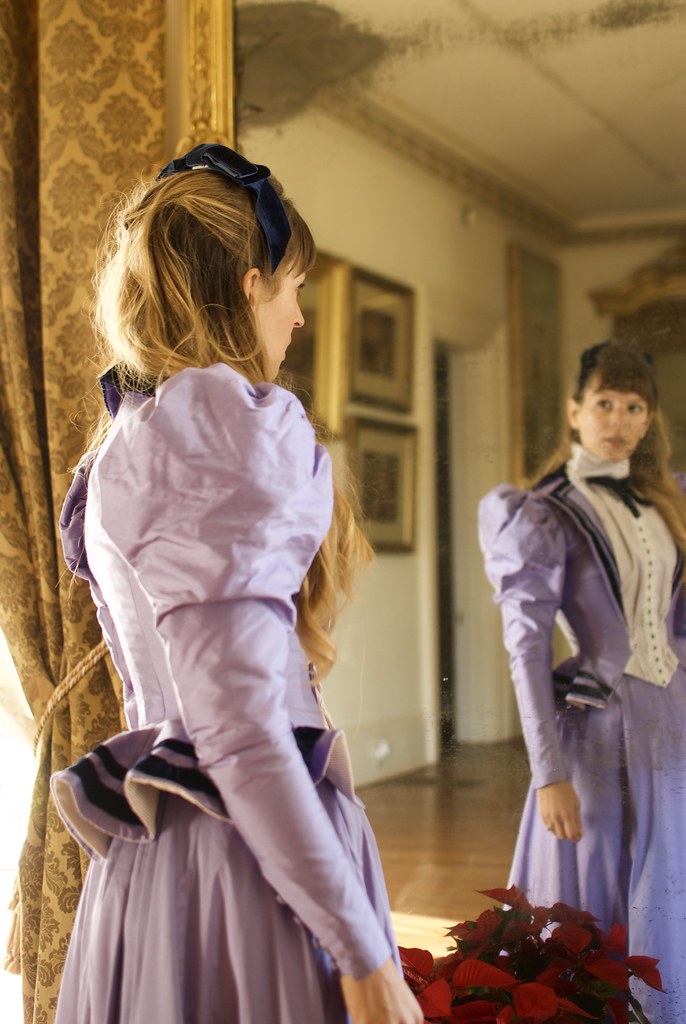
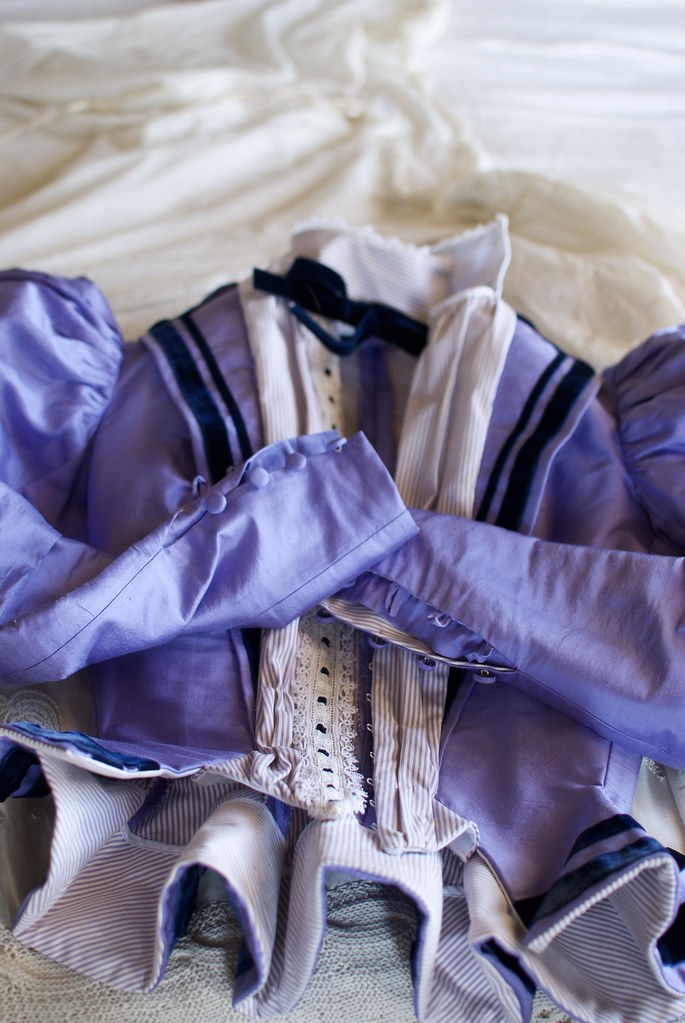
All those layers and boning made for an extremely substantial garment - it almost feels sculptural!
The sleeves were also underlined with cotton lawn, then lined with a fitted sleeve cut from the striped fabric, so when you wear the bodice you don't feel like you're wearing this giant sleeve, rather it sits quite close to the body. The outer sleeve head was gathered and sewn to the bodice by machine, then the lining sleeve was slipstitched into the armsyce, creating a neat finish. Because I removed virtually all the wearing ease from the lower half of the sleeve it was necessary for me to insert a placket so I could get the darn thing on and off! This was a great opportunity for me to add the sweet little detail of covered buttons and fabric loops. There is something extremely dainty and ladylike about doing up all those little buttons at your wrists as the finishing touch of getting dressed.
The bodice opens and closes by hook and eye tape sewn into the center front, and the high collar closes on the sides with snaps. The lace trim (which is actually 3 separate trimmings - the beading, lace edging sewn to each side, and velvet ribbon run through the beading, because I couldn't find an all-in-one trim that I liked!) and velvet bow at the throat conceal the openings.
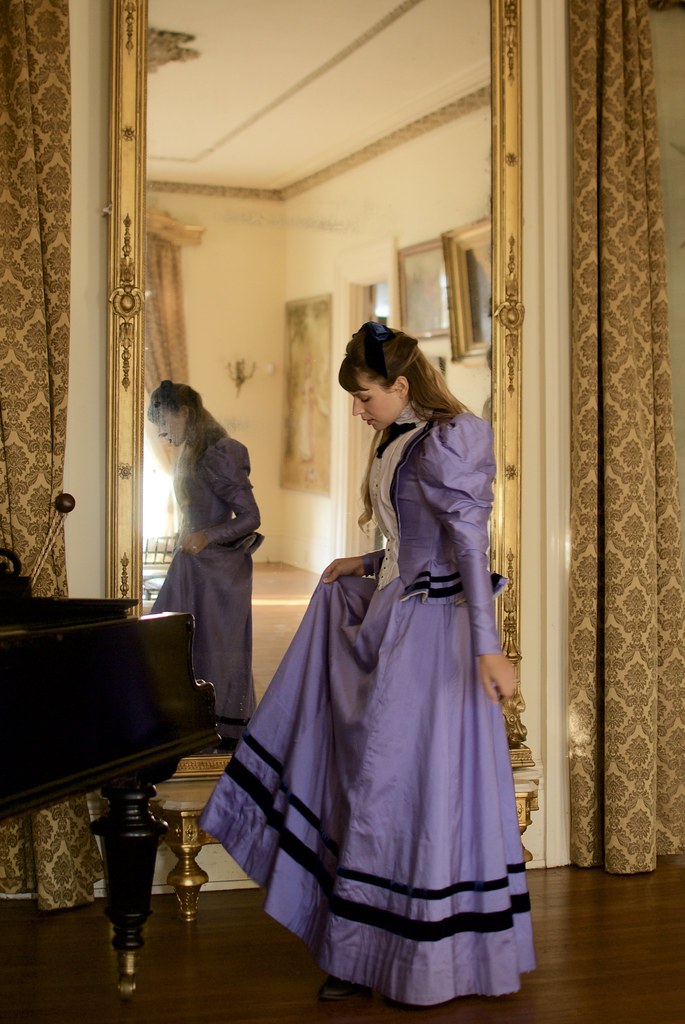
The skirt was a much more straight forward sew, but perhaps equally as time consuming simply because of the sheer volume! I drafted this skirt based on instructions for an early 1890's skirt in one of my historical costume books. It consists of seven gores, with the two back panels cut extra wide then gathered into the waistband to give the rear a little extra "oomph"! Each panel was underlined with cotton lawn, and the bottom third was interlined (sandwiched between the silk and the underlining) with cotton flannel to help weigh down the skirt and to give the trim some support.
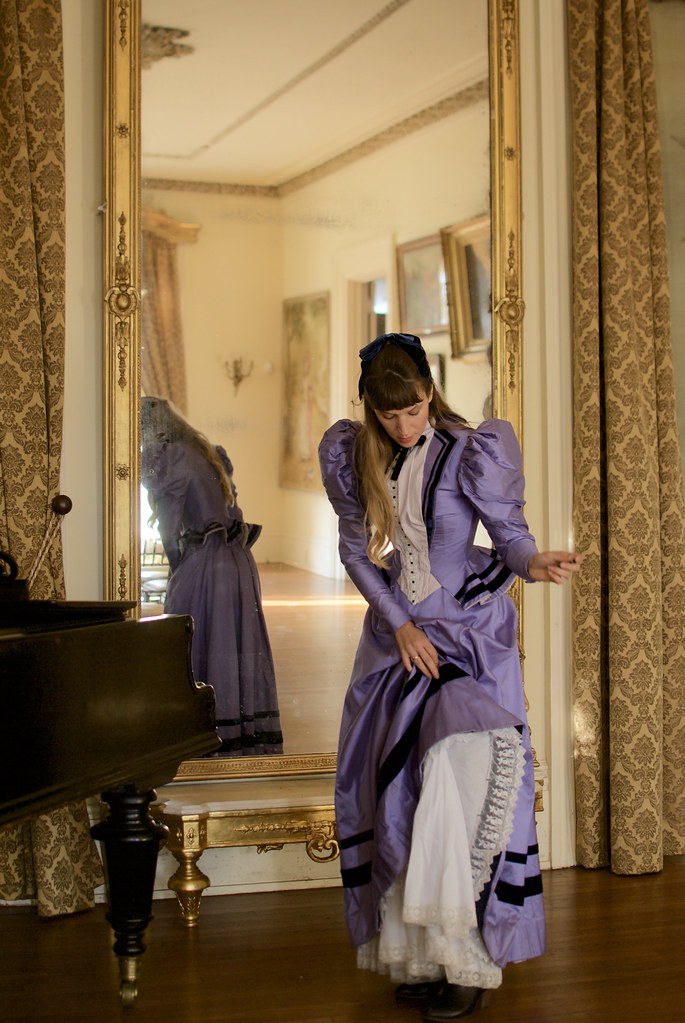

For the hem I cut a 3 inch bias facing of navy cotton velveteen with some gathered lace sewn to the inside. This helps the skirt stand away from the body, and acts as a kind of "dust ruffle" for the skirt. All of this was catch stitched to the underlining so it's not visible from the outside. This might seem like a random little step, but I have to admit that one of my pet peeves whilst judging the historical costume contest at Dickens on the Strand is flimsy hems. I know, I know! I sound like such a bitch! But guys, this is why they ask me to judge! No one else is side-eyeing the hems!! I know it's much simpler to just sew a skirt and hem it any old way, but a skirt with weight and heft and body to it just moves so much nicer! It's not going to catch the wind and show your ankles (god forbid!) it's going to swish while you walk, and you might even be able to get away with the fact that you're only wearing one petticoat (gasp!) rather than the de-rigeur two or three, because, guys, your weighty hem has got this one covered. Yur good.
The velvet trim was sewn on by hand over a long Thanksgiving weekend. I feel like I should complain about it, but I actually found it quite lovely. Well except for the part where I was staring down a deadline and starting to worry I wasn't going to finish in time! The skirt closes in the back with a hook and eye placket, which is concealed by deep pleats and the back gathers.
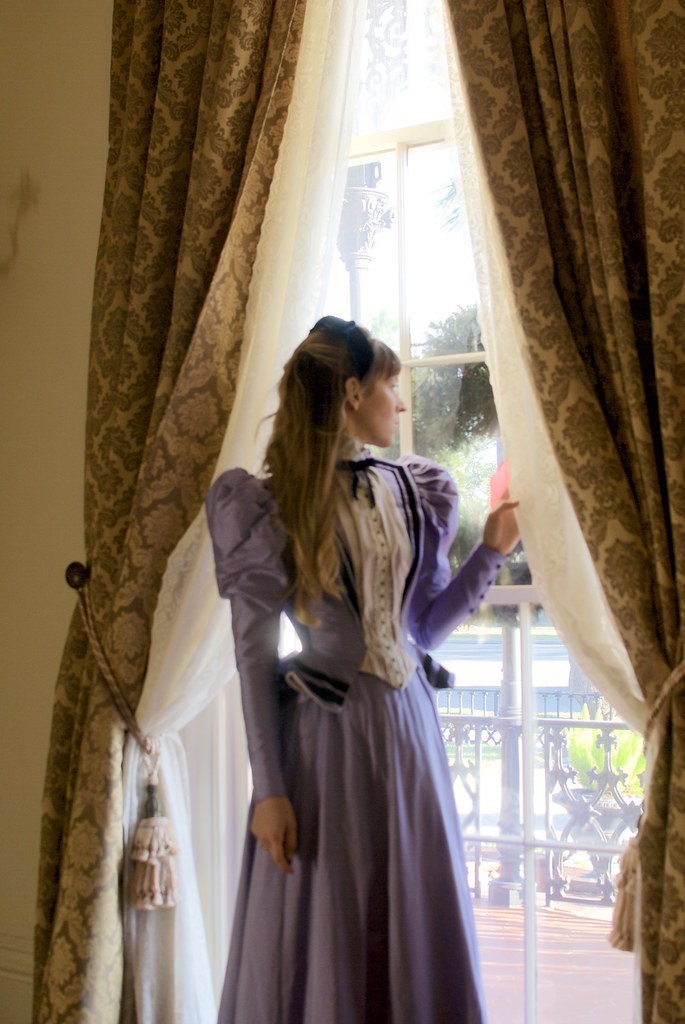
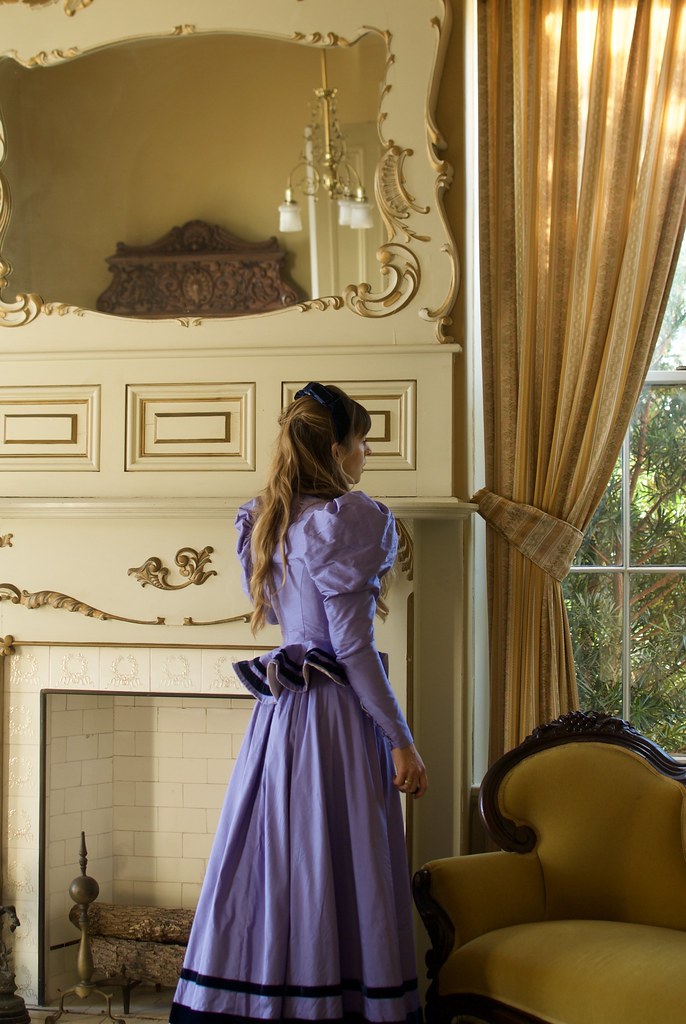
And now... let's talk about the underwear! Undergarments have got to be one of my favorite things to research and make for these historical costumes. It is my belief that a period look is built from the ground floor up. Can you wear a historical dress without all the undercrackers? Sure, but if you wonder why you look kinda rumply and limp and not like the ladies in the tin-types, well! I got news for you, sister: the devil is in the details!
*Obviously I'm joking here! Historical dress-up is about having fun and indulging in fantasy. If doing everything by the book sounds like fun to you, go to town! If 'fun' is just digging through your current wardrobe to find something that looks vaguely period appropriate, that works too! This is a judgement free zone. I want you guys to have fun.

As I mentioned previously, I made a new corset for this costume, as my previous corset was an Edwardian S-bend corset dating from 1903 and gives a completely different and unique shape that wasn't seen in the Victorian years. I also made a petticoat, which was incredibly straight-forward and kind of boring, and hopefully I will add more exciting petticoats in future years to expand my petticoat wardrobe, because, as we've already established, one petticoat is just not going to cut it! The most exciting thing about this petticoat is that the ruffle at the bottom is a full nine yards, yes nine yards of fabric! Thank goodness my past self bought all that cotton lawn with no idea what I was going to use it for...
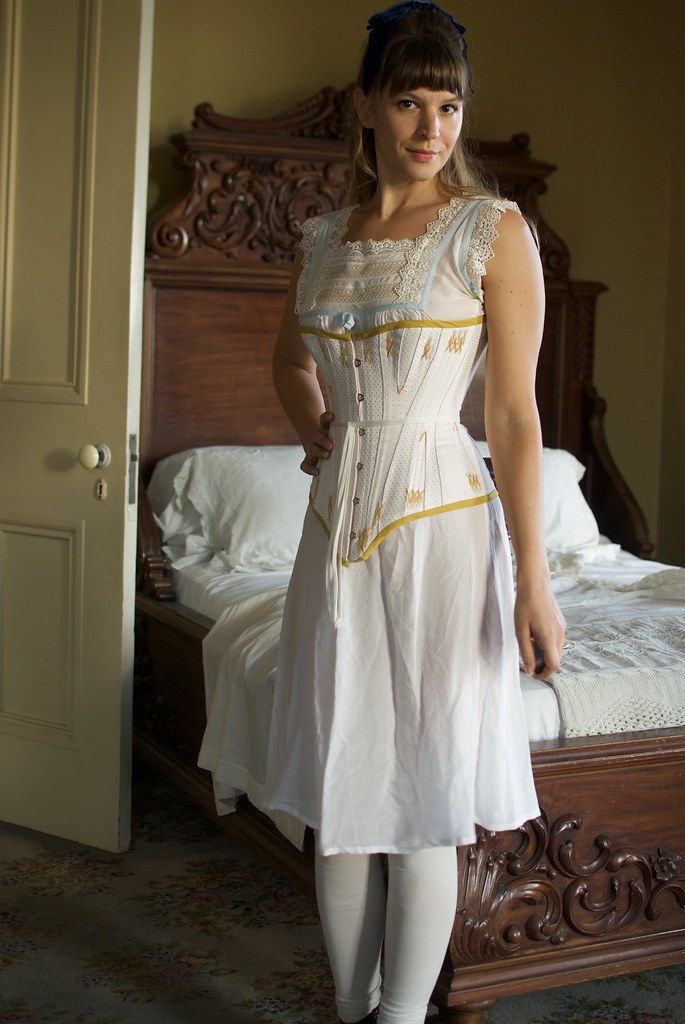
But let's talk about that corset, because that's where the real fun began! I started this corset back in August. All the specialty corset materials - the coutil, and boning, and busk, and lacing - were purchased from Farthingales Corset Supply, whom I cannot recommend enough if you're looking for high quality corsetry materials. Originally I planned on making the Truly Victorian 110 which is described as an 1880 Late Victorian Corset. I used a Truly Victorian pattern for my Edwardian corset and really don't have anything bad to say about it. However when this pattern came in the mail, for some reason I began second guessing my choice. I really wanted a corset that would create a dramatic, curvy shape, and many of the versions I was seeing of the 110 online appeared a bit straighter than the look I was after.
A quick aside here about corsets (actually, I could say a lot about corsets, their history, who wore them and why - they are a fascinating article of clothing, but I'll spare you) but achieving a dramatic shape isn't solely the job of the corset. A corset is a piece of cloth with some bones and lacing. It can only do so much. That dramatic look I was after was always going to be hindered by, well, me. True story: the more you've got to squish, the more dramatic your curves will look in a corset. The less you've got to squish, well... there's only so much that can happen! Women with a more muscular core aren't going to be able to lace down as small, since muscle isn't as happy being squeezed as soft flesh. I'm not saying I'm the most muscular, but, well, I've never been the curviest either, and no corset was going to give me the hourglass I was after. sigh. Once again, my buxom, rubenesque dreams are dashed by reality!
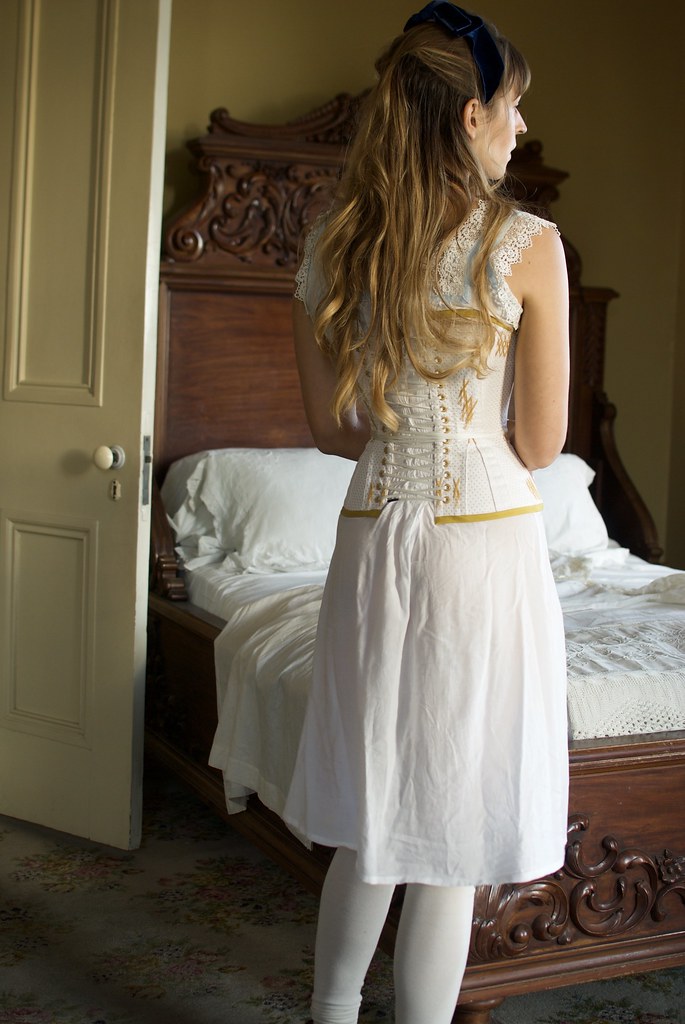
I did have dreams however of perhaps creating the illusion of curves (and therefore a smaller waist) by padding out my bust and hips, and so I happily (and ignorantly) started adding bust and hip gores into the TV110 pattern, only to quickly discover I was wasting all my coutil on something that was virtually unwearable.


At this point I abandoned the TV110 pattern and went searching for something with a more built in curvy look, and I landed on the Atelier Sylph Ref S pattern. The Atelier Sylph corset patterns are all drafted from the owners own collection of historical corsets, so they are one size. This pattern seemed sized close to my measurements, was from the correct time period, and looked fabulously curvy. So I gave it a go!
Unfortunately I think I may have done something wrong, as my corset ended up being able to close completely in the back, and the waist measured 26 inches, which is... my natural waist measurement. (cue sad trombones). So no fabulous corseted waist dimensions were achieved, and even worse, it flattened my boobs out!

At this point I had gone through a lot of cotton coutil - which isn't the cheapest of materials - and it was now well into October, and I hadn't even begun to muslin the rest of my costume. But! I believed a wearable corset was in my near future (and I'd also got much faster at sewing the damn things together) so I decided to give it one more shot. I adjusted the pattern to remove a total of 4 inches in circumference all over, then added a bust gore to help with the bust shaping. I actually had planned on adding two bust gores, but the memory of my first fail with adding in gores willy-nilly was fresh in my mind and at the last minute I bailed on the second gore. I wish I had left it in. The result is the corset you see before you! This gives me, I think, a very Victorian silhouette, complete with curved Victorian lower belly! Yes, I wish there was more room in the bust, and yes I wish my waist was smaller, but this laces a full inch smaller than my Edwardian corset and, if I'm being honest, I don't think I could take much more!

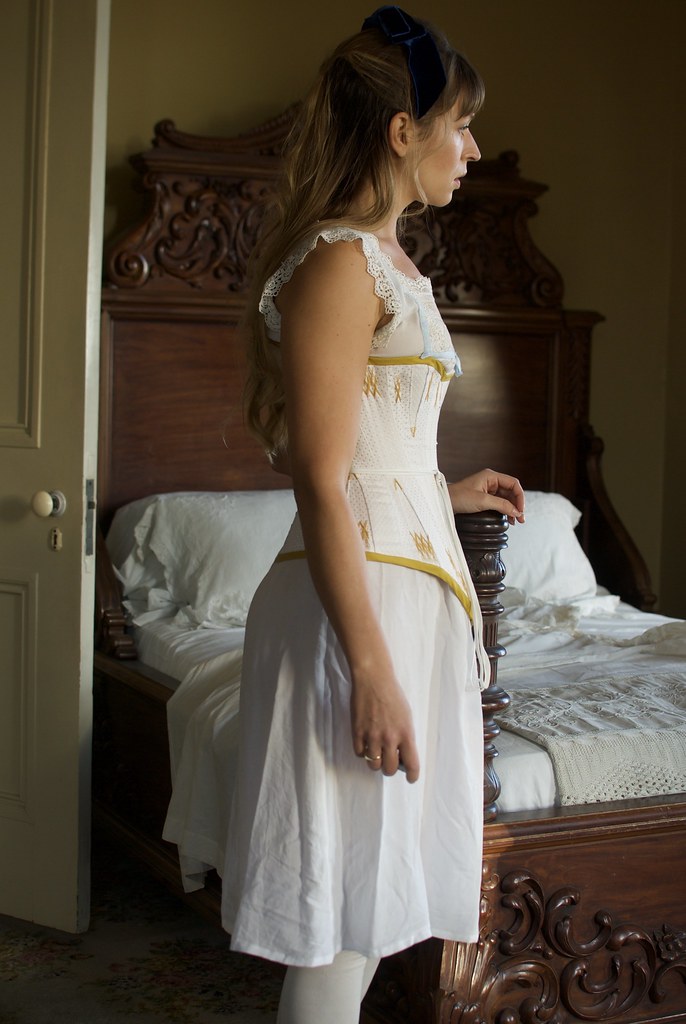
Before any of you ask - yes I can breathe! And eat, and drink (just not in large quantities, and no carbonated beverages please!) and no, it's not comfortable. At least not when you're comparing it with leggings and a sweatshirt! I am not 100% happy with this corset, and I do think I will continue tweaking the pattern. I learned a lot (like, do not place your boning on your hip gores... ouch!) and I think I can continue to improve this pattern to get something I'm really happy with in the future.
What I am pretty happy with is the look of the whole thing. The mustard flossing (a type of functional embroidery used to protect the fabric from the bones rubbing through) and bias binding paired with the light pink dotted cotton coutil makes for an adorable combination, if I do say so myself!


For the final version I used the coutil as the outer layer, and used some leftover salmon pink taffeta (from last years historical costume) for the inner layer. I then used strips of the taffeta to create boning channels which I stitched onto the inside of the corset (sadly I don't have a view of the inside of the corset once it was all boned and finished). For the boning I used white spring steel bones throughout. This is something else I think I will change in the future, switching out the spring steel bones for spiral steel bones through the sides of the corset, because they offer more flexibility.
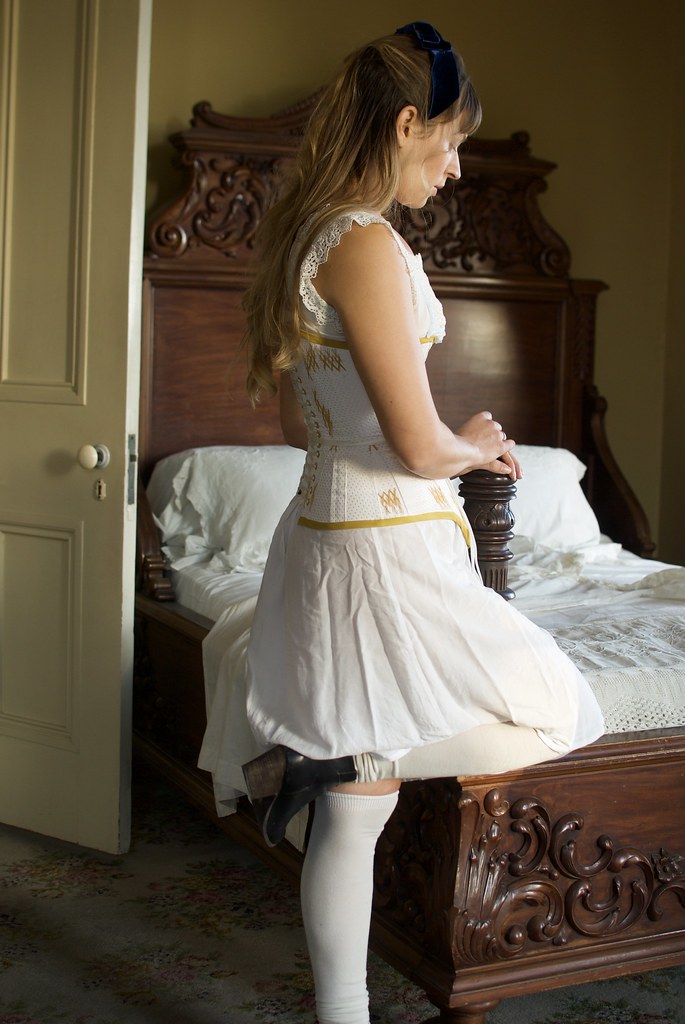
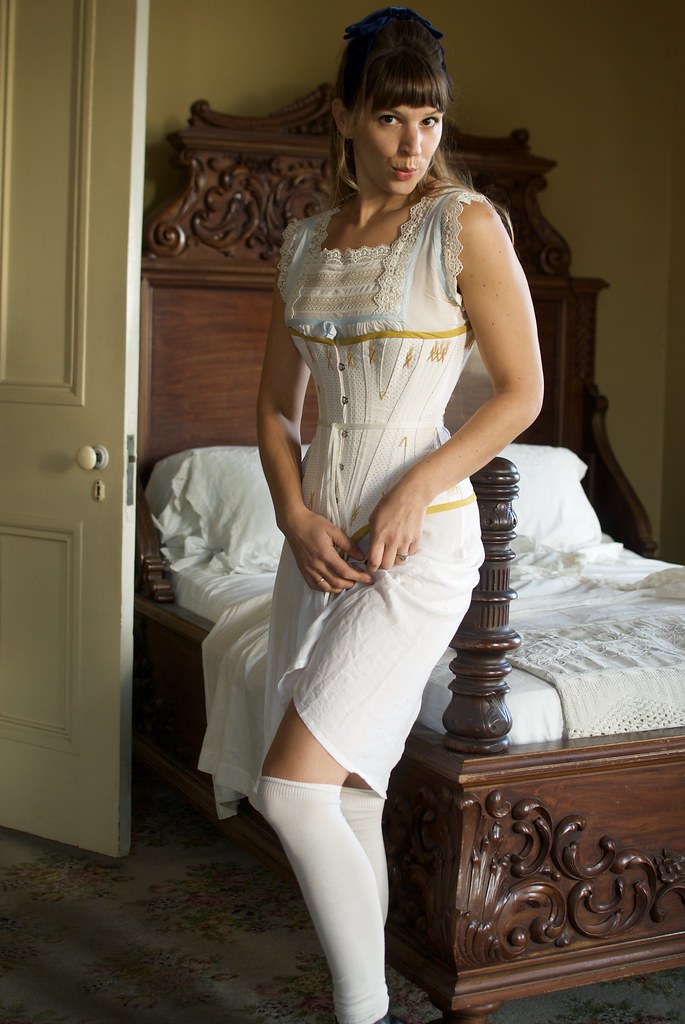
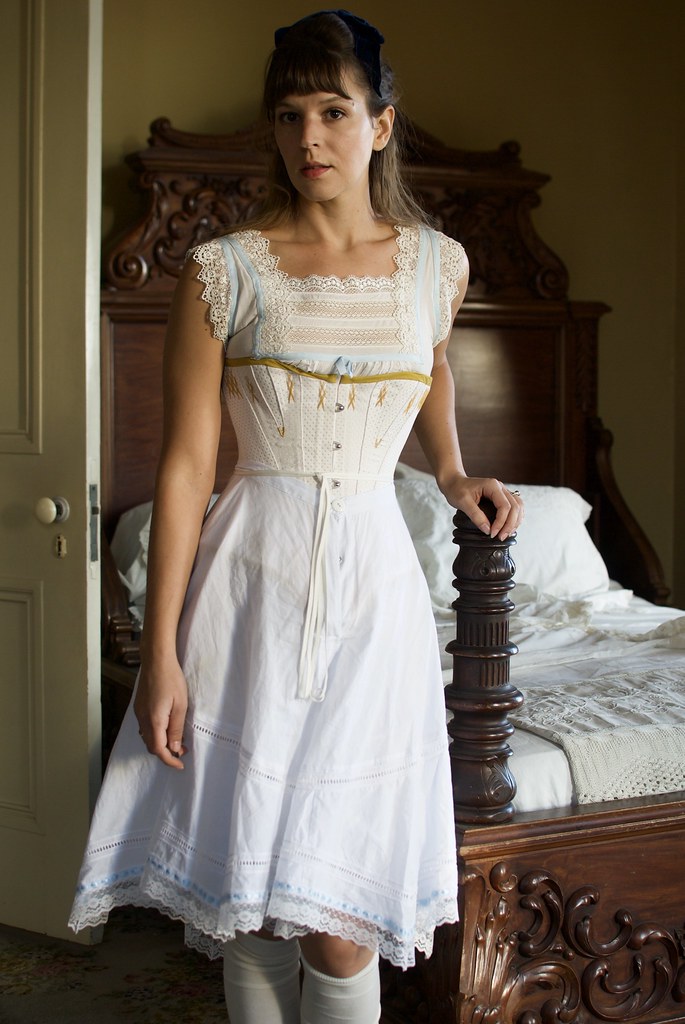
The rest of my undergarments - my chemise and drawers - are all the same ones I wore last year. They are technically Edwardian patterns, but I think they are so beautiful, and for heaven's sakes! No one sees them but me! So if the prettier Edwardian underthings make me happy, then so be it! I do think I might make myself a lower-cut chemise with a smaller shoulder strap one of these days, just to have options (you know, in case I decide to do an evening look... *rolls eyes*)
Oh yes! And I made a hat!


I wore this the first day of Dickens, but on the second day I was looking to remove anything that could potentially make me uncomfortable - so the shoes were switched out, and the hat, with its pointy hat pins, and all those bobby pins in the updo, were out. Instead I wore my hair half-up with the navy velvet bow like you see in the rest of these photos, and I actually thought it was more flattering! It's a bit of a juvenile look for the time period, and seeing as I'm 32, and married, I'd probably never be seen in public with my hair down, but I thought it looked really charming, so I'm sticking with it!
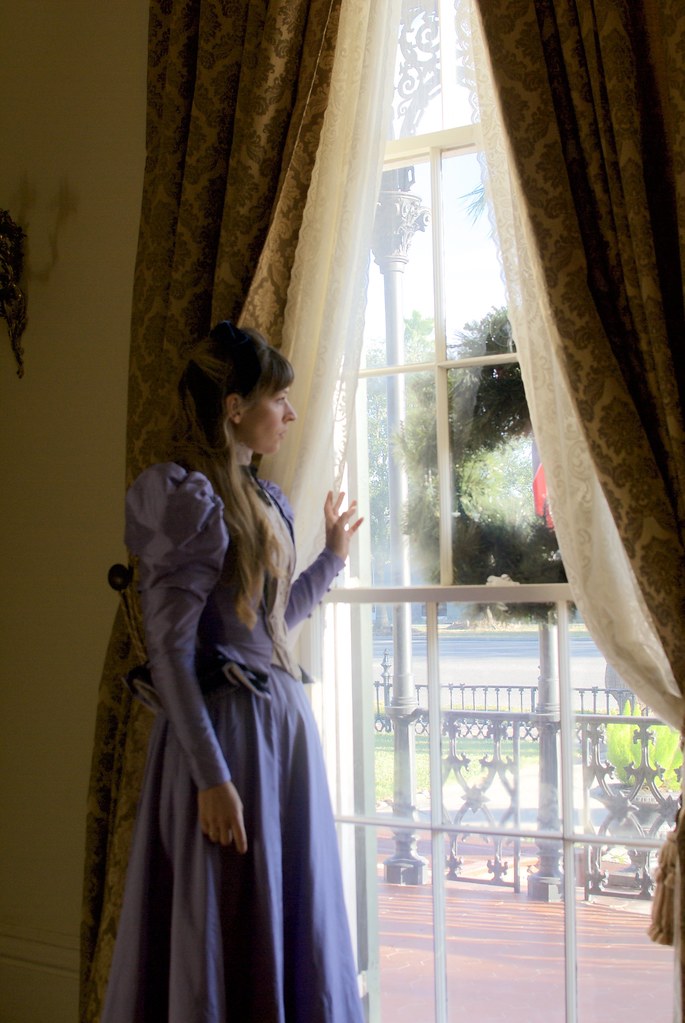
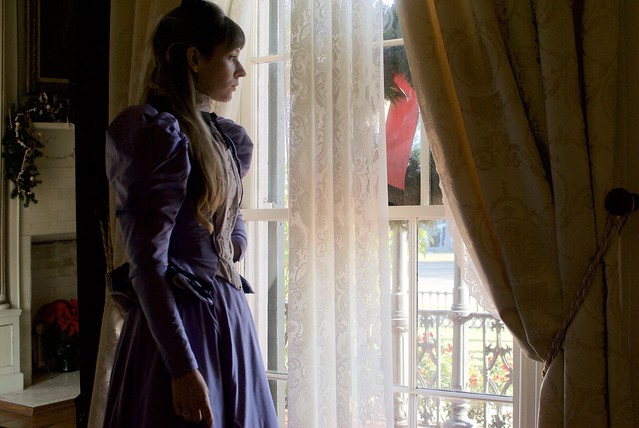
Phew! There you go guys! Did I leave anything out? Let me know in the comments if there's something you're dying to know that I didn't cover!
All in all I'm incredibly pleased with this costume. It was a real labor of love from start to finish, and I enjoyed every second of the escape it gave me into my fantasy life. The thing I'm perhaps most pleased with is that this dress feels much more seamless to me than last years costume, like it's one step closer to making an actual historical recreation, rather than just a costume. I also feel like it somehow manages to reflect my personal style in some crazy way! When I look at these pictures I don't think I look odd wearing these clothes. They seem to fit me! In the same way that my favorite pair of Morgan jeans feel like they just fit me. I don't know what this says about me, but right now I'm digging it!
But these types of projects can be all consuming for me, and it is definitely time to move on, to turn my attention to the many areas of my life I neglected over the past few months. To clean up my goddamn sewing room! But that doesn't mean I haven't still been thinking about next year! I'm curious to hear your thoughts, should I do 1890's again? I do feel a real kinship with this decade. Or should I challenge myself and try another decade? I'm toying with the idea of doing an 1870's natural form mourning dress.... think lots of black in various textures... silk, velvet, lace... maybe a veil... and creeping long train... very Victorian gothic.... Of course it would require an entirely new set of undergarments... thoughts????
And finally, thank you. Thank you guys so much for reading this post (if you made it this far). Thank you to everyone who supported me and cheered me on through Instagram. And the biggest of thank you's to the Galveston Historical Foundation and Nick Barbee for giving me access to the historic 1859 Ashton Villa to take my photos! I think we can all agree that they make for a stunning backdrop! Extra thanks to Nick for putting up with me the last few months (xo). And A final thank you, once again to GHF for putting on Dickens on the Strand, inviting me to be one of the judges for the costume contest, and fueling this new passion for historic costume making! The best friends enable my most crazy of rabbit holes! Thanks guys!
xx