Showing posts with label knits. Show all posts

2.19.2016

kaleidescope

Mood Fabrics - Deep Forest Abstract Jersey Wrap Dress

Hellllooooo Nurse! Ugh. It's the end of the day you guys and my humor has reached Animaniacs level... It happens. Clearly I can't think of a proper introduction for this post so we'll just... You wanna talk about the weather? Let's talk about the weather! When in doubt, right? Winter, man! Sucks. *she says as she basks in the 75F degree sunshine* Please don't throw things at me! Truly this has been an oddly mild winter.  If I let my thoughts stray too apocalyptic I'd say it was a sign of The End of Times and that we should all head for the bunker, but I'm feeling optimistic today and just enjoying the apocalyptic pleasant weather with a smile. I'll tell you what, though, all this warm weather has put a real damper on my winter sewing plans.  Oh! The things I had planned! Somehow it just seems strange to sew a quilted Tamarack jacket or a faux leather biker jacket when I feel like I need to start preparing for the impending doom of summer, like, now. Don't even get me started on the chunky wool sweater I've been spending my evenings toiling away on... Ah well. There's always the, like, three cold days of winter to look forward to next year...
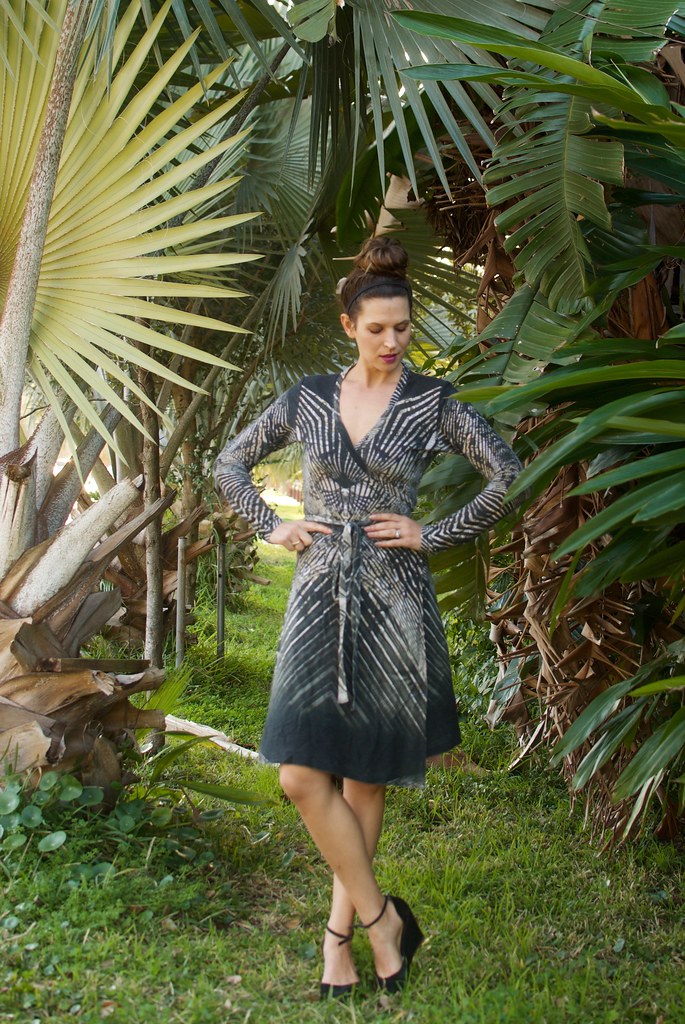
Mood Fabrics - Deep Forest Abstract Jersey Wrap Dress

But enough of that! Despite the unseasonably warm temperatures I've still been on a mission to add a few new long sleeve dresses to my wardrobe. Sometimes you just don't want to do the whole dress/cardigan layering jig. Sometimes you just want to put on one piece of clothing and have it be appropriate for the cooler seasons. I don't care what fashion blogs tell me, sometimes layering is for the birds! This dress is for those days. And lots of other days too.

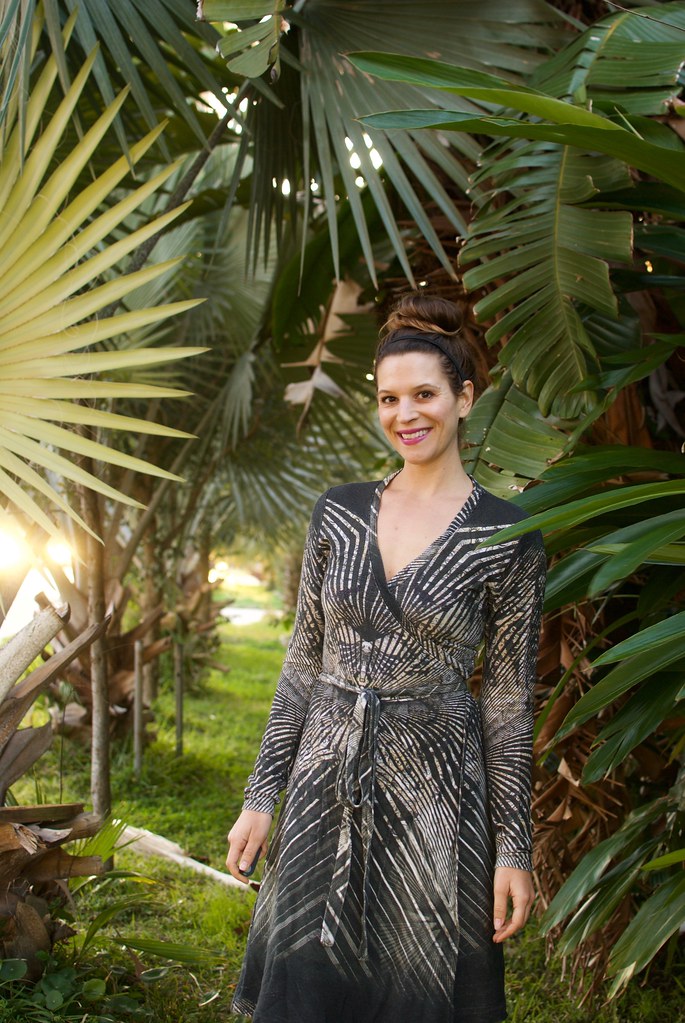
This is my February make for the Mood Sewing Network.  I'm still working through my blah feelings I wrote about in my last post, and so whipping up quick-sew knit garments is still sounding very appealing to me. This time I went for a wrap dress silhouette. If I had to wear one type of garment for the rest of my life it would be a wrap dress. So comfy. So flattering. So sexy-yet-work-appropriate. If you haven't gotten on board with wrap dresses I urge you - I implore you - to give them a try.
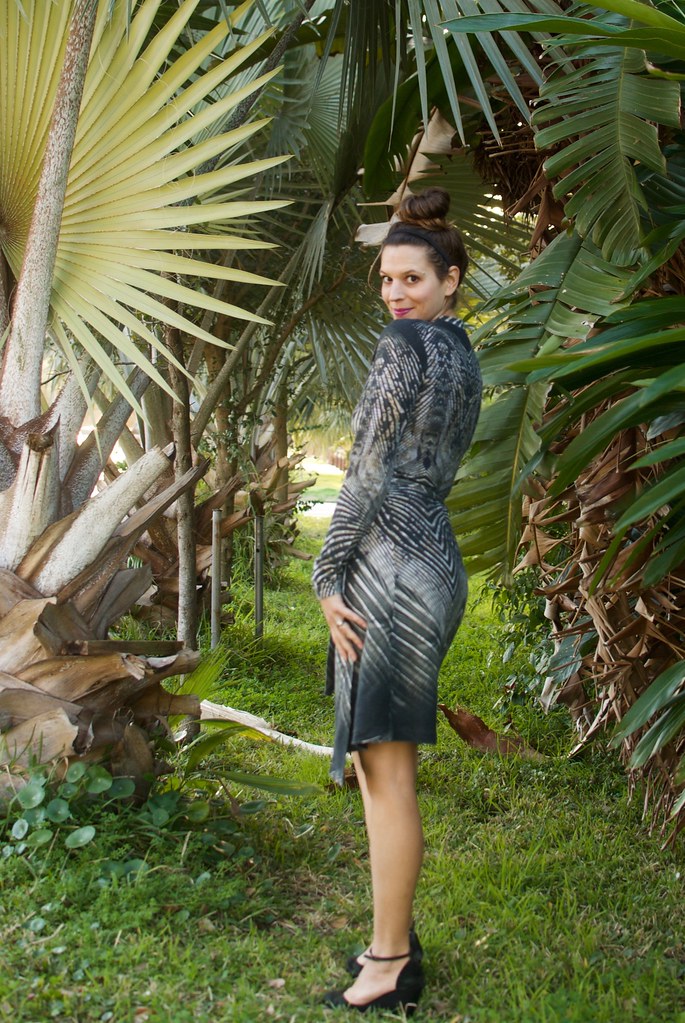
Mood Fabrics - Deep Forest Abstract Jersey Wrap Dress

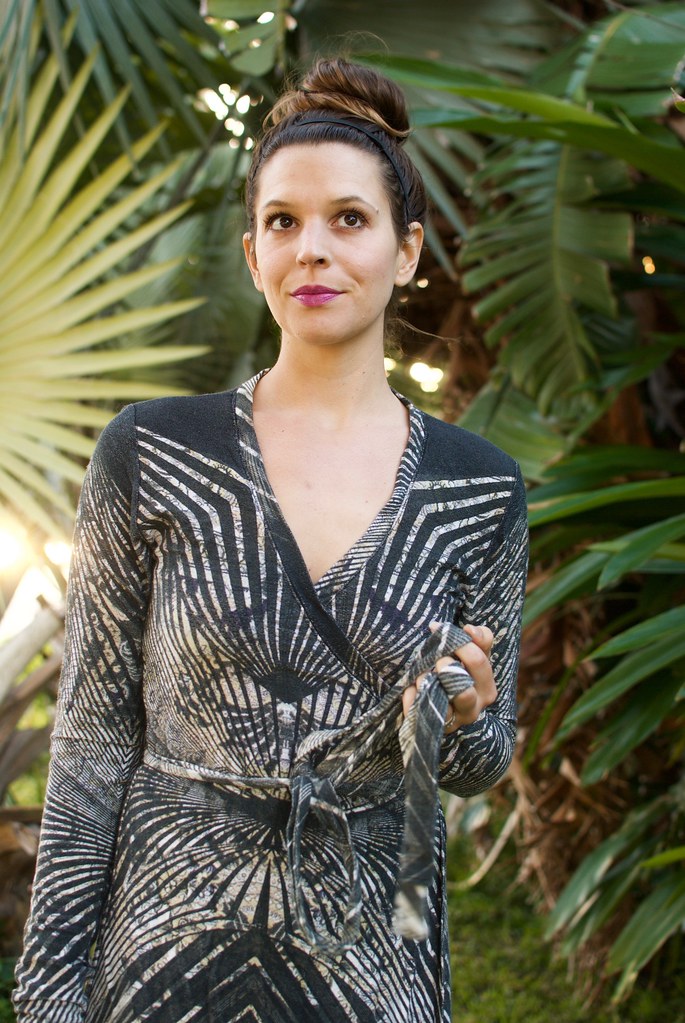
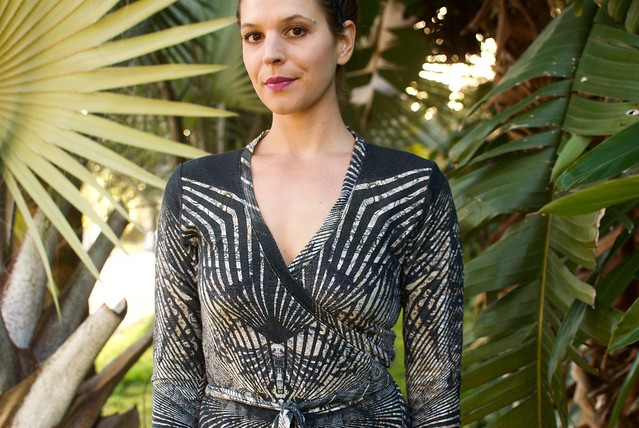
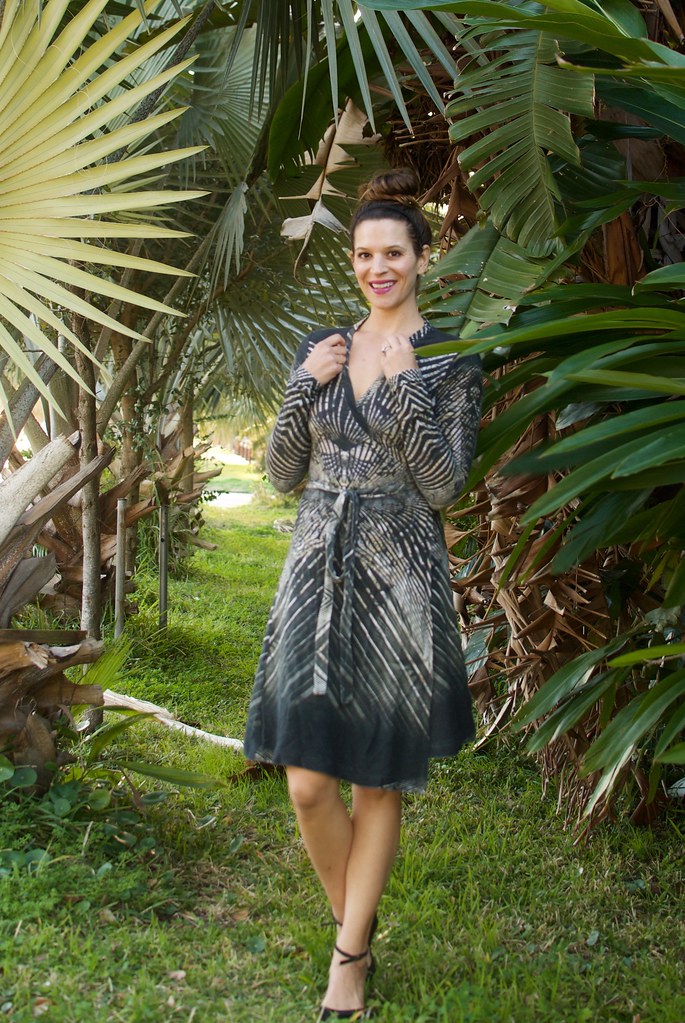
But this is obviously no ordinary wrap dress. Okay, I'll just call out the elephant in the blog post - DAT FABRIC, 'DO! Isn't this a spectacular print?? This is the Deep Forest Abstract Viscose-Cotton Jersey Knit Panel print from Mood's online store, and though I'm usually flummoxed by panel prints I just had to give this one a go! It looks simultaneously organic and futuristic with a heaping helping of Art Nouveau thrown in for good measure. The hand is really interesting too - it has a moderate amount of stretch in both directions and is a good medium weight.  The face of the fabric is actually looped, like the wrong side of terry cloth, and the back is smooth and white. The texture adds some visual interest, but it feels really nice against the skin. I ordered three panels and only had to do a small bit of piecing on the upper back (I created a yoke) to make this dress work.
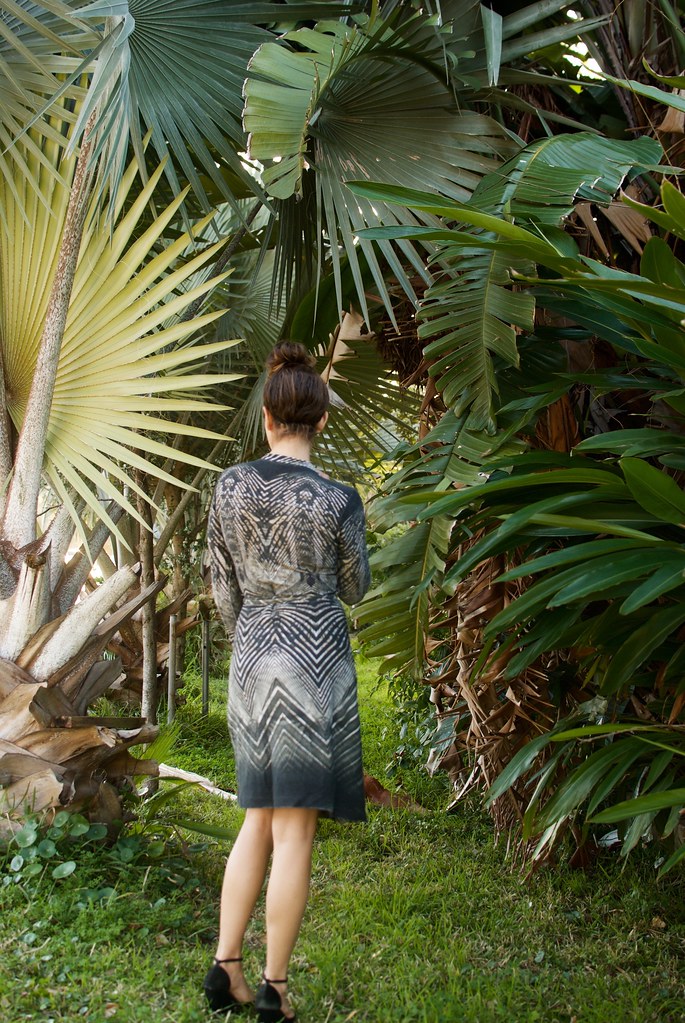
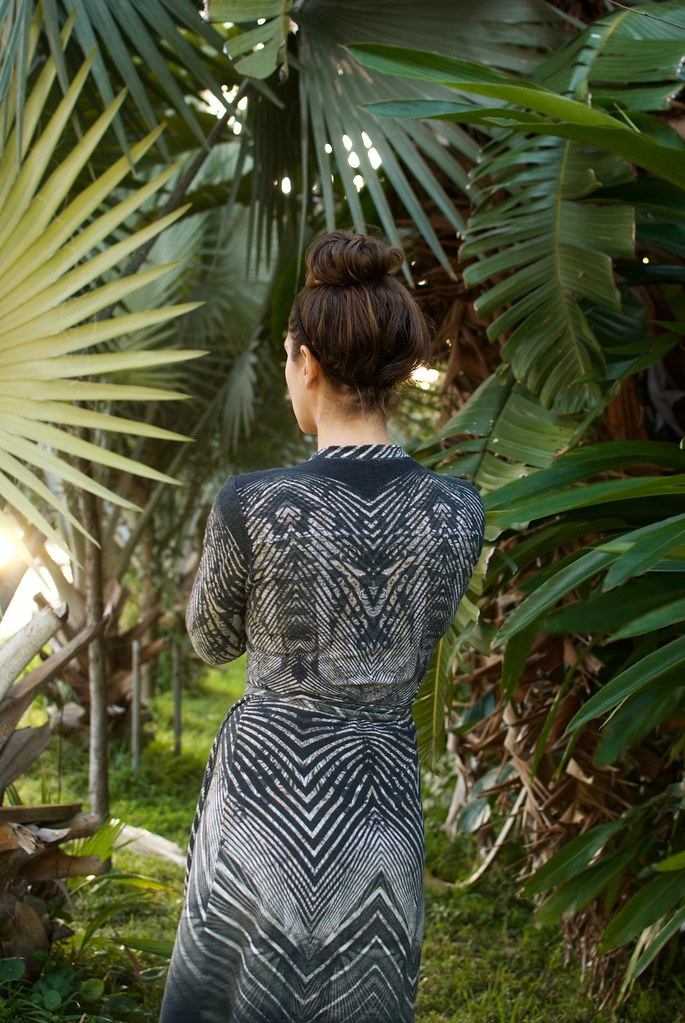
Mood Fabrics - Deep Forest Abstract Jersey Wrap DressMood Fabrics - Deep Forest Abstract Jersey Wrap Dress

By far the most interesting and challenging aspect of making this dress was in figuring out print placement.  I figured out early on that, given the flared shape of the skirt, matching the side seams on this print was not going to happen. Instead I concerned myself more with placing the pattern motifs so they would be most flattering when the dress was worn.  My original idea was to use the faded out black areas at the waist in order to create a slimming effect, however when I draped the fabric on my dress form I quickly realized that this was not the best idea.
FullSizeRender (1)FullSizeRender (2)

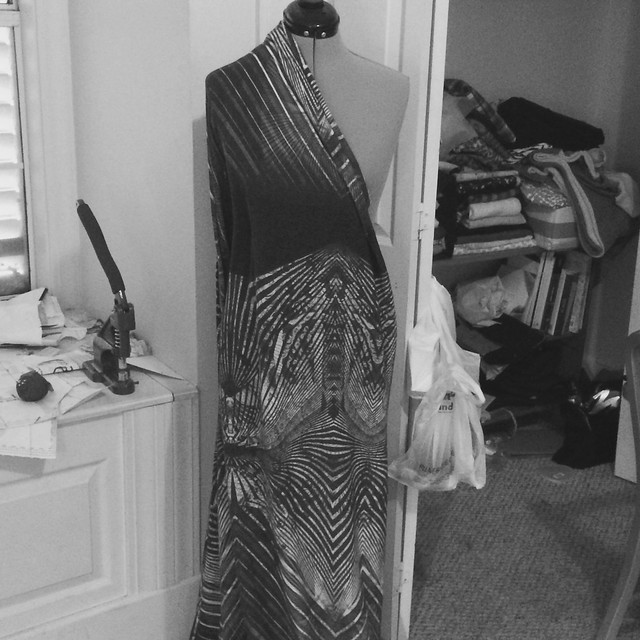
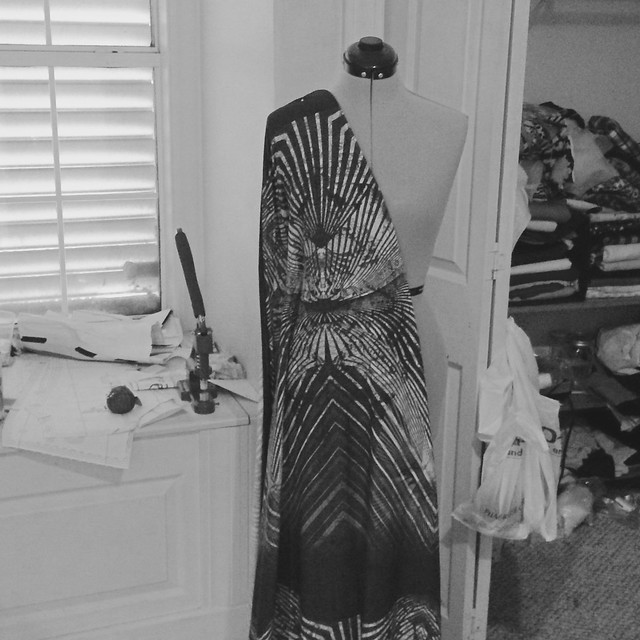
Here's my tip for you guys - when you're trying to decide on print placement drape the fabric over a form, or yourself, in roughly the shape of the garment you're trying to make and then take a picture of it.  I find that looking at a photograph helps give me some distance on the fabric so I can see the bigger picture and not get lost in details like I do when I'm looking in a mirror, or trying to shuffle pattern pieces around on a length of fabric.  Even better, make the photo black and white so you're not distracted by color and can see how the larger shapes are playing out across the figure.  I find this is helpful in avoiding mishaps like the good ol' flower-on-boob mistake we've all made!

Or just in determining the best use of a print, like in my photos above (please excuse my messy sewing room!) The first photo shows my original idea for the print placement, which you can see is still nice, however it really wasn't as flattering as I was hoping for, and the best parts of the print were underutilized.  In the second photo you can see that the swooping lines of the print actually creates the waist-flattering lines I was hoping for, and is a much better showcase for this print. Plus, the first placement may have left me with some unfortunate crotch and butt vortex-ing going on! A lucky save!
Mood Fabrics - Deep Forest Abstract Jersey Wrap DressMood Fabrics - Deep Forest Abstract Jersey Wrap Dress

For the pattern I simply traced an old American Apparel wrap dress I've had for literally ages. I have two of their wrap dresses, and despite the fact that I've trashed a good portion of my AA crap from my undergraduate days, I've always hung on to these wrap dresses.  I'm pretty happy with the way the pattern turned out, however I have a few minor complaints.  There's something slightly off with the shape of the armhole, which never bothered me in the originals (isn't it funny how we can totally overlook wonky fit in RTW garments, but we're so picky about it in our handmades?) and I wish I would have flared the skirt more (because swishy skirts are fun).  I might explore using my CCF Nettie pattern as a base to draft my own in the future. Or just stick with this one. Who knows?! 

Construction was straight-forward - mostly serged seams with finishing done on my sewing machine using my trusty triple-step stretch stitch.  One construction detail I did that I am very happy about was adding a piece of 1/4 inch elastic along the inside of the neck binding to help the neckline hug nice and tight and prevent gaping, and also to keep the neckline from stretching out over time, which is a problem I've had in previous knit wrap dress makes. 
Mood Fabrics - Deep Forest Abstract Jersey Wrap Dress

I've already worn this dress for several work events and am quite smitten with it! The print makes it a real show-stopper, but the wrap-dress and comfy knit fabric allow for me to feel good in it all day.  Nick has let hint that he thinks I "look sexy" in it, which is never a bad thing in my book, either! I'm pretty sure this will be a dress I reach for again and again! 

Well, friends, that about wraps up (yuk yuk) *head slap* this post! Until next time...

xx

1.27.2016

january blues

DSC_0531

Wow you guys! It feels like it has been FOR. EV. ER. since my last post! Happy Holidays! Happy New Year! So much belated happiness! My holidays were lovely, with a nice long visit with family on the East coast. Since coming back to Texas (and real life) I've been a bit slow to find my groove. If you follow me on instagram I've been trying to give little peeks at what I've been up to, but honestly my life feels pretty boring right now! I started a new knitting project (the Riptide pullover from Brooklyn Tweed's new Winter 16 collection - and I'm in luuuuurve with it). And I also joined a local gym which feels like a big step since my last post on my fitness journey. I decided I really wanted to lift heavier weights, which just isn't feasible in my apartment.  So far it's been good! I've never been so sore, or hungry! Seriously, I'm like an eating machine... I also got a new lens for my camera (Christmas present from Nick, he's good to me) - a Nikkor 35mm. I love having my camera back in action, but I'm still getting used to the new lens, so forgive me if some of my pictures are a little out of focus. But when the focus is right - oh it's good!

DSC_0540

And now we're all caught up! You will note that I didn't mention too much about my sewing plans in the above paragraph. That's because my sewing room has felt a bit stagnant as of late. Perhaps it's the winter blahs and the fact that they really promote couch time and knitting, or that I feel like I'm constantly schlepping from home to gym to work (a choice I willingly made) but I've been feeling a bit uninspired in that department.  It's happened before and I know I just need to ride it out and it'll pass, but it's always disconcerting when the sewjo plummets, ya know?

DSC_0550DSC_0556

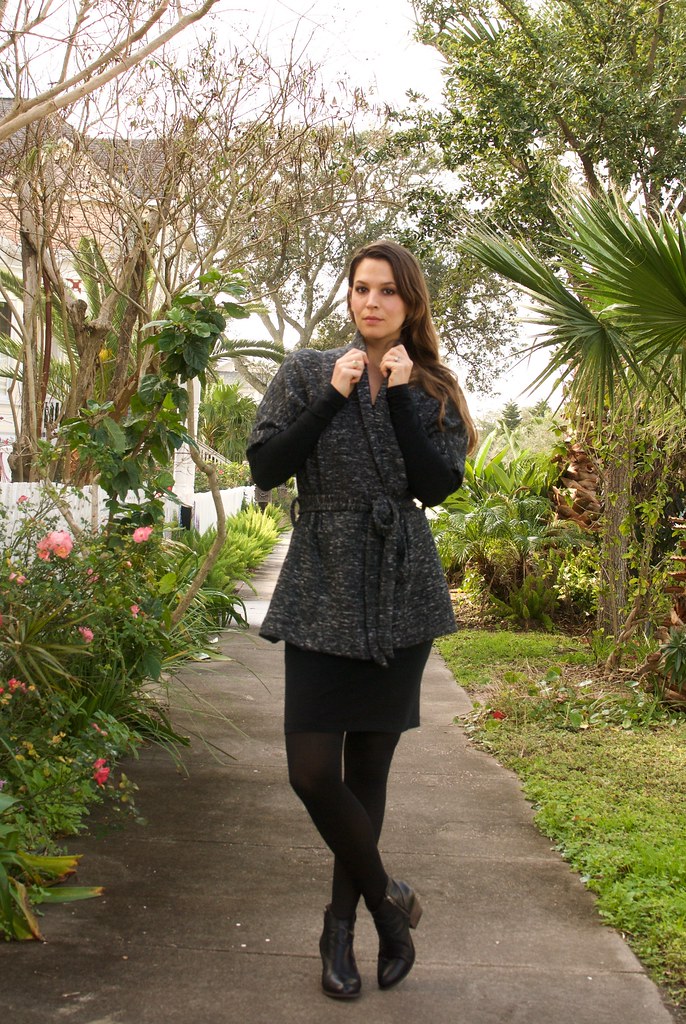
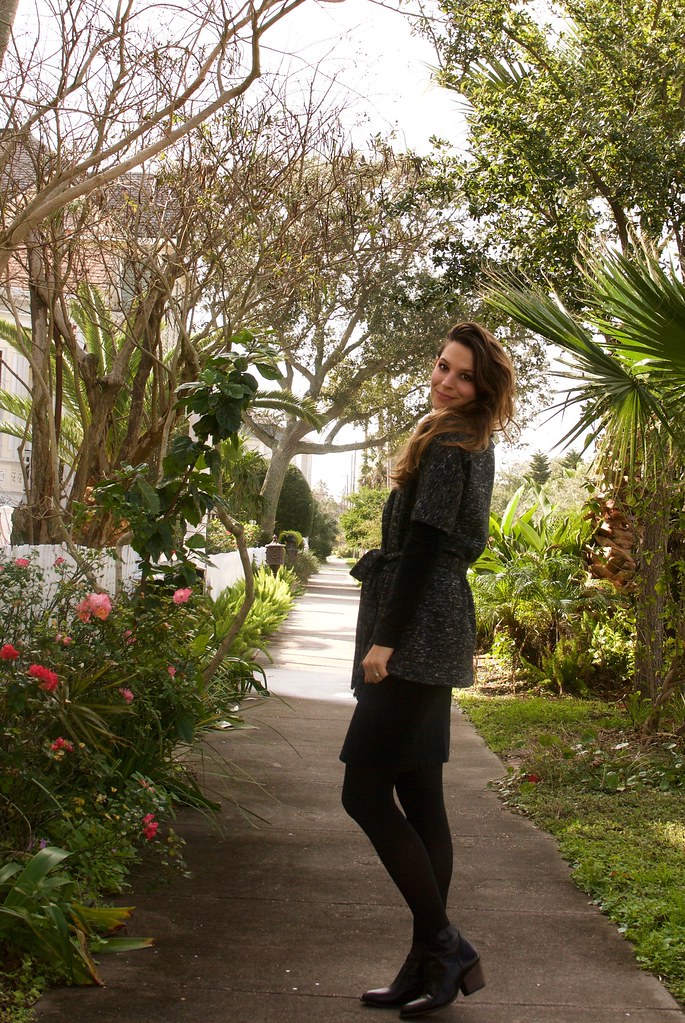
However I did manage to pull these two pieces out for my latest Mood Sewing Network make (I can always count on those MSN posts to get me into my sewing room!). They're not going to set the world on fire or anything, but they are comfy, cozy, adaptable to my wardrobe, and together look quite chic. 

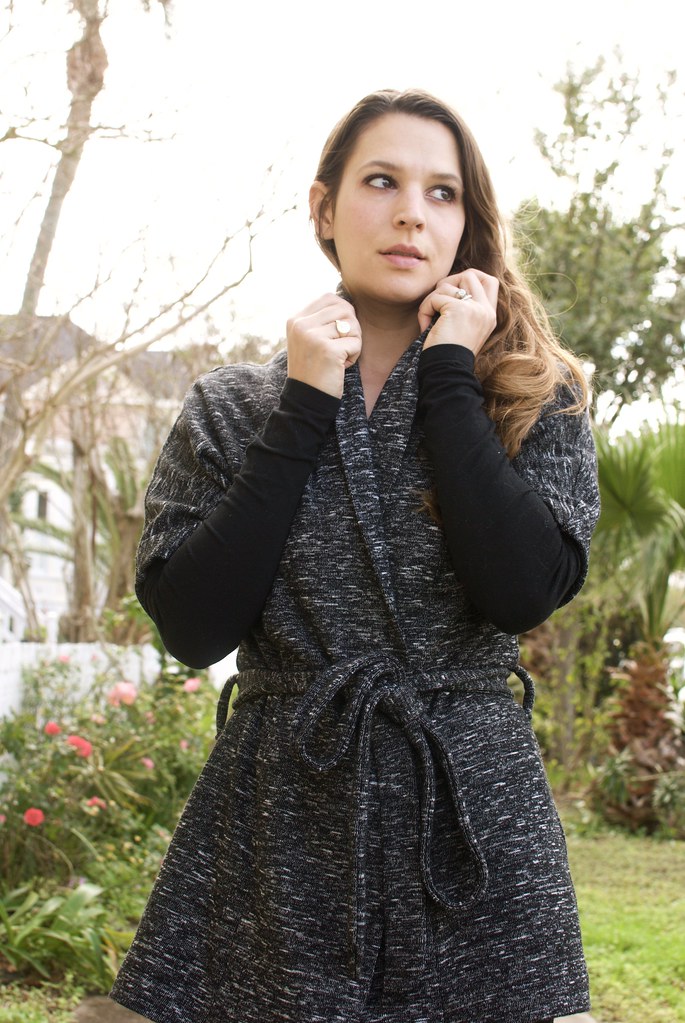
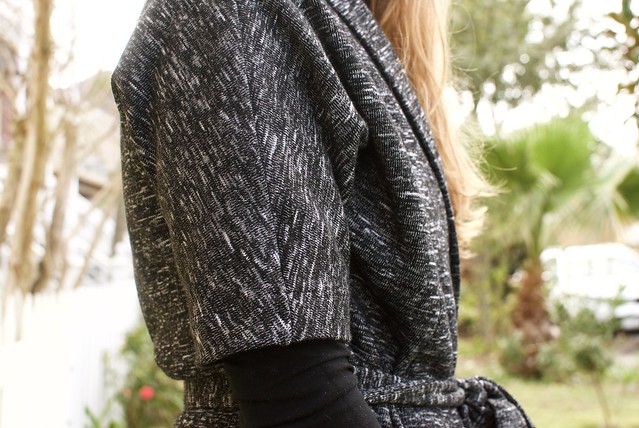
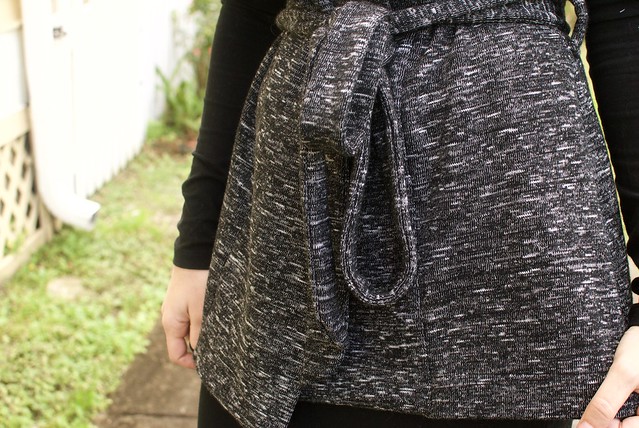
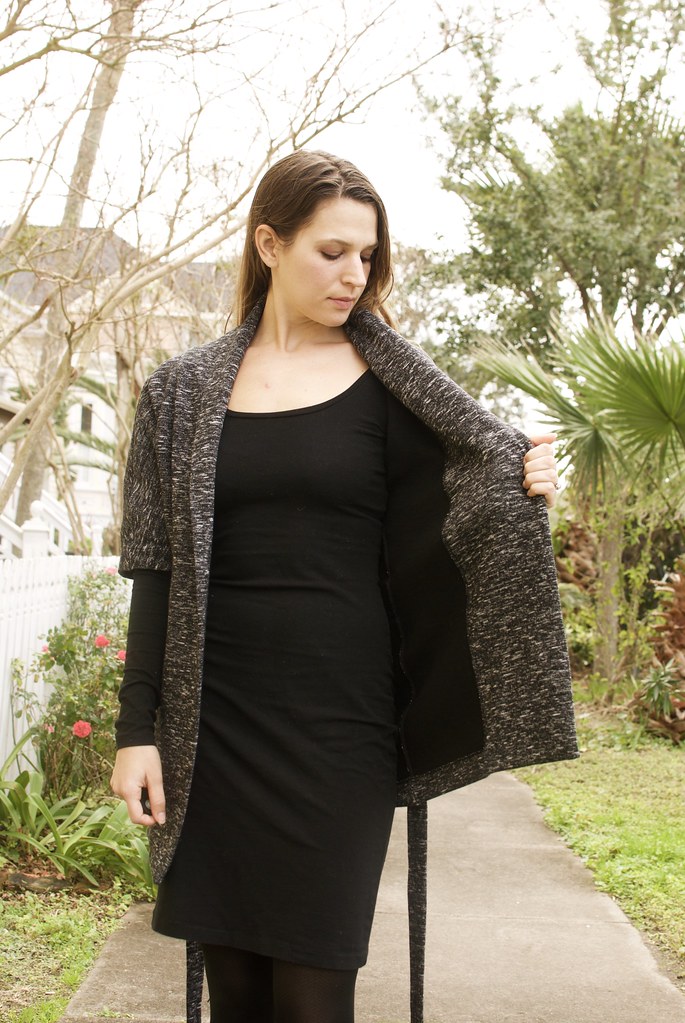
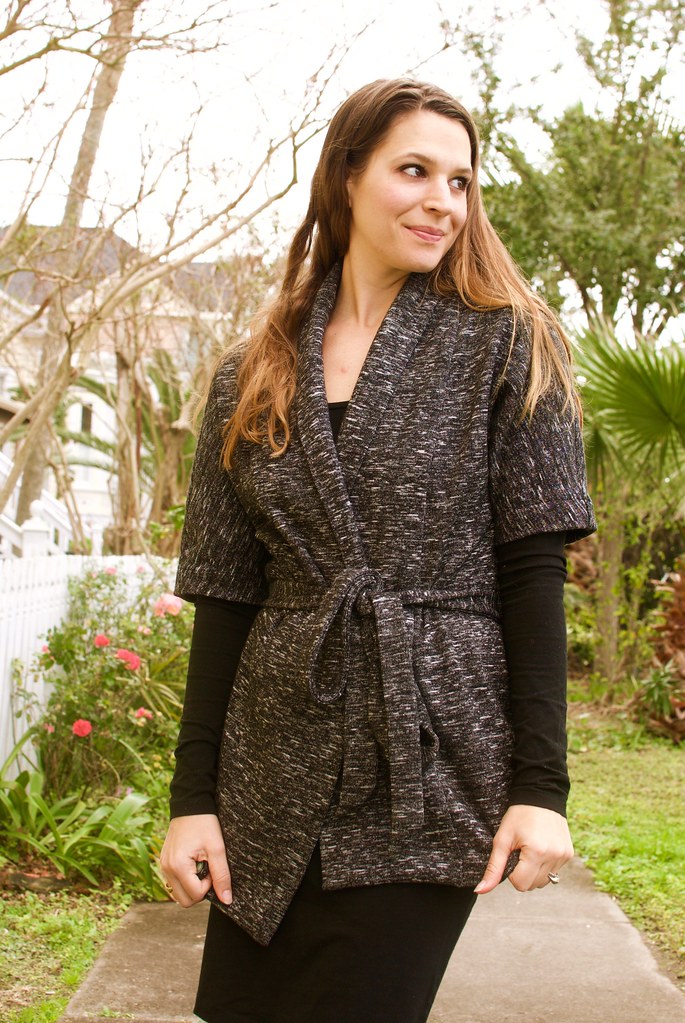
The sweater jacket uses Mood's Italian Black and White Double Cloth Blended Wool Slubbed Knit (phew! that's a mouthful...). I bought a yard and a half of this stuff back in the fall with the intention of making just such a garment. It's really lovely and thick and because of the wool content it's very warm, however since it's a blend it's not scratchy at all. Basically an ideal snuggly layer. After seeing Sarai's Oslo cardigan hack over on the Coletterie I knew that I wanted to use this fabric to make my own.  However for the life of me I couldn't figure out how to cut the pattern pieces out of my yard and half! I'm actually still scratching my head about how Lauren managed to do it. Granted she did not do the kimono sleeve variation but still... clearly she's a wizard. Anywho. Long story short I had to order another yard. It was worth it. Even if it did mean that this garment got pushed back into the new year.

DSC_0557DSC_0558

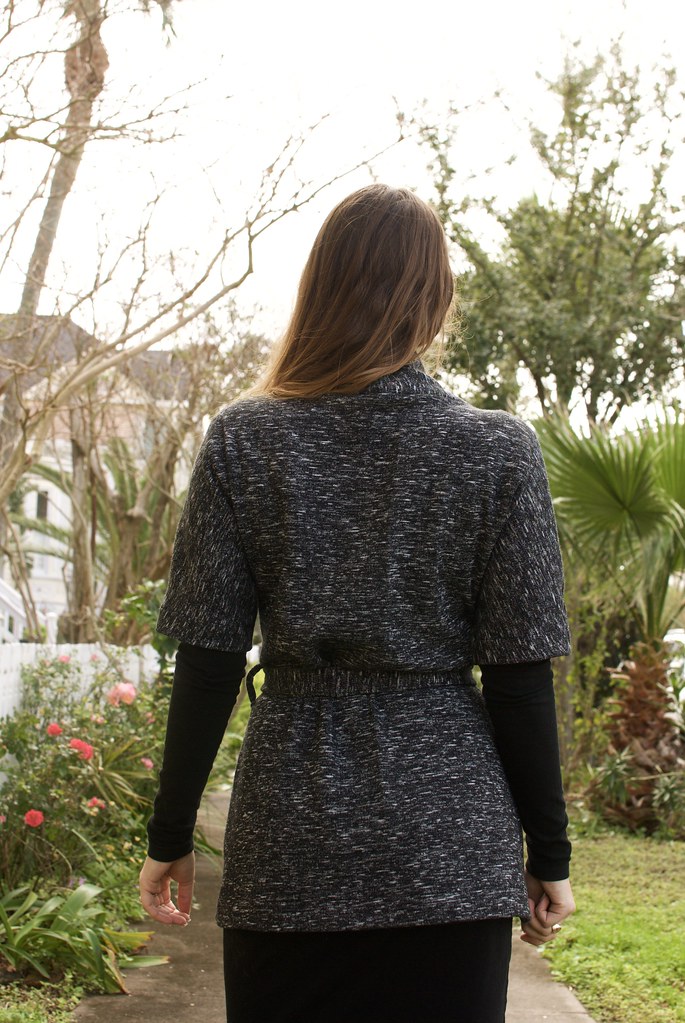
The Oslo cardigan is from Seamwork magazine.  The variation that I did involved a little bit of pattern manipulation to create the cut-on kimono sleeve, but nothing too difficult. And rather than the buttons in the front I added belt loops and a tie.  The only thing that I'm slightly bummed about is that I forgot to add width to the sleeves to get that cool kimono look that Sarai's has.  I thought the kimono sleeve looked kind of dumb at the regular slim sleeve width so I chopped them off at the elbows.  I say this was a happy accident as the shorter sleeve is kind of cool and makes for an interesting layering option.

DSC_0576

Construction wise this was pretty straightforward. I used my serger for all the seams and my sewing machine's 3-step stretch stitch for the hems.  The only place where I got a bit creative was in attaching the collar.  The way the instructions have you do it would have involved me running three layers of fabric through my serger. Since this fabric is quite thick I didn't think that would be the best idea so instead I used my sewing machine to sew the right side down, then attach the underside by stitching in the ditch.  Which was really a breeze on this fabric because the stitches just sank right in! No one can tell how accurate (or, ahem, inaccurate) I was.

DSC_0562DSC_0565

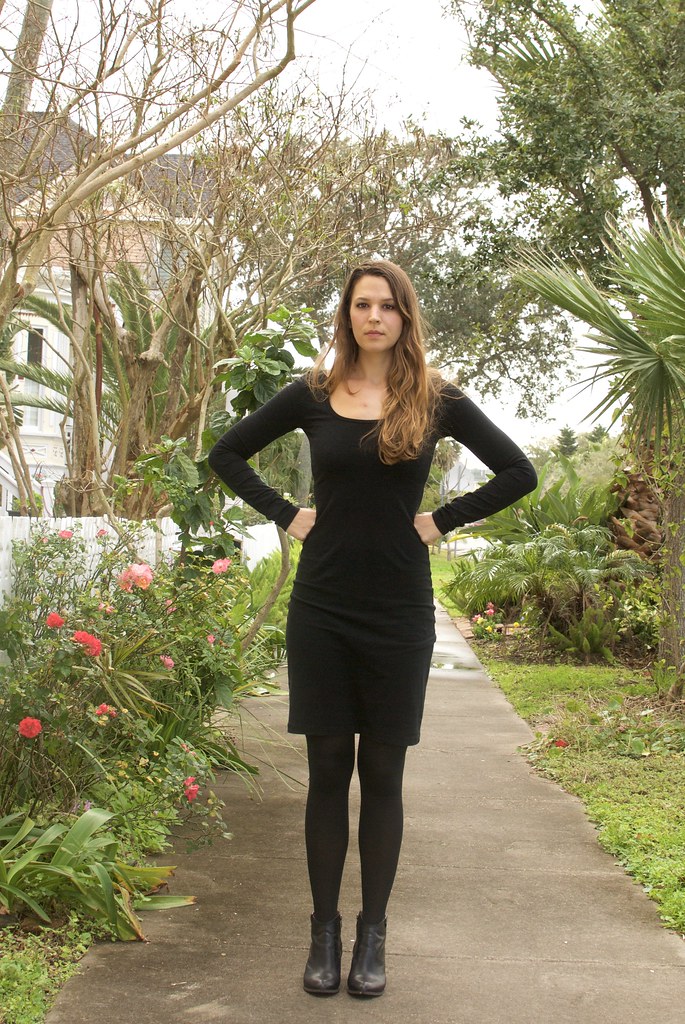
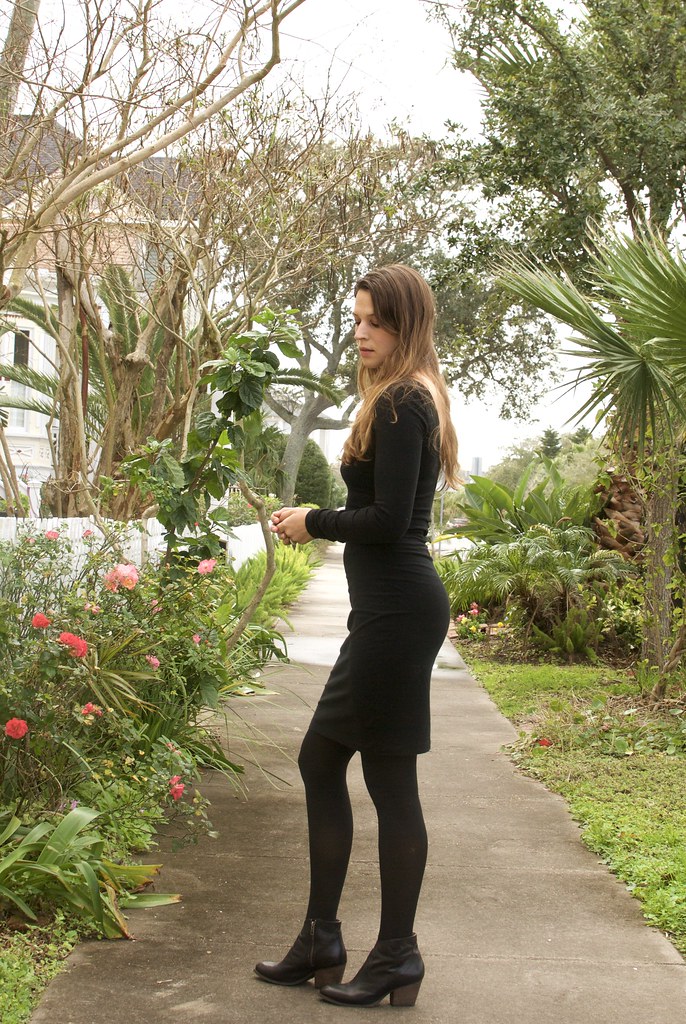
The dress I'm wearing is a Closet Case Files Nettie dress made up in Mood's Black Cotton-Viscose Jersey.   I used this same fabric previously to make leggings and I love it. It’s very stretchy and soft. This dress feels a bit revealing when I wear it alone because of the negative ease (I’m not comfortable in skin-tight dresses) but I love it as a layering piece.  I added length to the sleeves to make them nice and long so they bunch up at the wrists.  Construction wise, this was the same as for the sweater jacket – serger for the majority of the seams and a 3-step stretch stitch for the cuffs and hem.  

I love that stitch for stretch fabrics. It's really the only conventional machine stitch I’ve found for knits that doesn’t pop with wear. For some reason my machine’s zig-zag stitch never really seems to have any give, but the 3-step straight stitch does. Plus it looks super clean and professional. I highly recommend you give this stitch a try for knits if your machine has it. I'm sure most do. I have a very rudimentary machine.

Mood Fabrics | Italian Black and White Double Knit

As a whole, this outfit works pretty well as secret pajamas. Especially because they're like pajamas and a robe! And when the winter blues come a-knocking it's really all I can do to not wear my bathrobe to work (I wish I had my life together enough to own actual pajamas but...)  This is a decent second best in my opinion.  And both pieces work really well with the rest of my wardrobe. So even if I'm not blowing anyone's mind with these makes, I give them an A+ for wearability and the kind of thing I'll reach for again and again.

And there you have it! My first post of 2016. Feels good to dust off the cobwebs. I missed you guys. Anyone else in the midst of the January blues? Let's all hang out on the couch underneath a heating pad and commiserate...

xx
5.28.2015

sherbert

Brumby skirt & tank

Hey Gang! How's everyone's May been going? It's been pretty dreary here the past few weeks - there's been a lot of rain and flooding throughout Texas (I hope my fellow Texans are safe and dry and on high land! Y'all are in my thoughts!) but it hasn't quite been able to make it across the bay to this island I call home.  Instead we've just had endless clouds and suffocating humidity. Gross, but I'll take it over devastating floods... Yesterday the clouds decided to thin and allow some weak early evening sunlight through so I took the opportunity to shoot some pictures of my newest outfit.

Brumby skirt & tank

Earlier this month, the lovely Megan Nielsen sent me a note to tell me about the re-launch of her paper patterns and the release of her new sewing app and asked if I would be interested in reviewing the app along with her newest pattern - the Brumby Skirt (note - throughout the entirety of this post autocorrect kept trying to change "brumby" to "crumby" and it. is. driving. me. insane!!! end note).  I thought the pattern was cute and I have to admit to being more than a little curious about the app - so I said "sure" but there is of course more to it than that.

It's hard to imagine that there was a time when my blog roll wasn't stuffed to the gills with sewing blogs.  In fact, it's hard to imagine that there was a time when I wasn't even really aware that such a thing as a sewing blog existed - but as incredible as it may seem, dear reader, there was such a time. In this younger, naive-er plane of existence I was the voracious consumer of the Personal Style Blog. I loved to click through the images of women putting together outfits from their own closets. Even if my own wasn't nearly as extensive or creative, I found the different looks, the signature way these women wore clothes, and watching the evolution of trends emerge to be both aspirational and inspirational.  Fashion blogs (along with a myriad of other, much more personal circumstances) led me to sewing my own wardrobe.  It was through this channel that I discovered a certain Megan Nielsen.  I remember when Megan released her first ready-to-wear collection, and I remember when her business began to evolve into sewing patterns at practically the same time that my thoughts were turning towards a handmade wardrobe.  It was zeitgeist! I think it's for this reason that I will always feel a special kinship with Megan.  As a reader, I made the evolution from the fashion blog world, to the sewing blog world in tandem with Megan, and for both of us it was here that we found our home.

Brumby skirt & tank

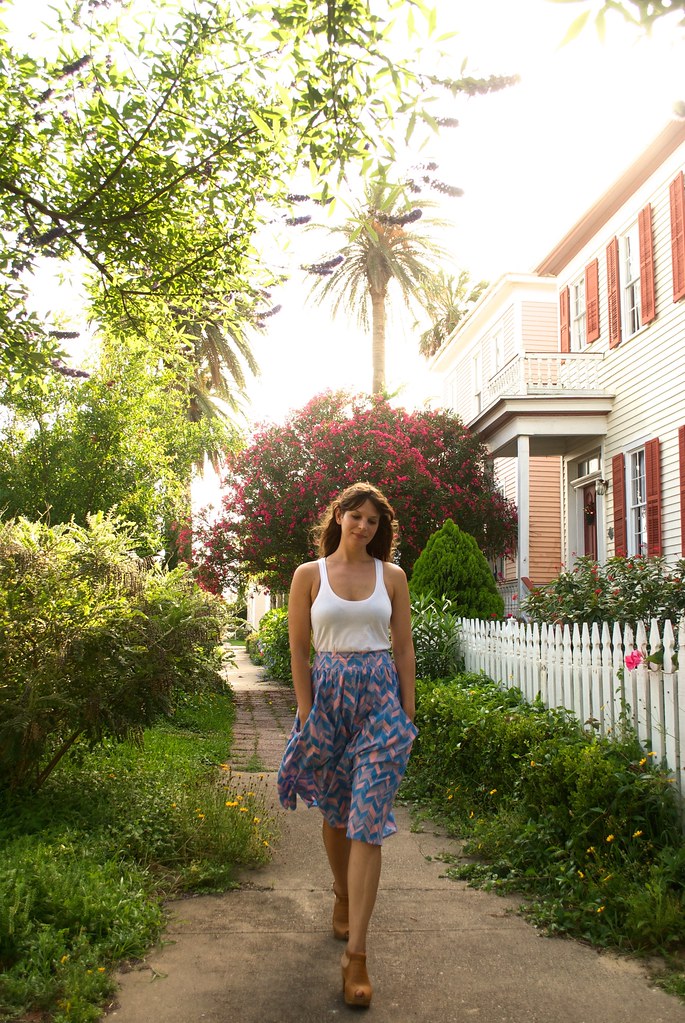
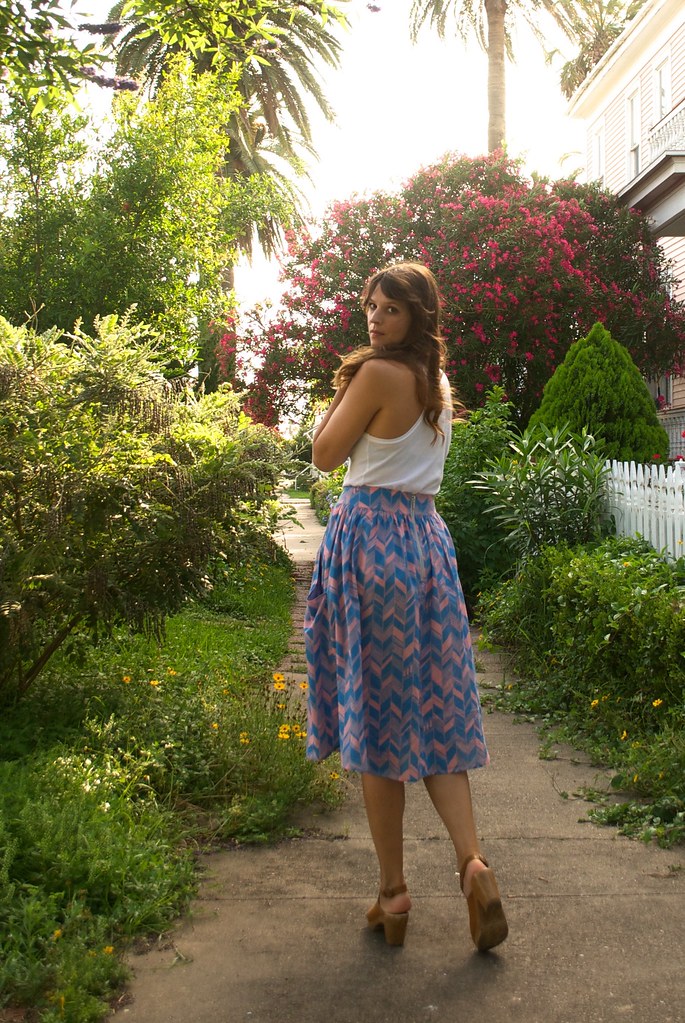
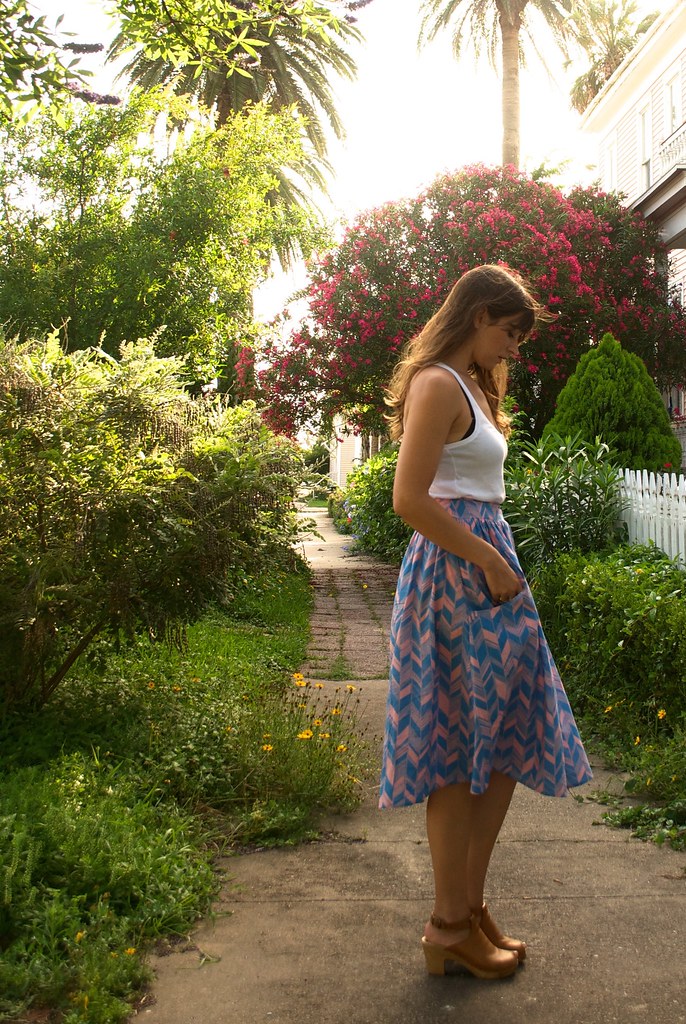
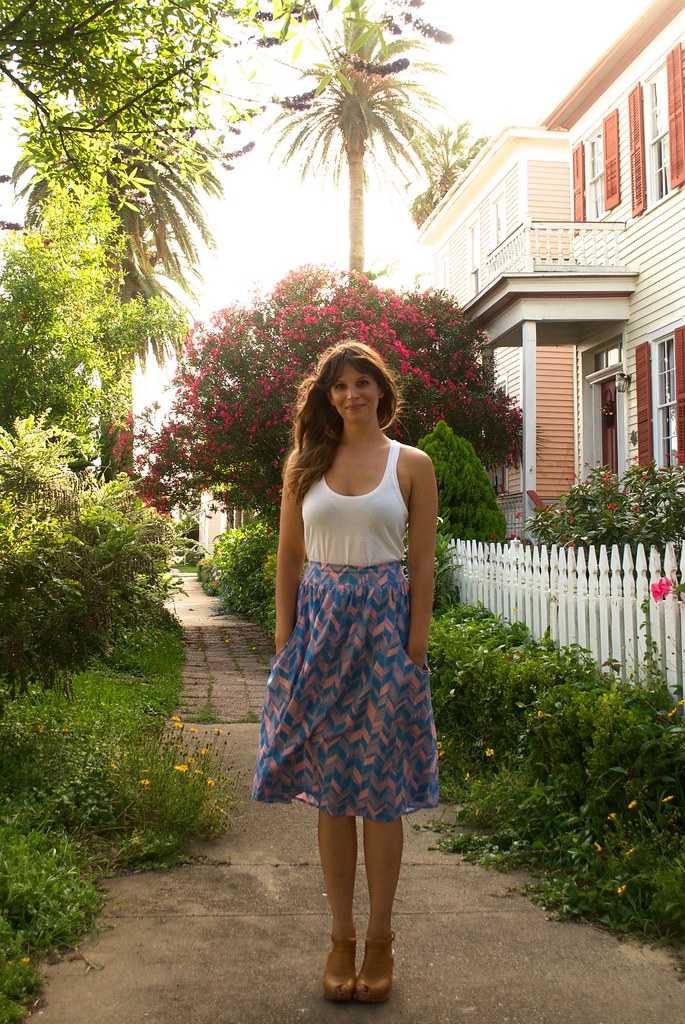
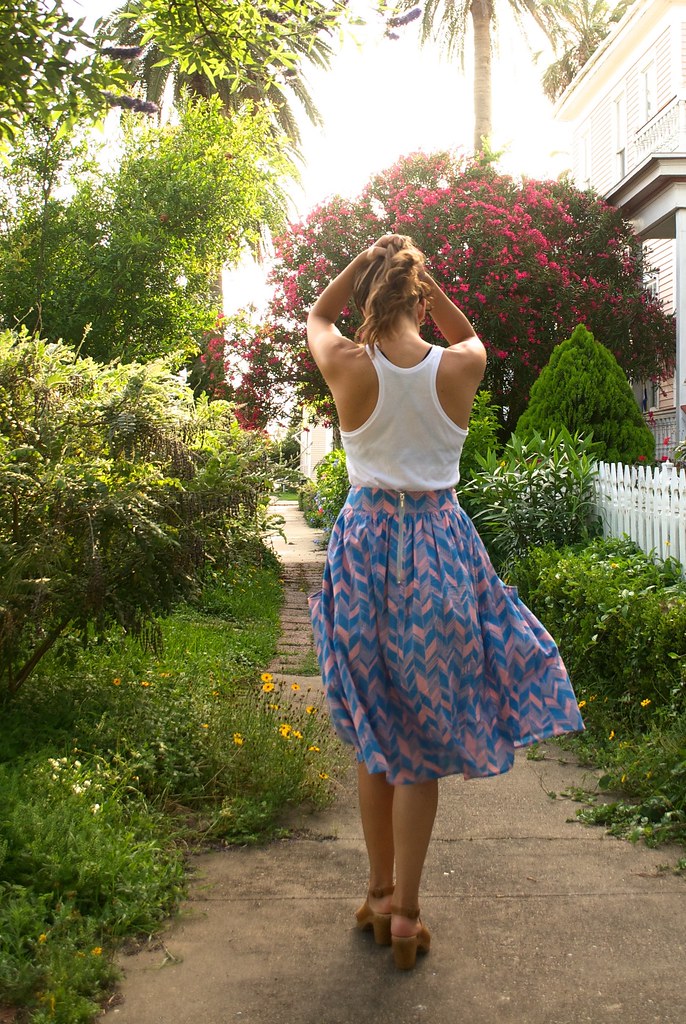
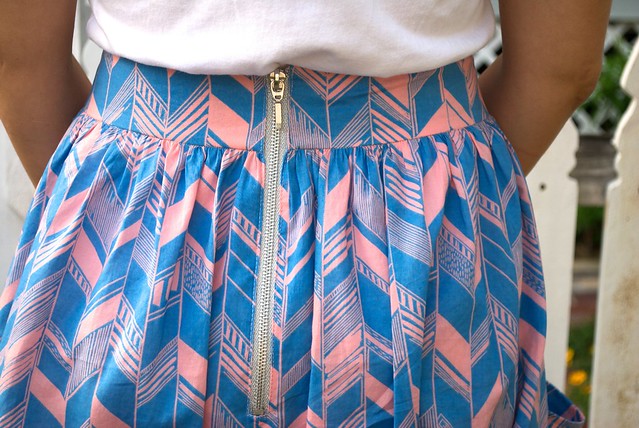
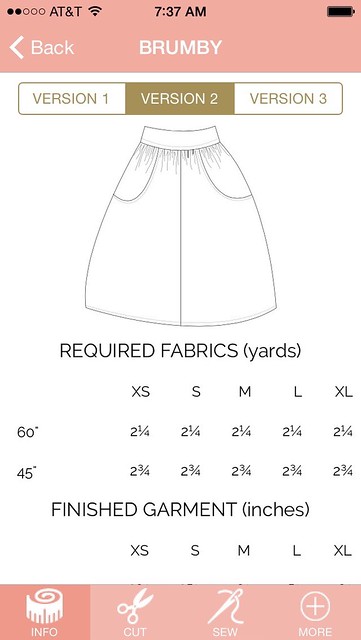
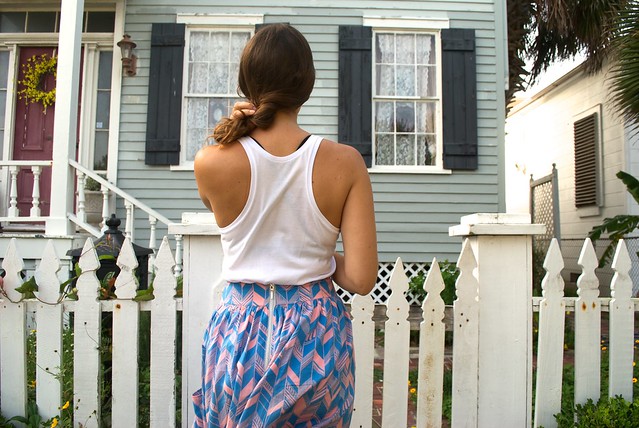
So it's with great pleasure that I present to you my Brumby Skirt! The Brumby is a gathered skirt with a wide waistband, an exposed zipper, deep pockets on versions 1 and 2, and three lengths - above the knee, knee length, and midi.  I made version 2 because I can't say 'no' to a midi skirt and I love a good statement-making pocket.  The fabric I used is some lovely cotton voile that I bought with my monthly Mood allowance in a cool, hand-drawn chevron print.  The colorway of the pattern feels very summery to me. Even though this fabric is somewhat sheer, because of the volume of this skirt I left it unlined and it works really well as a single layer.

Brumby skirt & tank

I think this pattern would be a really wonderful first make for a beginner.  I never really understood why people recommend learning to sew by making things like pillow cases or curtains when there are such cute patterns like this one out there that are easy and have a really impressive, wearable, and stylish result. Plus, you'll learn a few tricks, like gathering and setting in a zipper.  I mean, if you really love pillow cases and curtains, than you do you friend! But this isn't all that much more difficult, and  -  look how cute!! 

For my purposes, I could see myself wearing the midi version just as I'm wearing it here - as a casual summer look.  I really prefer dresses and skirts in the summer, but I don't always want to feel like I'm dressed to the nines, so this is a nice medium.  I can also see myself using this pattern to swap out with other dress bodices from my stash. So even though I feel like a gathered skirt might be the kind of thing I could draft up myself, it's always nice to have the option of a professional pattern ready to go.

Brumby skirt & tankBrumby skirt & tank

I feel like a big part of Megan's re-launch has been about thinking about the way sewers actually use their patterns.  Her new paper patterns are not all that different from the Big 4 patterns we're all familiar with - they're printed on a thin white tissue and come folded in a paper envelope along with a page of instructions printed on a slightly heavier newsprint.  I know this is highly subjective, but I actually really like this type of packaging. It's certainly not made to look pretty on a shelf, but it's unfussy and functional, and quite frankly, both of those things are more important to me in my sewing patterns than designer packaging.  

IMG_2232

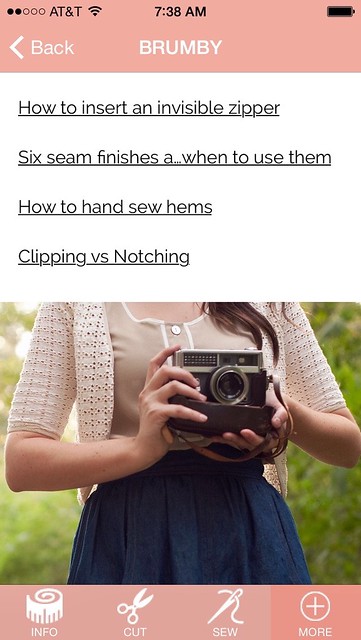
The one thing that I do feel sets a brand above the rest is the quality of the instructions, and the extra information (sew-alongs, tutorials etc.) that they provide the home sewer, and this is where Megan's approach is pretty interesting.  The instructions that come with the paper pattern are certainly sufficient and straight forward, but she's also released her sewing app which acts as a companion to all her patterns.  In the app you have access to all the pattern specs, fabric requirements, and a neat little shopping list you can check off as you go, cutting layouts, instructions and other fun things like ideas for customization, and links to tutorials and sew alongs.

IMG_2230
IMG_2231

For this review I just used the sewing app rather than the instructions that came with the pattern (although I gave them the once over just to see what's what).  I have to confess, I'm not the most technologically advanced person, and I wasn't quite sure how much an app could bring to my sewing experience.  But what this really made me realize is how often I do tend to look up instructions, tutorials, or pictures of finished garments on my phone as I sew.  I'm sure I'm not the only one.  The fact that it was all right there in one easy to access place, rather than doing a million different google searches, was definitely convenient and really pretty cool. I think the app is going to be especially handy for those who purchase the PDF pattern.  I don't know about you guys, but I always feel really guilty printing out instructions and whatnot after I've just printed out 50 pages for a pattern.  It always feels really wasteful to me, so knowing that all that information is easily accessible on my phone is a big bonus.  I have to say, I viewed the app with some skepticism at first, but it really won me over.  Megan may have just discovered the future of sewing patterns!

Brumby skirt & tank

I wanted to make a quick little something to go with my Brumby skirt so I had a look through my stash and found this white cotton jersey of unknown origin - probably one of those things I bought thinking it seemed like a practical thing to have around and then promptly forgot about because... boring.  But it's really a pretty nice quality so I decided to do a rub-off of an American Apparel tank I've had for years and don't necessarily love but for lack of anything better seems to get a lot of wear. I tried to fix some of the things that bother me about the original tank, while still keeping the sexiness of the deep scoop neck and armholes.  All in all, I'm really  pleased with how it turned out! I especially love it tucked in like I'm wearing it here.  The original tank just had serged edges for the neckline and armholes, but I wanted a more finished look for mine so I used a binding. I think it's an improvement on the original for sure!

Well guys! I think those are all my thoughts on this one! I hope wherever you are you are enjoying some early summer weather and sunshine! And what do you guys think - does a sewing app seem like the future to you? 

xx
4.30.2015

just call me crazy culottes

Mood Fabrics

Hey guys! Well, I know I said I wasn't going to apologize anymore for being a bad blogger, but here I am, feeling like a bad blogger and like an apology is in order.  For everyone interested in that Minoru tutorial I swear it's coming! I didn't mean to go AWOL on you this past month, but work got busy and so forth and so on... you know the jig. But I haven't forgotten about you!

In the meantime, here's a crazy new outfit to distract you from my bad blogger ways! Look! Pattern mixing!! *runs in the opposite direction*

Mood Fabrics

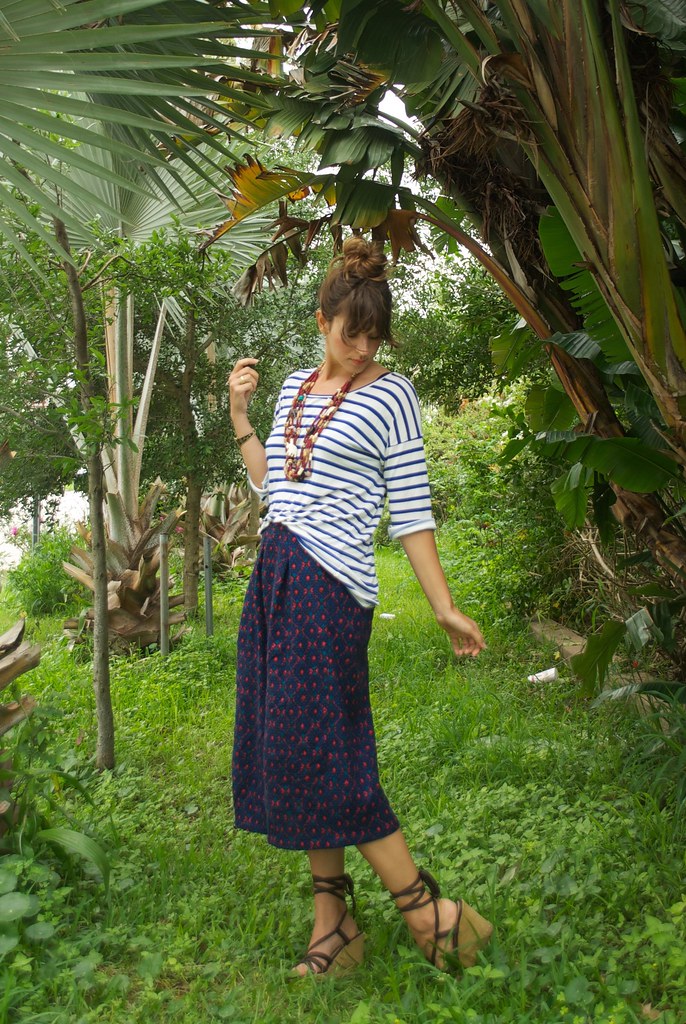
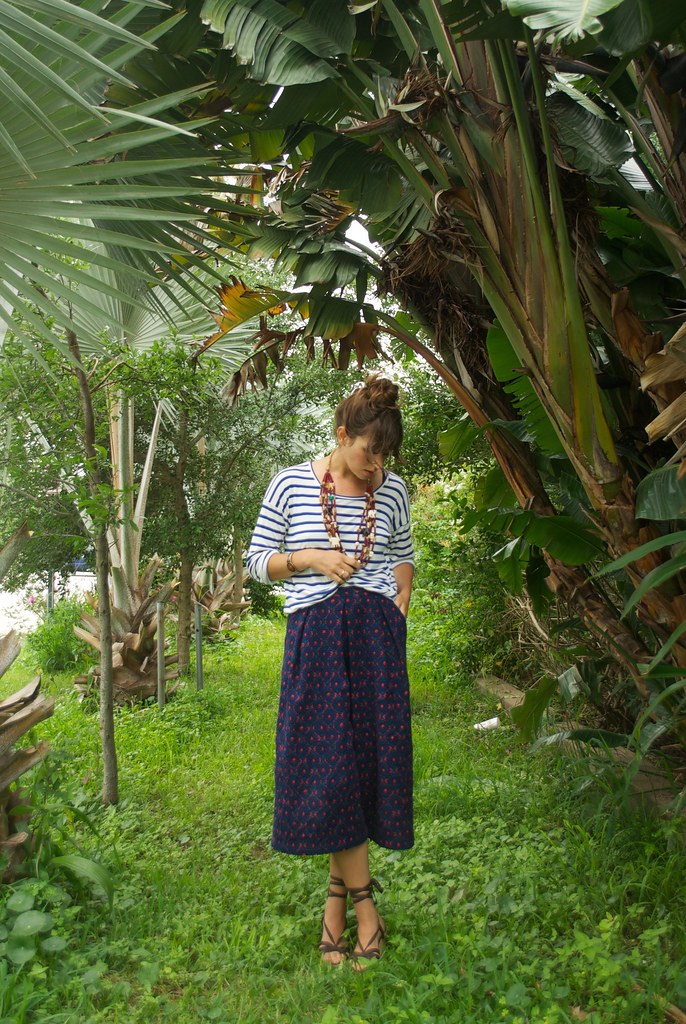
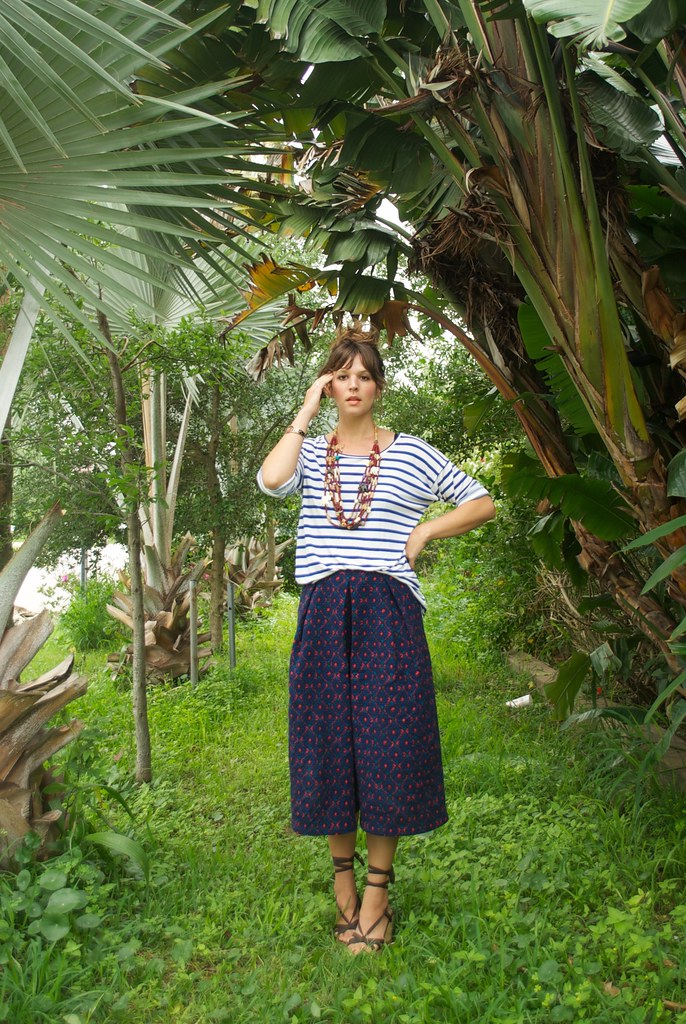
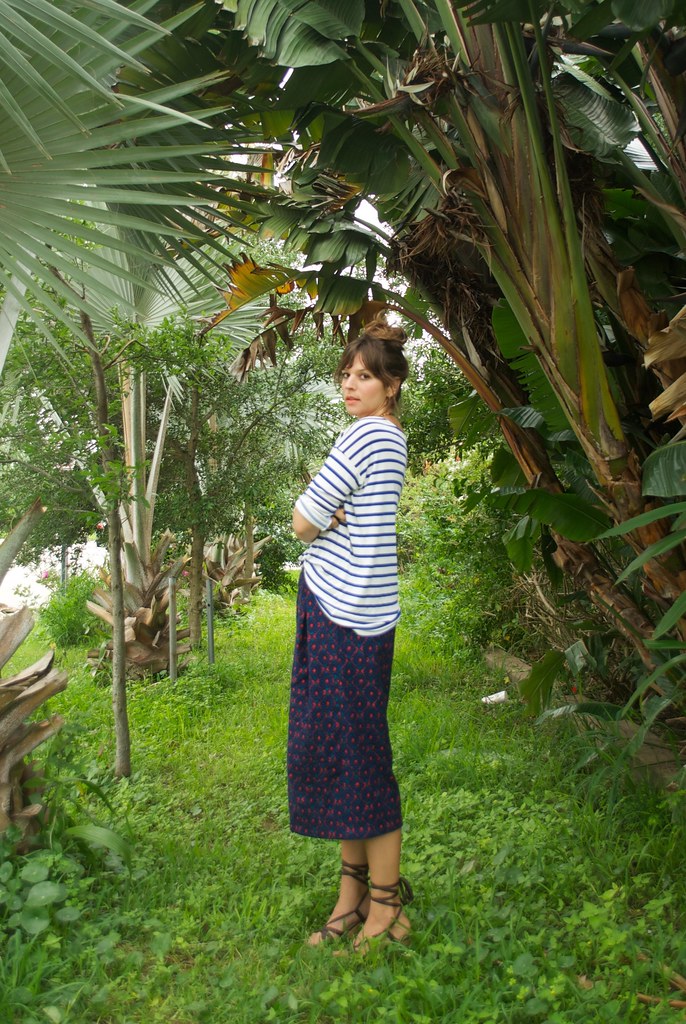
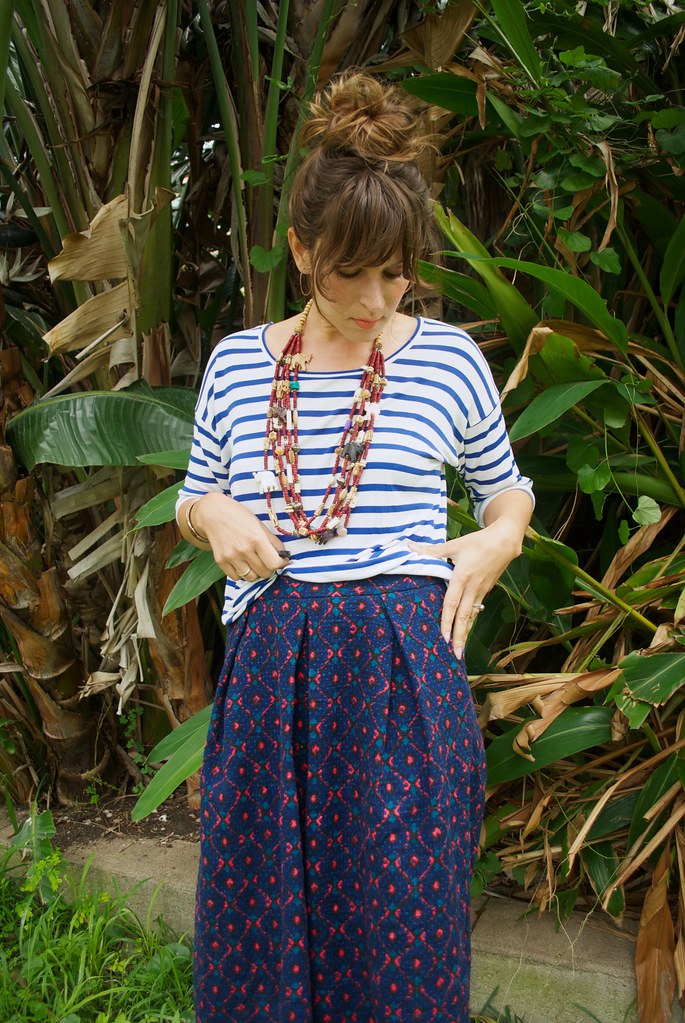
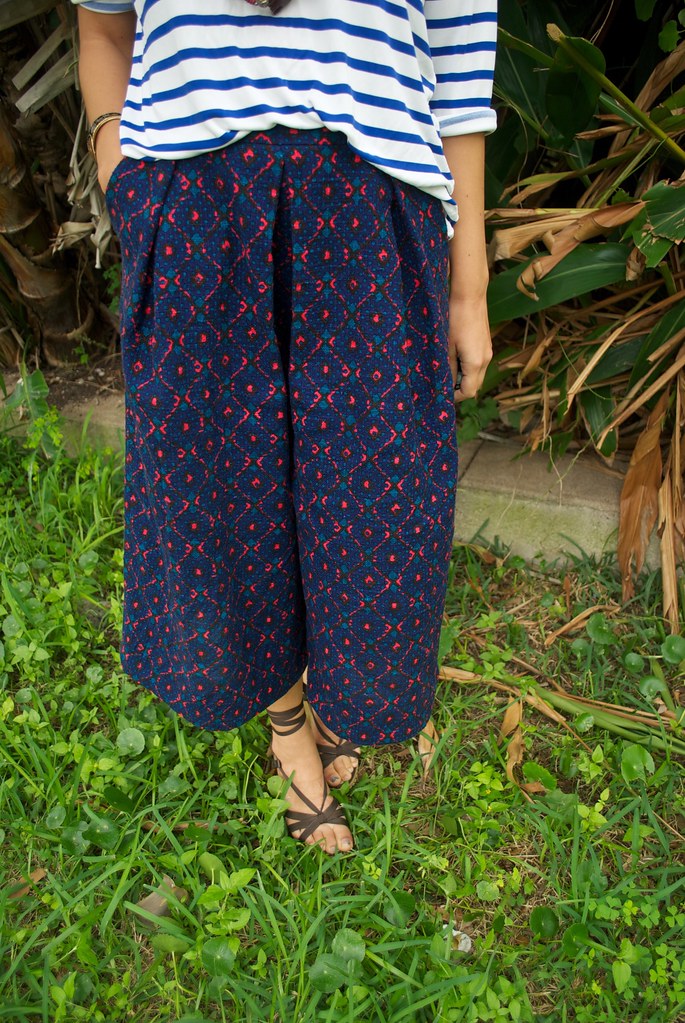
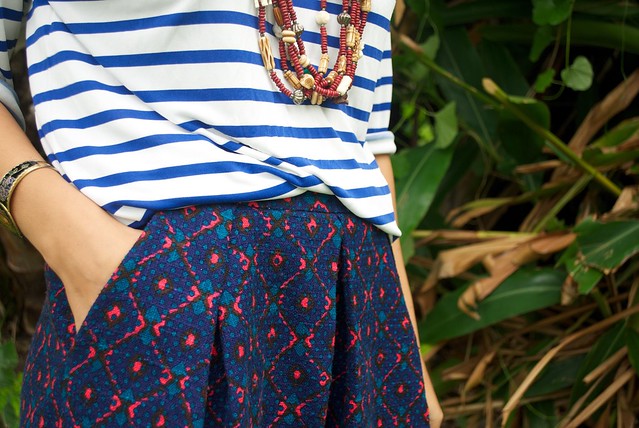
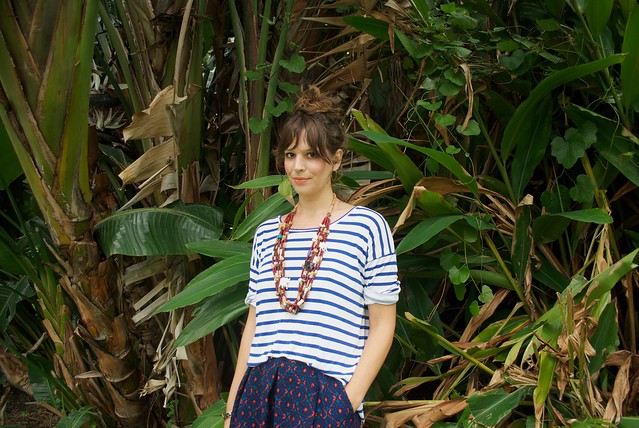
This outfit is my contribution to this month's Mood Sewing Network.  The top uses this Ralph Lauren Dazzling Blue/White Striped Viscose Jersey, and the bottoms are this Famous Designer Navy Geometric Cotton Woven.  Fun fact: the mysterious 'famous designer' is none other than Anna Sui, according to the print on the selvedge of this fabric which read "Anna Sui 2012".  I did my best to search Anna Sui's 2012 collections to see if I could spot the fabric anywhere, but no joy.  Perhaps it was used for a garment that went straight to stores? Your guess is as good as mine. But anyway! I've got Ralph Lauren and Anna Sui all in one outfit! Not too shabby for a nondescript Tuesday/Workday!

Mood Fabrics

I actually picked up both of these fabrics with zero idea of what to do with them.  I just thought the blue and white striped jersey seemed like a handy fabric to have on hand, and the print and texture of the cotton looked interesting, and I try to make it my policy, when funds allow, to grab fabrics that look interesting regardless of their practicality.  Generally speaking, however, I'm more of a "buy your fabric with your project in mind" kind of gal.  So this was kind of an anomaly that I went for two fabrics with no intended use in one order. Although it may also have been serendipity, because after my fabrics arrived (and after the standard time allotted for "oohing" and "ahhing" and petting and draping around my torso in front of a mirror that goes into every new fabric acquisition) I carefully folded each yardage and set them on top of my grotesquely disorganized fabric pile, one on top of the other. And it was like lightening struck my brain! Seeing the two of them like that, right next to one another, made me realize that they were meant to be worn together as an outfit.  More specifically, as this outfit, the image of which almost simultaneously came to me at that moment as well. Now if that doesn't sound like divine intervention from the Sewing gods than I don't know what does!

Mood FabricsMood Fabrics

I knew I had to make these two garments, if only to get the outfit out of my head and into reality! The shirt was first.  I used Grainline’s Hemlock Tee – a free, one-size, 3/4 length sleeve, slouchy top pattern.  This came together in no time at all. The Hemlock Tee is a great pattern for a casual top.  I didn't really follow the instructions on the Grainline blog, but just put it together the way I normally do knit tops. To match the stripes I just put a pin in every blue stripe.  It makes for a lot of pins to remove while I’m sewing, but it also ensures that everything is lined up perfectly.

The blue and white viscose jersey was super easy to work with.  I sewed this all together on my serger, using my twin needle for the hem and cuffs.  This jersey has a super smooth, almost silky hand with a slight sheen. It’s surprisingly weighty for viscose, falling in deep fluid folds, making it perfect for an oversized tee like this one (although I can also think of a myriad of other uses for it that would be just as lovely).


Mood Fabrics

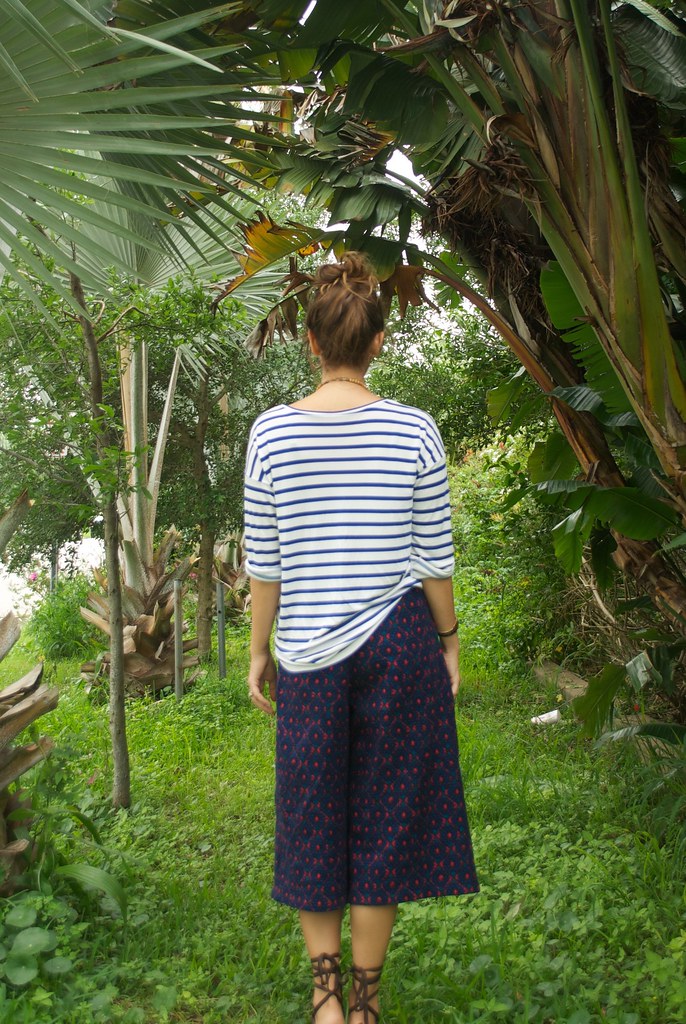
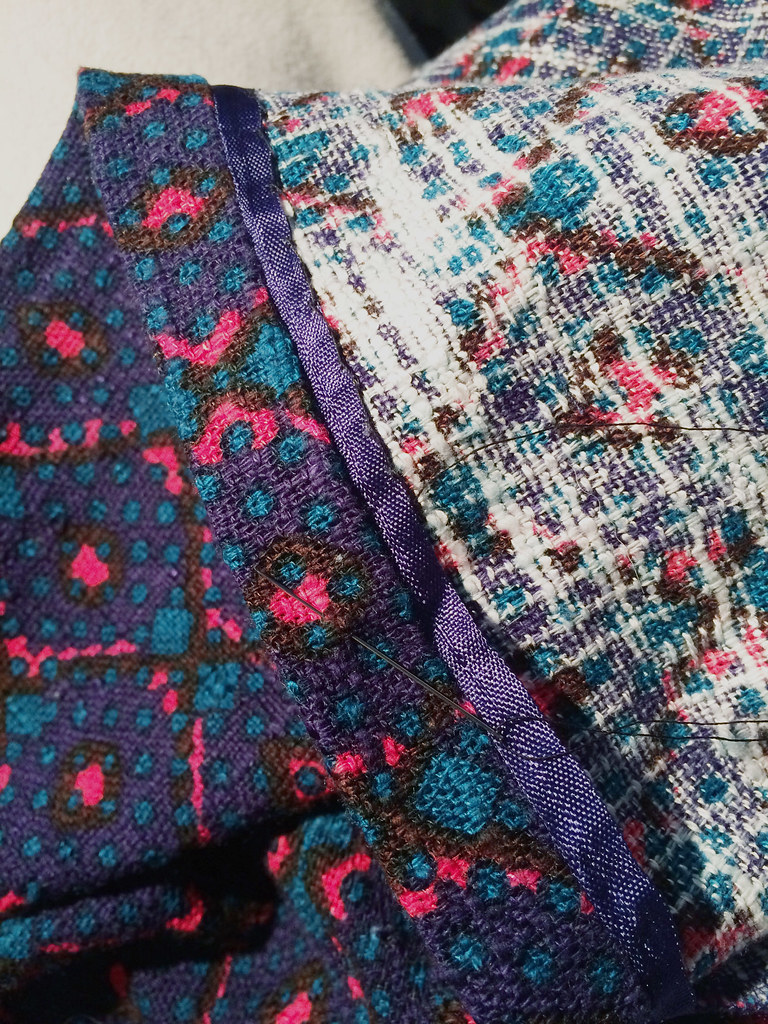
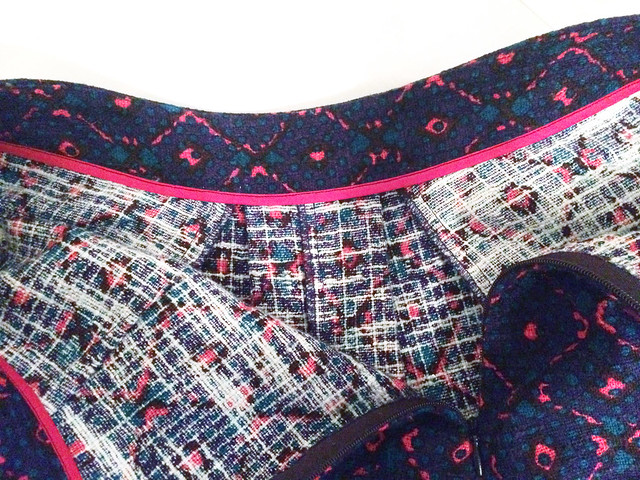
Culottes seem to be very trendy at the moment, and I’m clearly guilty of being bit by the bug! For these I used Style Arc’s Erin Woven Culotte pattern.  I love the deep pleats on the front and the way the pockets mirror the pleats.  I also love the jewel bright tones of this cotton woven and how they give these culottes a very bohemian feel.  This fabric has a very loose weave and a slubby, almost jute-like look, though with a much softer hand and drape.  It’s a bit more substantial than what the pattern called for, but I like the body it gives these culottes, while still keeping them airy for our sticky southern spring.

As with all Style Arc patterns, the instructions for these are minimal, and I actually took issue with a few of the steps.  For instance, they instruct you to baste the pockets in place along the top of the pants before doing the pleats, which as far as I could tell would result in your pockets getting folded up in the pleats.  Not only would this be bulky, it would also render those pockets pretty much useless! So just a heads up if you intend to make this pattern.  I honestly didn't fuss with the instructions too much since I've made a fair number of trousers in my sewing days and I'm pretty comfortable with the order of construction, and confident enough to come up with my own methods if I think the instructions don't make sense. However if you're new to sewing pants, these might not be the best ones to start with!  Or, go ahead and make them, just don't fold your pocket up into your pleats!!

Mood Fabricsimage1

Because of the loose weave, this fabric frayed like it was it’s job.  To combat this I serged all the raw edges as soon as I could, basically right after cutting, and I used fusible interfacing to reinforce the areas that I thought might lose some of it’s shape with wear – like the center back seat seam and the pocket openings.  I also bound the seam allowances at the waist and hems.  This was mostly for looks, since these culottes are unlined, but also to ensure I don’t start to unravel after a few wears.
image2Mood Fabrics
While the fraying may have been a bit of a headache, this cotton took heat and steam like a champ.  I just love how crisp those pleats are! And the stitches literally sank into the weave.  Honestly. Like, I was crossing my fingers I didn’t make any mistakes, because I don’t think I could have found my stitches to unpick if I tried!

Mood Fabrics

I'm glad I got this outfit out of my head and into my closet, if only because it's getting kind of crowded in there - my head, that is.  Although, come to think of it, my closet is a bit crowded these days too! But truly, that is one of my favorite things about sewing.  Before I knew how to sew I still had all these ideas for outfits floating around in my brain, and my only option for getting rid of them was to search the stores to find the closest approximation.  This wasn't particularly good for my wallet or my closet, as it usually ended with me impulse buying something completely different, and nowhere near closer to scratching that sartorial itch.

Although, if I'm being totally and 100% honest with you guys, I'm not completely convinced on the success of this outfit in reality.  I think my shoes and that kooky necklace that my Grandma gave me are really holding it together here.  But separately, I think these are really great pieces.  I've actually been wearing the top multiple days a week since I finished it earlier this month.  And I'm excited to try the culottes with a more structured or sleek silhouette up top - like a crop top or one of my Nettie bodysuits. Aren't separates the best?!

And speaking of handmade outfits - isn't Me Made May coming up??

xx
*Disclaimer: As part of the Mood Sewing Network I receive a monthly allowance to spend on fabric which I sew up into anything I want, then blog about first on the Mood blog, then on my own.  The fabric for this post was bought using my Mood allowance. 

10.09.2014

lounging

DSC_0014

I've said it before and I'll say it again: my life is really more of the 'leggings' 'jeans and a t-shirt' kind of grind than the 'pink jumpsuit' 'cocktail dress' affair I portray on this ol' blog. I'm pretty sure I'm not alone in that regard! Don't get me wrong, I wear the shit out of every damn garment I make, but that also means that I'm inappropriately overdressed for 99% of my daily activities. You should see me wield a weed-wacker in a pencil skirt, crop top, and espadrilles! It is truly a sight to behold!

DSC_0017

I've always enjoyed making wardrobe basics - things like jeans and t-shirts. I find that for every one of those items I make my wardrobe seems to expand tenfold. But my new endeavor takes things to even more casual places. I want to make a concerted effort to inject my wardrobe with more "softies" - comfy, casual clothing that can work, play, and snuggle with me. Because, really, isn't that what life is about?

DSC_0008DSC_0019

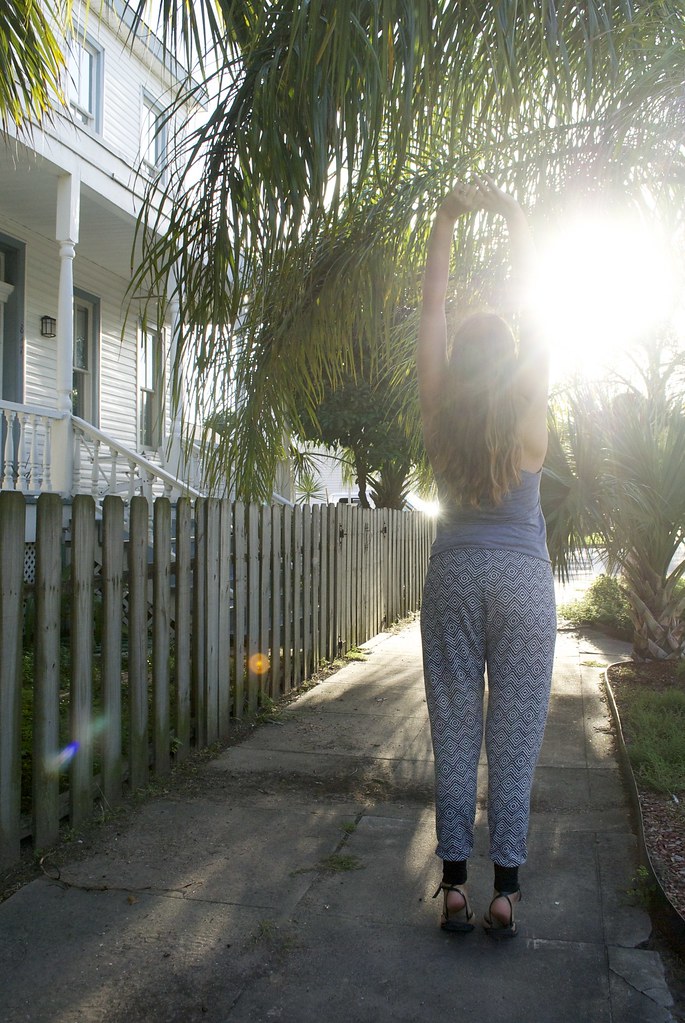
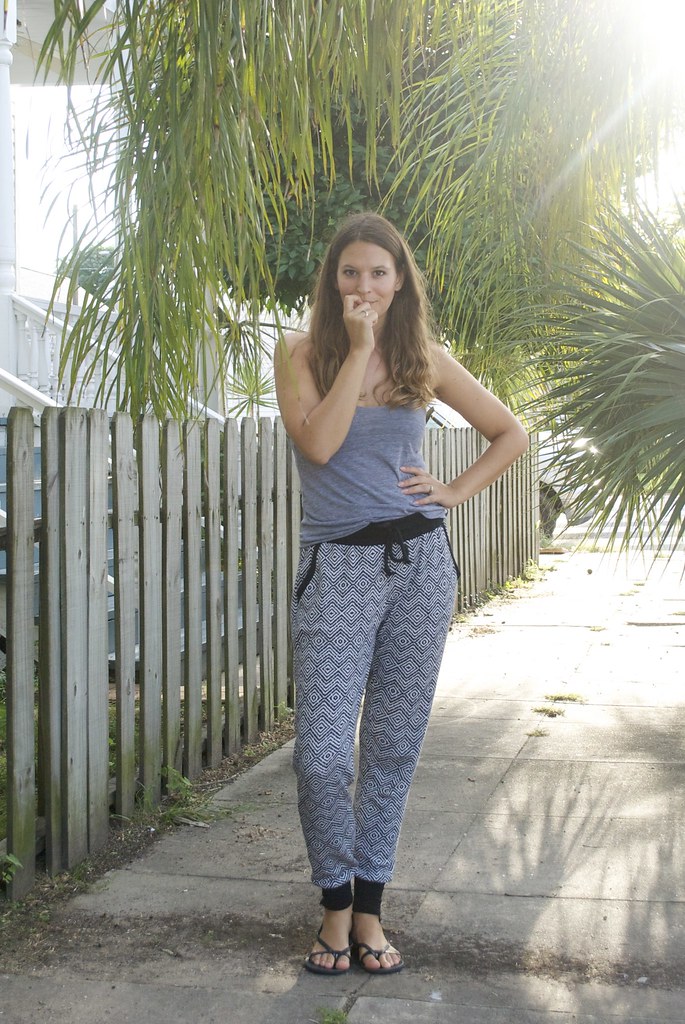
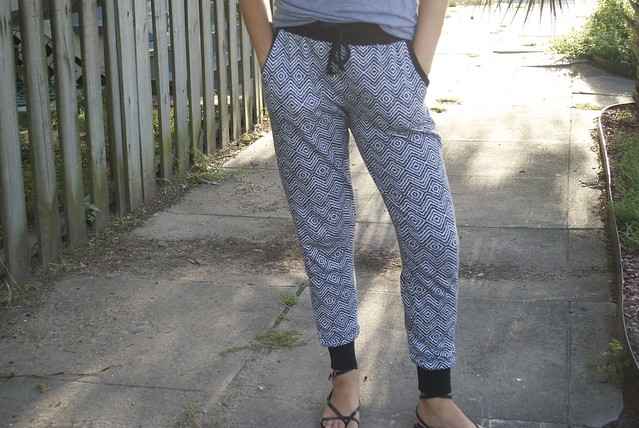
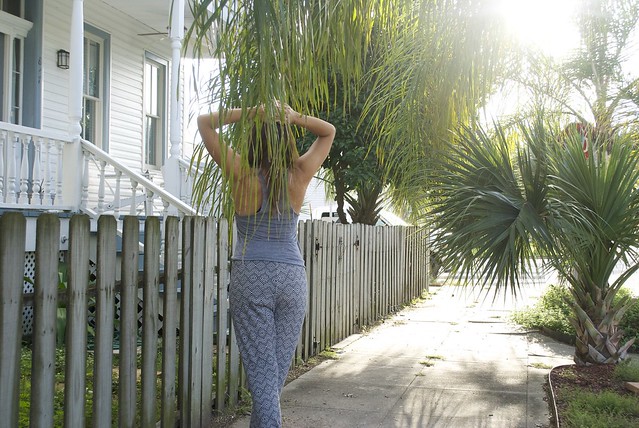
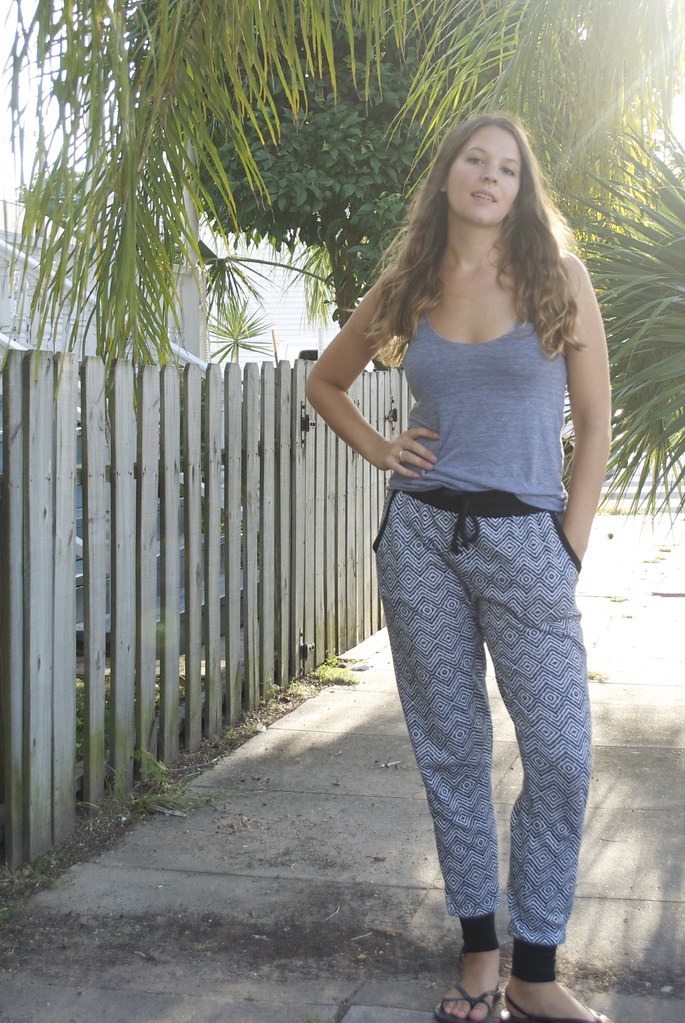
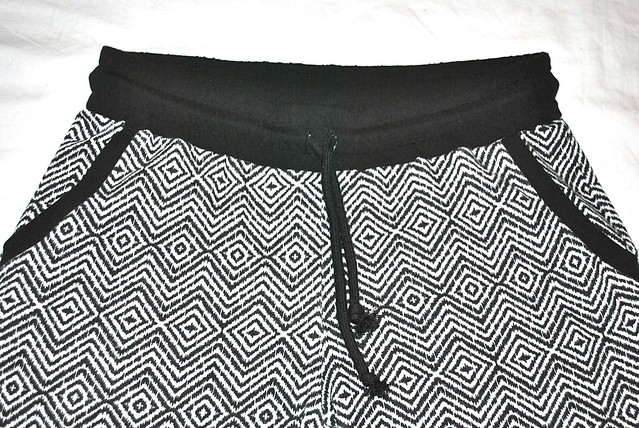
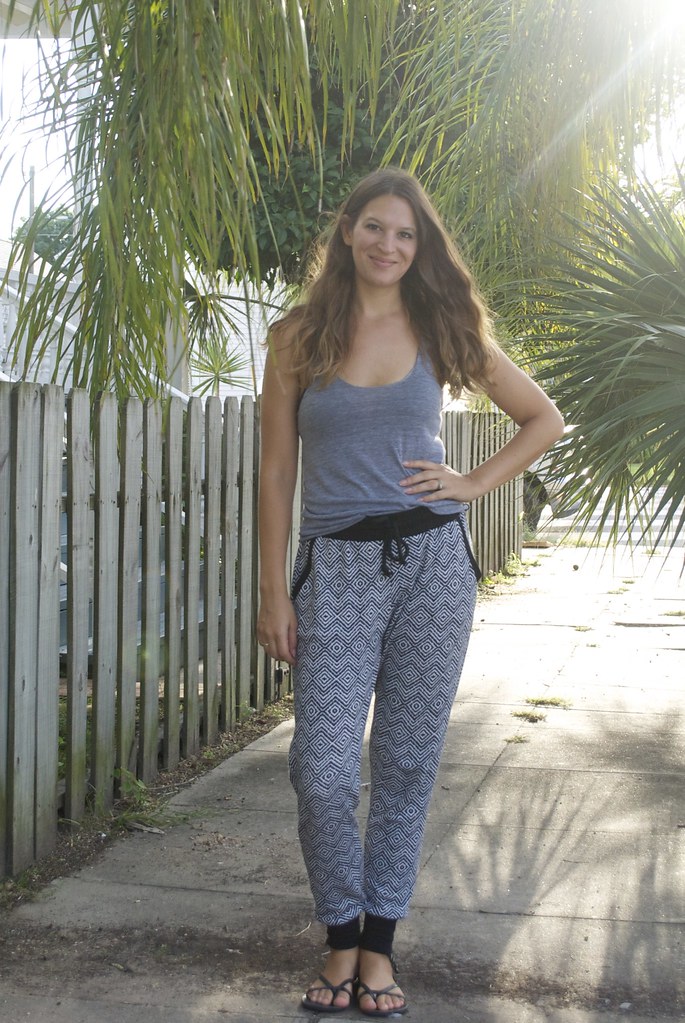
First stop on the Softie Sewing Journey are these cuh-razy, black and white, zigging and zagging, you-are-now-entering-the-twilight-zone, print Hudson pants. I've been waiting all summer for it to get cool enough for me to make this pattern. Spoiler Alert: it's still hot as balls here. But I went ahead and made them anyway. And proceeded to wear them all day. And experienced so. much. leg sweat. But it was WORTH IT  I tell you!

Kelli made a winner of a pattern! This pattern has everything that I love about indie patterns: on-trend styles with a modern cut and sizing, clear and easy to understand instructions, and great, everyday, wearability. These were a great quick project for me to knock out in between more involved sewing projects - almost instant gratification!

DSC_0004DSC_0005

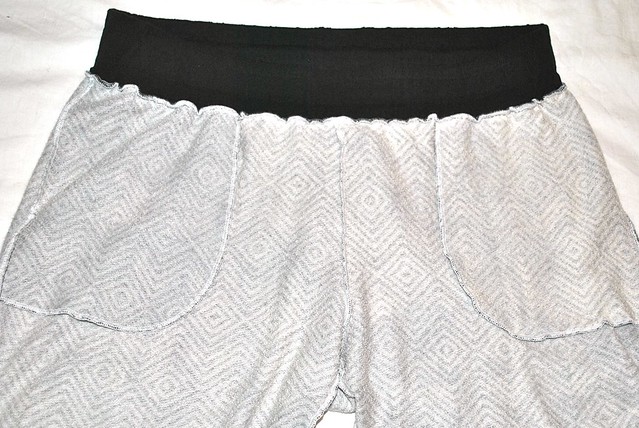
The fabric is a french terry from Girl Charlee (sold out, it seems). I wasn't really sure what french terry was, but I kept hearing it pop up on other blogs in reference to this pattern and it sounds kinda fancy, no? I mean, this ain't no Podunk Terry, this is Frennnncch Terry.  Which, if your curious, means it has a smooth face and a loopedy-looped textured back, like regular old terry cloth. So, yeah, not so fancy after all! But perfect for my Hudsons. They are a bit thicker than a regular cotton knit, but thinner than a sweatshirt fabric, falling somewhere in between. And that print was really what sold me. I've loved all the awesome print Hudson's I've seen pop up all over the internet (like these and these) and I wanted to get in on that action. The  black contrast fabric is some leftover cotton lycra, from this project, and also, incidentally from Girl Charlee. I picked up my black drawstring from none other than JoAnn's.

DSC_0009

I made this pattern up exactly as drafted, which worked out fine, especially since it has such an easy fit. I followed Kelli's instructions to choose your size based on your hip measurement, which put me at a size 8, which was a whopping two sizes bigger than my waist measurement according to the size chart! I think overall this resulted in a more relaxed, 'fancy sweatpants' sort of look than some of the more 'legging' like varieties I've been eyeing. I'm okay with this for this pair, but maybe I'll size down in the legs for future pairs. Especially since, after wearing for a day, I can see that this french terry doesn't have the best recovery and tends to bag out, particularly in the knees and butt. I actually emailed Kelli to ask her about fit and she mentioned that I may want to baste, try on, and take in the legs to get the fit I'm after. I, of course, was too excited to wear my finished pants to do this, but I'll keep it in mind for next time! I did sew the ankle band a bit smaller than instructed, because I got some scrawny ankles.

DSC_0007

And that's about it! My plan is to alternate some of these comfy, lounge-y, clothes with more sophisticated makes this fall and winter. I think, mentally, this is a good strategy so I don't overwhelm my brain with allll the difficult makes at once and then go numb with allll the quick and easy knits in one go. Variety is the spice of life! 

I can't wait for it to actually get cooler so I can style these pants with layers - I'm thinking button down shirts and blazers paired with ankle boots to get a more sophisticated, and even professional (and sneakily pajama-esque) work look. Even though I totally wore this to work today like this. You just can't teach an old dog new tricks... I will forever be trying to make my life more fancy than it is! Even in sweatpants!!

xx
6.18.2014

candy striper

DSC_0044

Do you guys remember that part in Sex and the City when Big is in New York for heart surgery and Carrie can't stop crying, and she goes to his hotel room where he's recuperating all dressed up like a sexy candy striper to keep him company, and they play games all night, and as they're falling asleep Big is like, "Kid, what are we doing?", and we're all like, "YES! Big finally gets it!", but then in the morning they wake up and he's all distant, and dick-ish, and kicks over the dominos, and we're like, "God dammit! Why do I even watch this show?!?" ?

Yeah... me too...

DSC_0037

This post has nothing to do with that. Except that anytime I see a fabric with thin red lines (especially if they're vertical) I inevitably think of the traditional candy striper uniform (and not necessarily the sexy kind!)

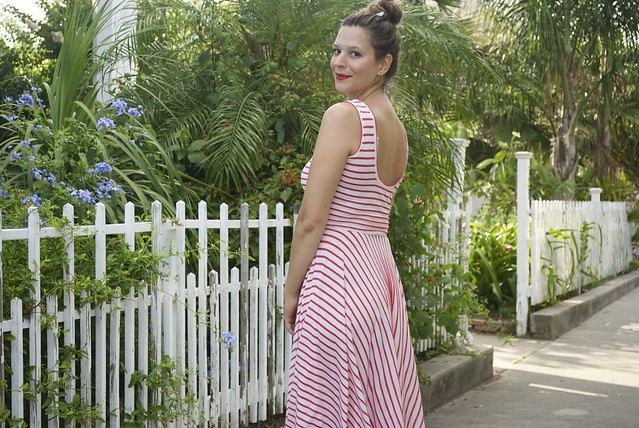
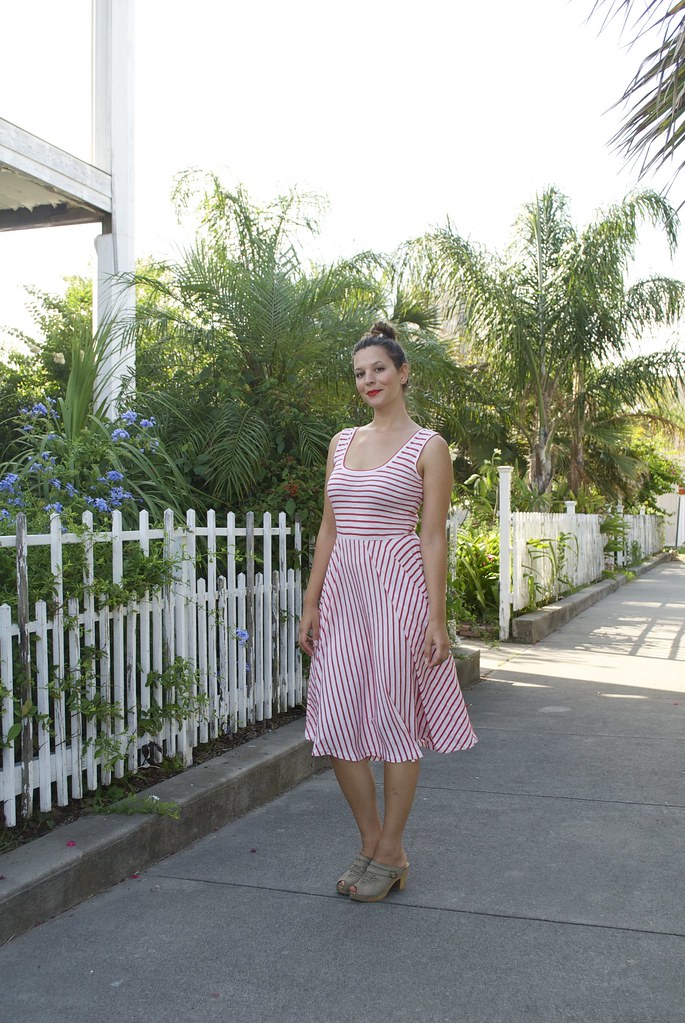
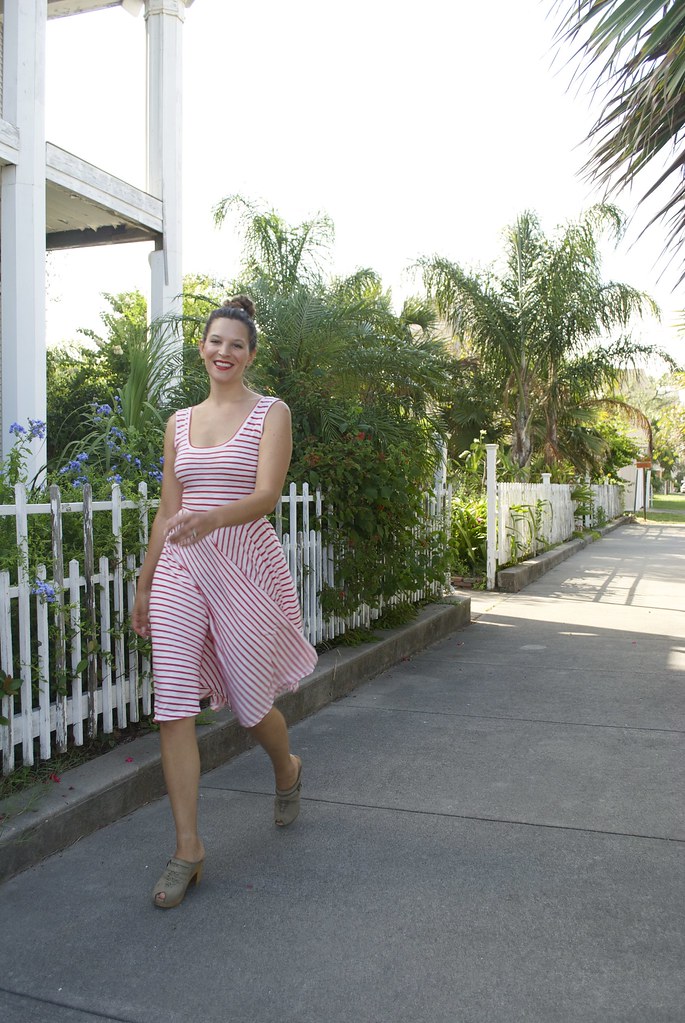
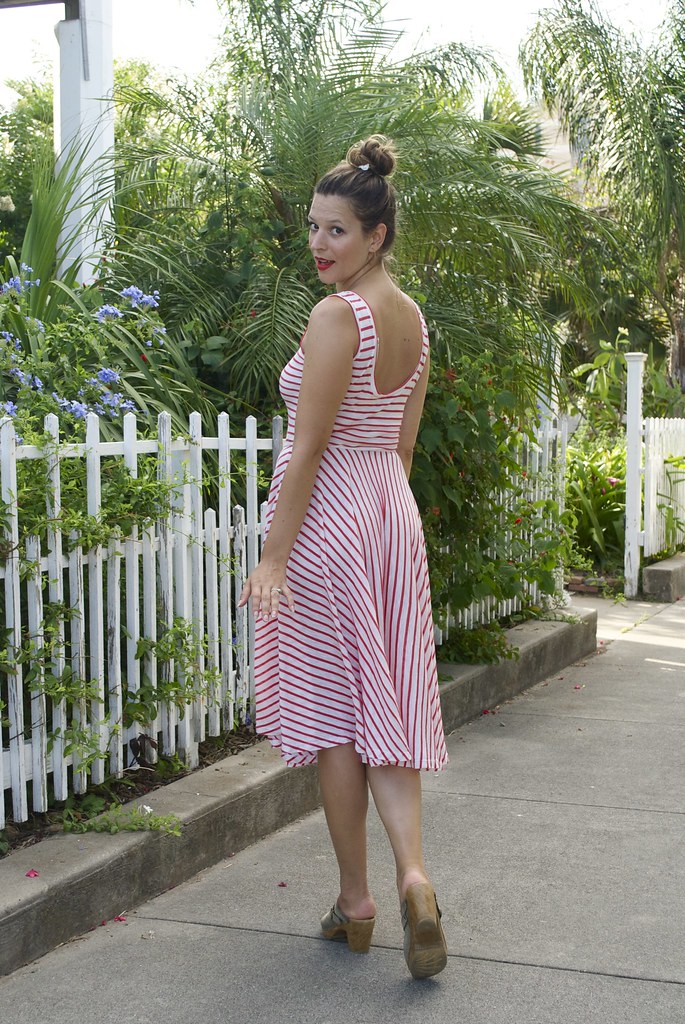
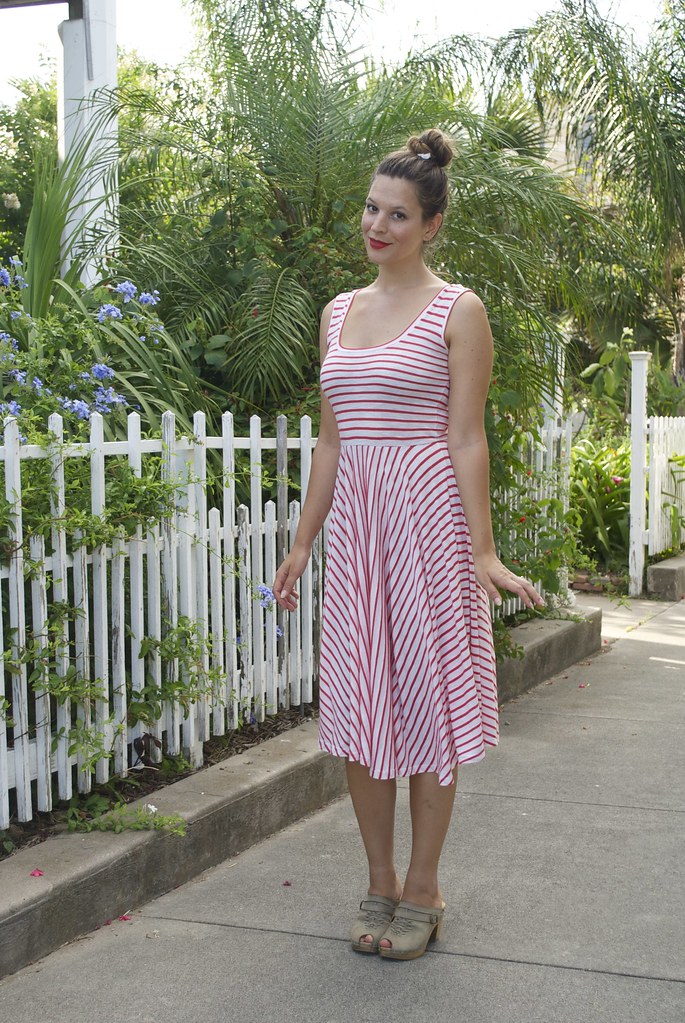
But enough of my free associating! I made a new dress! A simple, classic, easy breezy, knit dress - perfect for pulling on and feeling 'done' in a matter of seconds. I love it for work, I love it for the weekends, I love it for the swelteringly hot summer days we've been having, and for the many more that are yet to come! 

DSC_0051

This is my first, of (hopefully) many, Nettie hack dresses (and before you even ask, yes I am aware that my hem is uneven... more on that in a bit). Ever since making my black Nettie bodysuit I've been scheming up ways to work that pattern, because that little bodysuit has been getting a lot of wardrobe play! My favorite way to wear it is with fuller skirts, so when I was planning a Nettie hack it seemed like a no brainer to pair the top of the bodysuit with a full skirt. There are plenty of patterns out there to create a similar dress (Kitschy Coo's Lady Skater dress, and Colette's Moneta come to mind, but I'm sure there are others). However, this was such an easy pattern hack that it seems a bit silly to purchase another pattern. That Nettie is proving to be quite the versatile little pattern!

DSC_0018

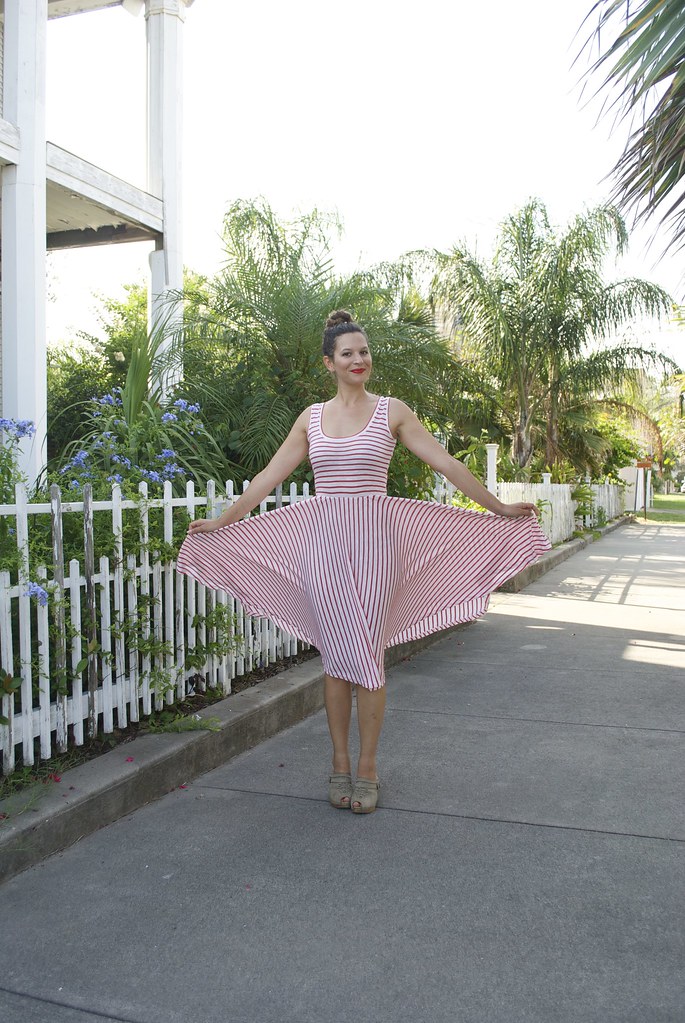
To make this I simply tried on my Nettie bodysuit, made a mark where my natural waist fell, then took it off and transferred that mark to the flat pattern (for reference, on me, it was about 1 inch below the second 'lengthen/shorten' line). Then I drafted a half circle skirt using my actual waist measurement, which is 27.5 inches, and the length I wanted the skirt to be, 26 inches (my preferred midi length), and with the help of the BHL circle skirt app, was able to figure out the maths and draw it up. I cut two half circles and sewed them together at the side seams to make a full circle (of course this was my intention all along so I took that into account when figuring out the waist radius. If this is making your head hurt, don't worry, mine hurts way worse!)

DSC_0032

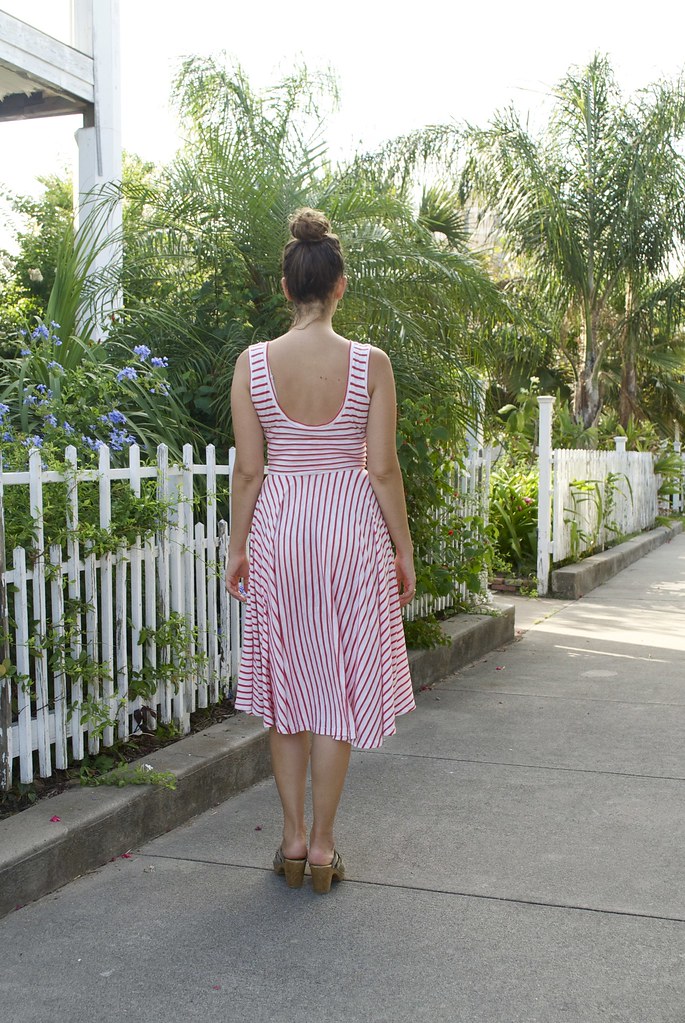
I suspect my less-than-accurate method of circle skirt drafting could use some work, because as you can see in some of these photos, the hem dips down in one area on both the back and the front. This would have been an easy thing to catch had I taken a second to try on the dress before I hemmed it, but I was in such a rush to wear the damn thing I went full speed ahead! It wasn't until I donned the finished dress and paraded out to the living room to show Nick that I discovered my error. It went a little something like this:

Me: Hey! How do you like my new dress!
Nick: (wolf whistles and other prerequisite admiring sounds) Looks great! I especially love the uneven hem!
Me: WHAT DO YOU MEAN 'UNEVEN HEM'????!!!!

Of course I could go back and fix the uneven areas, but let's be real, I'm not going to. I can live with a little hem dip if you can.

DSC_0046

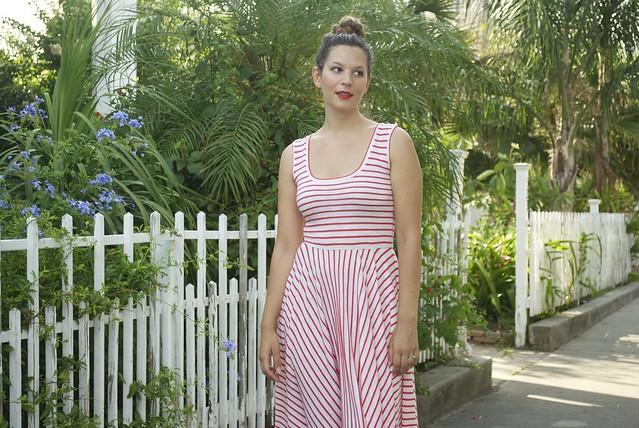
The fabric is a cotton jersey with a "Persimmon Red Slub Stripe" from Girl Charlee. It has about 30% width wise stretch, and not much vertical stretch. It's slightly sheer, but I just couldn't bring myself to line it (re: swelteringly hot) so nude undergarments are a must! I love the slightly preppy look of stripes in summer dresses, and playing with stripe direction is always fun when planning a garment. I love the way the stripes change direction across the circle skirt - it makes this garment look much more complicated than it is!

DSC_0045

There's not too much to say regarding the actual construction of the dress. I used a long zig-zag stitch, and a walking foot, to baste all the seams before sewing them on the serger to ensure that all my stripes matched up. I used clear elastic to stabilize both the shoulder and the waist. For the waist, I cut my elastic to fit the un-stretched waist of the bodice (26 inches), then first basted my skirt to the elastic, stretching the elastic as I went to create an even gather at the skirt waist. Then I serged the bodice and skirt together. This creates a nice, straight, waistline. As you can see, I left off the sleeves to the Nettie and instead used the same flat-binding method that is used for the neckline to finish the armholes. The hem, predictably, took forever. I first serged the raw edge, then sewed a long gathering stitch along the edge, turned it up and eased in the fullness, pressed it and stitched it down with a twin needle. Besides the uneven-ness, the hem is quite pretty!

DSC_0041

And for the second non-sequitor of this post, let's talk real quick about bodies - somehow it just feels so tied up with sewing your own wardrobe, and this dress is a great example of how making my own clothes has changed the way I feel about my body. This past weekend I was getting caught up on some blog reading and I read this post from Sarai over at the Coletterie which really resonated with me. I agree with pretty much all her points, but the one that really stood out to me was "Body Attitudes Change". Not to completely reiterate Sarai's post, but, you guys, bodies change!! And what's even more, the way we feel about our body, and in our body, and what we put on our body changes too. Even just a year ago I would not have considered this silhouette particularly flattering on me, but now, I just can't get enough of it! For the record, while my body is healthy and strong and (I feel) beautiful, I am not at my thinnest, nor my most toned. I lead an active life, but I don't really exercise, and as I get older it shows. You would think I'd be more comfortable in the looser clothes I used to favor, or ones that don't highlight my wide(er) waist, and full(er) upper body. Don't get me wrong, I still love my loose, billowy styles, it's just these days I've been feeling prettier, and more like 'myself' in curve-hugging silhouettes. At times it's almost felt like an identity crisis! 

It's extremely interesting to think about the way your body evolves in relation to the way your tastes and style evolves. It doesn't always work the way you think. I can't say whether these styles, like the dress here, are 'technically flattering' for my body 'type' (whatever that means). But I do know that I feel good in them, and to my eye, I don't look too shabby either.

What about you guys, has your tastes or style evolved in relation to your body changes? Has it surprised you?

xx