Showing posts with label pants. Show all posts

9.06.2016

sallie from the block

Safran Jeans

When I put on this outfit I wasn't totally sure if it was working - like, I wasn't sure if what I thought I looked like was representative of what I actually looked like.  Far too many times I've left the house thinking "hell yeah, I am one fine-ass lady" only to see a photo of myself, or a reflection in a window and realize "what the hell was I thinking?? I can't pull off a crop top..." or whatever.  To be fair, that false sense of confidence has gotten me through life pretty well - I think I do a pretty good job of fooling myself and, to a lesser degree, the people around me into thinking I am way cooler than I am. But sometimes I need a reality check.  So I do what I normally do and turned to Nick (note: while this is an outside opinion, it's a pretty biased one as a) he truly does think I'm a fine-ass lady and b) he might be a bit generous with the truth in order to, you know, avoid hurting my feelings, tactful guy that he is. But this still serves my purpose because, as I've noted above, I've been pretty happy in my self-delusion, and a biased outside opinion is really what I'm after).  So I asked him if I indeed looked as hot in reality as I thought I did in my head.  He told me that my shoes were unbuckled and flopping about and that made me look silly (I hadn't totally finished dressing when this conversation took place). Then he told me that if I had a pair of Timberland's I could pull off a "Jenny from the block" look, which basically told me all I needed to know. Any reference -- no matter how skewed or distant -- to JLo and her butt is good enough for me! 
Safran Jeans

And that, my friends, is the long-winded explanation of this post title! Don't you just love my ramblings? Isn't this what you come to this blog for? No? It's not? See, there goes that self-delusion again!

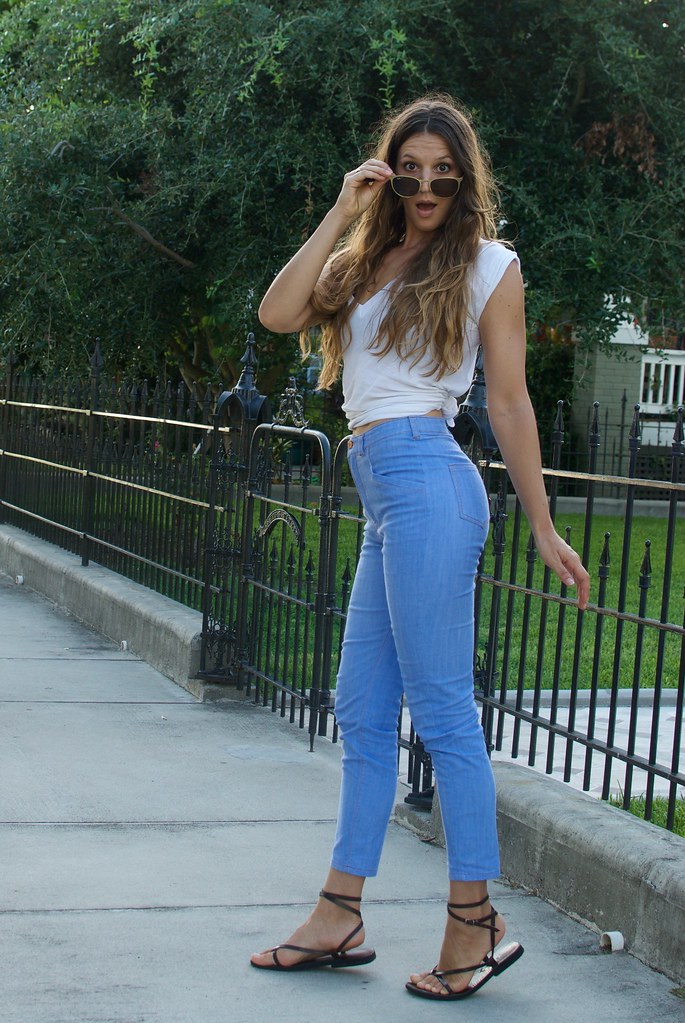
Fine, fine, fine! Let's talk sewing! Let me introduce you to my Safran jeans! This is the newest pattern from Deer and Doe.  They reached out to me, along with a few other ladies, a few weeks ago to see if I would be interested in making up the pants and blogging about them in exchange for an advanced copy of the pattern.  I always love a good pants pattern, and sewing jeans is actually one of my favorite things to make, and this pattern has some really fun details, so I said of course! And eagerly gathered my supplies.
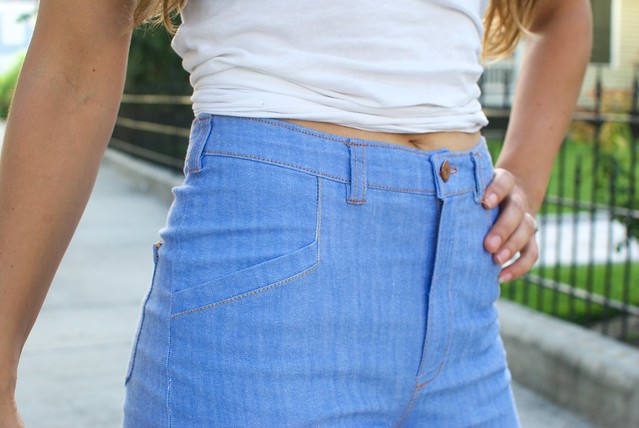
Safran jeansSafran Jeans

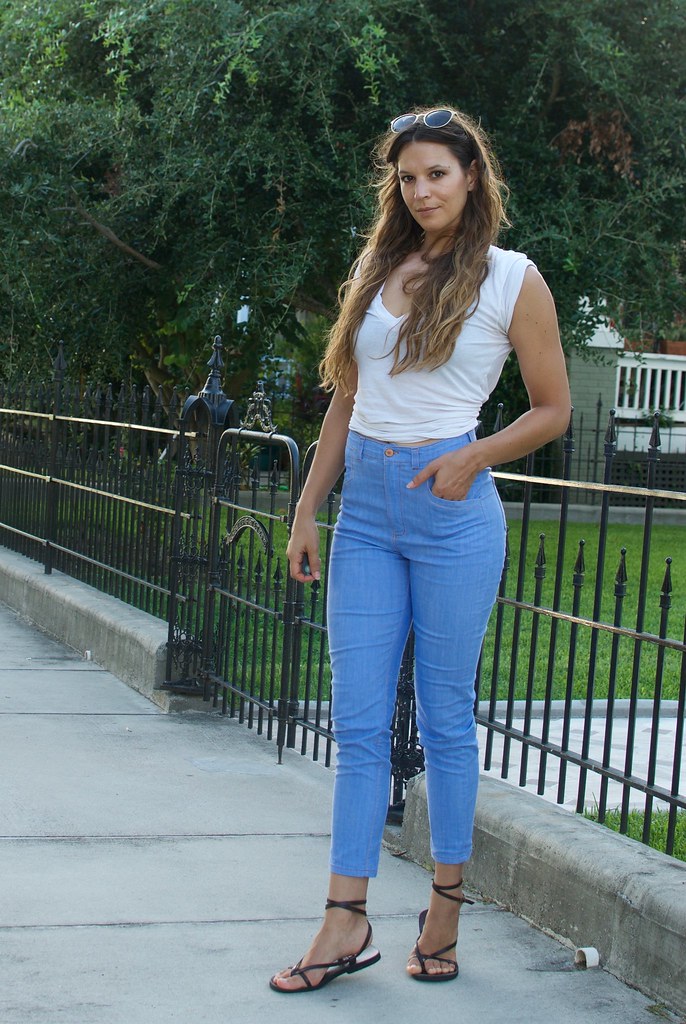
I really love the high waist of these jeans, the cropped length, and the angled faux-welt front pocket. Those were the details that really sold this pattern to me.  Overall they are pretty light on classic "jeans" styling, and could easily be made into a cute pair of cigarette trousers should that be your inclination.  Me? I love a healthy dose of topstitching, so I went the whole hog with gold topstitching thread, which I think really pops on this periwinkle blue stretch denim I got from Mood.

The actual construction of these jeans was pretty easy and straightforward for me, having made a fair few pair of jeans in the past.  I followed the instructions for those front pockets, and from there I just sewed according to my own preference.  I glanced at the instructions for the fly front and wasn't too impressed so I followed my usual method - which at this point is a combination of Closet Case Files fly front instructions and Grainline Studio's (I prefer Grainline's order for attaching the fly facing, but like Closet Case Files' for getting the topstitching right).
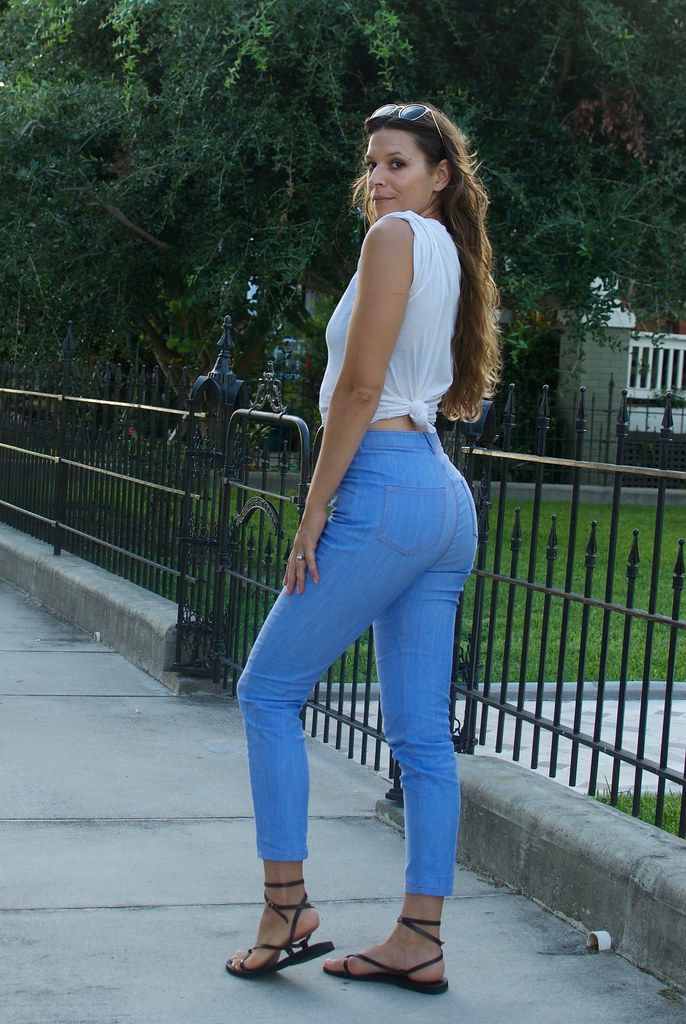
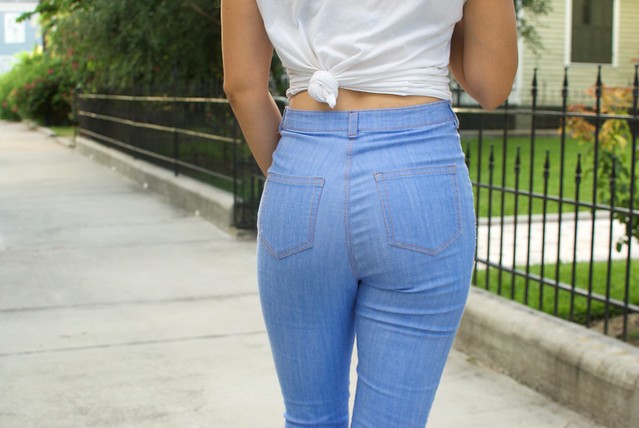
Safran JeansSafran Jeans

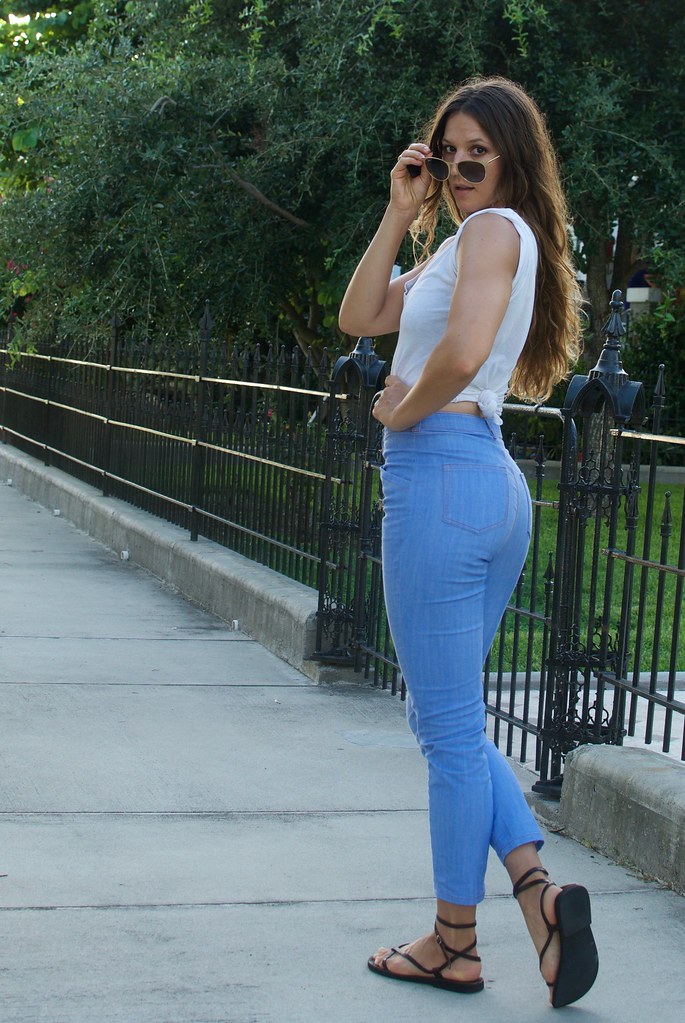
I had a few issues with the fit of these jeans, however after looking at these pictures I'm wondering if its all in my head...?

First of all, let me just say that I am not a perfectionist when it comes to fitting anything, but especially skinny pants made in stretch fabrics.  Some wrinkling and pulling is part of the territory. Also, as a second disclaimer, my body has changed in the past year and I haven't totally got a handle on the fitting problems I might be encountering as a result.  And finally, I'm not a fan of picking apart my makes on my blog - nothing is ever perfect, and I'm okay with that.  But since I encountered various fit issues with this pattern I thought I would tell you about them.

Before sewing these together I basted them to test the fit, as it was a new-to-me pattern, and a new-to-me pattern company.  As I said, I can ignore some pulling and wrinkling on this type of pant, but what does bother me is obviously curved or twisting side and inseams, excessive bunching at the knees and waistline gaping.  I was experiencing all three.  Even though I feel like these pants are cut to accommodate a curvier rear end, I was experiencing a significant amount of gaping at the back waist.  That was easy to fix by taking a wedge out of the center back seam (although I still think I'm getting some excess fabric back there - those horizontal ripples are actually being caused by the waist being too loose and the waistband wanting to slide down).  But the real head scratcher here was in the legs.  My side seams were very curved towards the front of my thighs, and at the ankle the side seam wanted to twist towards the front of my ankle.  My first instinct was that I must have cut the pants off grain, but on further inspection I noticed that the inseam was perfectly straight -- if the pants were off grain the whole leg would be twisting, not just one seam.  The knee area was particularly uncomfortable as there was an excess of fabric bunching up and sort of rotating around my knee.  I'll tell ya, friends, I was stumped as to what was going on! I did what any modern sewist would do and took to Instagram to let my smarter sewing friends diagnose my problems for me.  The overwhelming consensus was that it looked like I needed a full calf adjustment (what?! that's definitely not a problem I've ever had before...) and also that the front thigh was too tight.  As these pants were already cut, any adjustments I was going to make had to happen within the 5/8 seam allowance. So I let out the back calf area and the front thigh area and it seemed to make some difference, but I still feel that slight twisting along the side seam, and it annoys me.
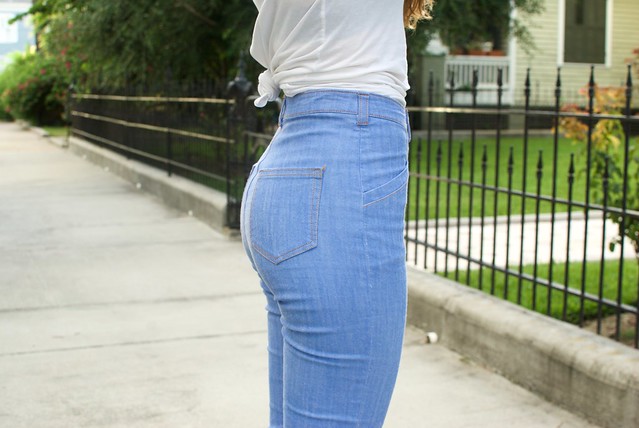
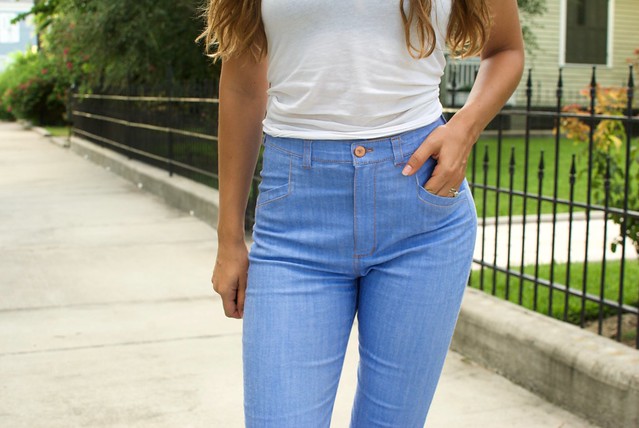
Safran JeansSafran Jeans

Just for comparison I laid my Safran jeans pattern over top of my Ginger jeans pattern (which fit me well) to compare, and the entire cut of the leg is totally different.  The Safran jeans are based on a much straighter block, where the Ginger jeans angle inwards from the hips to the ankles.  Not to get all anatomical here, but I think the more angled cut of the Ginger jeans mimics the natural angle of the femur in most women -- from a wider pelvis to a narrower knee -- than the straight cut of the Safran jeans. This, I think, makes for a straighter side seam, and less twisting and bunching at the knee. I don't think of myself as having full thighs or calves, but my body is undeniably more muscular than it was a year or so ago, and so my thinking is that while the Safran jeans are cut to accommodate a rounded rear end, they may not take into account a muscular thigh - particularly a developed quadricep.  Again, I don't think I have killer quads, but compared to the rest of my proportions (i.e. my waist measurement) they are fuller than this pattern allows for. Frankly, I think my booty to waist ratio was a bit more than this pattern was prepared for too! But thank goodness for stretch denim!
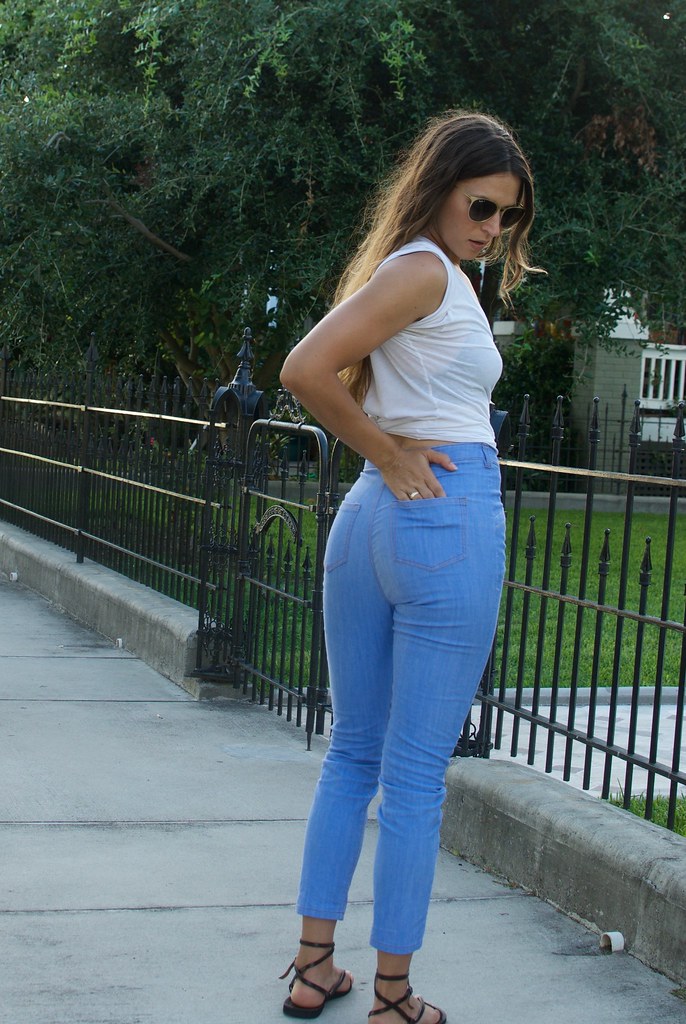
Safran Jeans

All in all though, these pants have been getting their fair share of wear.  As I said before, I love the high waist and the angled pockets, and the bright blue of this denim feels very fresh to me right now. The denim does stretch out after a full day of wearing, and it's most noticeable in the waist which starts to slide down, giving me the dreaded "load in her pants" look that can happen with high waisted jeans.  However, after a quick wash they are back to making me feel like a babe, so I'm ok with that! I think with a few tweaks to the shape of the leg this pattern could definitely see some future iterations. I love it in colored denim, and I just so happen to have some purple orchid colored denim sitting in my stash... Purple pants, anyone??

Hmmm... that might be that self-delusion talking again....


xx

10.09.2014

lounging

DSC_0014

I've said it before and I'll say it again: my life is really more of the 'leggings' 'jeans and a t-shirt' kind of grind than the 'pink jumpsuit' 'cocktail dress' affair I portray on this ol' blog. I'm pretty sure I'm not alone in that regard! Don't get me wrong, I wear the shit out of every damn garment I make, but that also means that I'm inappropriately overdressed for 99% of my daily activities. You should see me wield a weed-wacker in a pencil skirt, crop top, and espadrilles! It is truly a sight to behold!

DSC_0017

I've always enjoyed making wardrobe basics - things like jeans and t-shirts. I find that for every one of those items I make my wardrobe seems to expand tenfold. But my new endeavor takes things to even more casual places. I want to make a concerted effort to inject my wardrobe with more "softies" - comfy, casual clothing that can work, play, and snuggle with me. Because, really, isn't that what life is about?

DSC_0008DSC_0019

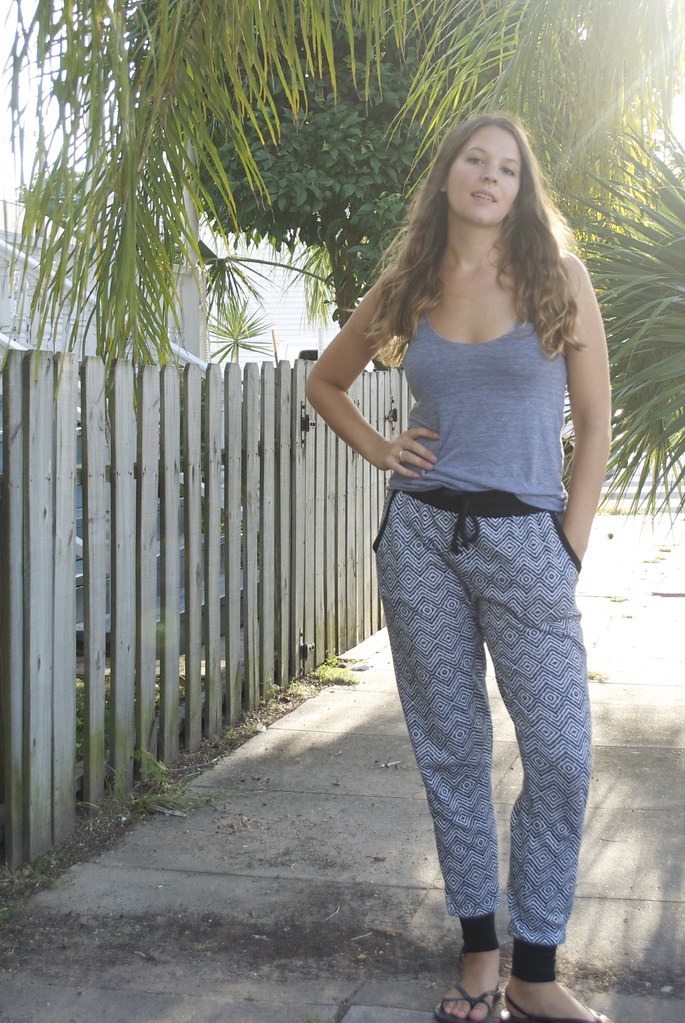
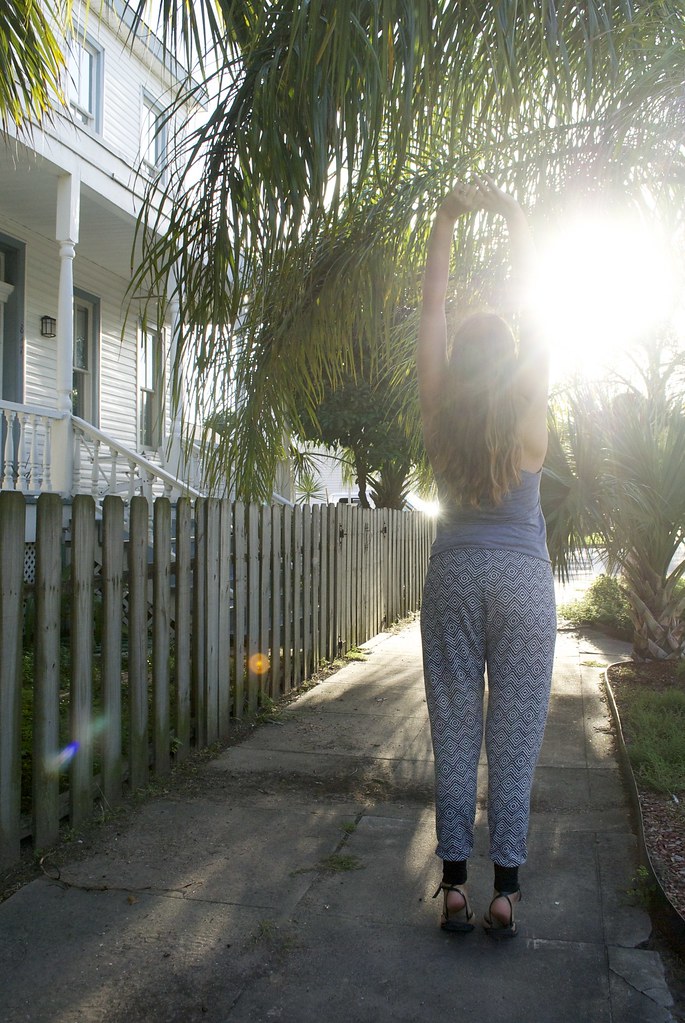
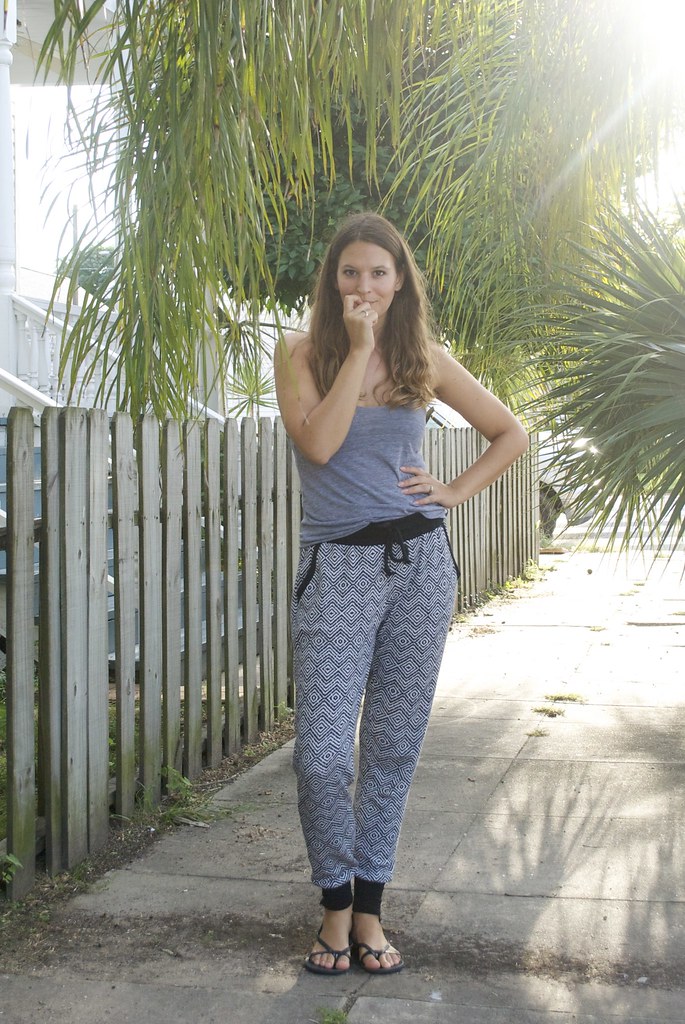
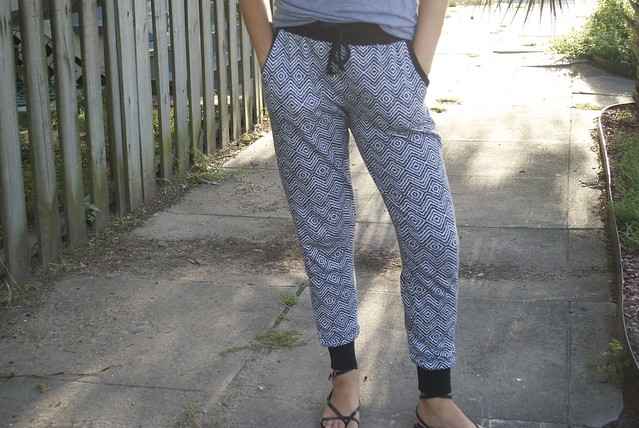
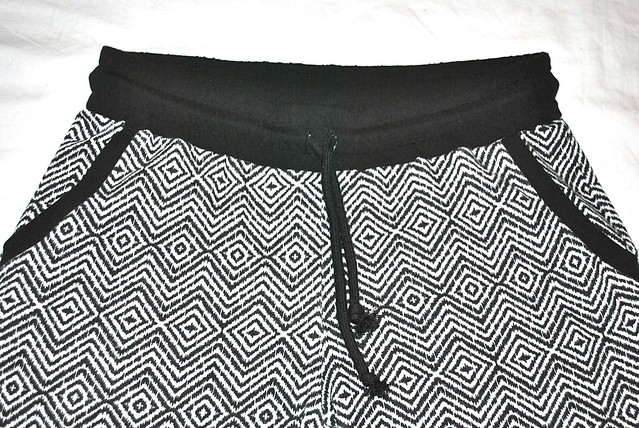
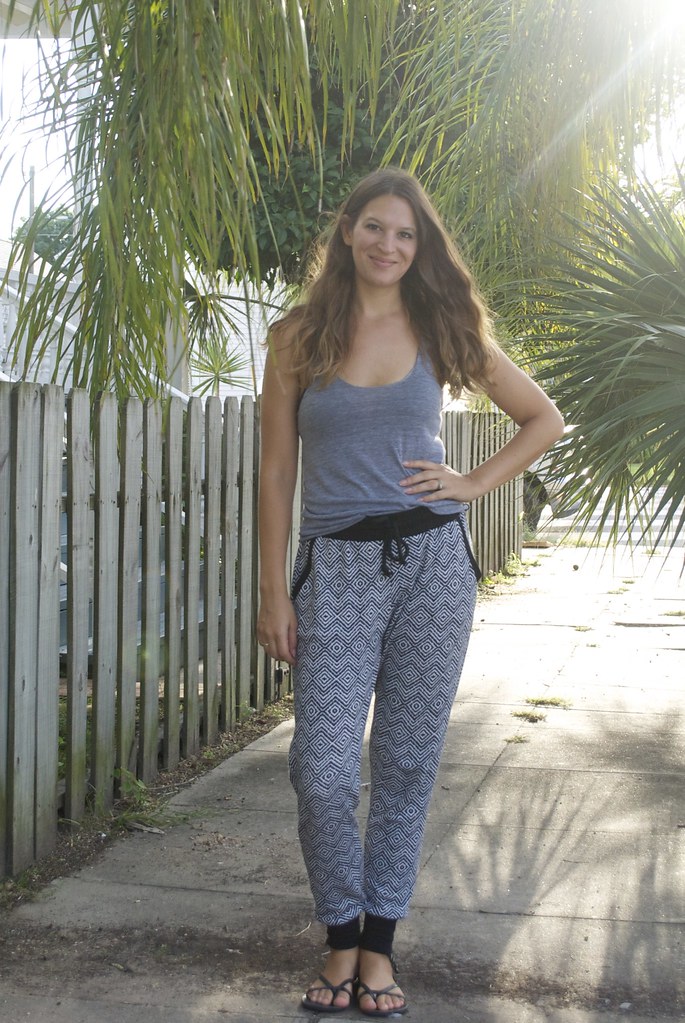
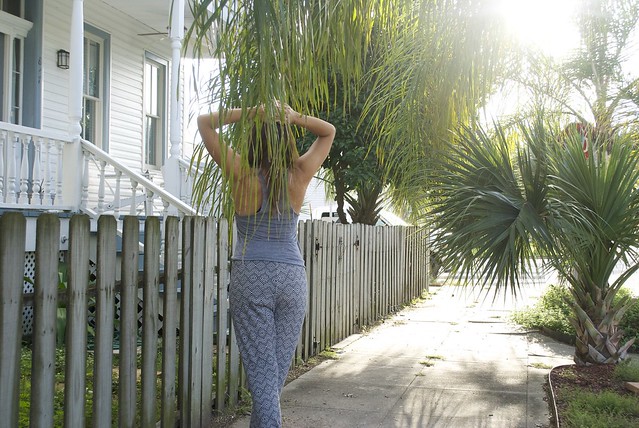
First stop on the Softie Sewing Journey are these cuh-razy, black and white, zigging and zagging, you-are-now-entering-the-twilight-zone, print Hudson pants. I've been waiting all summer for it to get cool enough for me to make this pattern. Spoiler Alert: it's still hot as balls here. But I went ahead and made them anyway. And proceeded to wear them all day. And experienced so. much. leg sweat. But it was WORTH IT  I tell you!

Kelli made a winner of a pattern! This pattern has everything that I love about indie patterns: on-trend styles with a modern cut and sizing, clear and easy to understand instructions, and great, everyday, wearability. These were a great quick project for me to knock out in between more involved sewing projects - almost instant gratification!

DSC_0004DSC_0005

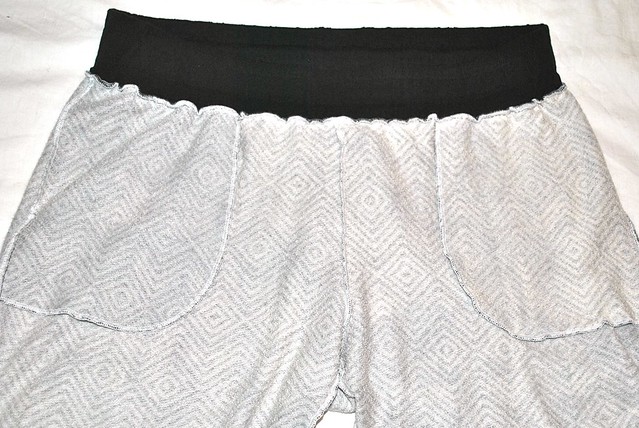
The fabric is a french terry from Girl Charlee (sold out, it seems). I wasn't really sure what french terry was, but I kept hearing it pop up on other blogs in reference to this pattern and it sounds kinda fancy, no? I mean, this ain't no Podunk Terry, this is Frennnncch Terry.  Which, if your curious, means it has a smooth face and a loopedy-looped textured back, like regular old terry cloth. So, yeah, not so fancy after all! But perfect for my Hudsons. They are a bit thicker than a regular cotton knit, but thinner than a sweatshirt fabric, falling somewhere in between. And that print was really what sold me. I've loved all the awesome print Hudson's I've seen pop up all over the internet (like these and these) and I wanted to get in on that action. The  black contrast fabric is some leftover cotton lycra, from this project, and also, incidentally from Girl Charlee. I picked up my black drawstring from none other than JoAnn's.

DSC_0009

I made this pattern up exactly as drafted, which worked out fine, especially since it has such an easy fit. I followed Kelli's instructions to choose your size based on your hip measurement, which put me at a size 8, which was a whopping two sizes bigger than my waist measurement according to the size chart! I think overall this resulted in a more relaxed, 'fancy sweatpants' sort of look than some of the more 'legging' like varieties I've been eyeing. I'm okay with this for this pair, but maybe I'll size down in the legs for future pairs. Especially since, after wearing for a day, I can see that this french terry doesn't have the best recovery and tends to bag out, particularly in the knees and butt. I actually emailed Kelli to ask her about fit and she mentioned that I may want to baste, try on, and take in the legs to get the fit I'm after. I, of course, was too excited to wear my finished pants to do this, but I'll keep it in mind for next time! I did sew the ankle band a bit smaller than instructed, because I got some scrawny ankles.

DSC_0007

And that's about it! My plan is to alternate some of these comfy, lounge-y, clothes with more sophisticated makes this fall and winter. I think, mentally, this is a good strategy so I don't overwhelm my brain with allll the difficult makes at once and then go numb with allll the quick and easy knits in one go. Variety is the spice of life! 

I can't wait for it to actually get cooler so I can style these pants with layers - I'm thinking button down shirts and blazers paired with ankle boots to get a more sophisticated, and even professional (and sneakily pajama-esque) work look. Even though I totally wore this to work today like this. You just can't teach an old dog new tricks... I will forever be trying to make my life more fancy than it is! Even in sweatpants!!

xx

6.10.2014

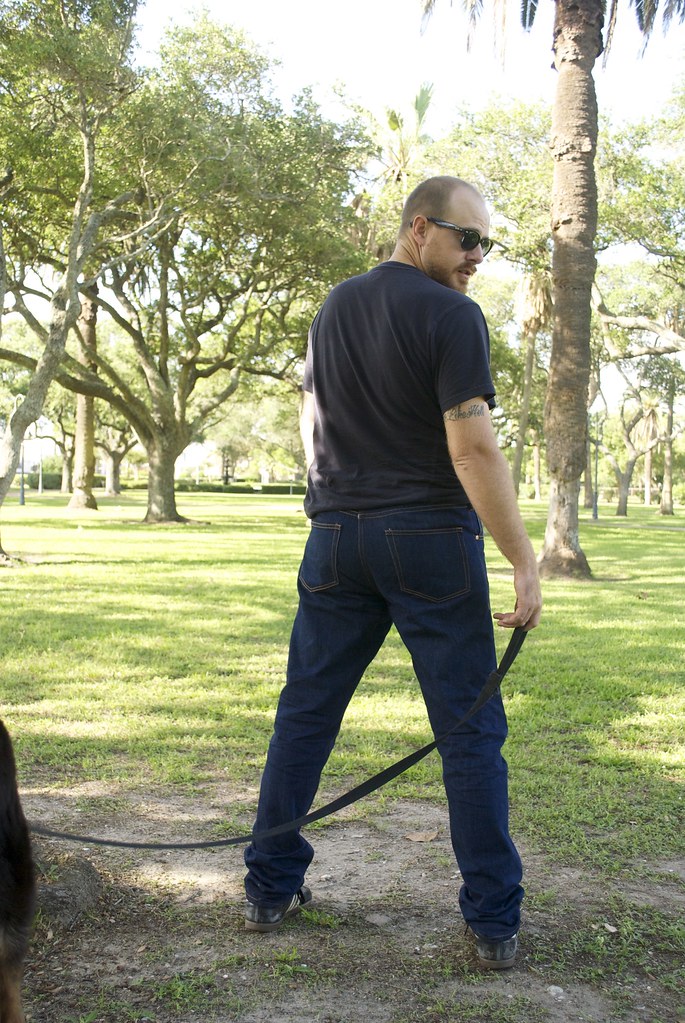
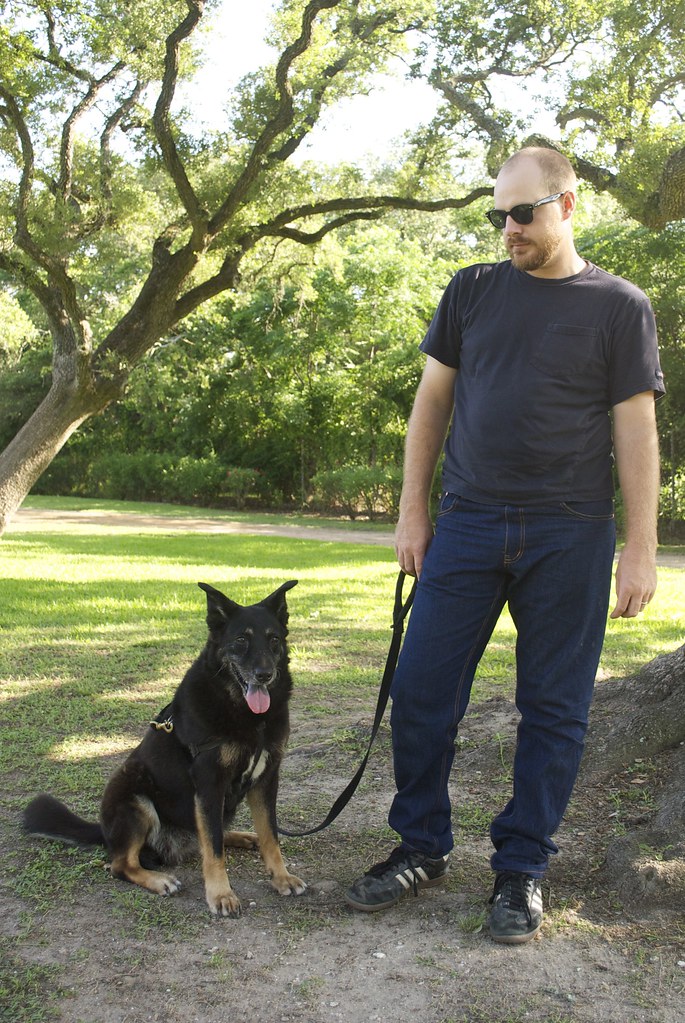
nick's jeans

DSC_0019
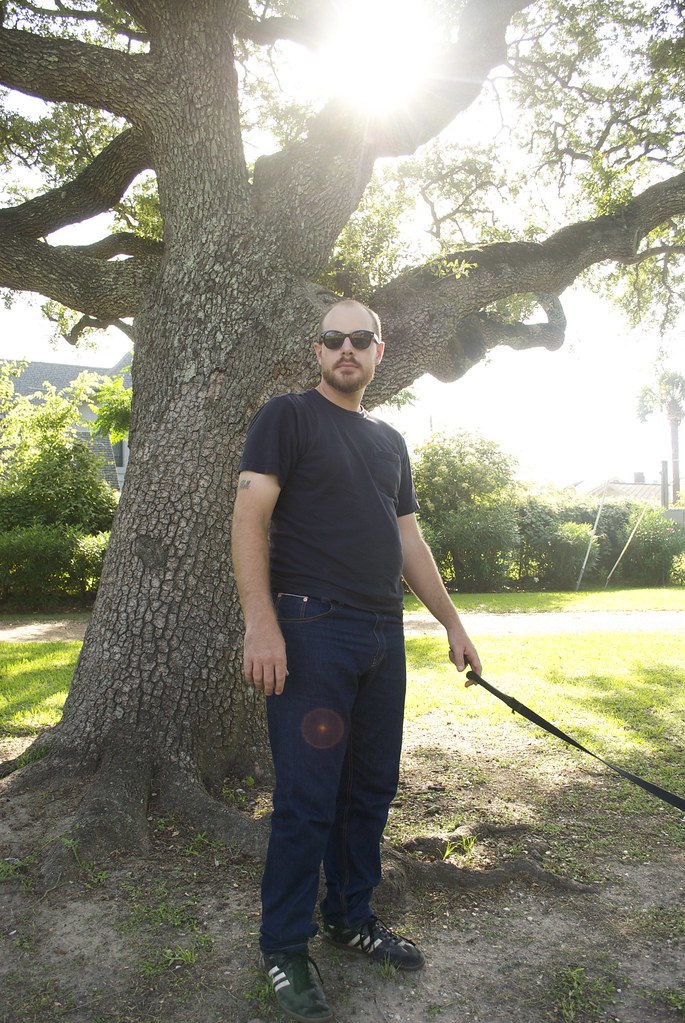
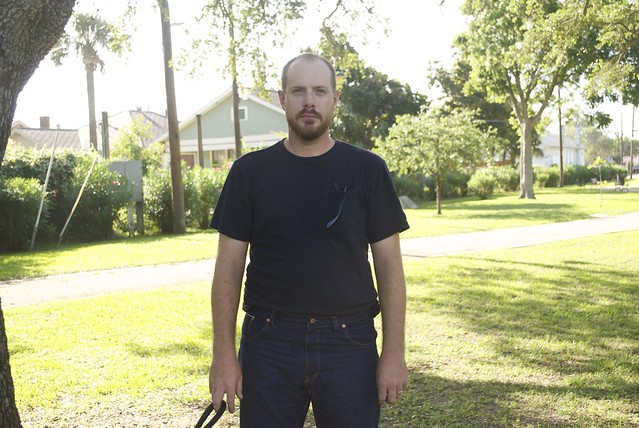
This is Nick doing his best Bruce Springsteen impression... *swoon*
Alternate post title: How To Objectify Your Man.

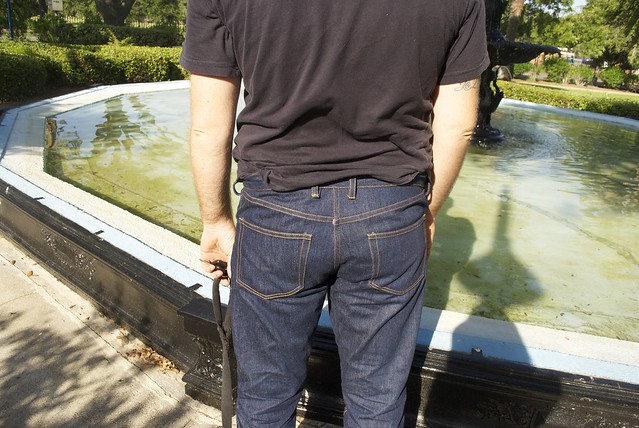
Hi there! I hope you guys aren't sick of looking at jeans yet, because (un)fortunately for you, I'm not sick of making them! I figured since I  got some good jeans-sewing-momentum going with my last pair, I might as well take advantage of it and make good on a promise to Nick to sew him a pair, too.

Now, I don't need to explain my selfish-seamstress ways to ya'll - I know I'm in good company here! But, this past Christmas I bought Nick all the goods - denim, thread, buttons, rivets - for me to make him his very own pair of jeans. And then proceeded to not make him jeans for the next six months! Seriously, I am the worst gift-giver in the history of ever. The fact that I made myself a pair of jeans before his... well... I was starting to feel like if I didn't get on it soon it would just end up being one of those things that gets brought up 20 years from now in an argument ("yeah, like that time you said you were going to make me jeans...") And really, it's not completely unselfish sewing - brownie points with your husband never hurt anything!

DSC_0004

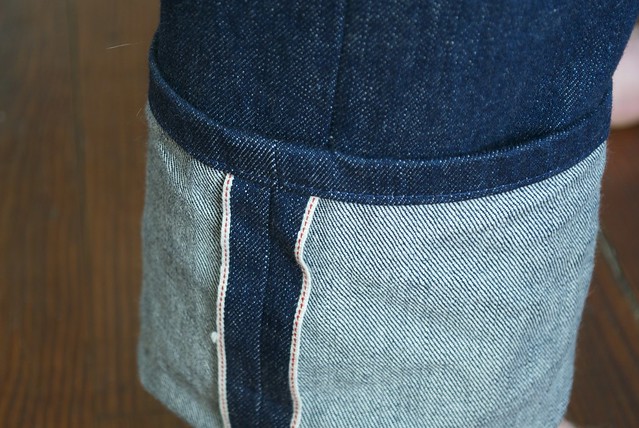
But the jeans! The jeaannnnssss!!! I made Nick a pair of pants back in November using the Jedediah pants pattern from Thread Theory with the intention of using them as a wearable muslin for a jeans pattern. We discussed a few changes he wanted - like a smaller back yoke and higher back pockets, and I felt confident that I could adjust the pattern to make it more of a jeans style, which mainly meant changing the shape of the front pockets. However when I went hunting for denim, I really decided that only selvedge denim would do for my guy.  I bought the 13.5 oz Cone Mills Selvedge Denim from Taylor Tailor's Supply shop (love that guy!) I love the look of a classic, no-nonsense jean on a man - and it's really Nick's style, too (go figure). I felt like selvedge denim would make a great classic looking jean, but still give that extra special little 'something'.

DSC_0009

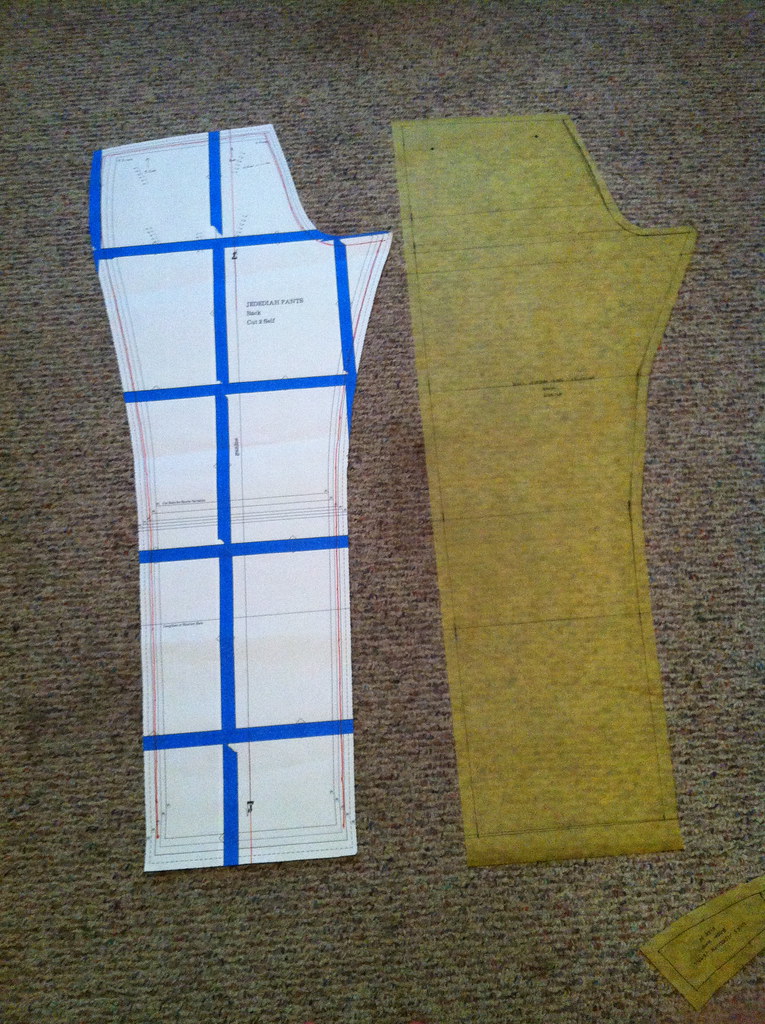
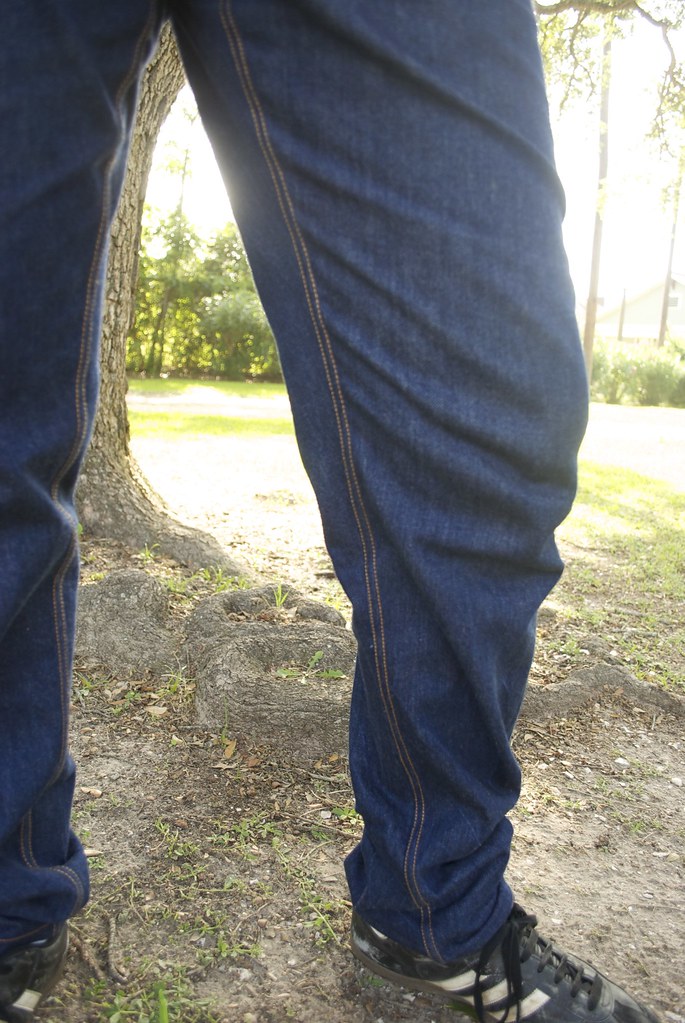
However, that presented a bit of a problem.  If you're unfamiliar with selvedge denim jeans, typically the selvedge - which usually has a contrasting color (this denim has a white and red line) - is used for the out-seam of the leg, which means that the pattern must be completely straight along the out-seam. This meant that I was going to have to make some much larger alterations to the Jedediah pattern, and, truth be told, was one of the main reasons I procrastinated on this for so long. I was really worried that shifting the pattern that much would cause the pants to fall weird. However, I bit the bullet and just decided what the hell, and gave it a go! And it worked out, so phew!

IMG_1233IMG_1234IMG_1235

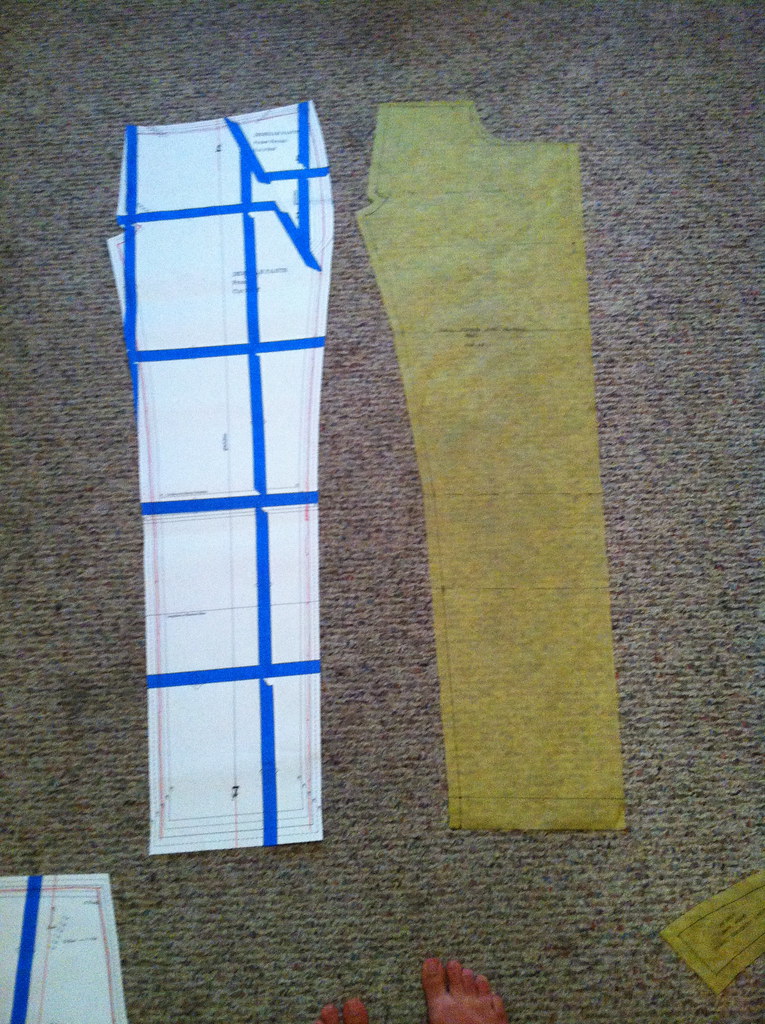
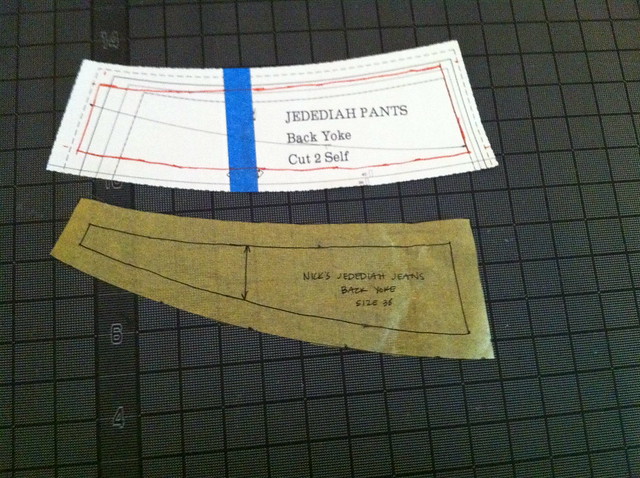
(Apologies for the nasty carpet in my sewing room... I swear it's clean, just old) Hopefully you can see in these photos the difference between the original Jedediah pants pattern on the left, and the altered "Jedediah Selvedge Jeans" pattern on the right. Basically, I measured the distance between the new, straight, out-seam and the original, curved, out-seam at different key points along the length of the leg (high hip, low hip, crotch, thigh, knee, etc.) and shifted the inseam over the corresponding amount.  You can also see how much I changed the yoke piece, too. I measured an old pair of Nick's jeans to get this shape, then transferred the amount I cut off of the yoke to the top of the pants backs.

DSC_0009
DSC_0018

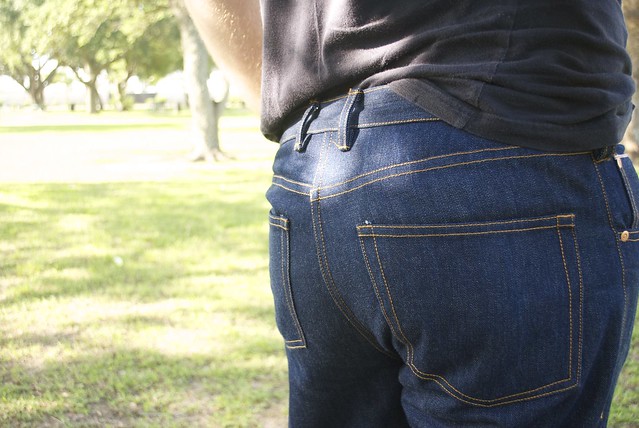
I may have taken a smidgen of width out of the hip/butt area while making all these adjustments, but I swear it was for a good reason! I felt like after wearing, Nick's Jedediah khaki's tend to get a very saggy seat and I thought that might help solve the problem. But I think instead it just made the jeans tight in allll the right places!! Bwahahahaha! Accidental WIN for this lucky lady!

While I don't know that this iteration is Nick's 'perfect jeans pattern', I actually really love the way they turned out. Next time (ha!) I would like to take a bit of width out of the waist in the back because I think that might actually be the cause of the saggy seat. And I might consider taking a tiny bit of width out of the legs, although Nick is pretty happy with the way the legs fit as is.

But let's take a look at some of the details, because with jeans, it's alllll about the details!

DSC_0014

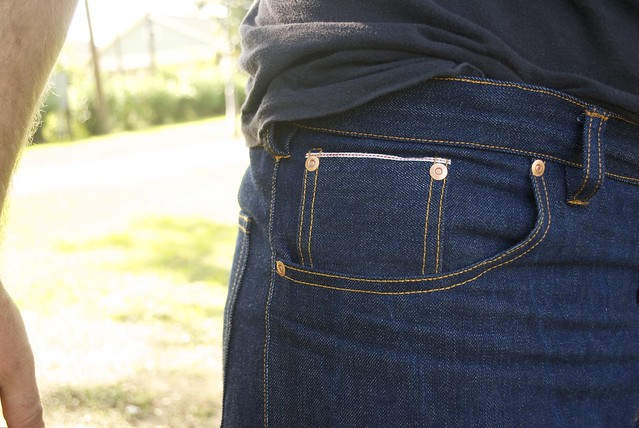
I stole a lof of ideas for these from Taylor Tailor's totally drool-worthy jeans. Here you can see the coin pocket which uses the selvedge edge as a nice design feature. Also prominent in this photo is some of my less-than-perfect topstitching! I was really worried about sewing such thick denim on my conventional sewing machine (an older model Singer HD) but it actually handled it like a champ through most of the process - until I got to the belt loops... oy vey. My machine doesn't love belt loops on a good day, but it was just not. happening. with these! I ended up forgoing my usual bartack method for the belt loops and instead just did a few rows of straight stitching. We'll see how well they hold up.

DSC_0016

For the back pockets I copied an old pair of Nick's jeans. Everything that could be sewn with a flat-felled seam was sewn with a flat-felled seam. Including the back rise and yokes, which results in a charmingly, slightly off 'v' where the two yokes meet.

DSC_0012

If love were a seam, it would be 72 inches of painstakingly, hand rolled, flat-felled inseam!

IMG_1248

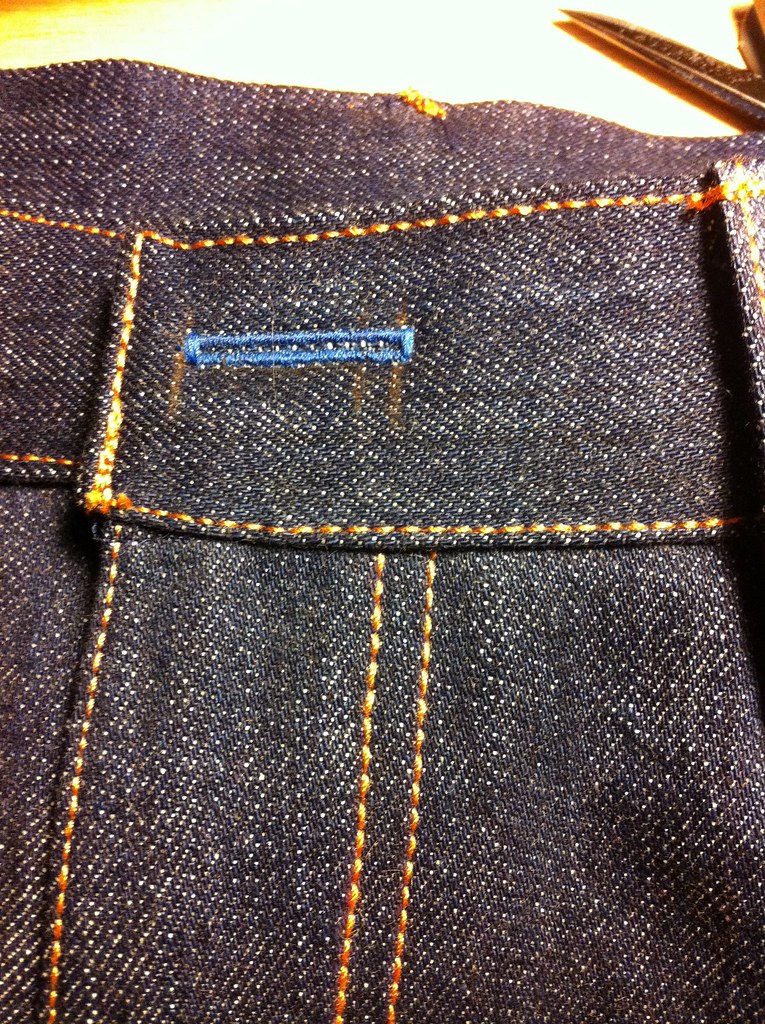
And, oddly enough, one of my favorite details is this little cobalt blue buttonhole!

DSC_0025

I gave Nick strict instructions to limit the amount of washing he gives these jeans. Indigo dyed, 100% cotton denim like this is known for it's ability to break in and 'mold' to the wearer, creating beautiful fades with time. I'm actually quite smitten with these jeans, to be honest! So smitten that I'm itching to make myself a pair, too! But don't worry, I'll take a jeans-sewing break for now and make something else for a bit to end the denim monotony that's been going on around these parts!

And now, because it's my blog and I say so...

DSC_0030

Let's take one last look at that tush!!

Seriously... dude butts do not get enough screen time on this blog!

xx

1.30.2014

welcome to the jungle

Mood Fabrics Carolina Herrera Brocade Pants
Hi ya'll!  So I know the weather has been pretty much crazy all over, and I totally don't envy all you northeners and your frozen eyeballs, but man, here in Galveston it's pretty much been driving me in.sane. One day it's in the 60's, the next it's in the 30's... oy! What's a girl supposed to do? Or, perhaps a more pertinent question: What's a girl supposed to wear? I just can't get a grip. Is it gonna be warm(ish) or freakishly cold? Am I gonna be pelted with sleet on my bike commute, or showered in sunshine? (I know, I really can't complain, but I'm gonna do it anyway.) (Also, is there any worse way to start a blog post than by complaining about the weather? My life is officially boring. I have nothing of interest to say anymore... apparently!)

Mood Fabrics Carolina Herrera Brocade Pants
Since I don't have any good chit-chat for you today, let's just jump into the meat n' potatoes, shall we?? I'm super excited to be sharing my first make for the Mood Sewing Network with you guys today - a pair of cropped trousers made with this fantastic Carolina Herrera coffee and white brocade! Generally speaking I like to let my choices in fabrics dictate what I'm going to make, since I'm a huge sucker for interesting textiles, and being let loose on Mood Fabrics' online inventory was like a crack addict being let loose on... I don't know... a pile of crack? (Ugh. Lame! What's with me today??) In the end, I decided to stick with a garment item I know I'll wear a ton (in this case, pants) but to challenge myself to use a fabric I've never worked with before. Which led me to Mood's amazing collection of brocades. Brocades you guys. How had I never explored these delicious fabrics before??

Mood Fabrics Carolina Herrera Brocade Pants
There were so many gorgeous brocades that were tempting me (like this one, and this one) and I could imagine them all as a fancy-pants pair of... well... fancy pants! (Gah! I did it again! I am need of a writing intervention!) But in the end I was sold on this incredibly unique polyester brocade.  It's truly unlike anything I've ever seen! Now normally I avoid polyester like the plague (in my climate, polyester usually means a prickly, sweaty mess), but Mood's description of this fabric as having an "abstract basketweave texture and ikat pattern" that is "simultaneously edgy and elegant" made me feel like passing this over simply because it is a synthetic would be a fabric tragedy of epic proportions. Also, I feel like somewhere along the line I heard someone much smarter than me say that modern synthetics get a bad rap based on the downfalls of their predecessors (read: every awesome late 60's, early 70's dress you ever thrifted that coated your back in sweat and hung on to your BO like it was it's job) but that new technologies are making synthetics almost as breathable as natural fibers. (I could have made all that up in a dream, but it sounds legit, right?) And let me tell you what, I'm so glad that I didn't let my fiber bias dissuade me from this fabric!

Mood Fabrics Carolina Herrera Brocade Pants
Okay.  I will admit that when this stuff arrived on my doorstep I may have wondered if my envisioned fancy pants may not end up looking more like crazy pants.  But then I wrapped the fabric this way, and that (like you do) took a couple of deep breaths, consulted my ever-wise gut (pfft!), and decided, no, these were gonna be some awesome pants. This fabric has a really wonderful texture - basketweave is one way to describe it, my husband keeps saying it looks like birch bark - and yet it's not stiff, or scratchy or bulky, or even difficult to work with. I cut my pants out on the cross grain because I really liked the way the pattern looked running down the front of my legs. Vaguely reptilian, but more geometric. I spent a little bit of extra time working with the pattern placement on these, making sure that each leg was a mirror image and that the strong horizontals and verticals met up.

Mood Fabrics Carolina Herrera Brocade Pants
I'll be honest, after getting my hands on this fabric, breathability really wasn't at the forefront of my concerns. Since this brocade definitely has some weight to it, it was pretty clear right off the bat that these would be winter pants, and I think the fabric worked great for that (although I could also see it making a really tremendous spring dress coat). And I have to say, I was truly surprised by how nicely this fabric presses, given it's texture and also that it's a polyester (I've always had miserable luck getting poly's to hold a crisp press).  This fabric just might make me rethink my polyester-ban!  I even left the pants unlined because the fabric felt fine against my skin. I did use some silky rayon bemberg lining in a lovely royal blue, also from Mood (here), for the pockets and to bind the inside of the waistband and leg hem, to add a pop of color to innards. I love little touches like that. However, you'll just have to take my word for it, because I forgot to get a shot of the insides. All other seams were simply serged and pressed flat.

Mood Fabrics Carolina Herrera Brocade Pants 
I used Ralph Pink's Cigarette Pants Pattern in a size US8/UK10 for these. It was my first time using this pattern.  I liked the overall shape of the pants in the illustration - the trouser pockets, front fly, single-welt back pockets, and cropped length - but overall, sadly, I'm not in love with this pattern.  I think the main issue is just that they were not made for my figure. They turned out insanely huge through the hips and legs when I sewed them up as directed (like, clownishly huge) and I had to take them in a ridiculous amount along the side seams, seat, and really anywhere I could get at them without having to totally undo some tricky areas (like the fly). This threw off some of my carefully strategized pattern placing along the seams (bummer), and also rendered those cute trouser pockets almost completely useless! I can just fit my hand in there! And to add to my frustration, the finished waistband feels just a mite snug (obviously Mr. Pink is designing for a much curvier lady than me!) I based my size choice off of my body measurements as listed, which was taking a bit of a leap of faith, since I usually choose sizes based on finished garment measurements, however there were none to be found! In this case, some finished garment measurements would have been extremely useful! I was also kind of bummed out that the pattern sizes weren't nested, so I only received the one size with my purchase.

Mood Fabrics Carolina Herrera Brocade PantsMood Fabrics Carolina Herrera Brocade Pants
But all pattern woes aside, I still think these pants turned out really great! I really love the combination of pairing an unexpected fabric with a basic, classic pattern to make an exciting statement piece to add to your wardrobe.  These pants pair great with a lot of the neutral tops in my closet, and they automatically make the outfit way more rock and roll! (As you might have guessed from my blog title, every time I look at these pants, this song keeps playing in my head, and I get an urge to do the Axel Rose shimmy... rather inexplicably really...) Now I just need a few more cold days so I can actually wear them!

xx


11.27.2013

1 for you, 50 for me...

DSC_0058

Here in the U.S., tomorrow is our Thanksgiving holiday (as I write this, at least) - the holiday that really starts off the whole holiday season with a bang (or at least with turkey and naps).  I always feel like this time of year we're supposed to reflect on all the things we're grateful for - sort of like a period of meditation before the expected New Years Resolution phase begins.  Honestly I always felt like the whole thing was a bit too... I don't know... Hallmark-y for me. But I do believe, wholeheartedly, in gratitude.  And there is not one thing, and not one soul on this earth that I am more grateful for than this guy right here.

DSC_0055

I could ramble on about all the things I love about my husband (actually, I couldn't, because when it comes to matters of the heart I get a tad bit... what's the word... verklempt) but really, it goes without saying.  So instead I'm just going to skate over that bit, and get right to brass tacks.

DSC_0041

See... Nick asked me to make him pants. Now if your husband asks you to make him pants, what do you do? You might look him straight in the eye, smile, and say, "Of course, Peaches! Just as soon as I finish whatever it is I'm doing right now" And then once you actually finish whatever you're doing right then, you put your selfish-sewing queue on hold and make your husband/wife/gf/bf/partner/whatever a damn pair of pants!! If this scenario describes you, then I say shove it well done you! Now why don't you go over there where I can't see you, mmmkay??

When Nick asked me to make him pants the first 5 times I pretended I didn't hear him. Then the next 15 times I promised he'd have them for his birthday. In June. Once his birthday came and went, and he was still asking, I just put it out there in some nebulous place of "yeaahhhh, I'll do that.... someday." Finally, it took him becoming quite distraught about the fact that his pants wardrobe is slowly dwindling and I promised to make him pants and do I want him to keep wearing the same pair of green shorts for the rest of his life? for me to hold up my end of the bargain. So almost a year later, I looked him straight in the eye, smiled, and said "Of course, Peaches! Just as soon as I finish whatever I'm doing right now." And once I finished whatever I was doing right then, I actually made him pants. Just kidding. I don't call Nick "Peaches"...

DSC_0068

Part of the hold up is to be blamed on the utterly dismal state of men's sewing patterns. I mean... gross you guys.  And because of this, Nick really wanted me to copy a pair of existing Banana Republic trousers that he owns, and, well... that just sounded hard. Not impossible, but like more work, time, and money than I was willing to put into something I wasn't even sure if he would like. Well thank goodness that in the yawning stretch of time from when he first started asking until now I became introduced to Thread Theory via the blog world.  I think all of us ladies who occasionally sew for men (and I'm sure some real live men, too) were rejoicing once we came upon these patterns.  Thank the heavens! Men's sewing patterns that look contemporary, yet classic, and aren't pajama pants! 

DSC_0027DSC_0027
Please excuse the ridiculous amount of dog hair on these... this fabric is seriously like a magnet!
So I decided to make the Jedediah Pants for Nick, which are an interesting design - somewhere between a classic trouser, with the side-slash pockets and waistband finishing - and a jean, with their patch pockets, back yoke, and flat-felled seams.  This made them a perfect pattern to start with, because they will be easy to adapt to a more traditional trouser (just add back welt pockets and convert the yoke to darts) or a jean (just add a curved front pocket).

Nick wasn't sure, from the pictures, if the cut of the pants would suit him, so we decided to have this first pair be more like a 'wearable muslin'.  I made them in a size 38 (my husband is a big man) out of some cheap khaki twill I bought from JoAnne's, which wrinkles like mad and collects animal hair like it's its job.  

DSC_0029

Now, those of you that have been hanging around here for awhile know that this is not my first time at the pants-sewing-rodeo.  But even though I'm pretty familiar with pants construction at this point, any time I work with a new pattern I like to follow their instructions.  The instructions for these pants were a little different than what I was used to, but overall nothing major.  They tell you to do things in a certain order that I found a bit awkward, and I'll probably do it the way I'm comfortable with in the future.  The only place I really hit a roadblock was with the fly.  No matter how many times I sew a zip fly I still need to follow instructions, and I have to say, the instructions for sewing the zip fly on the Jedediah Pants made no sense. Perhaps this was user error (or incompetence), but nevertheless I fussed and fought and couldn't make it work.  In the end I resorted to Grainline's zip-fly tutorial which I've used in the past and I feel like it gives a great result. Actually, I think from here on out I'm just going to stop second guessing and always use Grainline's method, because I just know it's going to work.

DSC_0028DSC_0028

As for the finished product? Well, aside from the fabric, I think we both feel like it's not too bad. It's a little bit big in the waist (my fault, I was being overly cautious and gave an extra half inch at the CB seam. you can see how they're bunching up underneath his belt in these pictures) and Nick feels like the rise is a bit lower than what he's used to.  We also think that the back yoke is a little large, and it makes the back patch pockets sit a little awkwardly low (on him).  I still think I'll use this pattern again to make him another pair of pants, making a few of these minor adjustments along the way. If he's lucky, he just might get a pair of jeans sooner rather than later (I mean... while I'm on a roll here...)

DSC_0037

Nick is incredibly camera-shy (most of the pictures I have of him are just a blur as he dashes out of frame) so getting him to pose for these pictures was a bit of a project! In the end, he was an awesomely good sport about it, even, perhaps, getting into it just a tiny bit. I like to think of the pose above as his "Jcrew-catalogue-man" pose.

Well, coming back to the theme of gratitude, I want to say thank you to all of you, dear readers, fellow sewing bloggers, friends, and (especially) family, for stopping by every now and then, for all your words of encouragement and praise, for letting me be a part of this awesome, supportive community, and for continually inspiring and teaching me, day after day, month after month, and year after year.  If you're celebrating Thanksgiving, I hope you have a lovely, holiday, and if you're not celebrating Thanksgiving, happy Thursday!

xx

11.06.2013

roseate spoonbill

DSC_0030

I can't say I've ever had a particular affinity for birds. Growing up, the only birds I could actually identify were Canadian Geese, of which there were an abundance of.  I also got pretty good at identifying goose poop... of which there was also an abundance of... Which is why it's pretty remarkable that these days I'm able to recall the names of a lot of our feathered friends that I see about.  Galveston has some pretty spectacular birding, and I guess it's the sort of thing that just rubs off after spending time in a place.  But of all the birds I see about, there's really only one that I get super excited about when I spot it, and that's the Roseate Spoonbill.

I remember the first time I saw a Roseate Spoonbill I was driving across the causeway that connects the island to mainland Texas, and out of the corner of my eye I saw this flash of pink in the sky.  It was shortly after we had moved to Galveston and I remember coming home and saying to my husband (not totally sure if I had imagined the whole thing or not) "Nick, I think there are pink birds here..." He, of course, already knew about the pink birds, being much more... well... just generally better informed about these things than I am.  To me, living in a place with such technicolor fowl flapping about, makes me feel like I'm in the most exotic place in the world, even if it is just costal Texas.

DSC_0037DSC_0052

So why am I waxing romantic about pink birds today? I swear there's a reason, and that reason does indeed tie into one of my two newest makes. So let me introduce you to...

My second Archer, made up in a silk crepe de chine.  This silk started it's life as plain white, and I was truly this close to leaving it white, because there is something pretty classic about a white, silk, button-up shirt, is there not? But I felt like maybe I could love it a little bit more if it was, I don't know, a little pinker.  So I dyed it.  Easy peasy.  Just a one step, good ol' fashioned, dunk-it-in-a-bucket-and-swish-it-around dye job. I mixed just the teensiest amounts of chocolate brown and coral pink dye (both from Dharma) to get the color I was aiming for.  And the color on my mind, my inspiration, was the pale shade of rose that the Roseate Spoonbill displays on it's soft, downy feathers.  See? Told you I had a point with all that bird nonsense!!

DSC_0039

As this is my second time making Grainline's Archer, I won't go into too many details here (to read about my first Archer, go here). And while I wear my first Archer a ton (like, multiple times a week, sometimes) I did make some changes to the pattern this time around to get the fit closer to how I like my button-ups.  I've been very jealous of the fit on all of Andrea's Archers, and so decided to take a page out of her book and decrease some of the width through the shoulders (I used this tutorial) and take in the side seams a bit at the waist for a more feminine shape.  The changes were subtle (only half an inch at the shoulders and about an inch at the waist) and I think my finished shirt keeps some of the 'boyfriend' vibe that I love so much about this pattern, while making it just a bit more flattering on my body.  Score. 

DSC_0029DSC_0028

Sewing this was also one of those experiences that sewists simply live for.  Everything came together absolutely gorgeously, the silk pressed beautifully, and because this shirt has so many sweet little details on it, it was one of those makes where you can actually see that you've made progress with your technique.  Very satisfying indeed.

DSC_0051

I also made up Tessuti's Suzy Pants pattern in this navy and white patterned silk crepe that I scored while in NYC.  I can't remember the name of the store, because I was in such a post-blogger-meetup euphoria that I wasn't really paying attention, but I do remember that I spotted it and immediately thought, "Suzy Pants".  I've been obsessed with Kelli's Suzy's since she posted them, and felt like they would make the perfect transition pants for fall.

I had already made one of Tessuti's patterns (here) and found them to be perfectly delightful to sew with.  I think much like Kelli, I was drawn to the Suzy pattern because they closely resemble a lot of the pleated, lightweight trousers that I've been seeing a lot from ready-to-wear lines.  While I probably could have done the work and converted my beloved Built By Wendy pants pattern to this style, it was much much easier to just download the Suzy pattern! I made these in a size XS, based off of my measurements and the finished garment measurements, and the fit was just what I was hoping for, loose, but not baggy. I also took a page from Kelli's book and made my Suzy's with a flat-front waistband and just elastic in the back.  I tapered the leg towards the ankle, and cropped the length, as well. I always think a tapered leg looks most stylish when it's cropped, plus, now they're the perfect length to wear with my fall/winter staples - my black booties! 

DSC_0030DSC_0028

I made these a few weeks ago, now (they go together super quickly) and have worn them at least twice a week since (and sometimes I change into them when I get home from work, because they are just that comfortable). So I guess that is testament to how much I love them? My husband kind of chuckles at me when I wear them and refers to them (fondly I'm sure...) as my fancy Zubaz pants.  I mean... I guess they do sort of have a '90's Mom' vibe (maybe in a cool way???) but definitely not a bad 90's pants vibe... right?? Right???

DSC_0031DSC_0044

Man, taking blog photos is just always awkward, right? Today the weirdos were in particularly rare form (or am I the weirdo in this scenario... so hard to tell...) While I was darting back and forth between my posing and adjusting the camera I noticed that there was some old dude in a BATHROBE standing on his porch watching me!! Just, like, leaning up against the post, giving me an eye-full of his silvery chest rug.  So I say, "Hey there" and kind of wave, and dude just growls at me in the thickest Russian accent, "Are you Russian?? You look like you could be Russian..."  Um. Huh? So I smile and say, "No, I'm not Russian"... And my man just keeps on standing there, smiling and staring!! Thus, the incredibly uncomfortable look on my face in that second-to-last picture! So finally I ask if I'm bothering him, and he says 'no' and goes back inside (to continue to creep at me behind his lace curtains...) but not without leaving a strong whiff of heebie-jeebies in his wake! Granted, I was taking pictures on the sidewalk right in front of his house, so, yeah... not really sure who's the bigger weirdo in this scenario... I mean, I did just shame a dude off his own porch so I could take pictures for my sewing blog on his private property.... Like, clearly  the robed Russian is the weirdo... right? Right...?

xx