Showing posts with label jeans. Show all posts

9.06.2016

sallie from the block

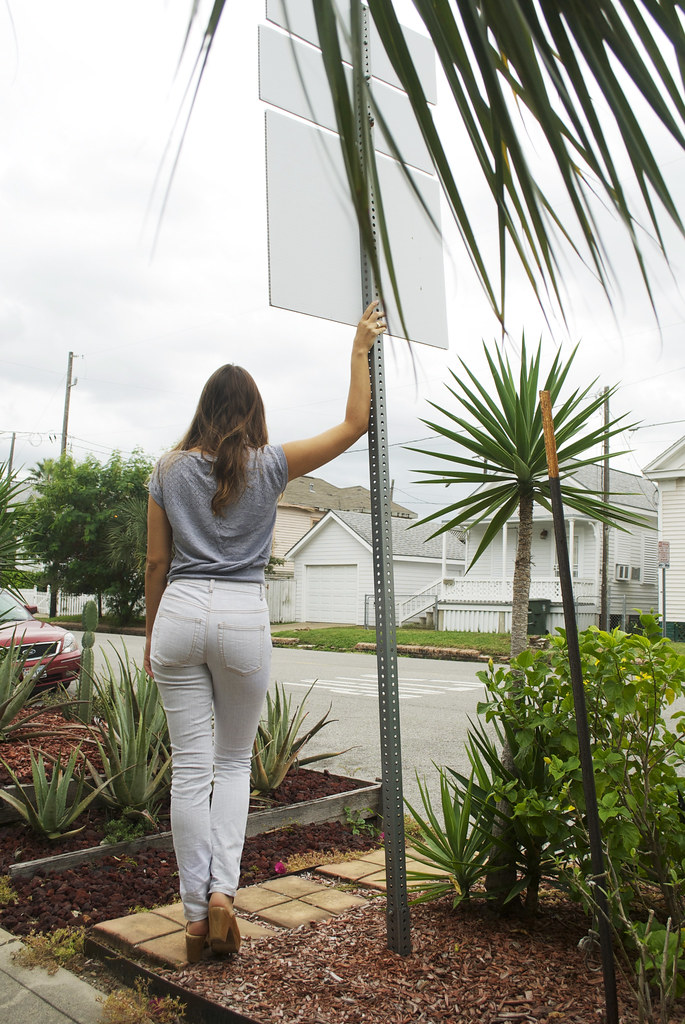
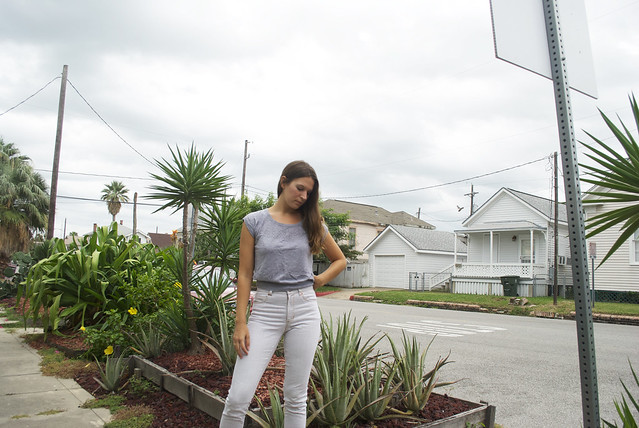
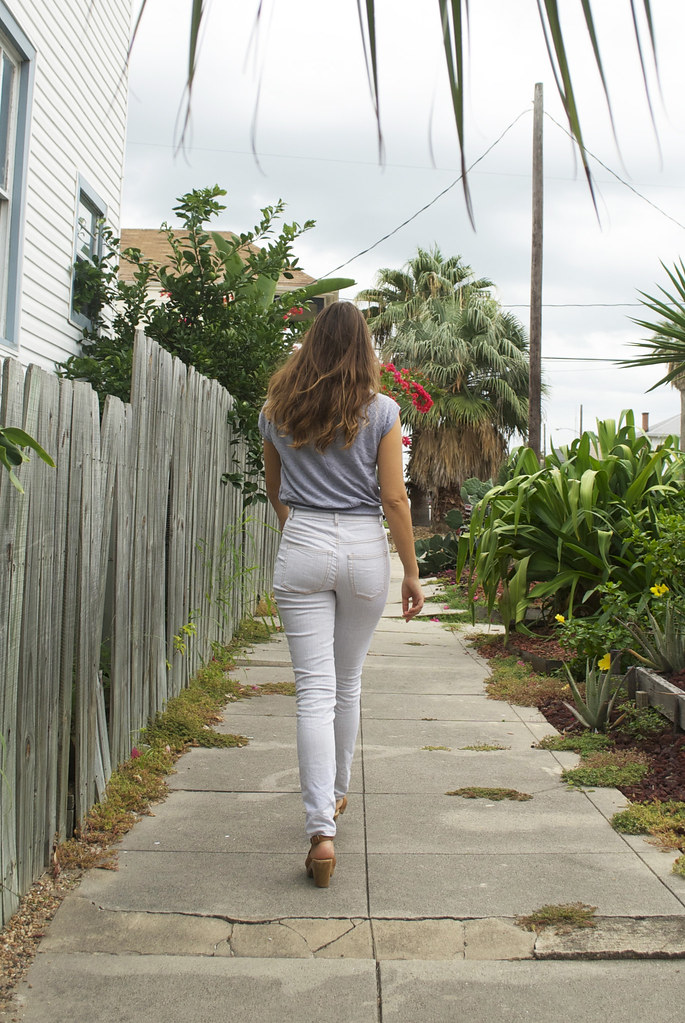
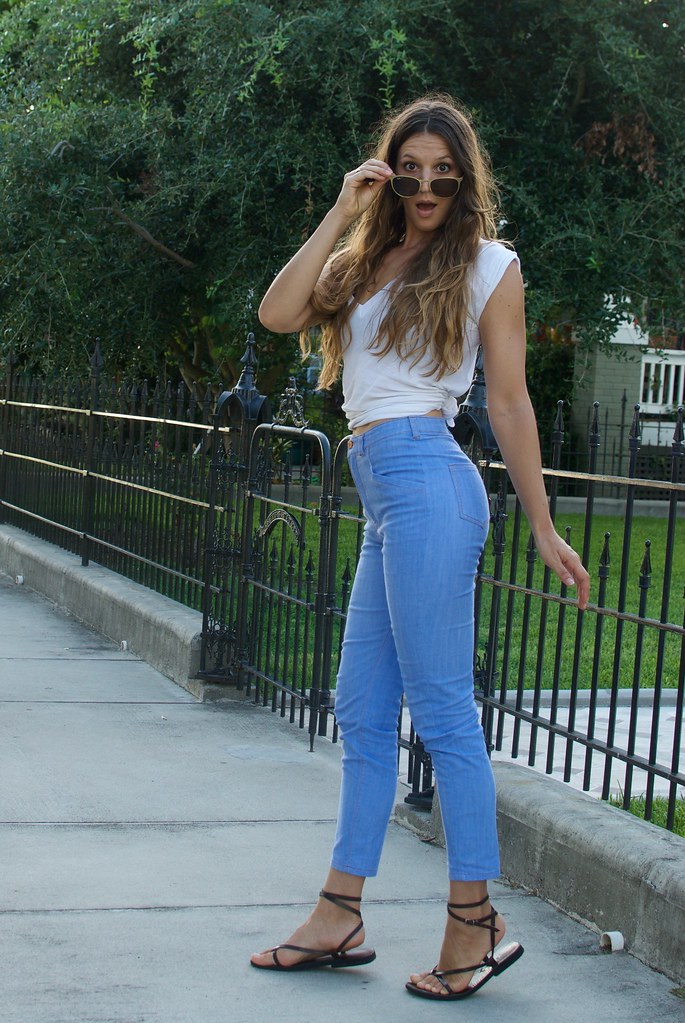
Safran Jeans

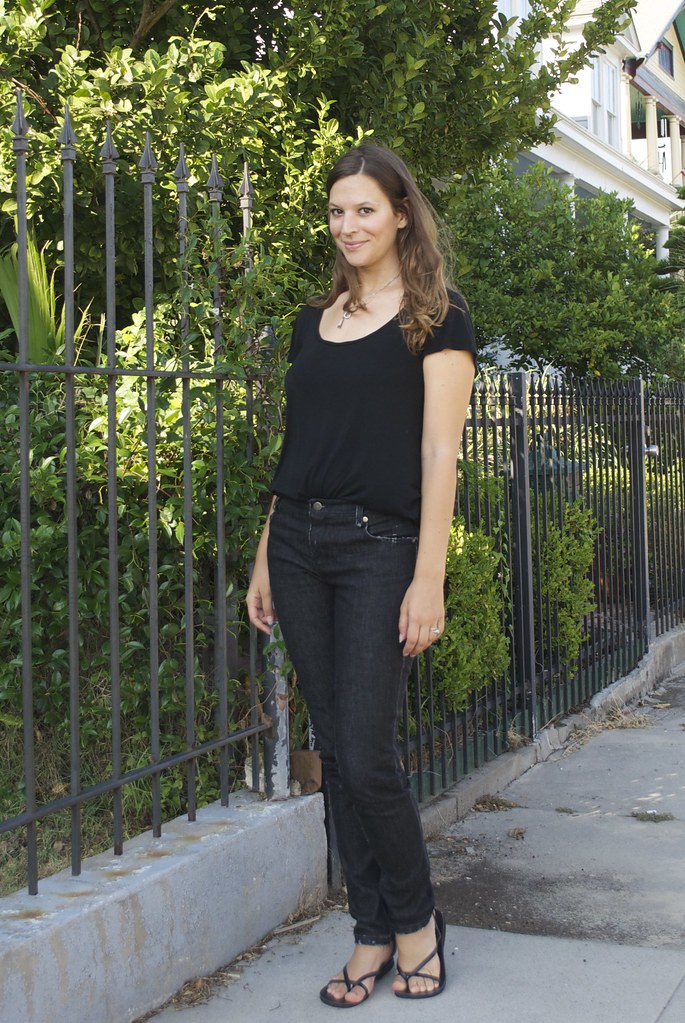
When I put on this outfit I wasn't totally sure if it was working - like, I wasn't sure if what I thought I looked like was representative of what I actually looked like.  Far too many times I've left the house thinking "hell yeah, I am one fine-ass lady" only to see a photo of myself, or a reflection in a window and realize "what the hell was I thinking?? I can't pull off a crop top..." or whatever.  To be fair, that false sense of confidence has gotten me through life pretty well - I think I do a pretty good job of fooling myself and, to a lesser degree, the people around me into thinking I am way cooler than I am. But sometimes I need a reality check.  So I do what I normally do and turned to Nick (note: while this is an outside opinion, it's a pretty biased one as a) he truly does think I'm a fine-ass lady and b) he might be a bit generous with the truth in order to, you know, avoid hurting my feelings, tactful guy that he is. But this still serves my purpose because, as I've noted above, I've been pretty happy in my self-delusion, and a biased outside opinion is really what I'm after).  So I asked him if I indeed looked as hot in reality as I thought I did in my head.  He told me that my shoes were unbuckled and flopping about and that made me look silly (I hadn't totally finished dressing when this conversation took place). Then he told me that if I had a pair of Timberland's I could pull off a "Jenny from the block" look, which basically told me all I needed to know. Any reference -- no matter how skewed or distant -- to JLo and her butt is good enough for me! 
Safran Jeans

And that, my friends, is the long-winded explanation of this post title! Don't you just love my ramblings? Isn't this what you come to this blog for? No? It's not? See, there goes that self-delusion again!

Fine, fine, fine! Let's talk sewing! Let me introduce you to my Safran jeans! This is the newest pattern from Deer and Doe.  They reached out to me, along with a few other ladies, a few weeks ago to see if I would be interested in making up the pants and blogging about them in exchange for an advanced copy of the pattern.  I always love a good pants pattern, and sewing jeans is actually one of my favorite things to make, and this pattern has some really fun details, so I said of course! And eagerly gathered my supplies.
Safran jeansSafran Jeans

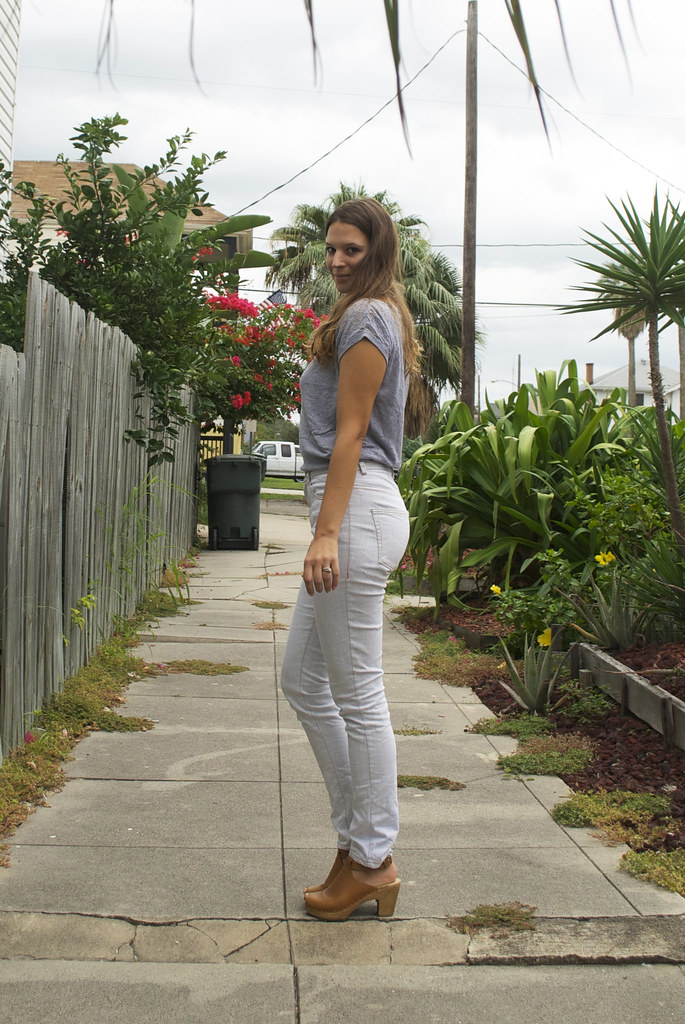
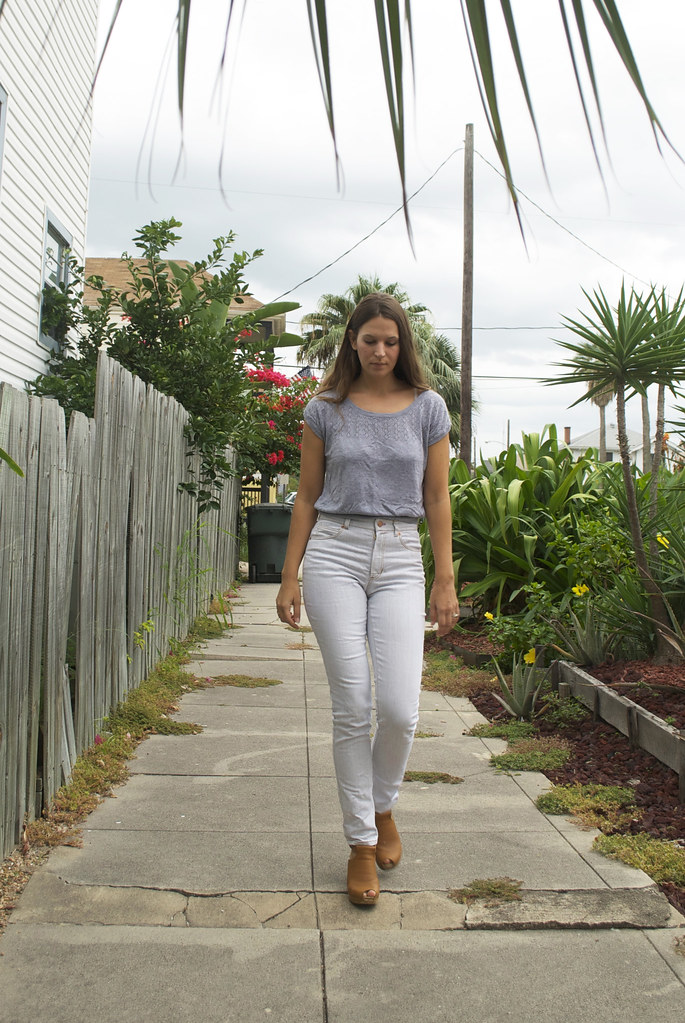
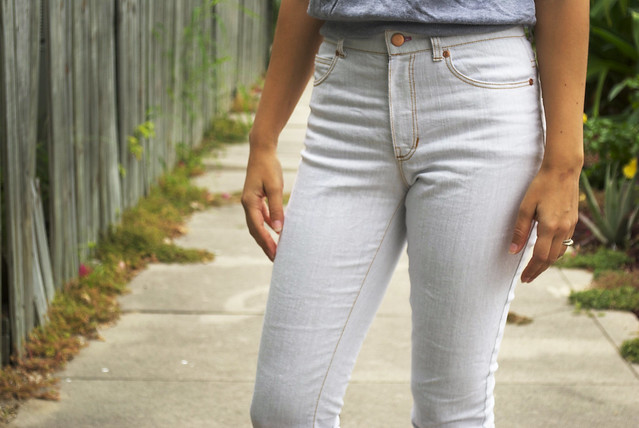
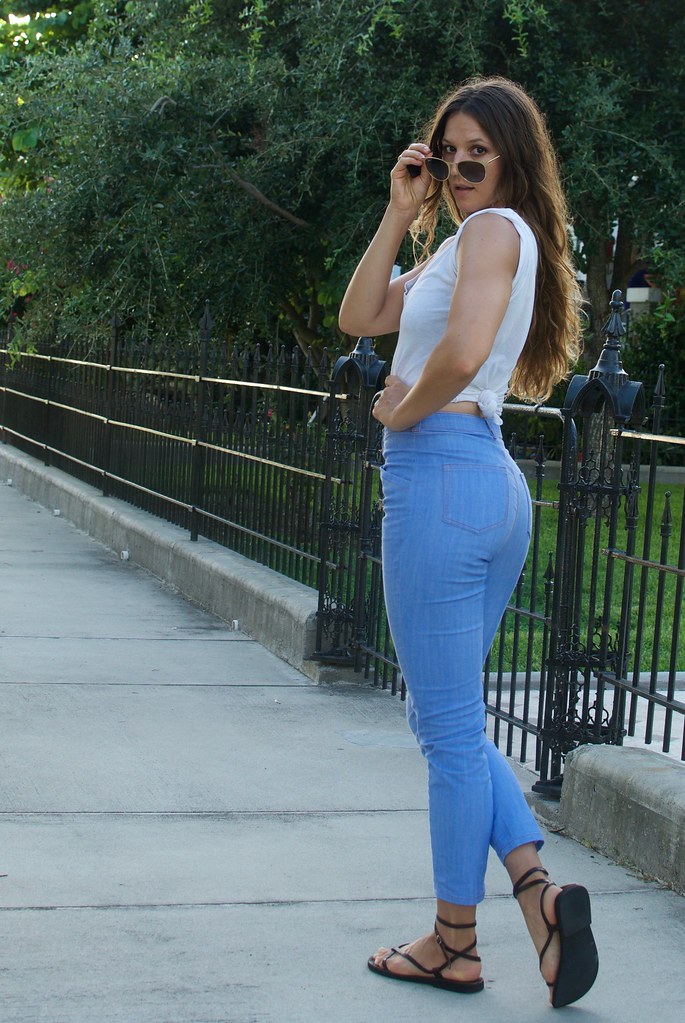
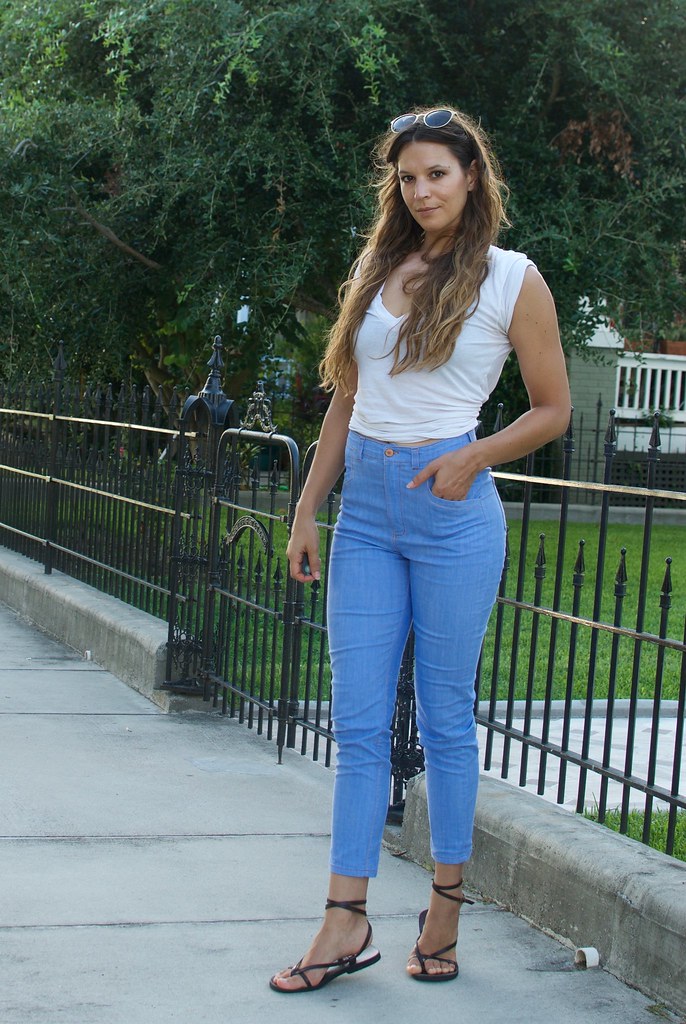
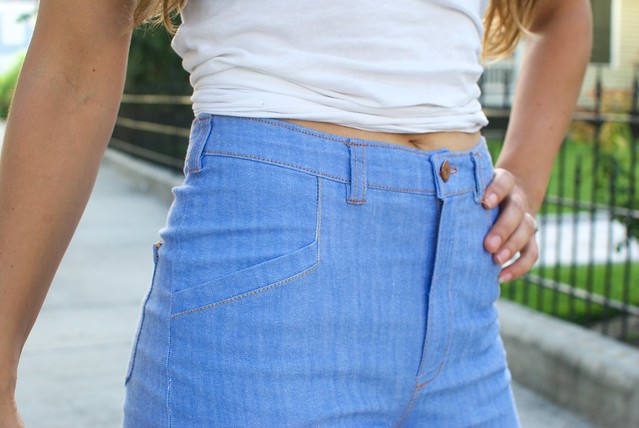
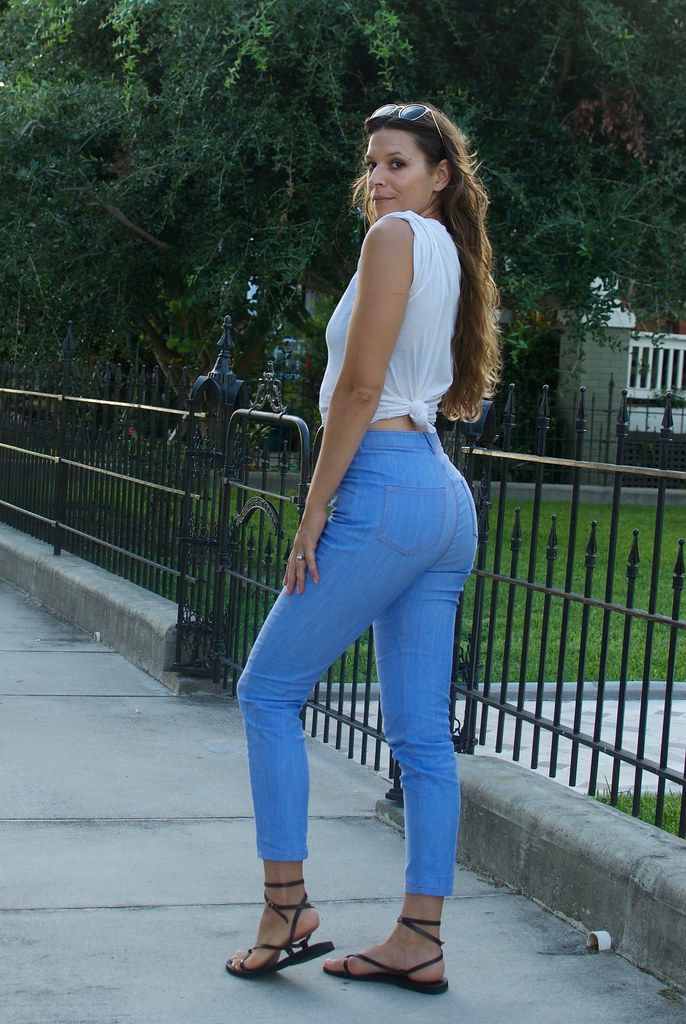
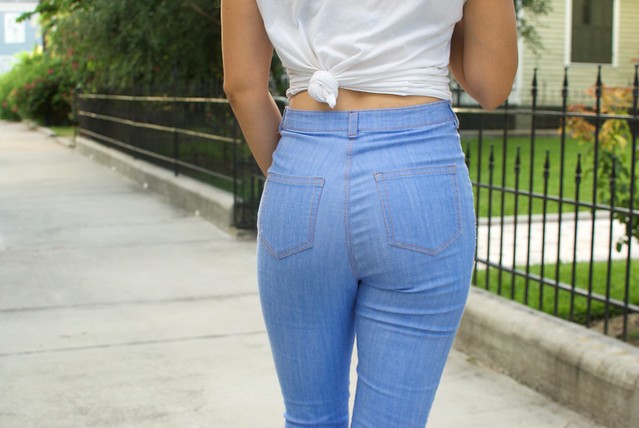
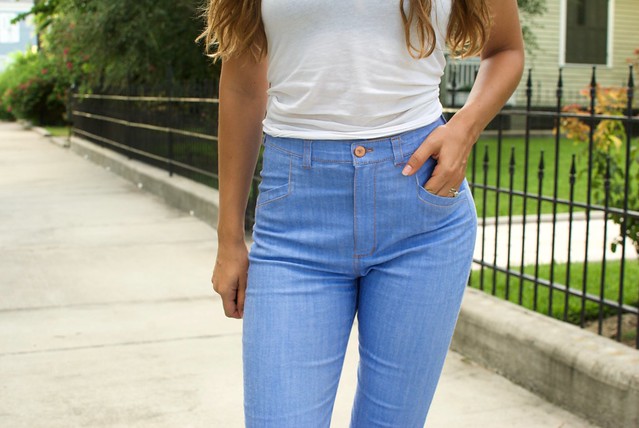
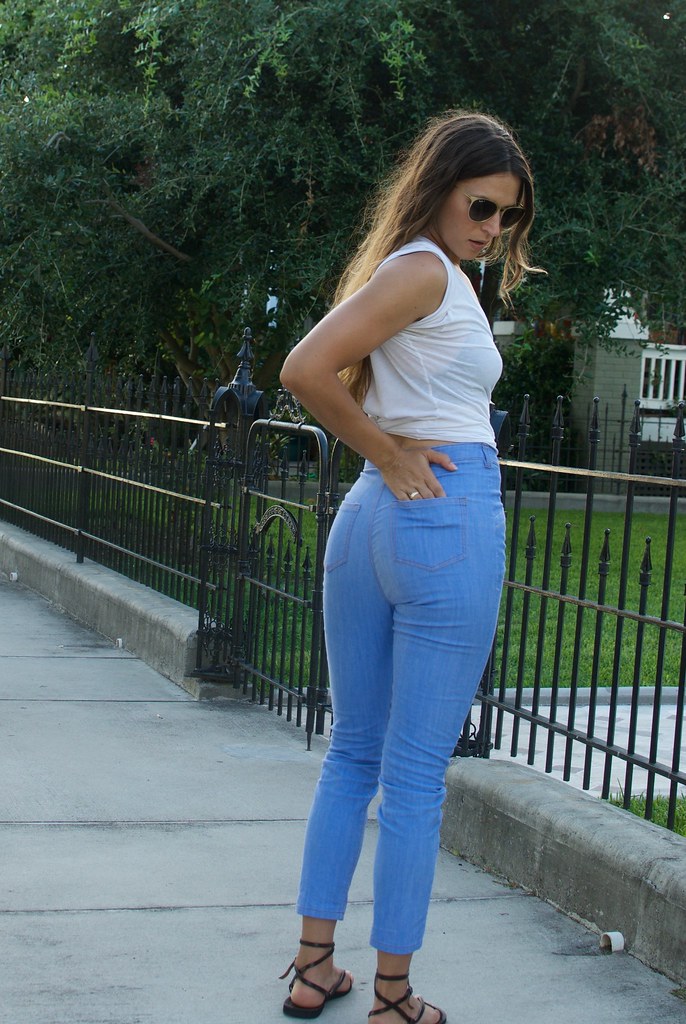
I really love the high waist of these jeans, the cropped length, and the angled faux-welt front pocket. Those were the details that really sold this pattern to me.  Overall they are pretty light on classic "jeans" styling, and could easily be made into a cute pair of cigarette trousers should that be your inclination.  Me? I love a healthy dose of topstitching, so I went the whole hog with gold topstitching thread, which I think really pops on this periwinkle blue stretch denim I got from Mood.

The actual construction of these jeans was pretty easy and straightforward for me, having made a fair few pair of jeans in the past.  I followed the instructions for those front pockets, and from there I just sewed according to my own preference.  I glanced at the instructions for the fly front and wasn't too impressed so I followed my usual method - which at this point is a combination of Closet Case Files fly front instructions and Grainline Studio's (I prefer Grainline's order for attaching the fly facing, but like Closet Case Files' for getting the topstitching right).
Safran JeansSafran Jeans

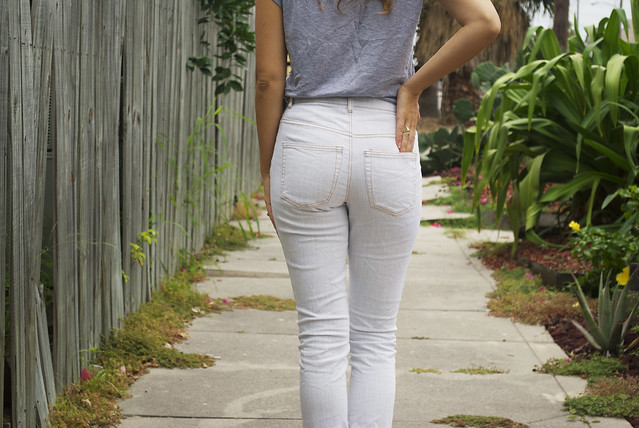
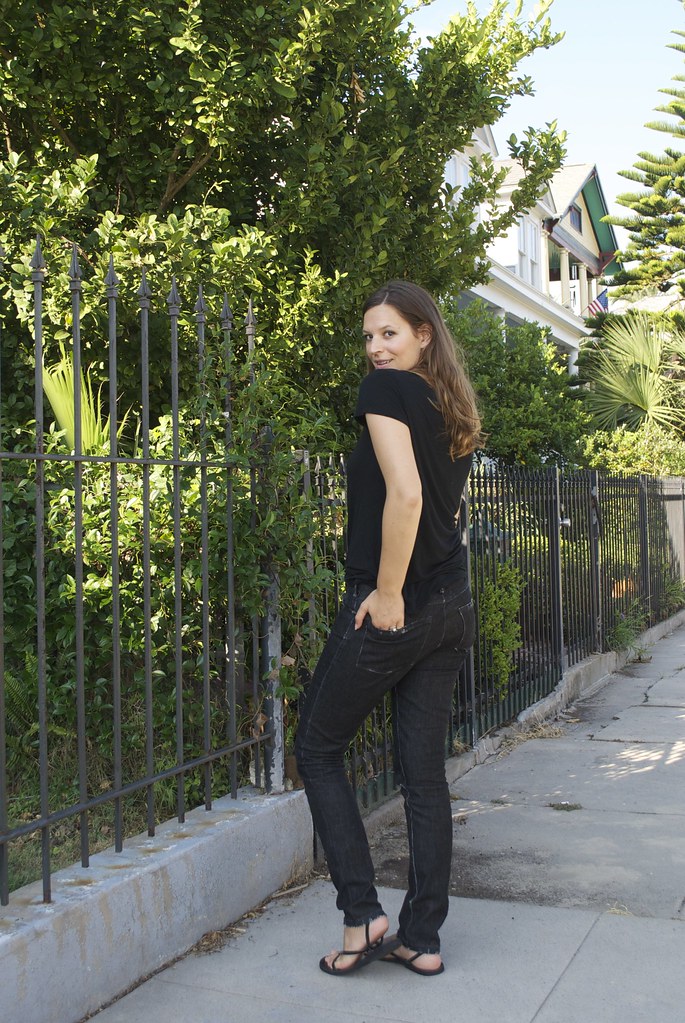
I had a few issues with the fit of these jeans, however after looking at these pictures I'm wondering if its all in my head...?

First of all, let me just say that I am not a perfectionist when it comes to fitting anything, but especially skinny pants made in stretch fabrics.  Some wrinkling and pulling is part of the territory. Also, as a second disclaimer, my body has changed in the past year and I haven't totally got a handle on the fitting problems I might be encountering as a result.  And finally, I'm not a fan of picking apart my makes on my blog - nothing is ever perfect, and I'm okay with that.  But since I encountered various fit issues with this pattern I thought I would tell you about them.

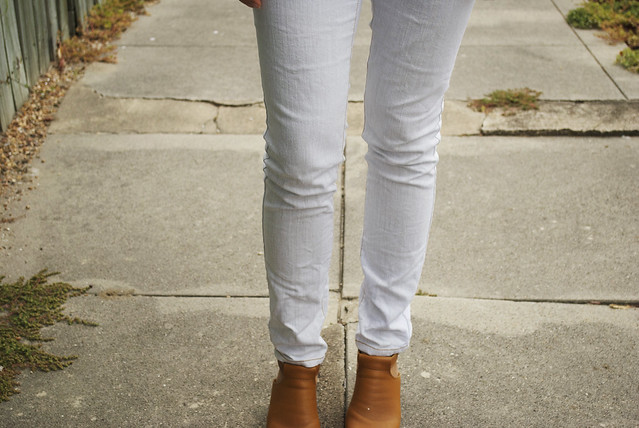
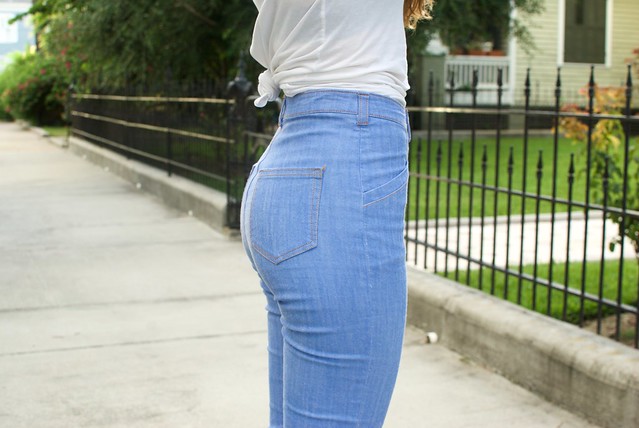
Before sewing these together I basted them to test the fit, as it was a new-to-me pattern, and a new-to-me pattern company.  As I said, I can ignore some pulling and wrinkling on this type of pant, but what does bother me is obviously curved or twisting side and inseams, excessive bunching at the knees and waistline gaping.  I was experiencing all three.  Even though I feel like these pants are cut to accommodate a curvier rear end, I was experiencing a significant amount of gaping at the back waist.  That was easy to fix by taking a wedge out of the center back seam (although I still think I'm getting some excess fabric back there - those horizontal ripples are actually being caused by the waist being too loose and the waistband wanting to slide down).  But the real head scratcher here was in the legs.  My side seams were very curved towards the front of my thighs, and at the ankle the side seam wanted to twist towards the front of my ankle.  My first instinct was that I must have cut the pants off grain, but on further inspection I noticed that the inseam was perfectly straight -- if the pants were off grain the whole leg would be twisting, not just one seam.  The knee area was particularly uncomfortable as there was an excess of fabric bunching up and sort of rotating around my knee.  I'll tell ya, friends, I was stumped as to what was going on! I did what any modern sewist would do and took to Instagram to let my smarter sewing friends diagnose my problems for me.  The overwhelming consensus was that it looked like I needed a full calf adjustment (what?! that's definitely not a problem I've ever had before...) and also that the front thigh was too tight.  As these pants were already cut, any adjustments I was going to make had to happen within the 5/8 seam allowance. So I let out the back calf area and the front thigh area and it seemed to make some difference, but I still feel that slight twisting along the side seam, and it annoys me.
Safran JeansSafran Jeans

Just for comparison I laid my Safran jeans pattern over top of my Ginger jeans pattern (which fit me well) to compare, and the entire cut of the leg is totally different.  The Safran jeans are based on a much straighter block, where the Ginger jeans angle inwards from the hips to the ankles.  Not to get all anatomical here, but I think the more angled cut of the Ginger jeans mimics the natural angle of the femur in most women -- from a wider pelvis to a narrower knee -- than the straight cut of the Safran jeans. This, I think, makes for a straighter side seam, and less twisting and bunching at the knee. I don't think of myself as having full thighs or calves, but my body is undeniably more muscular than it was a year or so ago, and so my thinking is that while the Safran jeans are cut to accommodate a rounded rear end, they may not take into account a muscular thigh - particularly a developed quadricep.  Again, I don't think I have killer quads, but compared to the rest of my proportions (i.e. my waist measurement) they are fuller than this pattern allows for. Frankly, I think my booty to waist ratio was a bit more than this pattern was prepared for too! But thank goodness for stretch denim!
Safran Jeans

All in all though, these pants have been getting their fair share of wear.  As I said before, I love the high waist and the angled pockets, and the bright blue of this denim feels very fresh to me right now. The denim does stretch out after a full day of wearing, and it's most noticeable in the waist which starts to slide down, giving me the dreaded "load in her pants" look that can happen with high waisted jeans.  However, after a quick wash they are back to making me feel like a babe, so I'm ok with that! I think with a few tweaks to the shape of the leg this pattern could definitely see some future iterations. I love it in colored denim, and I just so happen to have some purple orchid colored denim sitting in my stash... Purple pants, anyone??

Hmmm... that might be that self-delusion talking again....


xx

11.11.2014

my gingers

Ginger Jeans

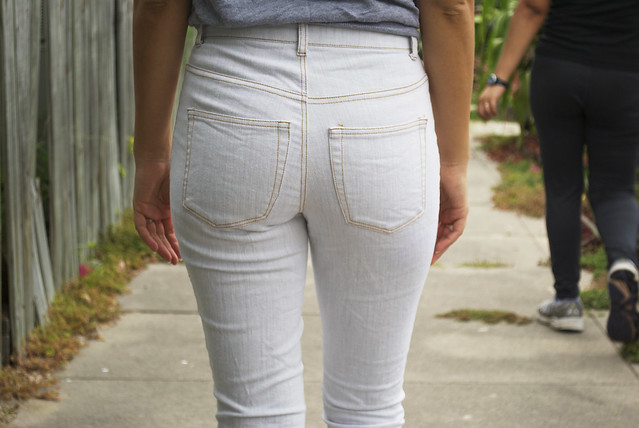
I need to be honest with you, friends, I could probably have filled this post with just pictures of my butt because, seriously, every single photo I took today of my rearview was just killing it!! And while that probably sounds like I have an insanely inflated sense of self when it comes to my booty, I assure you, I don't! IT'S JUST THESE JEANS!! 

Ginger Jeans

So for posterior  I mean, posterity, I've included some front shots too, but I just want you to know it wasn't easy!!! *Sigh* the things I do for you guys...

But anyway, Heeeyyyy! What's new with y'all? Did you have a good Halloween? Is your November getting off to a swinging good start? I got myself into a bit of a blogging rut after posting my last Mood Sewing Network make - I just couldn't muster the mojo to re-write the post over here on my home turf, so if you haven't seen it, let me just direct you on over to the MSN site.  Once I accepted the fact that that post was just not going to get re-posted I felt like I unclogged the drains and could finally move on to sharing some of these other makes that have been sitting around waiting to be blogged about! 

And first on that list are these white Ginger Jeans - the newest pattern from Closet Case Files!

Ginger Jeans

You know, I really love seeing women that I've come to know, and call my friends through the sewing  and blogging community expand, and grow, and take on new ventures, and find success through their passion and hard work.  And no one embodies this more for me than my pal, Heather Lou.  I'm just so proud of her and her burgeoning pattern business! And it's with good reason too - because each new pattern she releases knocks it out of the park.  And I'm not just saying that because I love her (even though I do) but I really believe that each of her patterns possess a little bit of magic that makes me feel like a million bucks every time I put them on.  Case in point: these Ginger Jeans have since been dubbed my 'sexy jeans'.  They may not be perfect, but that rear view is worth the title alone, in my opinion!!

Ginger Jeans

Okay, okay, I know you guys didn't come here to listen to me wax poetic about my tush and my love for Heather, so let me tell you a bit about the actual pants you see before you.  First of all, Heather asked me to test this pattern, and I said 'yes' because I love making jeans, and I love wearing jeans, and I love learning about jeans, and because - duh - she's my girl! (Okay, I'm done, I swear... well maybe not...) So the jeans in this post are my test version.

Ginger Jeans

I used a moderately stretchy, mid-weight denim that I picked up with my Mood allowance.  Funny thing about these jeans - this is actually the wrong side of the denim! The right side of the denim was described on the Mood site as being a 'burnished gold', and of course, me being me, I thought "oooh gold jeans!!!" and clicked 'buy' without a second thought. Then the denim arrived and, much to my dismay, they weren't so much 'gold' in real life as they were a sad, slightly greenish, khaki color. Boo.  (To be fair, had I gotten past the 'gold' descriptor and gone on to read the rest of the color description I might not have been so disappointed) I was all resigned to just make them up as a muslin that never saw the light of day, when I had the sudden brainwave to use the wrong side of the fabric, which is this pretty normal looking white color you see before you. Total save!

Ginger Jeans

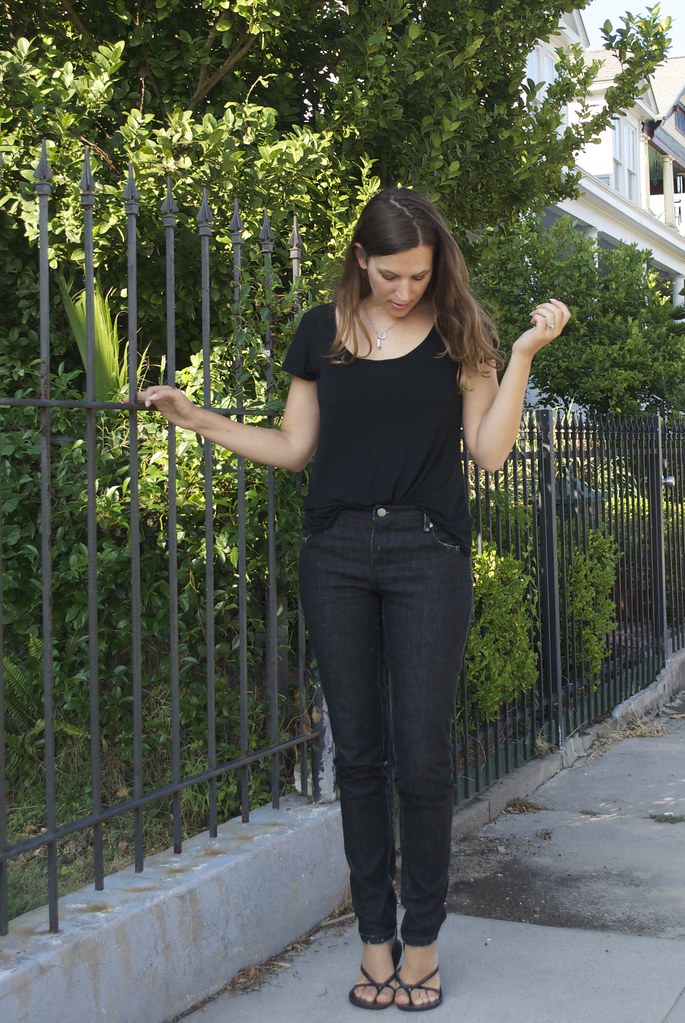
I'm no novice to jeans making - in fact these Ginger's will make my sixth pair of handmade jeans.  And I really have to say, it's one of the things I love to make the most.  I just get so much satisfaction out of all the topstitching and details, and I really enjoy knowing that I'm making something that will get a lot of love and wear.  For my test version of the Ginger Jeans pattern I made View B - the high-waisted and skinny leg variation.  I chose this style for two reasons: 1) I love a good high rise for their vintage-y sexy look and 2) My hacked-to-pieces Built By Wendy pattern that I've been using to make my own jeans pretty closely resembles View A and I was looking for something a little different.  I cut a size 6 for these, which is a size smaller than what I've cut in Heather's patterns in the past.  My measurements were a bit all over the place - a 6 in the waist and a 10 in the hips.  I gambled by cutting the 6 and sewing the hips and legs at a 3/8" SA instead of the instructed 5/8".  The resulting fit is very close, but they're still comfy (stretch denim is a beautiful thing)!

Ginger Jeans

I really love the fit of these! I'm sorry, I have to say it again, but I don't know what sort of voodoo magic Heather puts into her patterns because each one makes my bum look ace! I really only ever have this experience with her patterns, so... obviously it's witchcraft.  To be fair, I do have a bit of a camel toe issue with the front rise (I tried to pose in such a way as to minimize it's appearance in these photos - also, isn't 'camel toe' an awful name?) but it's not enough to make me stop wearing them in public. Also, it should be noted that Heather has made a few fit adjustments to the pattern after we testers gave her our feedback. I believe one of the things she changed was to take a little scoop out of the crotch curve on the high-waisted version to solve any potential camel toe issues. Of course, we're all such unique little snowflakes, no one is going to fit any one pattern exactly the same.  I'm sure I'll still have to make little tweaks here and there when I make my next pair of Gingers from the finalized pattern, but... that's sewing!

Ginger JeansGinger Jeans

Some of the little details I added to my jeans were this gold topstitching thread and copper buttons and rivets, all bought from Taylor Tailor.  And maybe my favorite little detail is the hot pink thread I used to sew the buttonhole.  This was something I did on my husband's jeans and I just loved how personalized it made them feel.  See?! There's just so many little ways you can customize your jeans when you make them yourself - it's like a 'Choose Your Own Adventure' sewing experience! 

I also have to say that these are some of the most thorough instructions I've ever come across.  Sewing jeans can be a bit of a process which is probably why so many people are intimidated by them.  Heather really breaks the whole thing down for you with the instructions, I even learned a few new tricks to add to my jeans sewing arsenal! And, of course, she's doing an exhaustive series of posts as part of her sew-along covering just about everything you could ever want to know about making your own jeans. Truly, it's a like a gold mine of jeans sewing information! I've long been an advocate of making your own jeans - it's just so damn empowering - and I love that now there's all the information you could possibly want all in one place.

Ginger Jeans

Let's finish off with one last look at that boot-ay because... I mean... hot damn!

I'm sure I probably sound like a Closet Case Files fan girl in this post, and, well, I am! But I also hope you guys know I wouldn't just rave about something for no good reason - I'm just really pleased with the way my jeans turned out! 

But I guess the real question is whether or not the Ginger Jeans pattern will replace my Tried and True Built By Wendy jeans pattern? You know... they just may! I most definitely need more of these high-waisted beauties in my closet, and if the low rise version gives equally good ass - then who am I to complain! I will say that I was able to get my dirty little mitts on one of the Ginger Jeans denim kits before they sold out, and... yeah. There's gonna be more Gingers in my future.

What about you guys? Anyone else looking to make this handmade jeans thing happen?

xx
6.10.2014

nick's jeans

DSC_0019
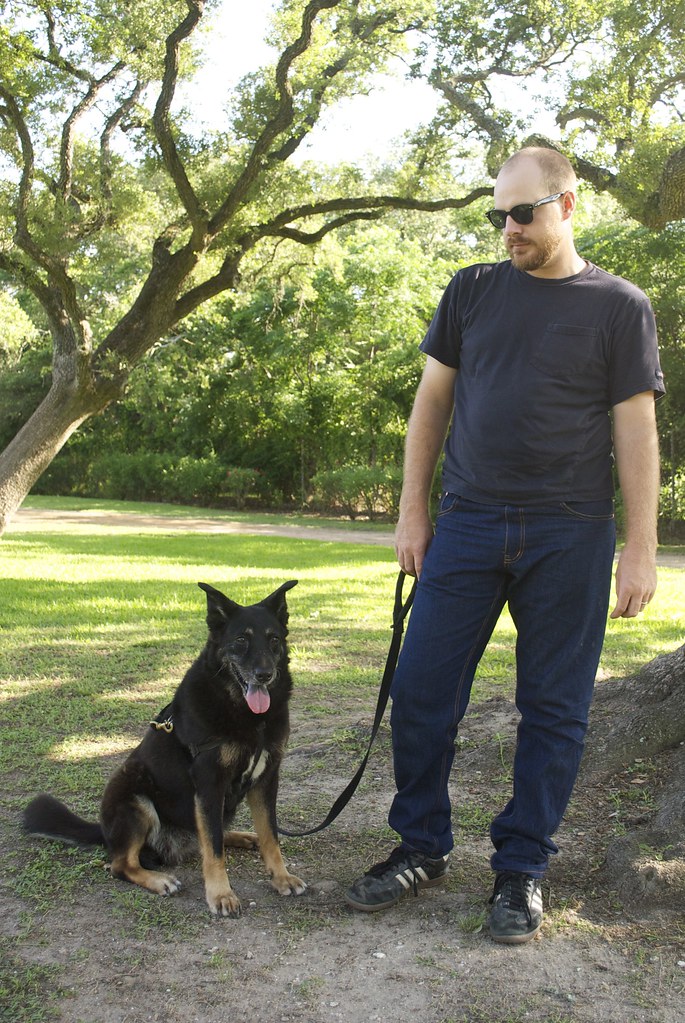
This is Nick doing his best Bruce Springsteen impression... *swoon*
Alternate post title: How To Objectify Your Man.

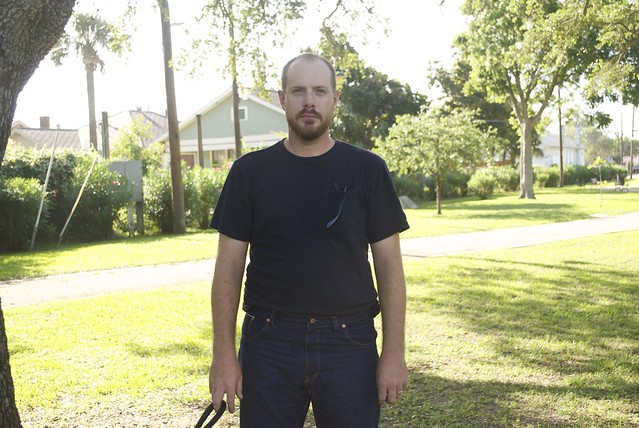
Hi there! I hope you guys aren't sick of looking at jeans yet, because (un)fortunately for you, I'm not sick of making them! I figured since I  got some good jeans-sewing-momentum going with my last pair, I might as well take advantage of it and make good on a promise to Nick to sew him a pair, too.

Now, I don't need to explain my selfish-seamstress ways to ya'll - I know I'm in good company here! But, this past Christmas I bought Nick all the goods - denim, thread, buttons, rivets - for me to make him his very own pair of jeans. And then proceeded to not make him jeans for the next six months! Seriously, I am the worst gift-giver in the history of ever. The fact that I made myself a pair of jeans before his... well... I was starting to feel like if I didn't get on it soon it would just end up being one of those things that gets brought up 20 years from now in an argument ("yeah, like that time you said you were going to make me jeans...") And really, it's not completely unselfish sewing - brownie points with your husband never hurt anything!

DSC_0004

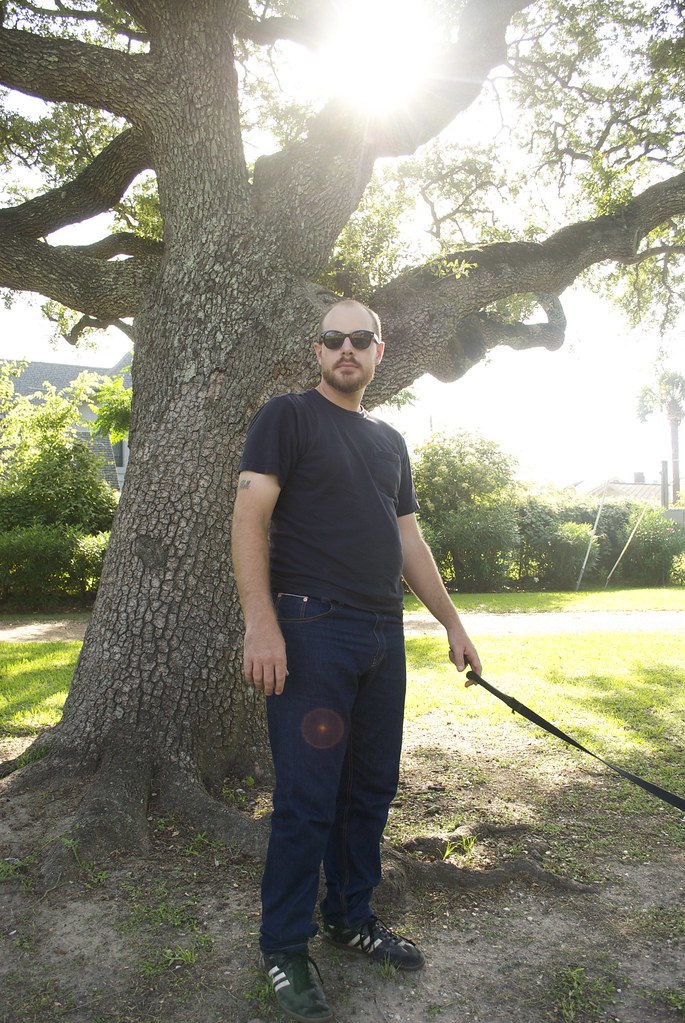
But the jeans! The jeaannnnssss!!! I made Nick a pair of pants back in November using the Jedediah pants pattern from Thread Theory with the intention of using them as a wearable muslin for a jeans pattern. We discussed a few changes he wanted - like a smaller back yoke and higher back pockets, and I felt confident that I could adjust the pattern to make it more of a jeans style, which mainly meant changing the shape of the front pockets. However when I went hunting for denim, I really decided that only selvedge denim would do for my guy.  I bought the 13.5 oz Cone Mills Selvedge Denim from Taylor Tailor's Supply shop (love that guy!) I love the look of a classic, no-nonsense jean on a man - and it's really Nick's style, too (go figure). I felt like selvedge denim would make a great classic looking jean, but still give that extra special little 'something'.

DSC_0009

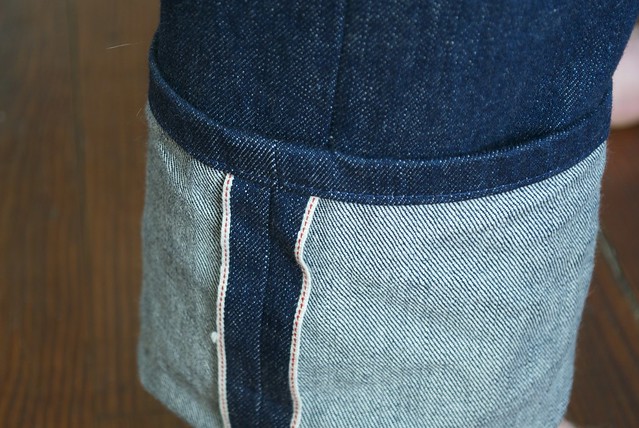
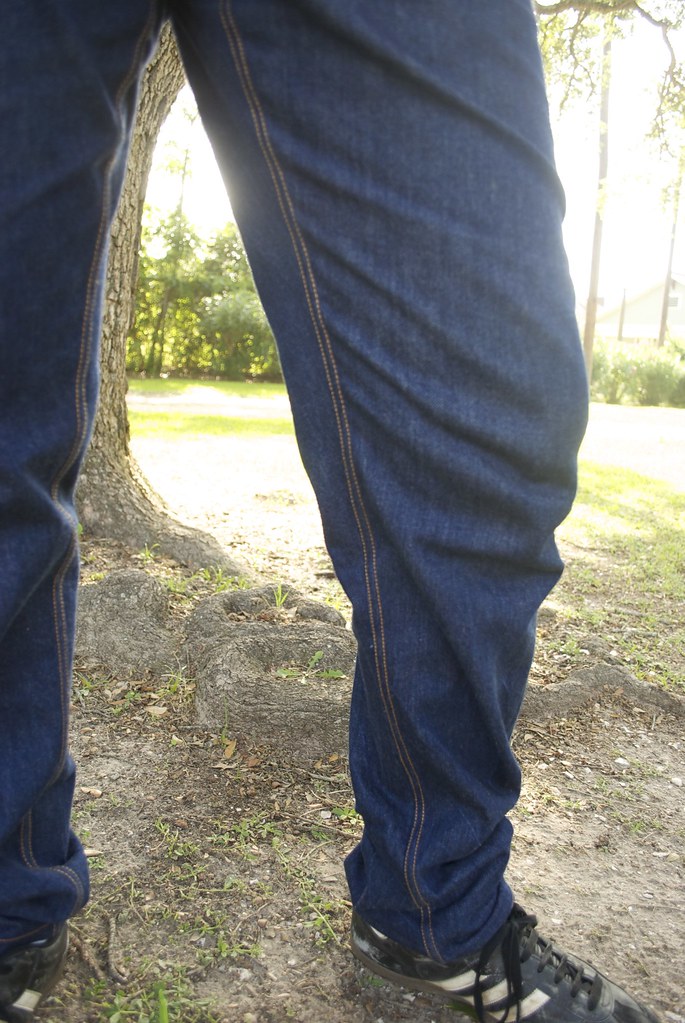
However, that presented a bit of a problem.  If you're unfamiliar with selvedge denim jeans, typically the selvedge - which usually has a contrasting color (this denim has a white and red line) - is used for the out-seam of the leg, which means that the pattern must be completely straight along the out-seam. This meant that I was going to have to make some much larger alterations to the Jedediah pattern, and, truth be told, was one of the main reasons I procrastinated on this for so long. I was really worried that shifting the pattern that much would cause the pants to fall weird. However, I bit the bullet and just decided what the hell, and gave it a go! And it worked out, so phew!

IMG_1233IMG_1234IMG_1235

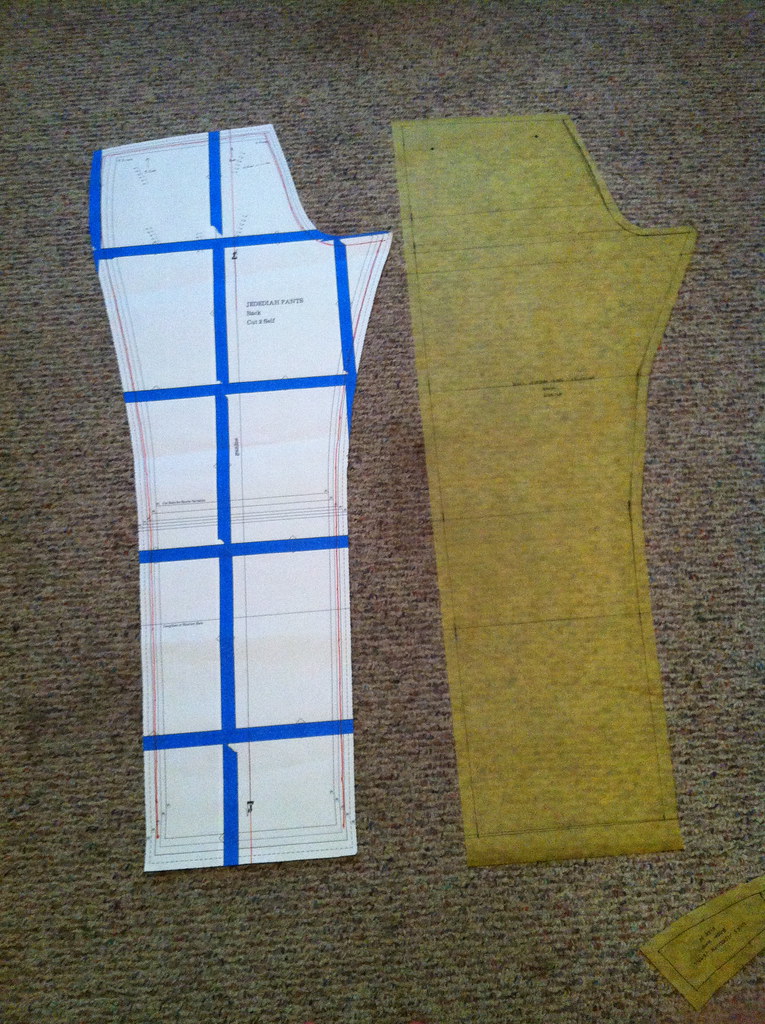
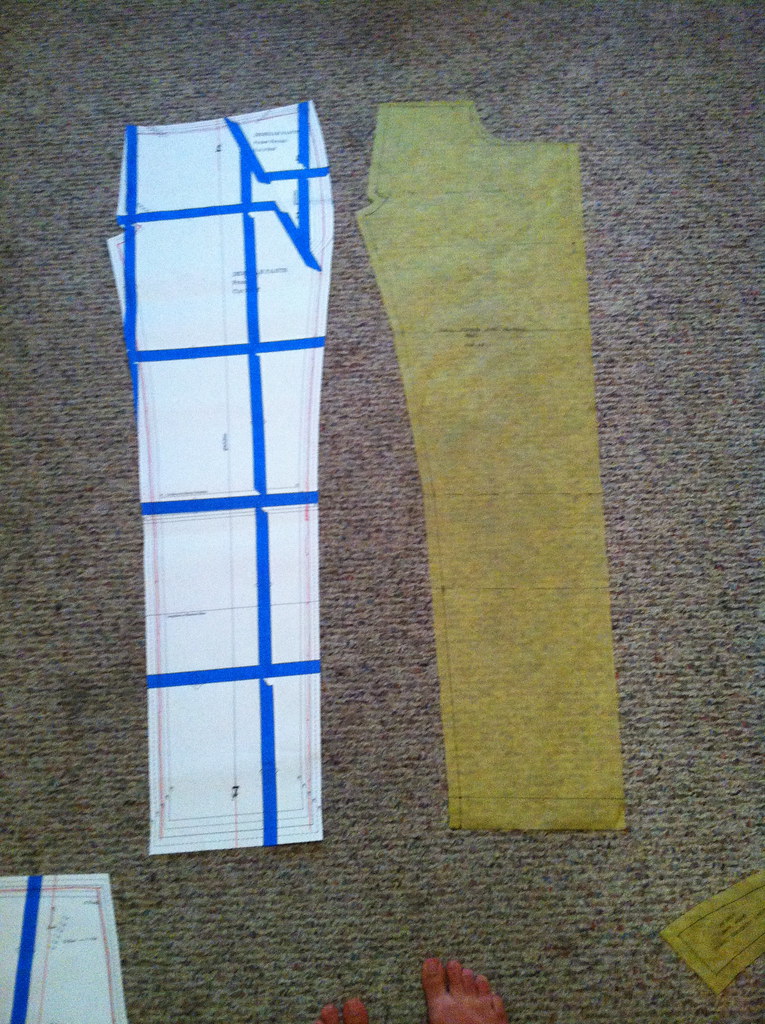
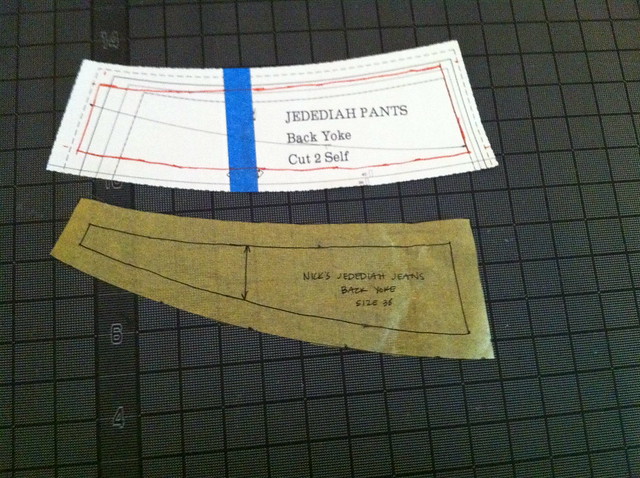
(Apologies for the nasty carpet in my sewing room... I swear it's clean, just old) Hopefully you can see in these photos the difference between the original Jedediah pants pattern on the left, and the altered "Jedediah Selvedge Jeans" pattern on the right. Basically, I measured the distance between the new, straight, out-seam and the original, curved, out-seam at different key points along the length of the leg (high hip, low hip, crotch, thigh, knee, etc.) and shifted the inseam over the corresponding amount.  You can also see how much I changed the yoke piece, too. I measured an old pair of Nick's jeans to get this shape, then transferred the amount I cut off of the yoke to the top of the pants backs.

DSC_0009
DSC_0018

I may have taken a smidgen of width out of the hip/butt area while making all these adjustments, but I swear it was for a good reason! I felt like after wearing, Nick's Jedediah khaki's tend to get a very saggy seat and I thought that might help solve the problem. But I think instead it just made the jeans tight in allll the right places!! Bwahahahaha! Accidental WIN for this lucky lady!

While I don't know that this iteration is Nick's 'perfect jeans pattern', I actually really love the way they turned out. Next time (ha!) I would like to take a bit of width out of the waist in the back because I think that might actually be the cause of the saggy seat. And I might consider taking a tiny bit of width out of the legs, although Nick is pretty happy with the way the legs fit as is.

But let's take a look at some of the details, because with jeans, it's alllll about the details!

DSC_0014

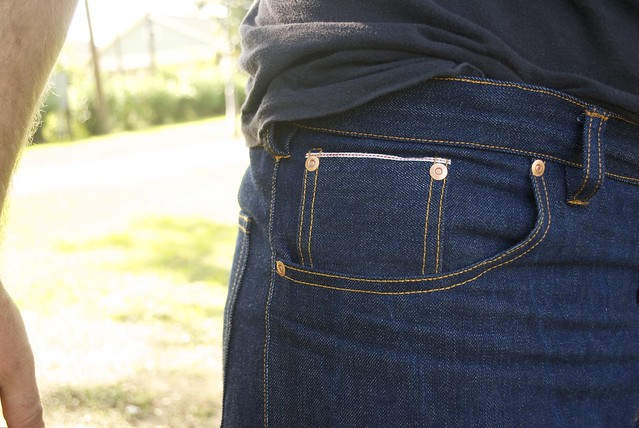
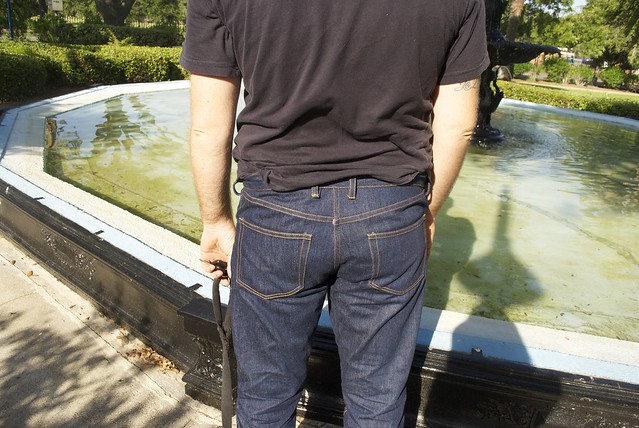
I stole a lof of ideas for these from Taylor Tailor's totally drool-worthy jeans. Here you can see the coin pocket which uses the selvedge edge as a nice design feature. Also prominent in this photo is some of my less-than-perfect topstitching! I was really worried about sewing such thick denim on my conventional sewing machine (an older model Singer HD) but it actually handled it like a champ through most of the process - until I got to the belt loops... oy vey. My machine doesn't love belt loops on a good day, but it was just not. happening. with these! I ended up forgoing my usual bartack method for the belt loops and instead just did a few rows of straight stitching. We'll see how well they hold up.

DSC_0016

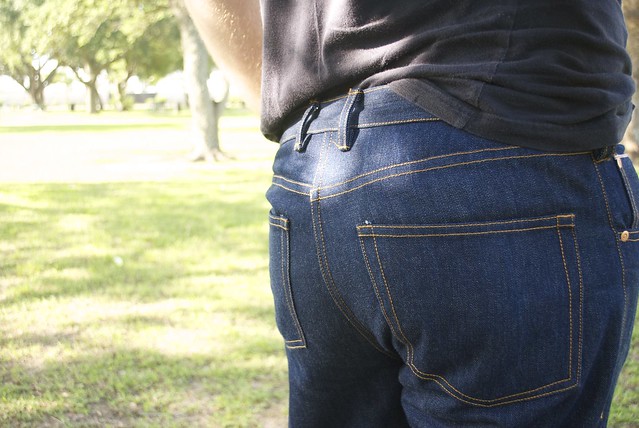
For the back pockets I copied an old pair of Nick's jeans. Everything that could be sewn with a flat-felled seam was sewn with a flat-felled seam. Including the back rise and yokes, which results in a charmingly, slightly off 'v' where the two yokes meet.

DSC_0012

If love were a seam, it would be 72 inches of painstakingly, hand rolled, flat-felled inseam!

IMG_1248

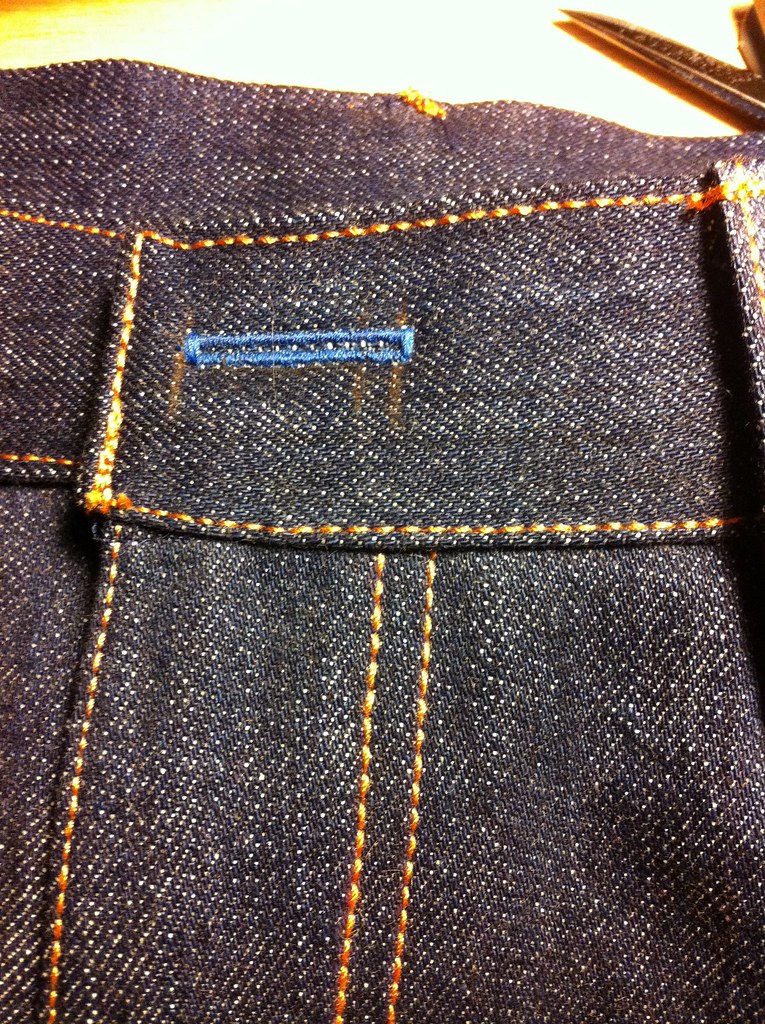
And, oddly enough, one of my favorite details is this little cobalt blue buttonhole!

DSC_0025

I gave Nick strict instructions to limit the amount of washing he gives these jeans. Indigo dyed, 100% cotton denim like this is known for it's ability to break in and 'mold' to the wearer, creating beautiful fades with time. I'm actually quite smitten with these jeans, to be honest! So smitten that I'm itching to make myself a pair, too! But don't worry, I'll take a jeans-sewing break for now and make something else for a bit to end the denim monotony that's been going on around these parts!

And now, because it's my blog and I say so...

DSC_0030

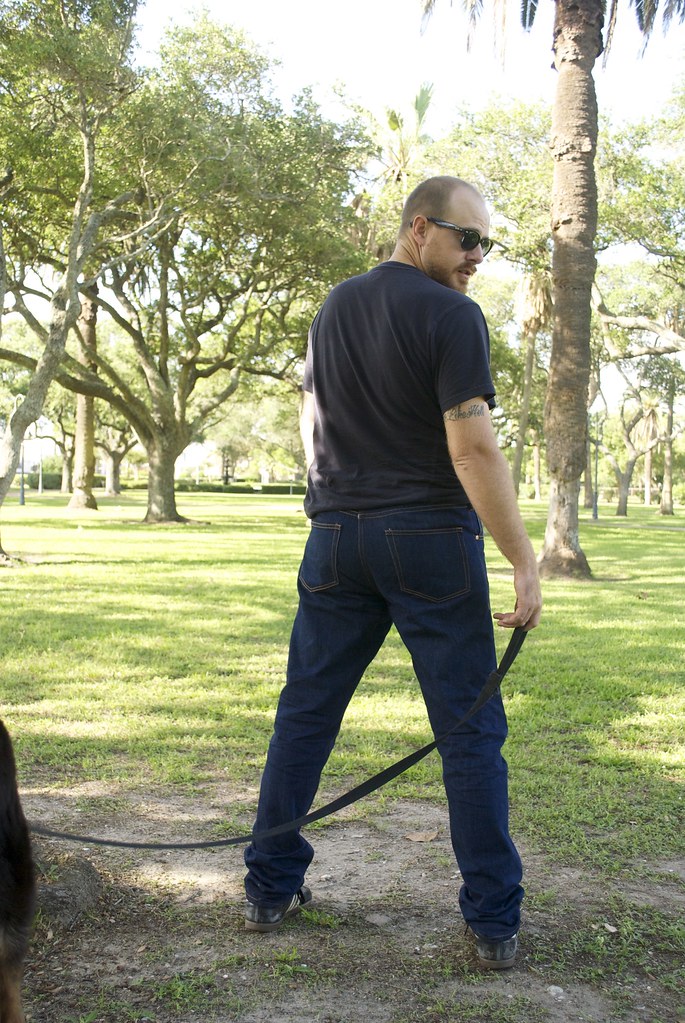
Let's take one last look at that tush!!

Seriously... dude butts do not get enough screen time on this blog!

xx
5.30.2014

black on black

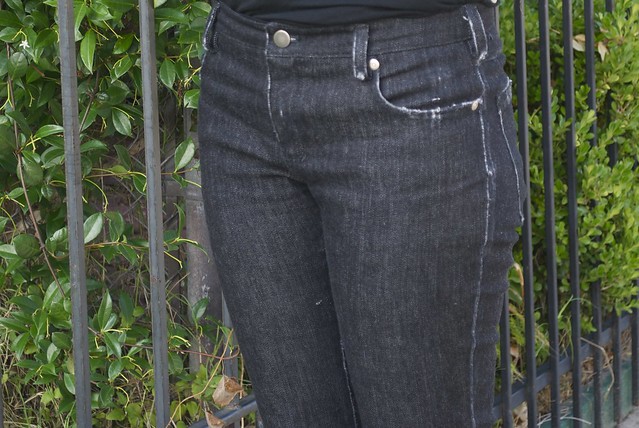
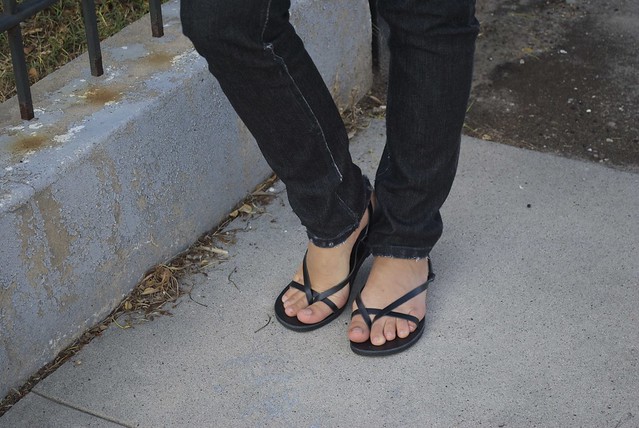
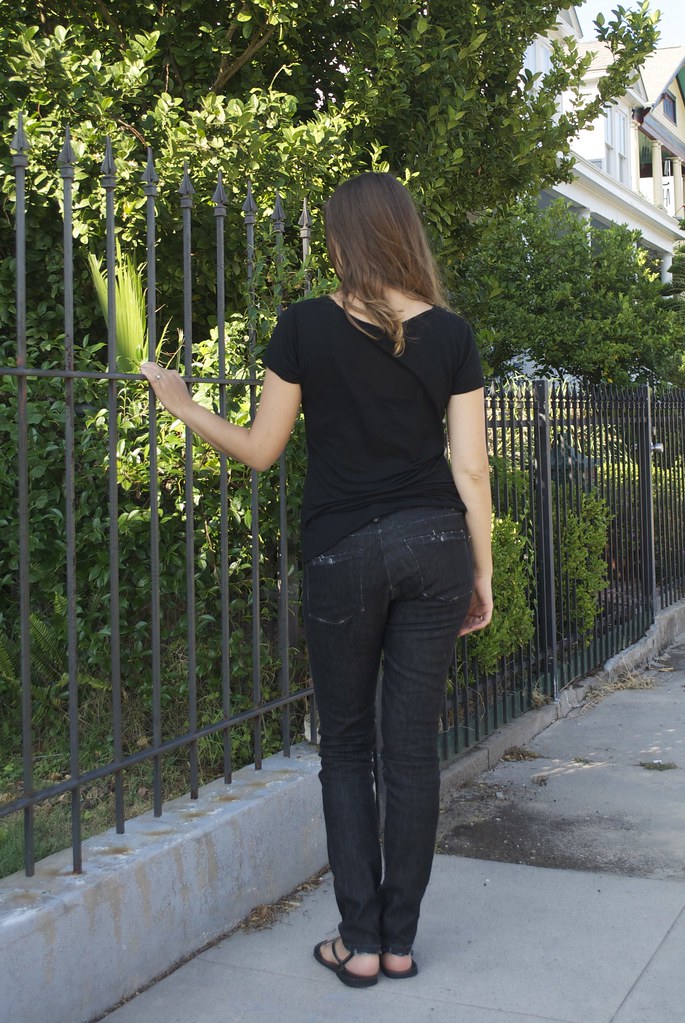
Mood Fabrics Black distressed denim and black jersey tee

Hey everybuddy! I know these pictures look suspiciously a lot like my last post - but I swear it's all new makes! I feel like every year around this time I get the urge to make myself a new pair of jeans - and once I go down the jeans making route, well, it's basically a straight shot to Wardrobe-Basic-Ville!  After all, one can make only so many fun dresses before you're left standing in front of your closet on a random Tuesday morning, naked, with nothing to wear! (No? Only me?)

So for this months Mood Sewing Network make, I bring you the ever-so-humble jeans and a t-shirt combo - in all black. Because black is always the new black. This was mildly inspired by the fact that earlier this month I listened to Just Kids by Patti Smith on audiobook, read by none other than Patti Smith herself. Despite the fact that I was already pretty familiar with Patti Smith and Robert Mapplethorpe's story (I'm pretty sure it's a requirement for every art school kid), it was still a pretty engrossing read... er.. listen? And it definitely led me down a rabbit-hole of image searches where I became pretty obsessed with Patti and Robert's grungy, rock & roll style.

But let's talk about sewing!

Mood Fabrics Black distressed denim and black jersey tee

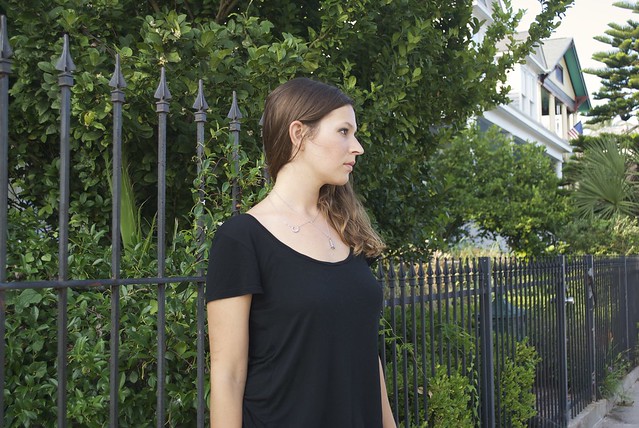
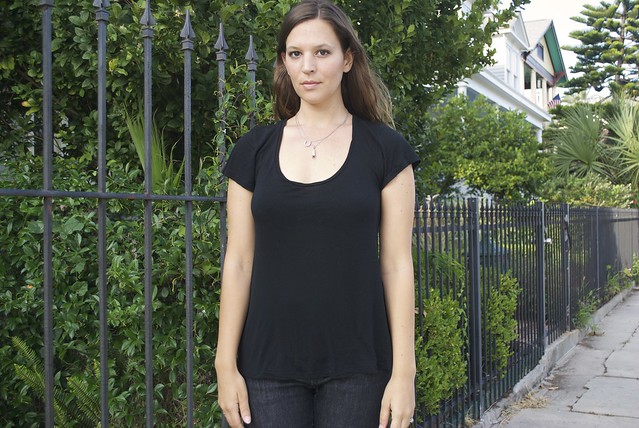
This is my fourth pair of handmade jeans (here, here, and the ones that started it all, here), and I swear they just keep getting better! For this pair I used a black, medium weight denim with a bit of stretch by Theory from Mood Fabrics online. Unfortunately this particular denim is now sold out, but I highly recommend the Theory denim. I've used it for one other pair of jeans and the stuff holds up well. I always like to order swatches of my denim before buying, because it's a bit hard to tell the difference online. That way I can pick out the weight, color, and amount of stretch I like best.  This denim had some stretch for comfort, but wasn't so stretchy that it didn't feel like denim, if you know what I mean. True confessions: I've actually been wearing these jeans for the past three days by the time I got around to photographing them, and the denim hasn't stretched out much at all!

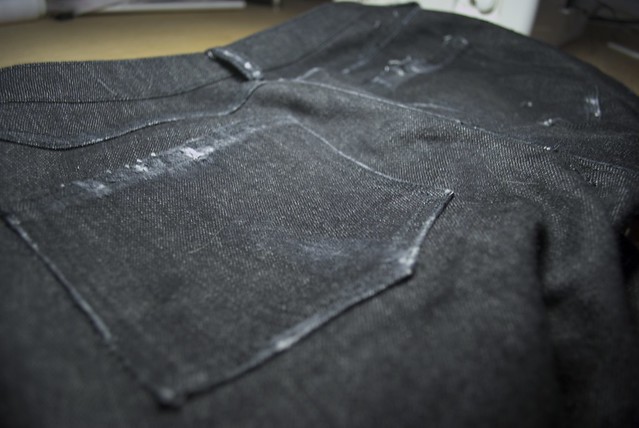
Mood Fabrics Black distressed denim

Also - distressing!!! Denim. Distressing denim. I feel like people generally fall into two camps when it comes to jeans: The Purists (I will take my denim raw, and dark, and made the way my forefathers made it) and The Fashion Followers (Colored denim?! Let's do it!! Printed denim?!?! Where do I sign up!! Denim so torn up and distressed it's practically a crime that their selling it?!?! Gimme some of dat!!!)(Also, I couldn't think of a better name for this camp, suggestions are welcome). And then there's those of us that fall in between. I appreciate some fresh raw denim, so stiff it'll chafe your thighs the first month of wearing, but every now and then I get envious of those cool kids with their store-bought denim all perfectly ripped and faded... 

So I decided to try my hand at some light distressing of my own. After all,  distressing denim is just a fun embellishment! Obviously for the home sewer, industrial distressing techniques are a bit scarce, but you'd be surprised what you can do with a few basic tools. For my pair I used a hammer and a metal plate to hammer each seam, then I took a dremmel tool to the edges to wear them down and fray certain areas. It was great stress relief! You know, in case the yoga and meditation ain't working - there's nothing quite like destroying something to cure what ails 'ya! 

Mood Fabrics Black distressed denim and black jersey tee

For the pattern I used my ol' reliable - the Built By Wendy pants pattern from SewU, which is so altered at this point that I should just call it mine. On my last pair of jeans that I made I had some issues with the dreaded leg twist (that spoiler of all jeans-making fun!) If you're not familiar, leg twist is when one or both legs ... well... twist! It's mildly irritating both visually, and physically for the wearer. It's often the result of inaccurate cutting or sewing, and seems to be very prevalent with jeans due to the twill weave of the fabric - which tends to have built in warp - or skew (according to my google searches). So this time I took a few precautionary steps to prevent this: 1) I traced and cut all pieces on a single layer instead of folded in half (this also results in greater fabric yield) and 2) I made sure that all the leg pieces were cut from the same area of fabric - meaning I lined them all up, going in the same direction, horizontally across the fabric. I actually remembered to take a picture while I was working to show you what I'm talking about:

My yardage was wide enough that all four leg pieces could be placed this way. This way if the twill weave was to skew, they would all skew together! Anyway, it worked! Nothing but perfectly straight seams here! If you want to read more about leg twist - this is a good source.

Mood Fabrics Black distressed denim

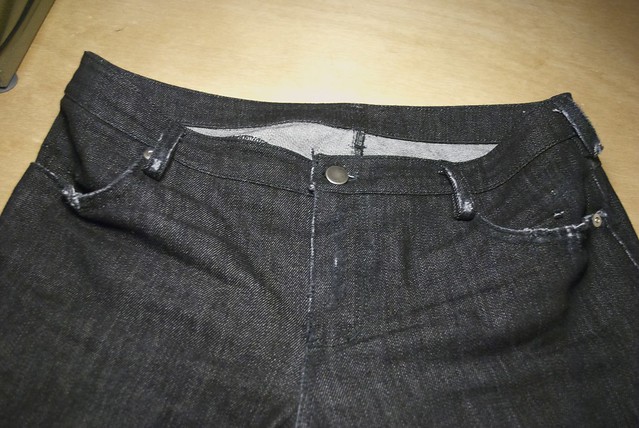
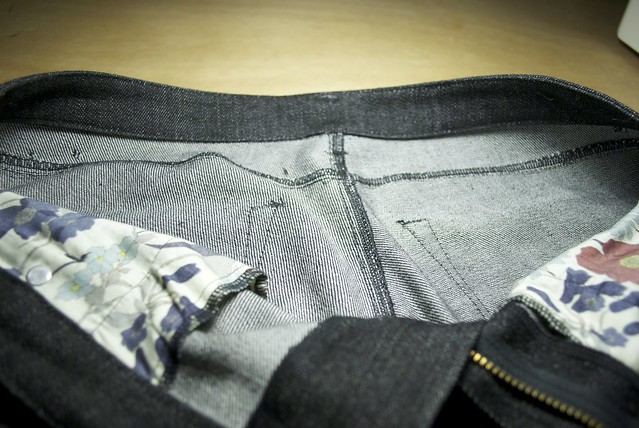
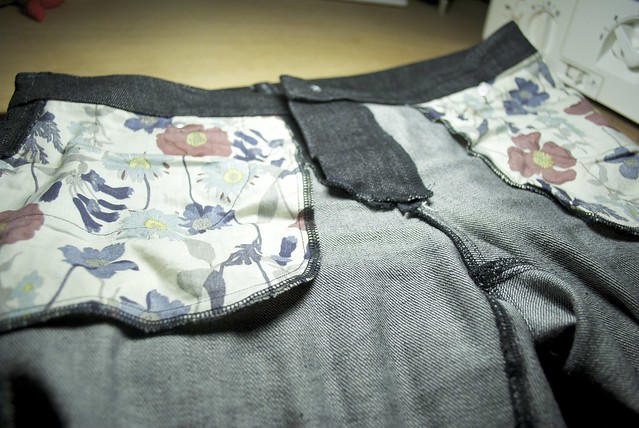
I realized I've never really shown you guys the insides of one of my pairs of jeans. Not that they're all that exciting, but I know how nosy all of us sewists are when it comes to construction! All of my topstitching was done in black topstitching thread, which unfortunately means that it's not super visible. This is a shame, because this just might be my best topstitching on a pair of jeans yet! Also, fun fact - I don't use a twin needle to do any of my topstitching. I've broken way too many twin needles during jeans sewing that I've just given up. I usually draw out my topstitching by hand, and use my chalk lines as a guideline.

I serged all the raw edges since this is stretch denim, and because I was too lazy to do flat felled seams. And the pocket lining is just some pretty floral fabric that I keep around for just such a purpose.

Mood Fabrics Black distressed denim
Mood Fabrics Black distressed denim and black jersey tee

Because jeans sewing can be such a time-consuming project (especially if you're like me and only own one sewing machine - you're constantly changing out thread!) I wanted to pair it with an instant-gratification sew. And nothing says 'instant-gratification' to me quite like a knit t-shirt!

Mood Fabrics Black viscose jersey tee

After seeing Heather Lou's super sexy version of Deer & Doe's Plantain Tee I decided I had to jump on that bandwagon. Also, free t-shirt pattern!?! Yes please! I used this drapey silk viscose jersey from Mood, and, man oh man, is this stuff ever luxurious to wear! Silky and smooth and light, with a lovely fluidity. Even though this pattern calls for a more stable knit, I felt like the drapey quality of this silk viscose would actually pair well with the subtle flared shape of the Plantain tee (and, also, I was copying Heather... duh... clearly I can't get enough of that girl). I stabilized the shoulder seams with a bit of clear elastic, and sewed all major seams on my serger. The sleeve and shirt hems were both simply folded under and finished with a double needle.

Mood Fabrics Black viscose jersey tee

And to thank you guys for putting up with another extra long post, I'll leave you with this gem:

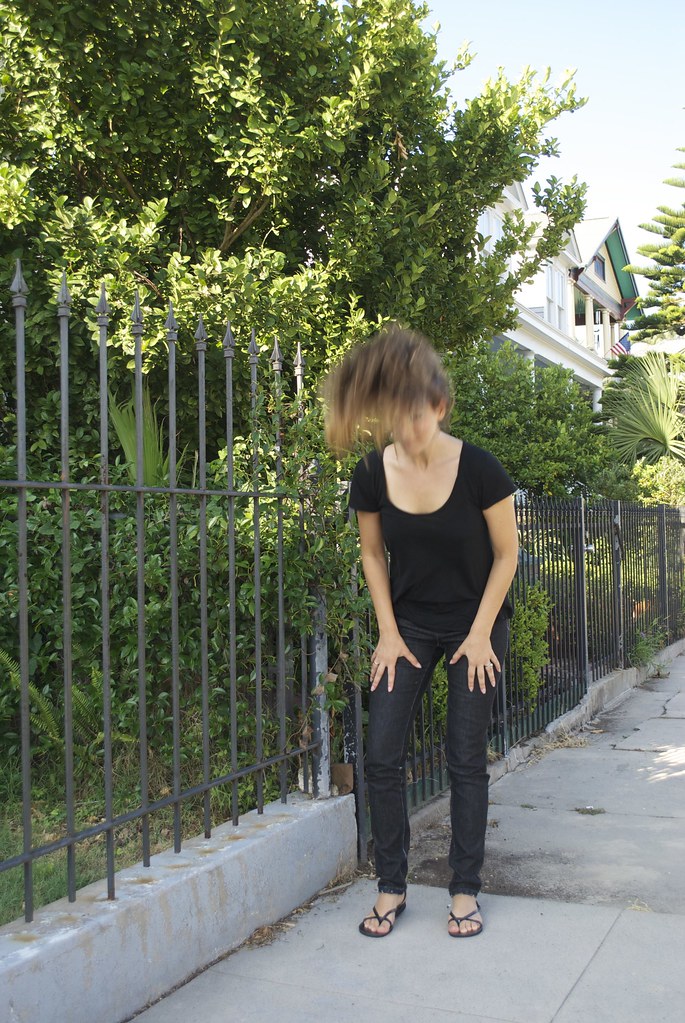
DSC_0053

Not really sure what I was going for there! But ya know... I like to get a little crazy for the camera every now and then. And yes, this was in front of a stranger's house. A stranger who came home while I was taking these. I have no shame...

Well, anyway! I've been wearing both of these makes a ton since they came hot off of the sewing machine! I think that's a sign of a great basic! What about you guys - got any wardrobe basics planned for the near future?

xx
7.15.2013

a new pair

DSC_0047

Hey there! I'm back! I'm so pleased so many of you found the fabric dyeing tutorial instructive, and I do hope to see some hand-painted goodies popping up in my blog reader in the future! If any of you do decide to tackle some fabric dyeing yourself, please send me some pictures! I'd love to steal your ideas wait... that's not right... I mean, suck your creative juices... no... not that either... hmm... let's just go with see what you come up with! Kidding.. kidding...

So what brings me to this rambunctious crop of palmettos on this overcast summer day? I wanted to show off my two latest makes, of course! You might recognize the fabric for this top as the sample that I dyed in my tutorial.  Although the camera was being a bit silly with color - the blue dye is a deeper hue than it appears in these pictures.

DSC_0112

I dyed just under two yards of this white silk crepe de chine - just enough to make a Scout tee! I've been craving some easy, basic summer staples this season, and the Scout definitely fit the bill. I also felt like the pattern lends itself really well to using fun fabrics, like this hand dyed number.  And I'd be lying if I said that I wasn't especially tempted to whip up a Scout as part of that awesome Kollabora contest, but in true Sallie fashion I just didn't get my shit together in time to meet the deadline! Which is a damn shame, because I love prizes. I love prizes almost as much as I hate deadlines! So, as you can see, I am doomed to a life of no prizes and dissatisfaction... woe is me.

DSC_0137DSC_0053

All joking aside here (hehe... I never put the joking aside) I was destined to make this Scout sooner or later as part of my systematic attempt to have my wardrobe littered with Grainline patterns.  Jen, do you make these patterns specifically for me?? I just have to ask. And if so, have you been getting those brain waves I've been sending you? Great, thanks - I'll expect to see sketches on my table by next week then? 

Omigod, I just can't stop the kidding today. What's with me?? Alright. Serious face. Just the facts m'am. I made this top in a size 4, no adjustments.  While this size matches my measurements (exactly - I mean... she's gotta be making these just for me! Right... sorry... back to business...) I could also see me sizing up in the future to get an even slouchier fit for optimum cool-itude. And, as literally everyone everywhere has said about this pattern, it was a breeze to sew up, even in silk, making it a great project for a long afternoon.  I finished all the seams with french seams, not because I'm particularly partial to the, admittedly, pretty finish, but because I was too lazy to change my serger thread from black to white. Ahh yes... you know you have a problem when your laziness induces more work...

DSC_0088

And on to project number two! This past spring I decided it was time for a new pair of jeans.  It had been about a year since I made my first pair - and then commenced to wear them every. single. day of the following 365 days. Funny that it took me an entire year to realize that I should really have more than one pair of jeans in my wardrobe! But after a year of hard wear, my first pair of jeans were no longer looking like my 'nice' jeans - but rather like my 'work' jeans.  Several gallery installs and deinstalls had resulted in paint stains - a years worth of bike commutes meant a few grease stains and the odd snag or two - and countless washings and dryings had meant faded color and tarnished buttons.

It was time.  This was also a great opportunity for me to refine the Built By Wendy pattern (only available in the Sew U book) I've been using as my base for pants. (Question: at what point does a commercial pattern become your own?) Gotta hand it to a years worth of wear 'n tear to show me where a pattern could be improved! Don't get me wrong, I was incredibly happy with my first pair of jeans. Obviously. But there were some small adjustments I wanted to make on this pair - like the depth of the front pocket opening and the overall width of the front pockets.  My first pair's zipper also had a tendency to show a teensy amount, so I used a different insertion method for the fly (Grainline's, in fact!)  But perhaps the biggest adjustment's happened with the fit.  I loved the fit of my first pair of jeans - at first. But over time I noticed that the grain was off on the legs and it really bothered me.  I knew this happened because I took the outer seam in to get them to fit after I sewed up the inseam.  I really needed to adjust the fit overall, and redraw the grainline. So that's what I did with this pair.

DSC_0096DSC_0107

I measured an old pair of Levi's to determine a few style points on this pair.  One interesting thing that I found in doing this is that the pants front were significantly narrower than the pants back.  I think this creates an optical illusion of being curvier in the back, and leaner in the front - and it also makes anatomical sense - since the muscles in the back of our legs tend to be much fuller than our front.  I also decided to have these jeans be a bit less 'skinny' in the ankle than my first pair, so they are cut a bit straighter from the knee down, and I hemmed them shorter.  I like to think of this as a gentle transition from my hipster art school days to a more 'mature' look. Ha!!

I used a Marc Jacobs denim from Mood, with just a hint of stretch along the cross-wise grain.  I know some people are anti-stretch denim, but me? I loves it.  I have to say, I'm really happy with this denim.  Definitely quality stuff. It has the color and feel of old school denim, and it didn't bleed nearly as much as the denim I used on my last pair. Which I take as a good sign. I get a lot of questions about where to buy jeans supplies, and I always recommend Mood for their denim. I order a couple of swatches and choose from there.  My buttons and rivets are from Taylor Tailor (who has a whole store full of really great looking jeans supplies, including some drool-worthy selvedge, non-stretch, denim that I think I might use to make my husband some jeans) and my thread is just Gutterman topstitching thread - though Taylor Tailor has some really gorgeous topstitching thread I might splurge on for my next pair!

DSC_0067

Well that's all for now! I literally have a 'to sew' list a mile long... anyone else have this problem? I swear, all these gorgeous indie pattern companies keep releasing winners this season. I'm having a hard time saying 'no'!

xx