6.18.2014

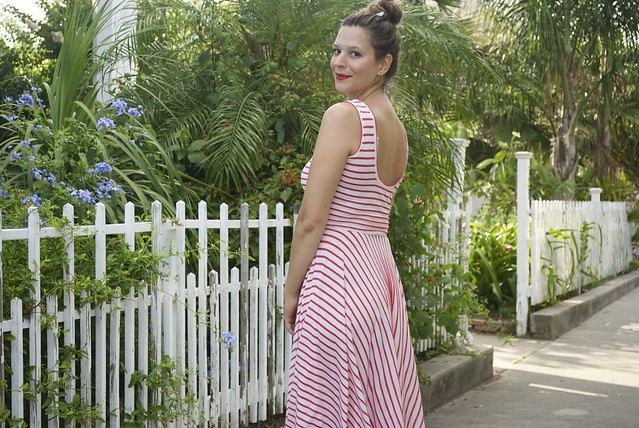
candy striper

DSC_0044

Do you guys remember that part in Sex and the City when Big is in New York for heart surgery and Carrie can't stop crying, and she goes to his hotel room where he's recuperating all dressed up like a sexy candy striper to keep him company, and they play games all night, and as they're falling asleep Big is like, "Kid, what are we doing?", and we're all like, "YES! Big finally gets it!", but then in the morning they wake up and he's all distant, and dick-ish, and kicks over the dominos, and we're like, "God dammit! Why do I even watch this show?!?" ?

Yeah... me too...
DSC_0037

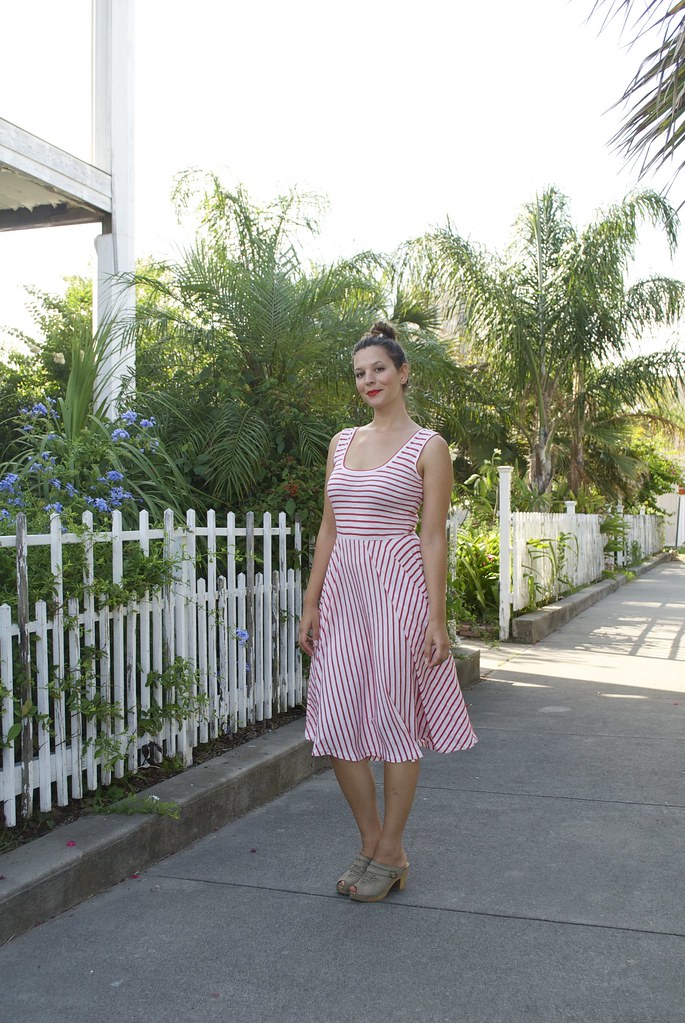
This post has nothing to do with that. Except that anytime I see a fabric with thin red lines (especially if they're vertical) I inevitably think of the traditional candy striper uniform (and not necessarily the sexy kind!)

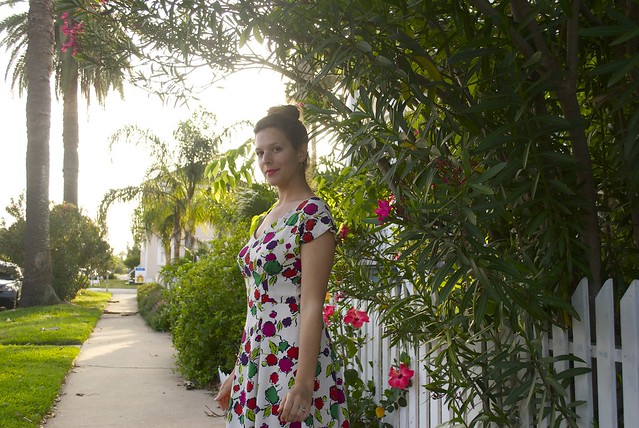
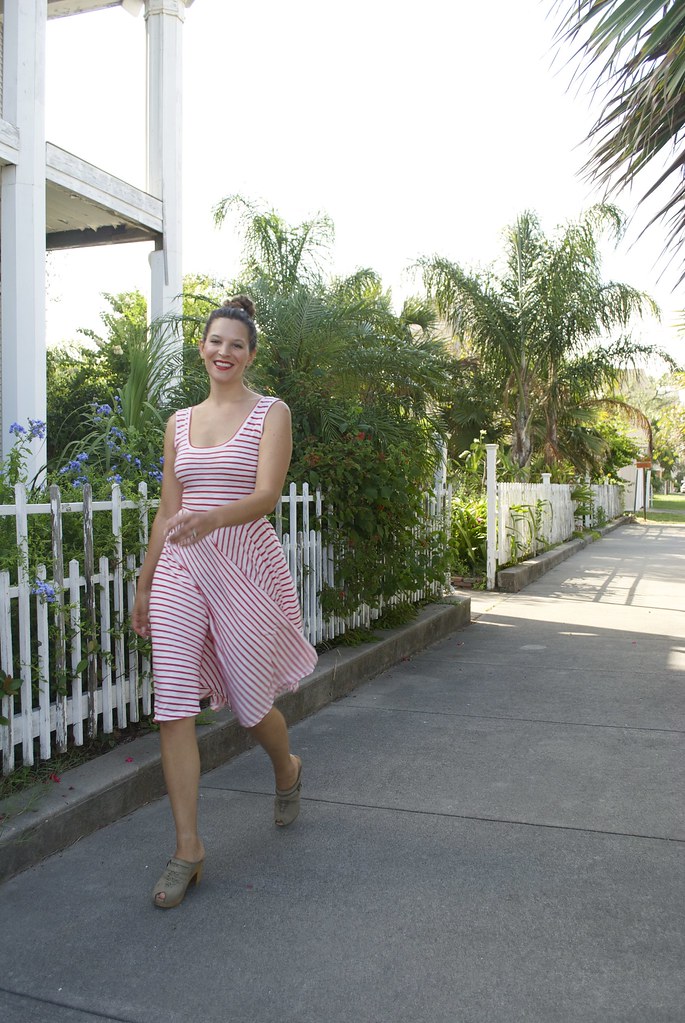
But enough of my free associating! I made a new dress! A simple, classic, easy breezy, knit dress - perfect for pulling on and feeling 'done' in a matter of seconds. I love it for work, I love it for the weekends, I love it for the swelteringly hot summer days we've been having, and for the many more that are yet to come! 
DSC_0051

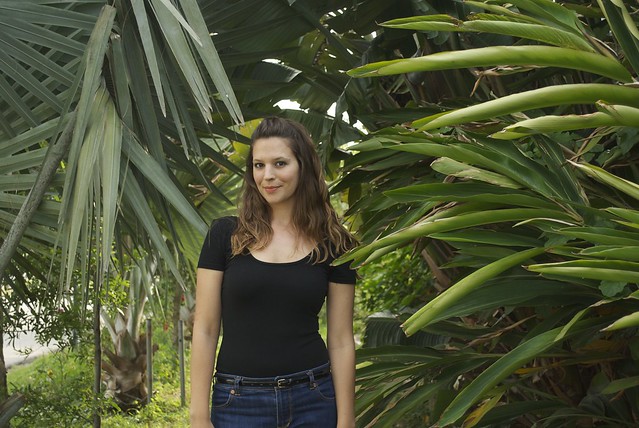
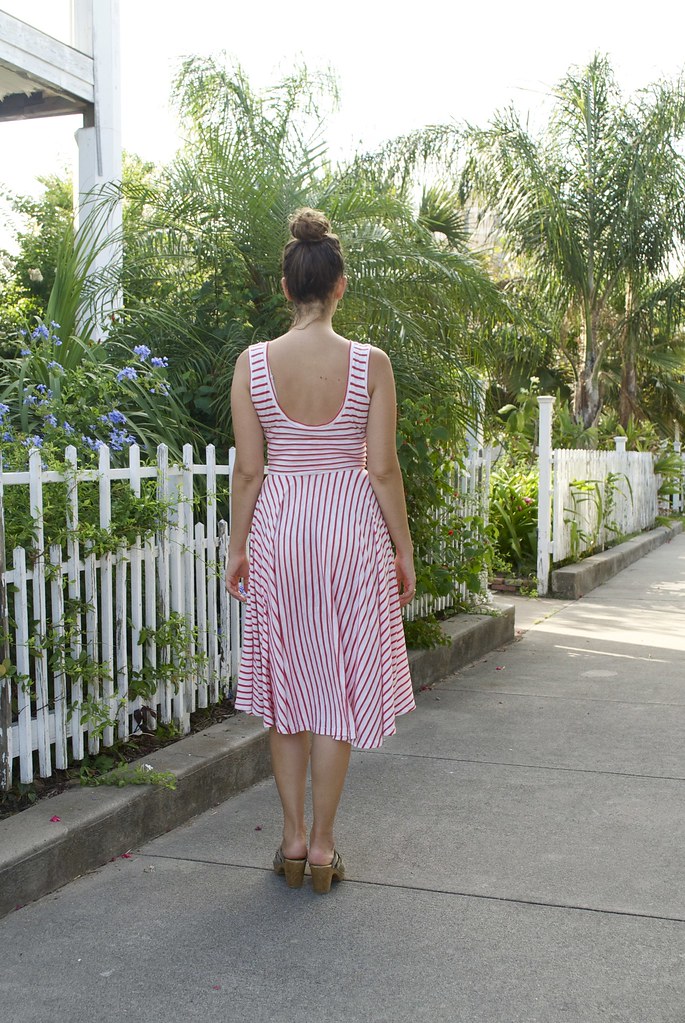
This is my first, of (hopefully) many, Nettie hack dresses (and before you even ask, yes I am aware that my hem is uneven... more on that in a bit). Ever since making my black Nettie bodysuit I've been scheming up ways to work that pattern, because that little bodysuit has been getting a lot of wardrobe play! My favorite way to wear it is with fuller skirts, so when I was planning a Nettie hack it seemed like a no brainer to pair the top of the bodysuit with a full skirt. There are plenty of patterns out there to create a similar dress (Kitschy Coo's Lady Skater dress, and Colette's Moneta come to mind, but I'm sure there are others). However, this was such an easy pattern hack that it seems a bit silly to purchase another pattern. That Nettie is proving to be quite the versatile little pattern!
DSC_0018

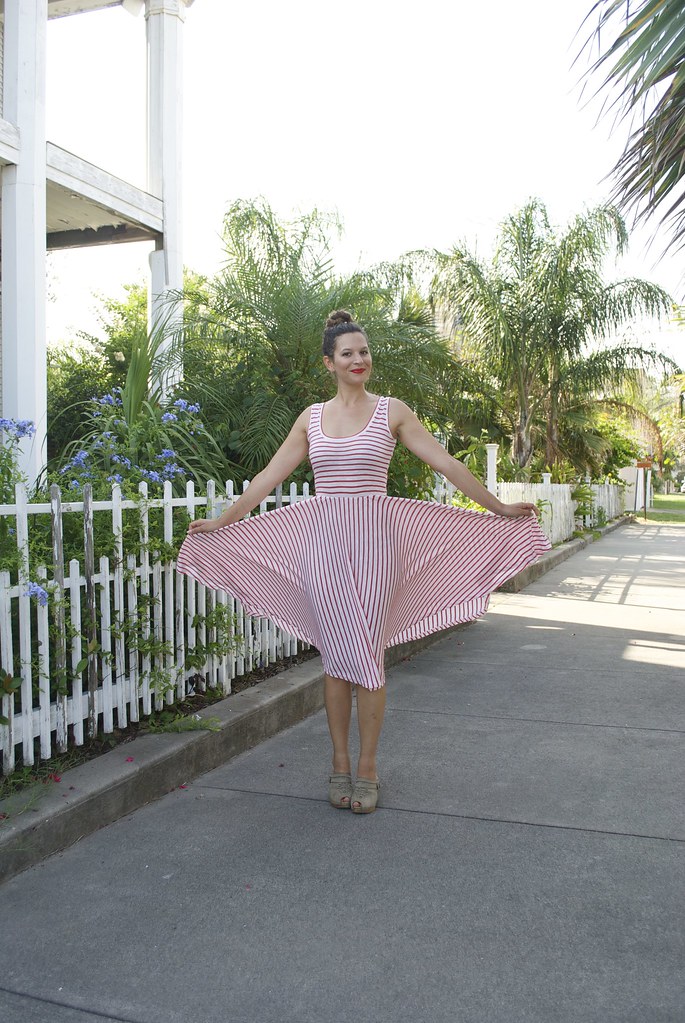
To make this I simply tried on my Nettie bodysuit, made a mark where my natural waist fell, then took it off and transferred that mark to the flat pattern (for reference, on me, it was about 1 inch below the second 'lengthen/shorten' line). Then I drafted a half circle skirt using my actual waist measurement, which is 27.5 inches, and the length I wanted the skirt to be, 26 inches (my preferred midi length), and with the help of the BHL circle skirt app, was able to figure out the maths and draw it up. I cut two half circles and sewed them together at the side seams to make a full circle (of course this was my intention all along so I took that into account when figuring out the waist radius. If this is making your head hurt, don't worry, mine hurts way worse!)
DSC_0032

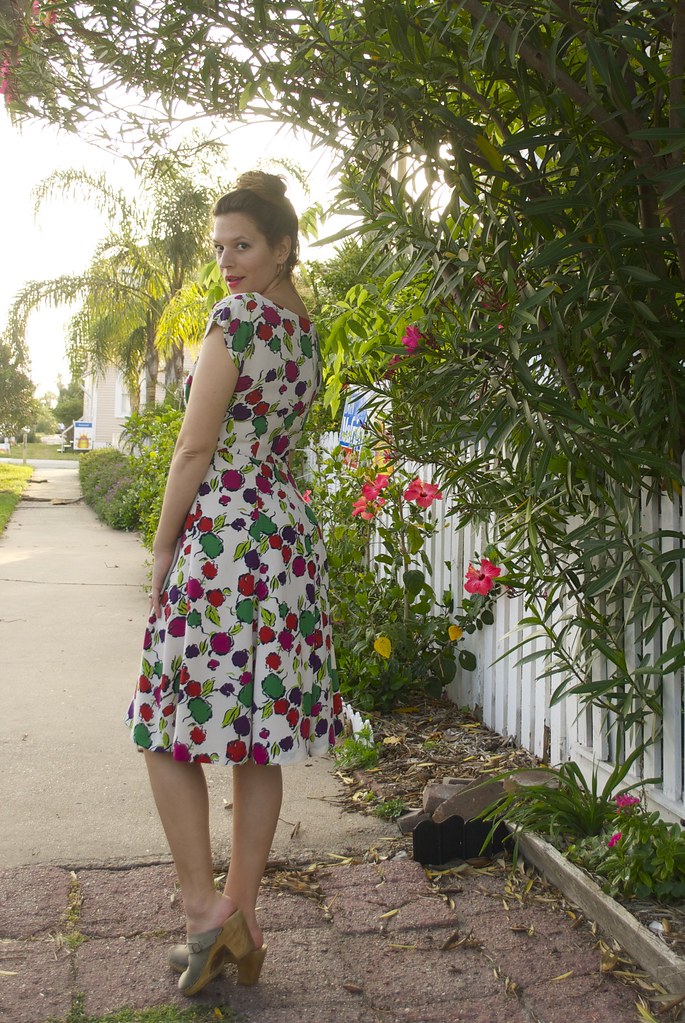
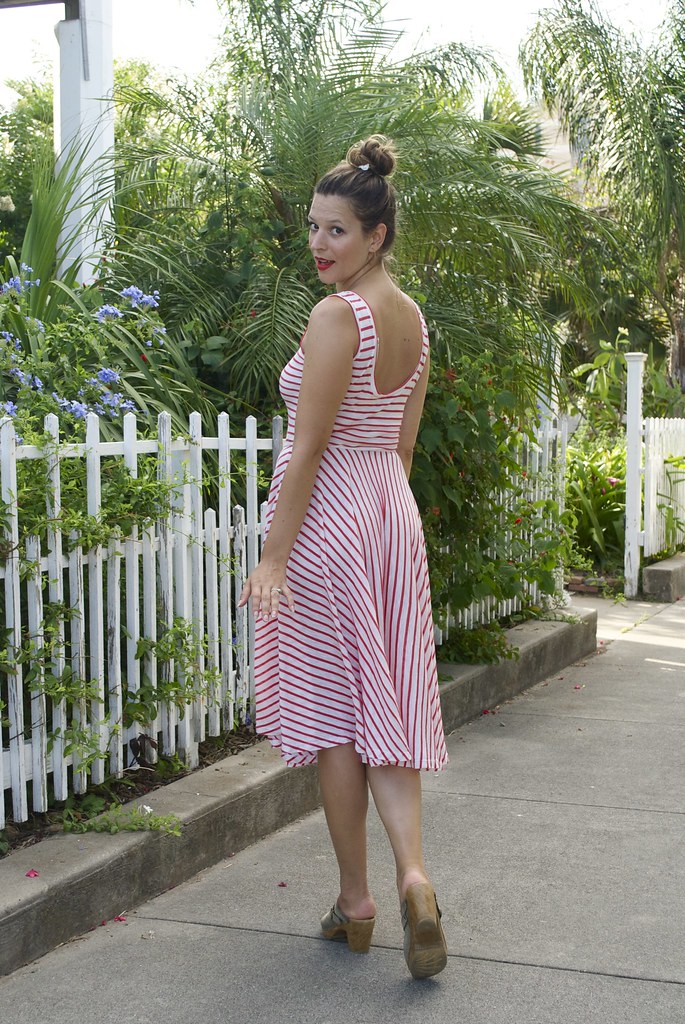
I suspect my less-than-accurate method of circle skirt drafting could use some work, because as you can see in some of these photos, the hem dips down in one area on both the back and the front. This would have been an easy thing to catch had I taken a second to try on the dress before I hemmed it, but I was in such a rush to wear the damn thing I went full speed ahead! It wasn't until I donned the finished dress and paraded out to the living room to show Nick that I discovered my error. It went a little something like this:

Me: Hey! How do you like my new dress!
Nick: (wolf whistles and other prerequisite admiring sounds) Looks great! I especially love the uneven hem!
Me: WHAT DO YOU MEAN 'UNEVEN HEM'????!!!!

Of course I could go back and fix the uneven areas, but let's be real, I'm not going to. I can live with a little hem dip if you can.
DSC_0046

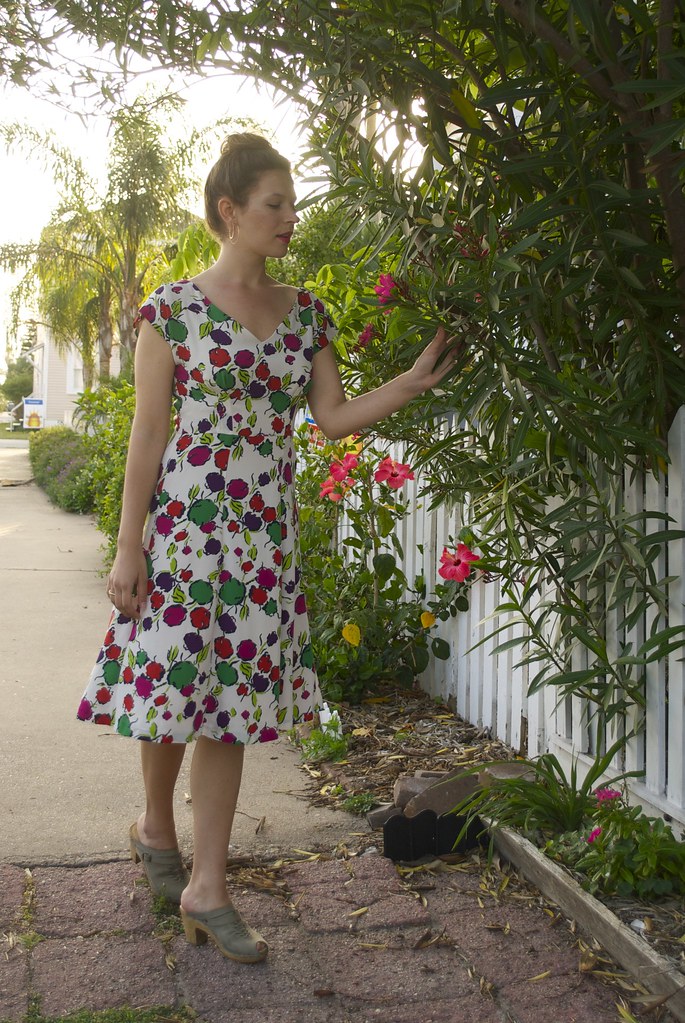
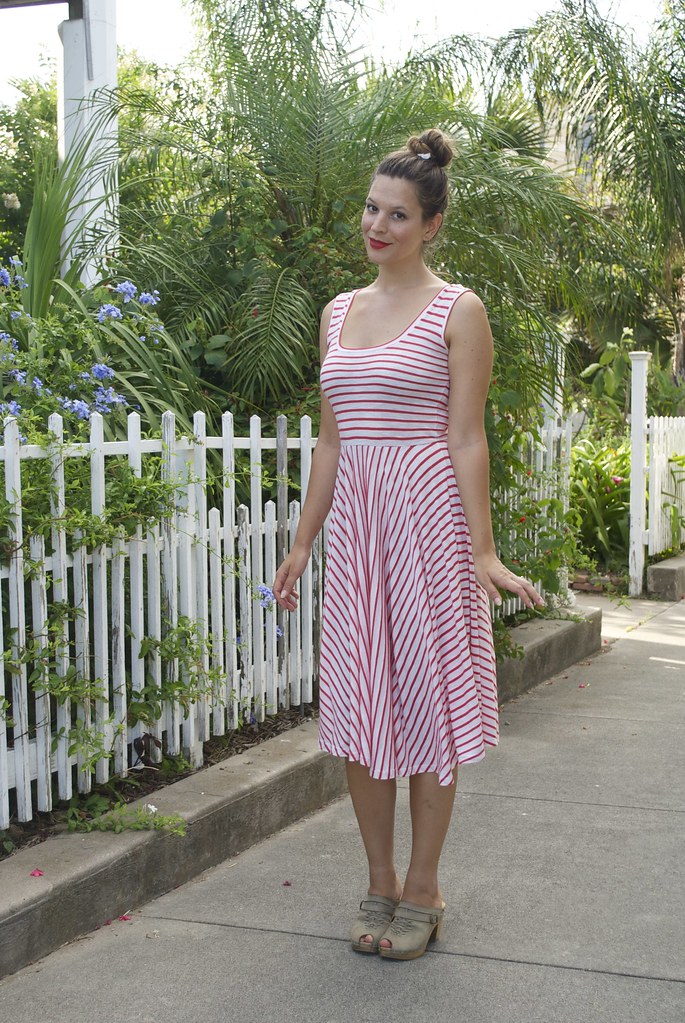
The fabric is a cotton jersey with a "Persimmon Red Slub Stripe" from Girl Charlee. It has about 30% width wise stretch, and not much vertical stretch. It's slightly sheer, but I just couldn't bring myself to line it (re: swelteringly hot) so nude undergarments are a must! I love the slightly preppy look of stripes in summer dresses, and playing with stripe direction is always fun when planning a garment. I love the way the stripes change direction across the circle skirt - it makes this garment look much more complicated than it is!
DSC_0045

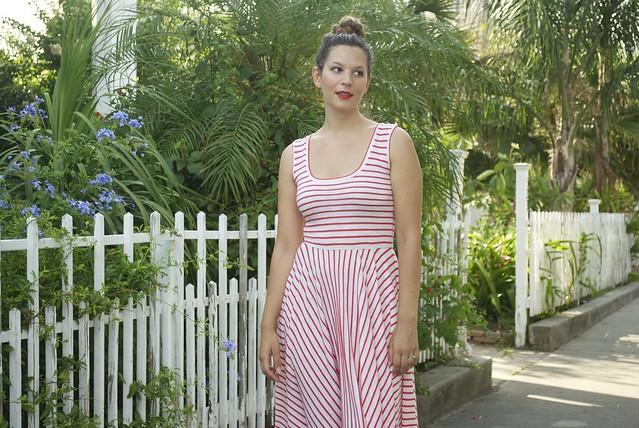
There's not too much to say regarding the actual construction of the dress. I used a long zig-zag stitch, and a walking foot, to baste all the seams before sewing them on the serger to ensure that all my stripes matched up. I used clear elastic to stabilize both the shoulder and the waist. For the waist, I cut my elastic to fit the un-stretched waist of the bodice (26 inches), then first basted my skirt to the elastic, stretching the elastic as I went to create an even gather at the skirt waist. Then I serged the bodice and skirt together. This creates a nice, straight, waistline. As you can see, I left off the sleeves to the Nettie and instead used the same flat-binding method that is used for the neckline to finish the armholes. The hem, predictably, took forever. I first serged the raw edge, then sewed a long gathering stitch along the edge, turned it up and eased in the fullness, pressed it and stitched it down with a twin needle. Besides the uneven-ness, the hem is quite pretty!
DSC_0041

And for the second non-sequitor of this post, let's talk real quick about bodies - somehow it just feels so tied up with sewing your own wardrobe, and this dress is a great example of how making my own clothes has changed the way I feel about my body. This past weekend I was getting caught up on some blog reading and I read this post from Sarai over at the Coletterie which really resonated with me. I agree with pretty much all her points, but the one that really stood out to me was "Body Attitudes Change". Not to completely reiterate Sarai's post, but, you guys, bodies change!! And what's even more, the way we feel about our body, and in our body, and what we put on our body changes too. Even just a year ago I would not have considered this silhouette particularly flattering on me, but now, I just can't get enough of it! For the record, while my body is healthy and strong and (I feel) beautiful, I am not at my thinnest, nor my most toned. I lead an active life, but I don't really exercise, and as I get older it shows. You would think I'd be more comfortable in the looser clothes I used to favor, or ones that don't highlight my wide(er) waist, and full(er) upper body. Don't get me wrong, I still love my loose, billowy styles, it's just these days I've been feeling prettier, and more like 'myself' in curve-hugging silhouettes. At times it's almost felt like an identity crisis! 

It's extremely interesting to think about the way your body evolves in relation to the way your tastes and style evolves. It doesn't always work the way you think. I can't say whether these styles, like the dress here, are 'technically flattering' for my body 'type' (whatever that means). But I do know that I feel good in them, and to my eye, I don't look too shabby either.

What about you guys, has your tastes or style evolved in relation to your body changes? Has it surprised you?

xx

6.10.2014

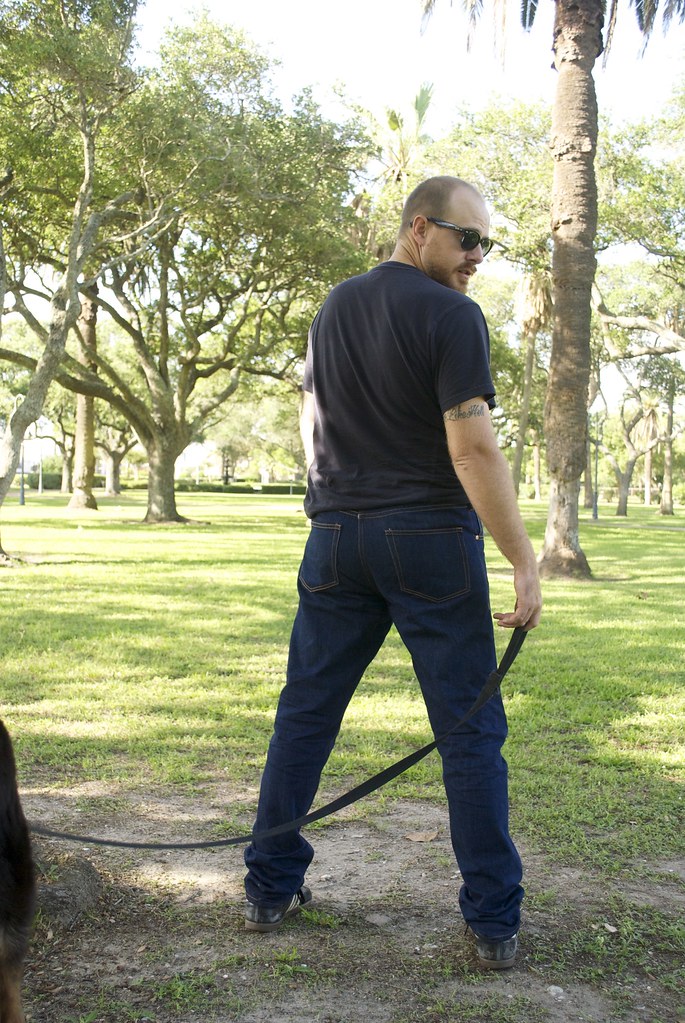
nick's jeans

DSC_0019
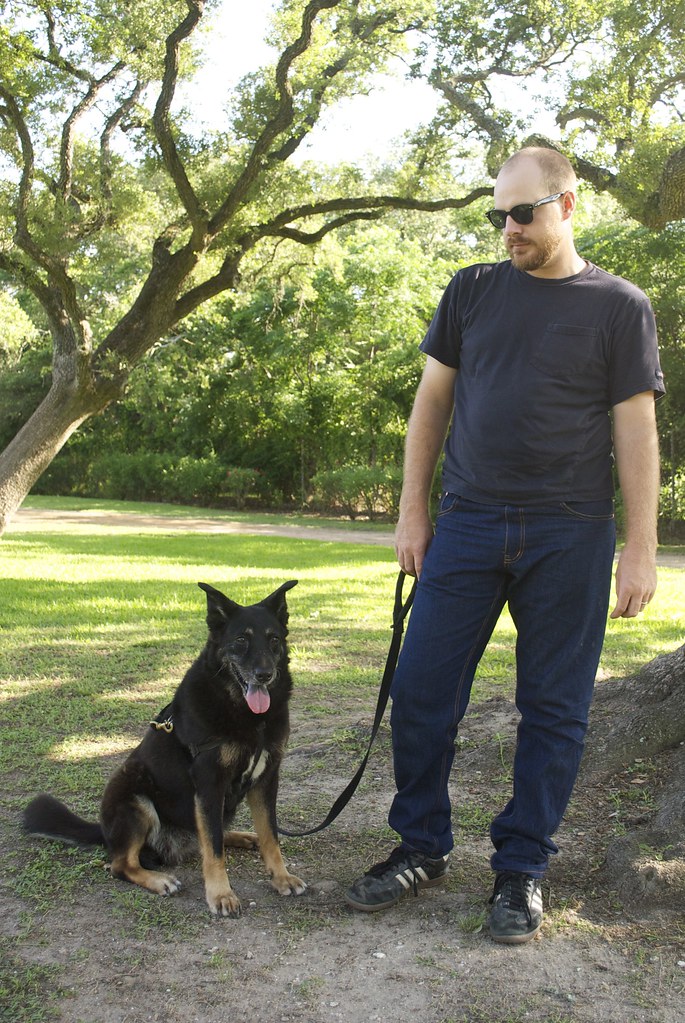
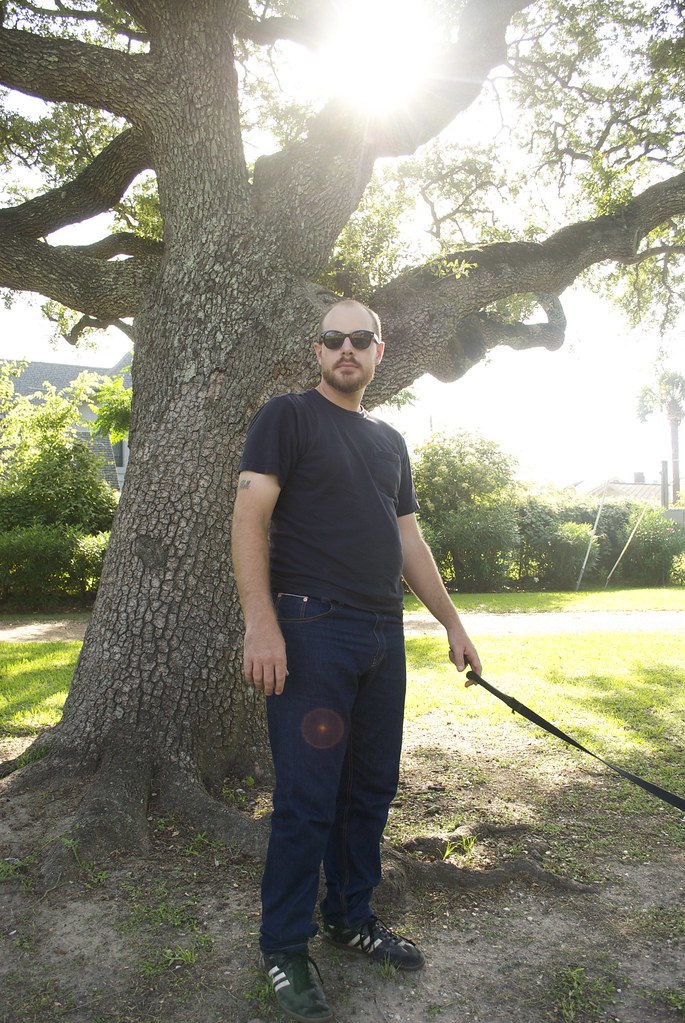
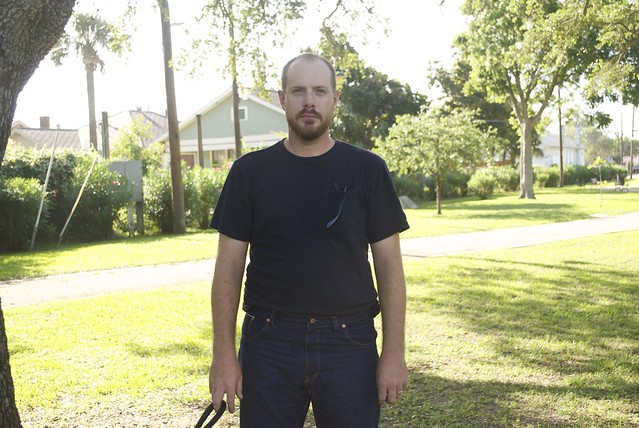
This is Nick doing his best Bruce Springsteen impression... *swoon*
Alternate post title: How To Objectify Your Man.

Hi there! I hope you guys aren't sick of looking at jeans yet, because (un)fortunately for you, I'm not sick of making them! I figured since I  got some good jeans-sewing-momentum going with my last pair, I might as well take advantage of it and make good on a promise to Nick to sew him a pair, too.

Now, I don't need to explain my selfish-seamstress ways to ya'll - I know I'm in good company here! But, this past Christmas I bought Nick all the goods - denim, thread, buttons, rivets - for me to make him his very own pair of jeans. And then proceeded to not make him jeans for the next six months! Seriously, I am the worst gift-giver in the history of ever. The fact that I made myself a pair of jeans before his... well... I was starting to feel like if I didn't get on it soon it would just end up being one of those things that gets brought up 20 years from now in an argument ("yeah, like that time you said you were going to make me jeans...") And really, it's not completely unselfish sewing - brownie points with your husband never hurt anything!

DSC_0004

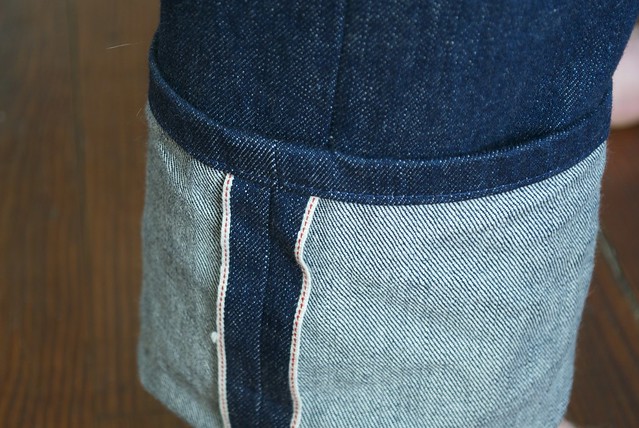
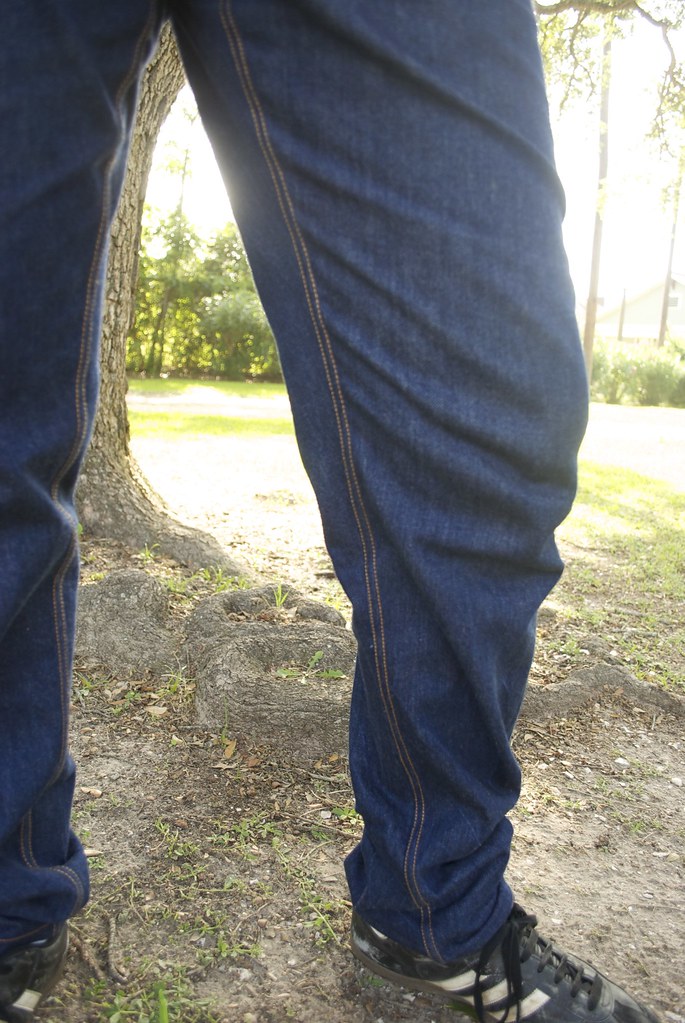
But the jeans! The jeaannnnssss!!! I made Nick a pair of pants back in November using the Jedediah pants pattern from Thread Theory with the intention of using them as a wearable muslin for a jeans pattern. We discussed a few changes he wanted - like a smaller back yoke and higher back pockets, and I felt confident that I could adjust the pattern to make it more of a jeans style, which mainly meant changing the shape of the front pockets. However when I went hunting for denim, I really decided that only selvedge denim would do for my guy.  I bought the 13.5 oz Cone Mills Selvedge Denim from Taylor Tailor's Supply shop (love that guy!) I love the look of a classic, no-nonsense jean on a man - and it's really Nick's style, too (go figure). I felt like selvedge denim would make a great classic looking jean, but still give that extra special little 'something'.

DSC_0009

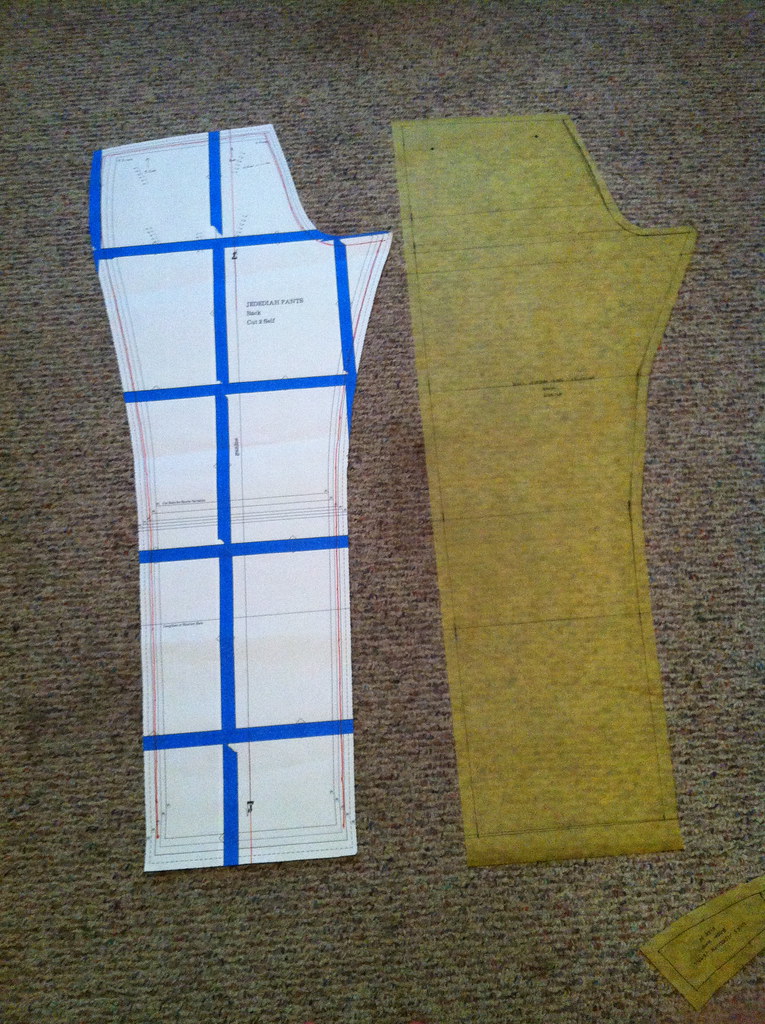
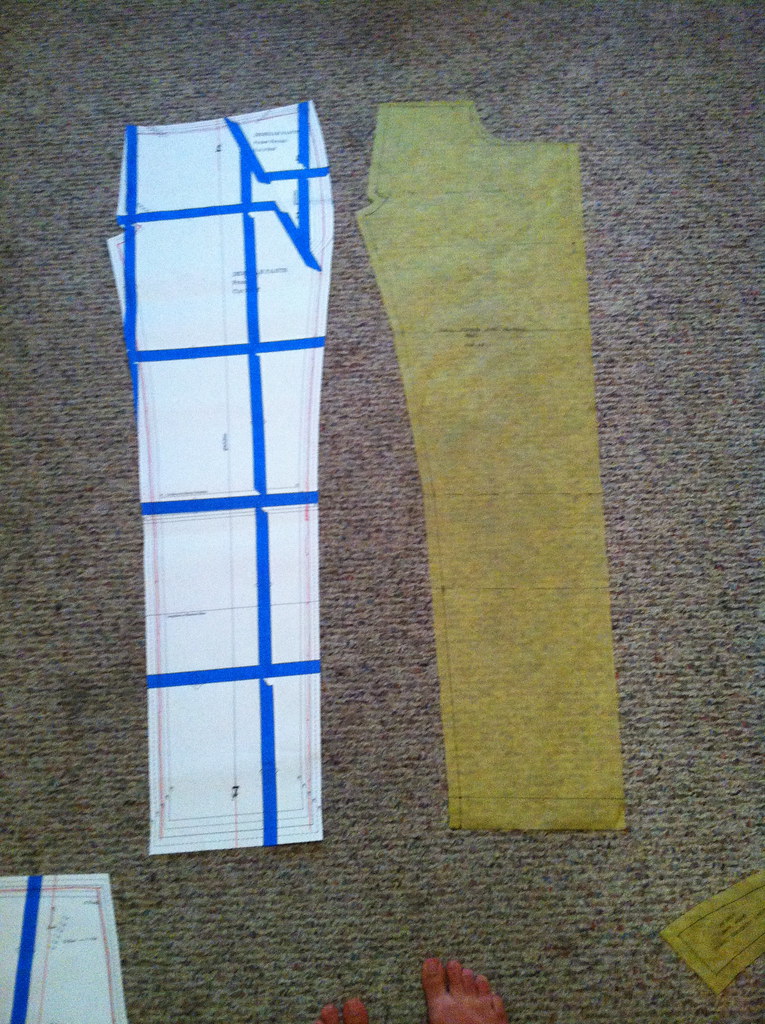
However, that presented a bit of a problem.  If you're unfamiliar with selvedge denim jeans, typically the selvedge - which usually has a contrasting color (this denim has a white and red line) - is used for the out-seam of the leg, which means that the pattern must be completely straight along the out-seam. This meant that I was going to have to make some much larger alterations to the Jedediah pattern, and, truth be told, was one of the main reasons I procrastinated on this for so long. I was really worried that shifting the pattern that much would cause the pants to fall weird. However, I bit the bullet and just decided what the hell, and gave it a go! And it worked out, so phew!

IMG_1233IMG_1234IMG_1235

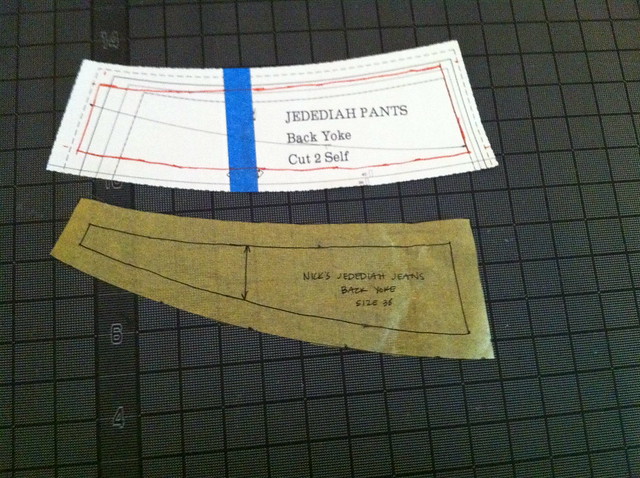
(Apologies for the nasty carpet in my sewing room... I swear it's clean, just old) Hopefully you can see in these photos the difference between the original Jedediah pants pattern on the left, and the altered "Jedediah Selvedge Jeans" pattern on the right. Basically, I measured the distance between the new, straight, out-seam and the original, curved, out-seam at different key points along the length of the leg (high hip, low hip, crotch, thigh, knee, etc.) and shifted the inseam over the corresponding amount.  You can also see how much I changed the yoke piece, too. I measured an old pair of Nick's jeans to get this shape, then transferred the amount I cut off of the yoke to the top of the pants backs.

DSC_0009
DSC_0018

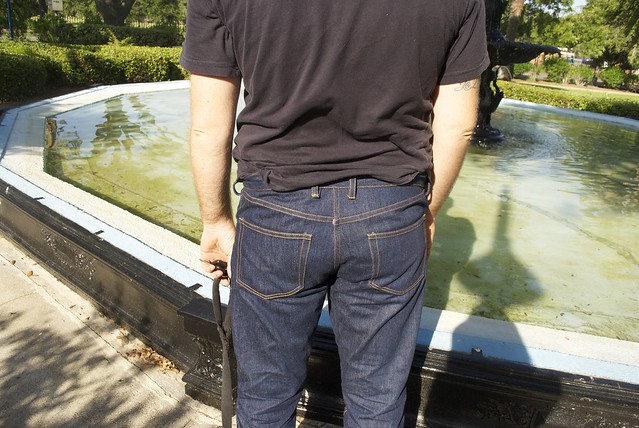
I may have taken a smidgen of width out of the hip/butt area while making all these adjustments, but I swear it was for a good reason! I felt like after wearing, Nick's Jedediah khaki's tend to get a very saggy seat and I thought that might help solve the problem. But I think instead it just made the jeans tight in allll the right places!! Bwahahahaha! Accidental WIN for this lucky lady!

While I don't know that this iteration is Nick's 'perfect jeans pattern', I actually really love the way they turned out. Next time (ha!) I would like to take a bit of width out of the waist in the back because I think that might actually be the cause of the saggy seat. And I might consider taking a tiny bit of width out of the legs, although Nick is pretty happy with the way the legs fit as is.

But let's take a look at some of the details, because with jeans, it's alllll about the details!

DSC_0014

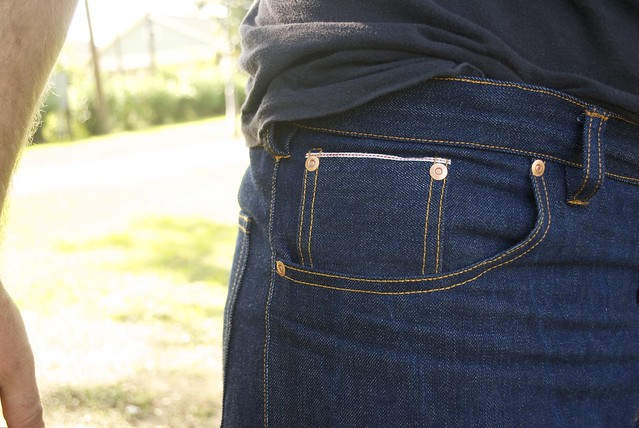
I stole a lof of ideas for these from Taylor Tailor's totally drool-worthy jeans. Here you can see the coin pocket which uses the selvedge edge as a nice design feature. Also prominent in this photo is some of my less-than-perfect topstitching! I was really worried about sewing such thick denim on my conventional sewing machine (an older model Singer HD) but it actually handled it like a champ through most of the process - until I got to the belt loops... oy vey. My machine doesn't love belt loops on a good day, but it was just not. happening. with these! I ended up forgoing my usual bartack method for the belt loops and instead just did a few rows of straight stitching. We'll see how well they hold up.

DSC_0016

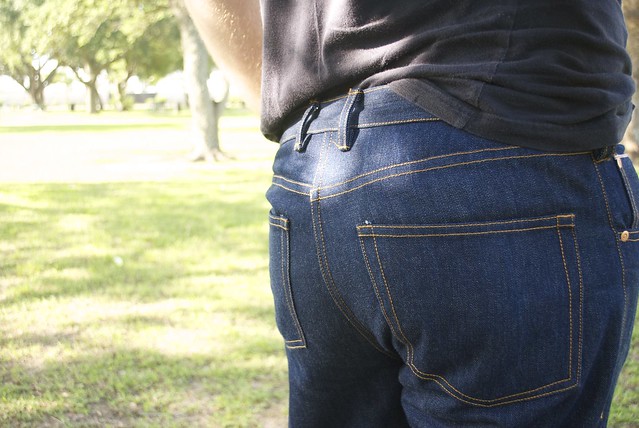
For the back pockets I copied an old pair of Nick's jeans. Everything that could be sewn with a flat-felled seam was sewn with a flat-felled seam. Including the back rise and yokes, which results in a charmingly, slightly off 'v' where the two yokes meet.

DSC_0012

If love were a seam, it would be 72 inches of painstakingly, hand rolled, flat-felled inseam!

IMG_1248

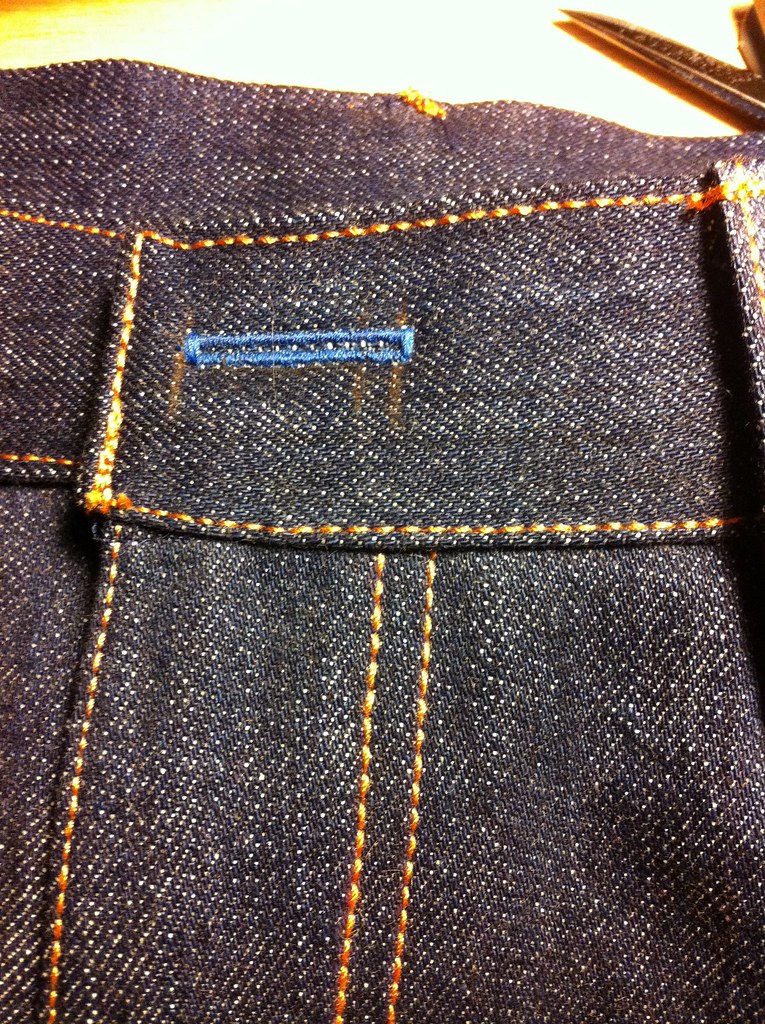
And, oddly enough, one of my favorite details is this little cobalt blue buttonhole!

DSC_0025

I gave Nick strict instructions to limit the amount of washing he gives these jeans. Indigo dyed, 100% cotton denim like this is known for it's ability to break in and 'mold' to the wearer, creating beautiful fades with time. I'm actually quite smitten with these jeans, to be honest! So smitten that I'm itching to make myself a pair, too! But don't worry, I'll take a jeans-sewing break for now and make something else for a bit to end the denim monotony that's been going on around these parts!

And now, because it's my blog and I say so...

DSC_0030

Let's take one last look at that tush!!

Seriously... dude butts do not get enough screen time on this blog!

xx

5.30.2014

black on black

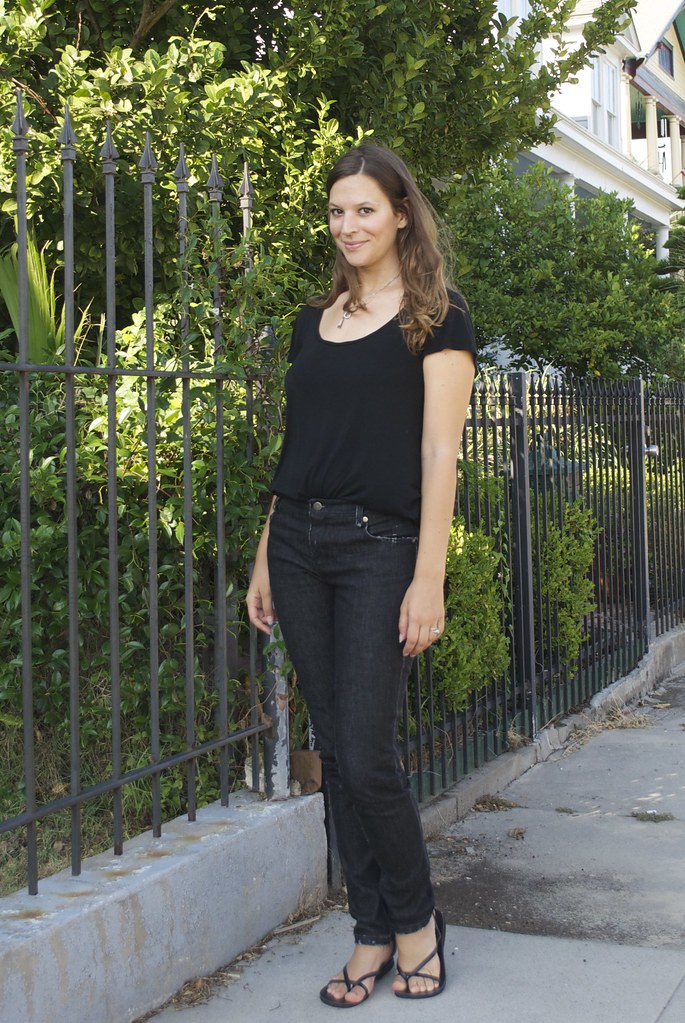
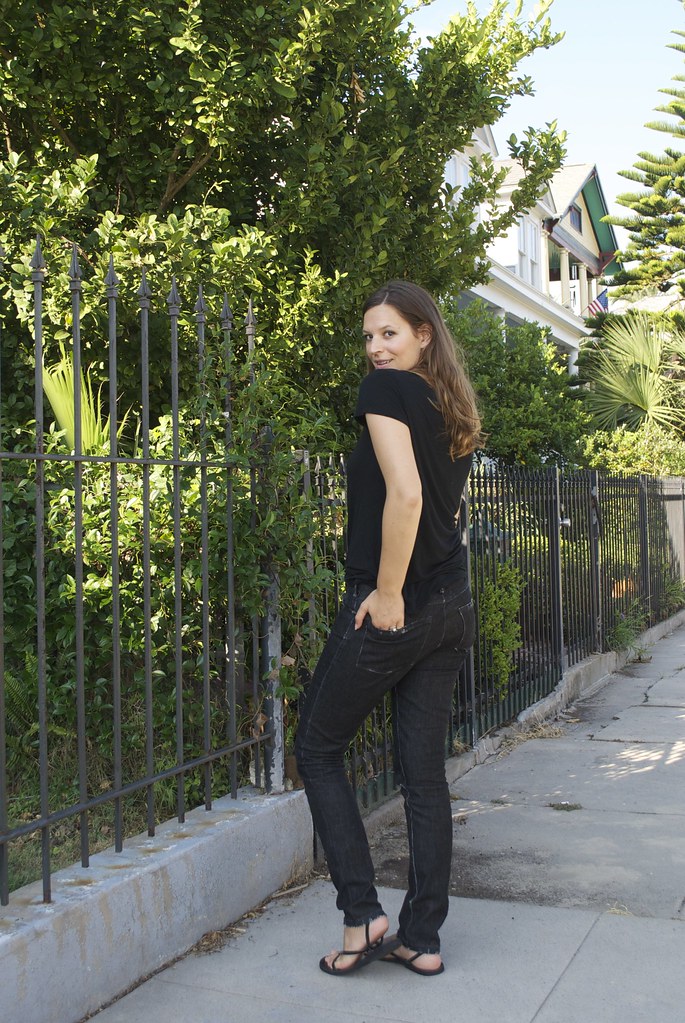
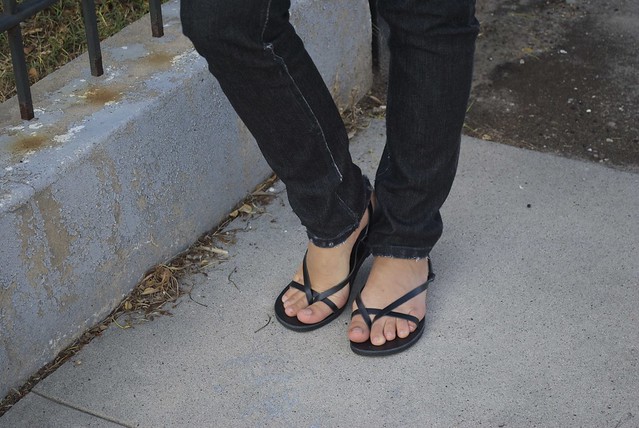
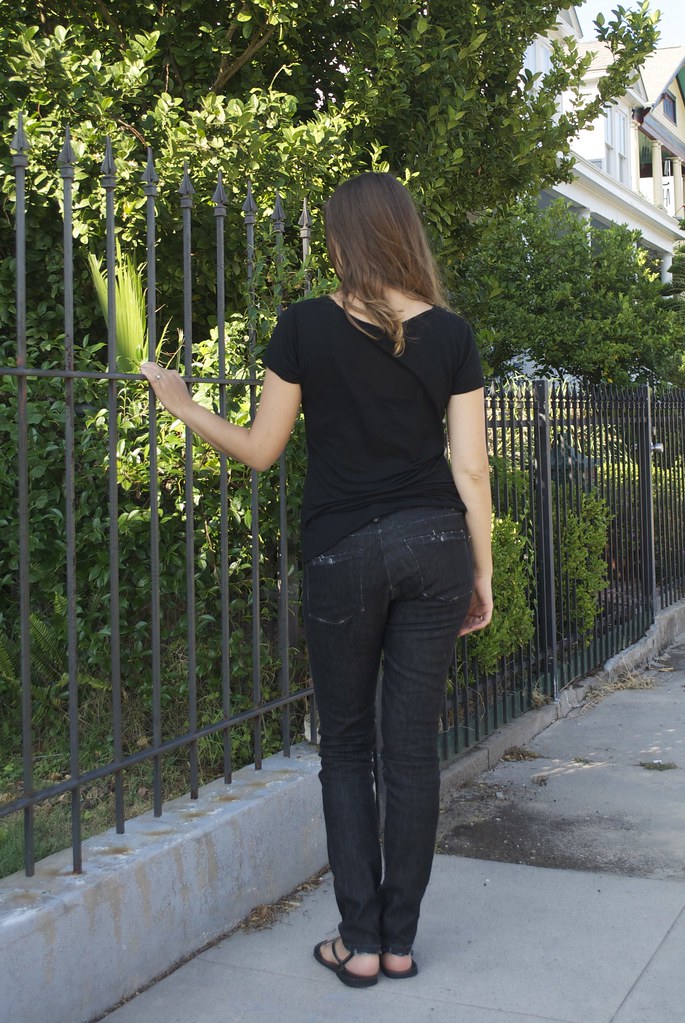
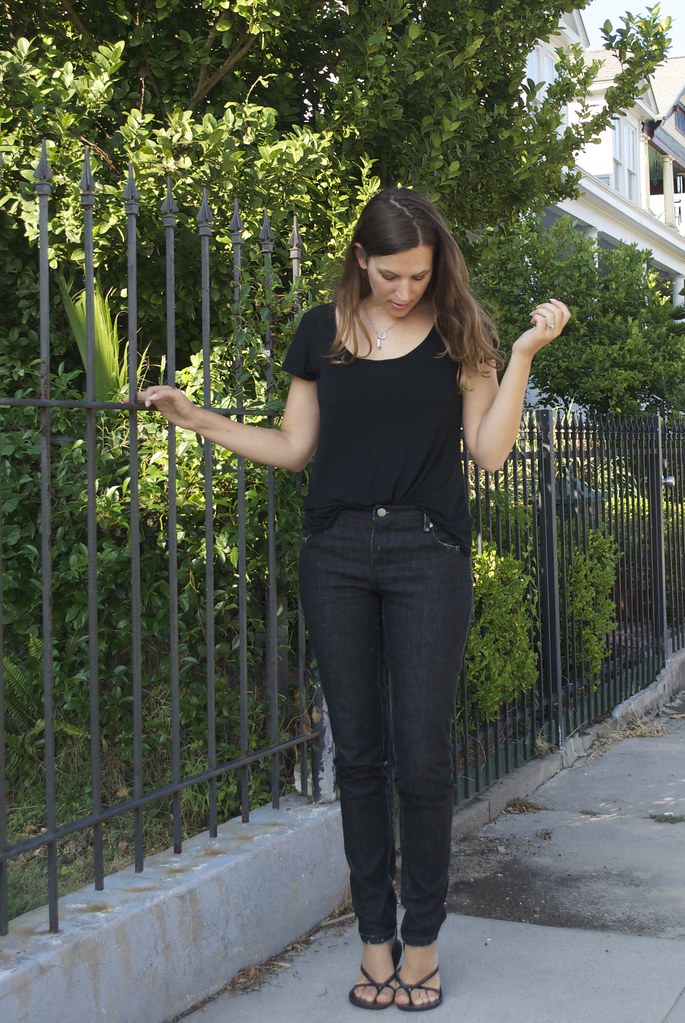
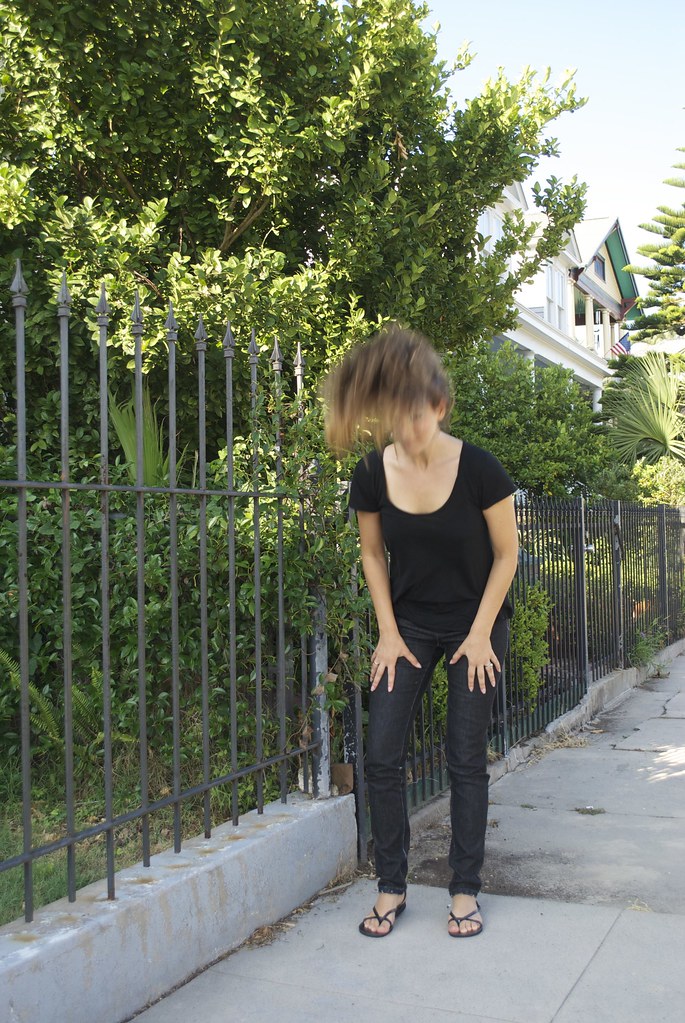
Mood Fabrics Black distressed denim and black jersey tee

Hey everybuddy! I know these pictures look suspiciously a lot like my last post - but I swear it's all new makes! I feel like every year around this time I get the urge to make myself a new pair of jeans - and once I go down the jeans making route, well, it's basically a straight shot to Wardrobe-Basic-Ville!  After all, one can make only so many fun dresses before you're left standing in front of your closet on a random Tuesday morning, naked, with nothing to wear! (No? Only me?)
So for this months Mood Sewing Network make, I bring you the ever-so-humble jeans and a t-shirt combo - in all black. Because black is always the new black. This was mildly inspired by the fact that earlier this month I listened to Just Kids by Patti Smith on audiobook, read by none other than Patti Smith herself. Despite the fact that I was already pretty familiar with Patti Smith and Robert Mapplethorpe's story (I'm pretty sure it's a requirement for every art school kid), it was still a pretty engrossing read... er.. listen? And it definitely led me down a rabbit-hole of image searches where I became pretty obsessed with Patti and Robert's grungy, rock & roll style.

But let's talk about sewing!

Mood Fabrics Black distressed denim and black jersey tee

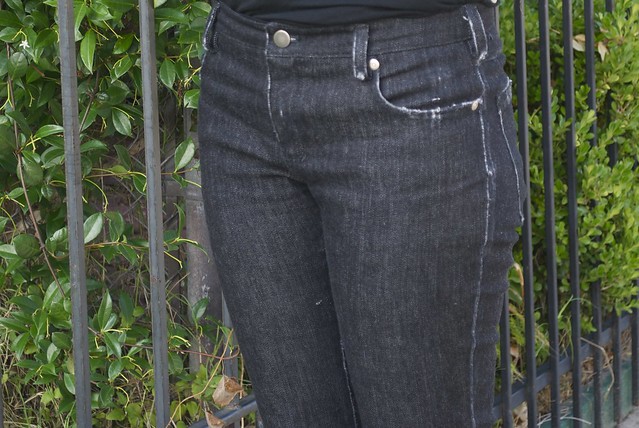
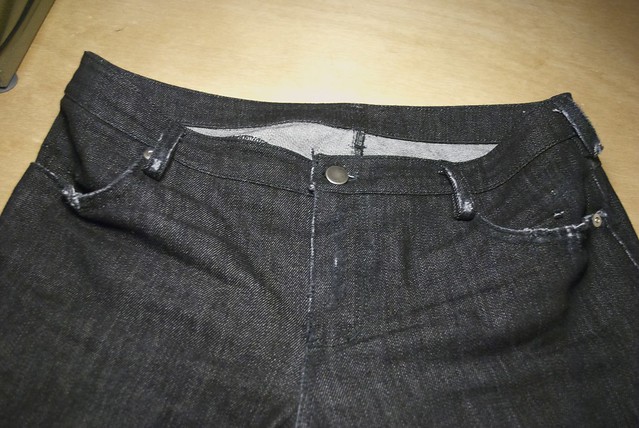
This is my fourth pair of handmade jeans (here, here, and the ones that started it all, here), and I swear they just keep getting better! For this pair I used a black, medium weight denim with a bit of stretch by Theory from Mood Fabrics online. Unfortunately this particular denim is now sold out, but I highly recommend the Theory denim. I've used it for one other pair of jeans and the stuff holds up well. I always like to order swatches of my denim before buying, because it's a bit hard to tell the difference online. That way I can pick out the weight, color, and amount of stretch I like best.  This denim had some stretch for comfort, but wasn't so stretchy that it didn't feel like denim, if you know what I mean. True confessions: I've actually been wearing these jeans for the past three days by the time I got around to photographing them, and the denim hasn't stretched out much at all!

Mood Fabrics Black distressed denim

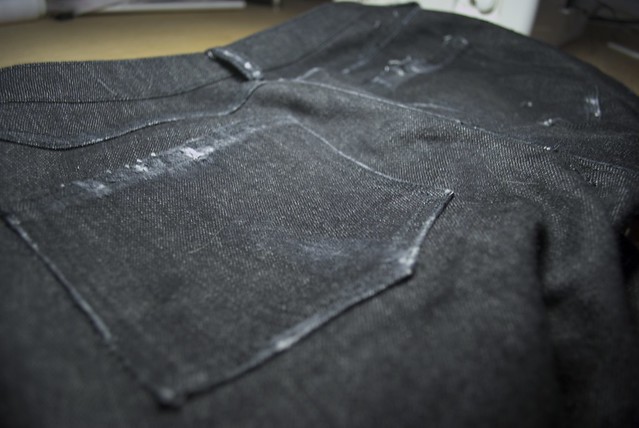
Also - distressing!!! Denim. Distressing denim. I feel like people generally fall into two camps when it comes to jeans: The Purists (I will take my denim raw, and dark, and made the way my forefathers made it) and The Fashion Followers (Colored denim?! Let's do it!! Printed denim?!?! Where do I sign up!! Denim so torn up and distressed it's practically a crime that their selling it?!?! Gimme some of dat!!!)(Also, I couldn't think of a better name for this camp, suggestions are welcome). And then there's those of us that fall in between. I appreciate some fresh raw denim, so stiff it'll chafe your thighs the first month of wearing, but every now and then I get envious of those cool kids with their store-bought denim all perfectly ripped and faded... 

So I decided to try my hand at some light distressing of my own. After all,  distressing denim is just a fun embellishment! Obviously for the home sewer, industrial distressing techniques are a bit scarce, but you'd be surprised what you can do with a few basic tools. For my pair I used a hammer and a metal plate to hammer each seam, then I took a dremmel tool to the edges to wear them down and fray certain areas. It was great stress relief! You know, in case the yoga and meditation ain't working - there's nothing quite like destroying something to cure what ails 'ya! 

Mood Fabrics Black distressed denim and black jersey tee

For the pattern I used my ol' reliable - the Built By Wendy pants pattern from SewU, which is so altered at this point that I should just call it mine. On my last pair of jeans that I made I had some issues with the dreaded leg twist (that spoiler of all jeans-making fun!) If you're not familiar, leg twist is when one or both legs ... well... twist! It's mildly irritating both visually, and physically for the wearer. It's often the result of inaccurate cutting or sewing, and seems to be very prevalent with jeans due to the twill weave of the fabric - which tends to have built in warp - or skew (according to my google searches). So this time I took a few precautionary steps to prevent this: 1) I traced and cut all pieces on a single layer instead of folded in half (this also results in greater fabric yield) and 2) I made sure that all the leg pieces were cut from the same area of fabric - meaning I lined them all up, going in the same direction, horizontally across the fabric. I actually remembered to take a picture while I was working to show you what I'm talking about:

My yardage was wide enough that all four leg pieces could be placed this way. This way if the twill weave was to skew, they would all skew together! Anyway, it worked! Nothing but perfectly straight seams here! If you want to read more about leg twist - this is a good source.

Mood Fabrics Black distressed denim

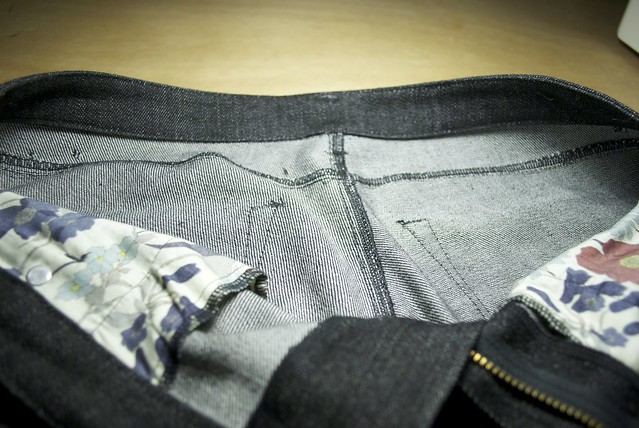
I realized I've never really shown you guys the insides of one of my pairs of jeans. Not that they're all that exciting, but I know how nosy all of us sewists are when it comes to construction! All of my topstitching was done in black topstitching thread, which unfortunately means that it's not super visible. This is a shame, because this just might be my best topstitching on a pair of jeans yet! Also, fun fact - I don't use a twin needle to do any of my topstitching. I've broken way too many twin needles during jeans sewing that I've just given up. I usually draw out my topstitching by hand, and use my chalk lines as a guideline.

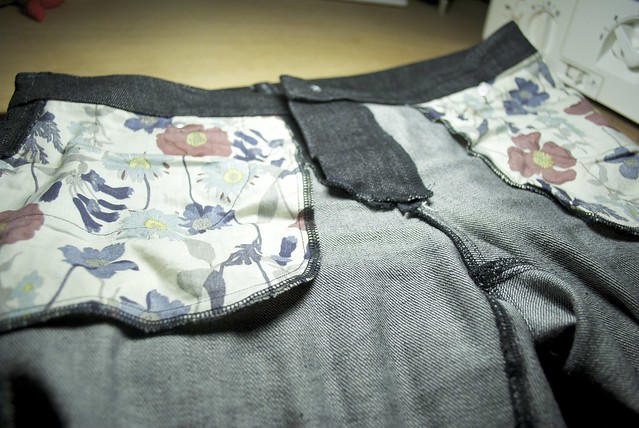
I serged all the raw edges since this is stretch denim, and because I was too lazy to do flat felled seams. And the pocket lining is just some pretty floral fabric that I keep around for just such a purpose.

Mood Fabrics Black distressed denim
Mood Fabrics Black distressed denim and black jersey tee

Because jeans sewing can be such a time-consuming project (especially if you're like me and only own one sewing machine - you're constantly changing out thread!) I wanted to pair it with an instant-gratification sew. And nothing says 'instant-gratification' to me quite like a knit t-shirt!

Mood Fabrics Black viscose jersey tee

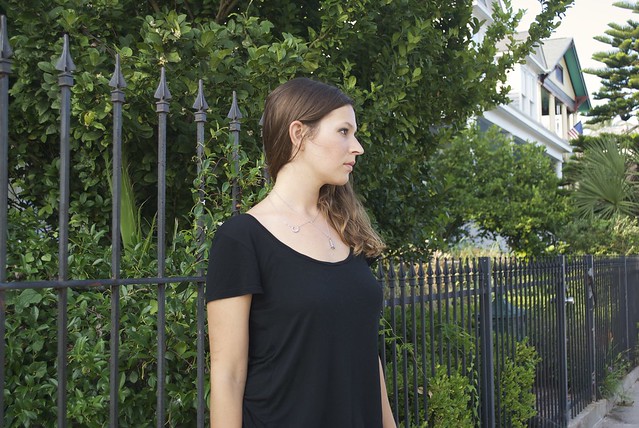
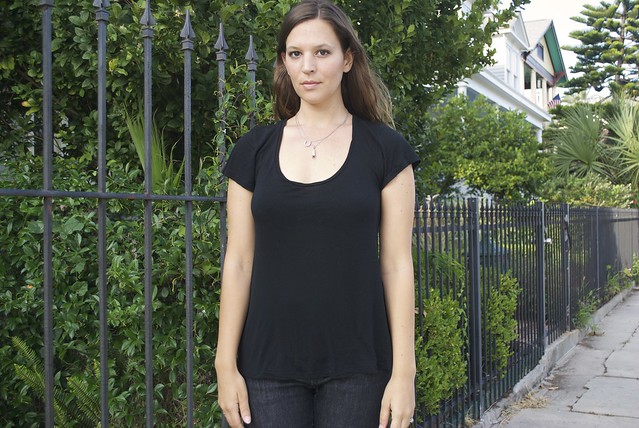
After seeing Heather Lou's super sexy version of Deer & Doe's Plantain Tee I decided I had to jump on that bandwagon. Also, free t-shirt pattern!?! Yes please! I used this drapey silk viscose jersey from Mood, and, man oh man, is this stuff ever luxurious to wear! Silky and smooth and light, with a lovely fluidity. Even though this pattern calls for a more stable knit, I felt like the drapey quality of this silk viscose would actually pair well with the subtle flared shape of the Plantain tee (and, also, I was copying Heather... duh... clearly I can't get enough of that girl). I stabilized the shoulder seams with a bit of clear elastic, and sewed all major seams on my serger. The sleeve and shirt hems were both simply folded under and finished with a double needle.

Mood Fabrics Black viscose jersey tee

And to thank you guys for putting up with another extra long post, I'll leave you with this gem:

DSC_0053

Not really sure what I was going for there! But ya know... I like to get a little crazy for the camera every now and then. And yes, this was in front of a stranger's house. A stranger who came home while I was taking these. I have no shame...

Well, anyway! I've been wearing both of these makes a ton since they came hot off of the sewing machine! I think that's a sign of a great basic! What about you guys - got any wardrobe basics planned for the near future?

xx

5.07.2014

ooohh nettie...

DSC_0024

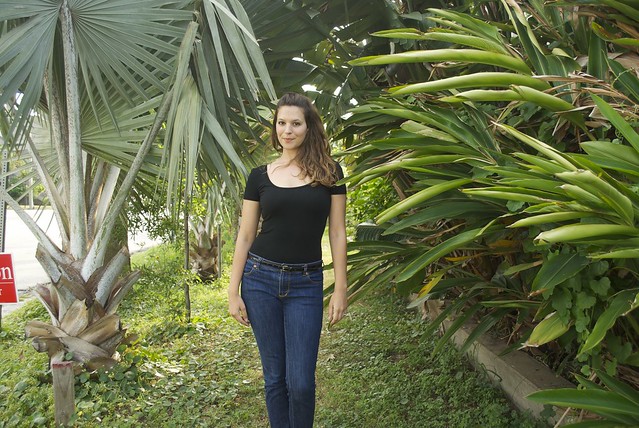
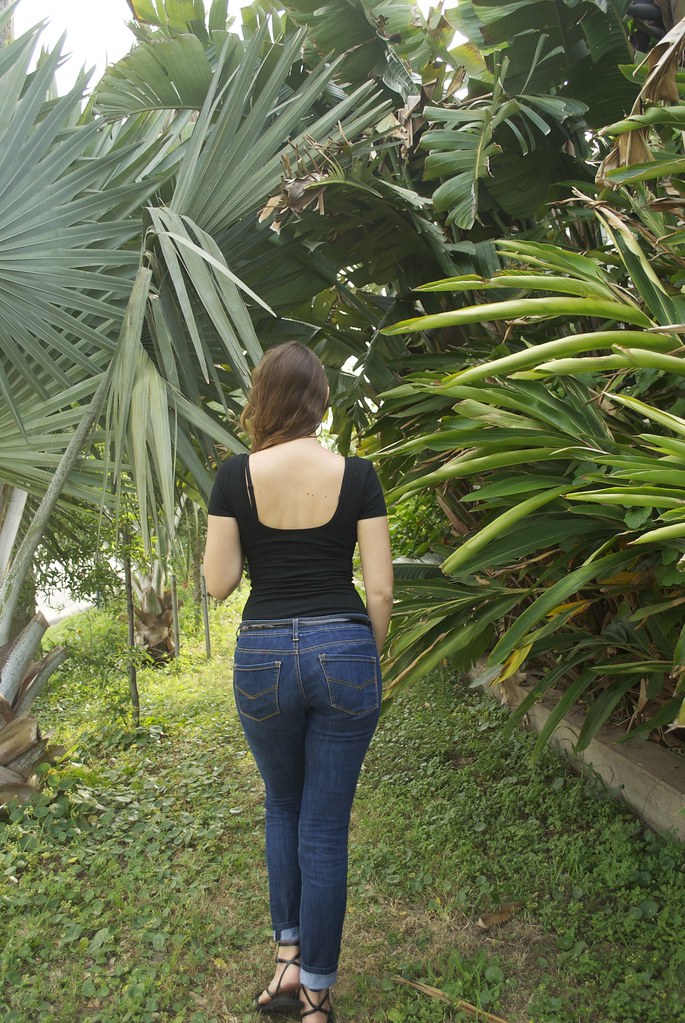
You guys had to know this was coming.  There was no way I was going to let a pattern designed by one of my all time favorite people, and inspired by one of my all time favorite people pass my little ol' blog by!! Yes, this is the Nettie bodysuit from Closet Case Files.

DSC_0027

I'm sure a lot of you can relate to my rather sordid history with bodysuits. I believe I had some fun flowery numbers that I wore as a preteen in the grungy 90's (accompanied by an awesome choker, no doubt). But then full on puberty happened and I grew some boobs, and things just kind of changed all over and there was no way I was going to be caught dead in skin-tight anything!

Fast forward a few years, and some body-confidence-building later and I was ready to try bodysuits again. I had a job as a bartender at a questionable corner bar in Philly and relied heavily on my male customers for tips (hey, it ain't glamorous, but it's the truth!) So I bought one of those American Apparel bodysuits and wore it with mini skirts. To this day I regret that look! That bodysuit somehow managed to hug me in all the wrong places!

So after that I just sort of assumed that bodysuits were better left to the preteen set, and the svelte ballerinas among us. No harm, no foul.

DSC_0028

That is, until I met Nettie. When Heather told me she was making a bodysuit pattern I admit I was skeptical as to whether it would be for me or not, because, as I said, I'd been burned before! But because I have implicit trust in Heather, I went for it.

DSC_0037

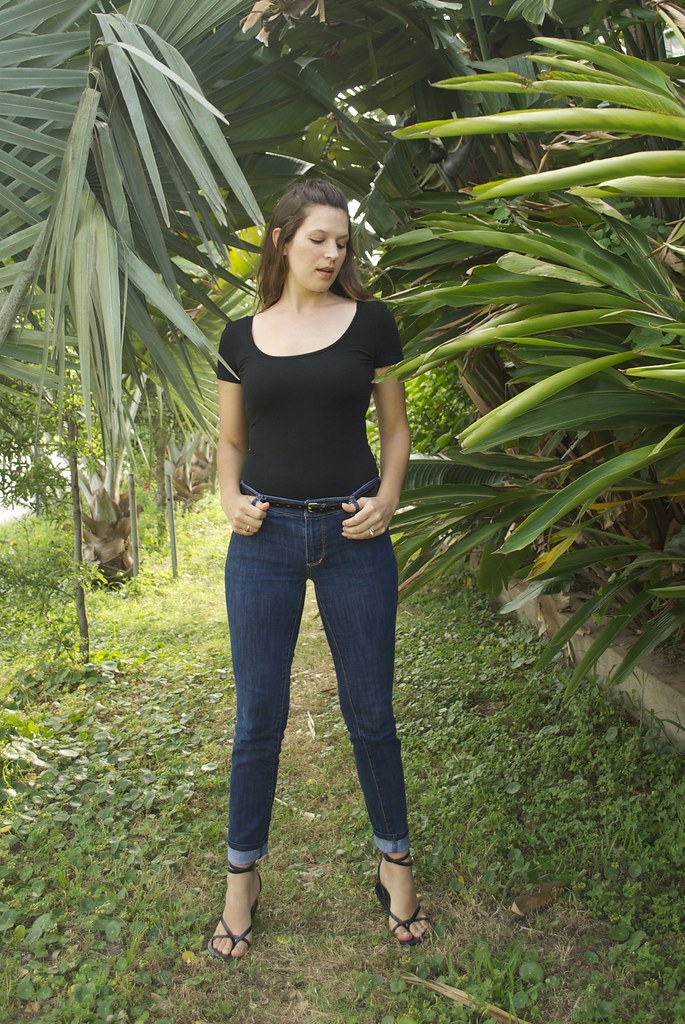
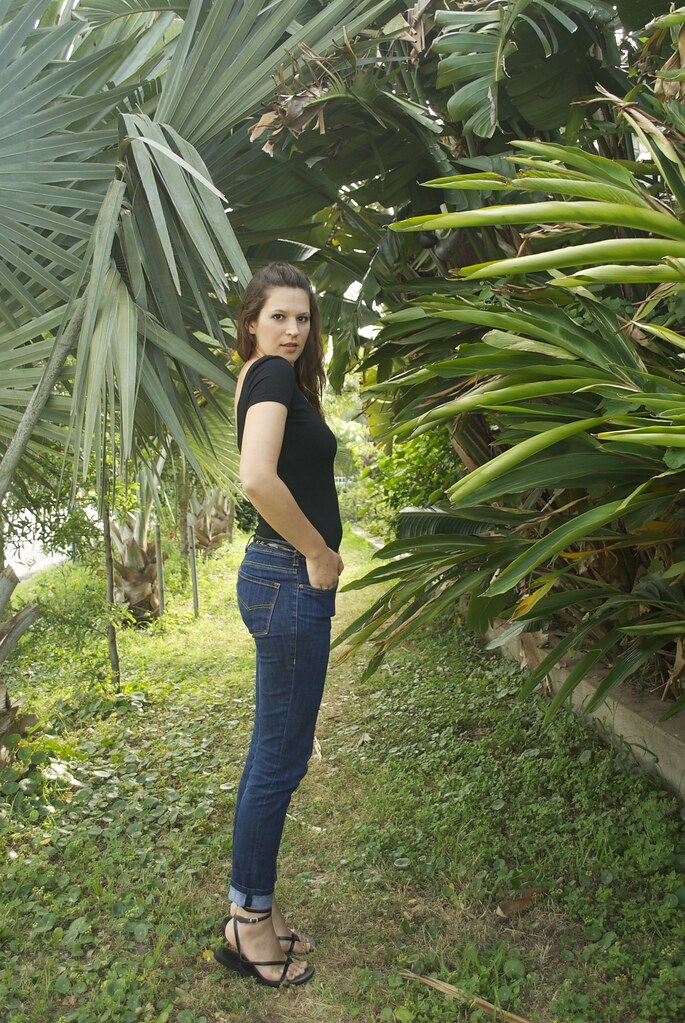
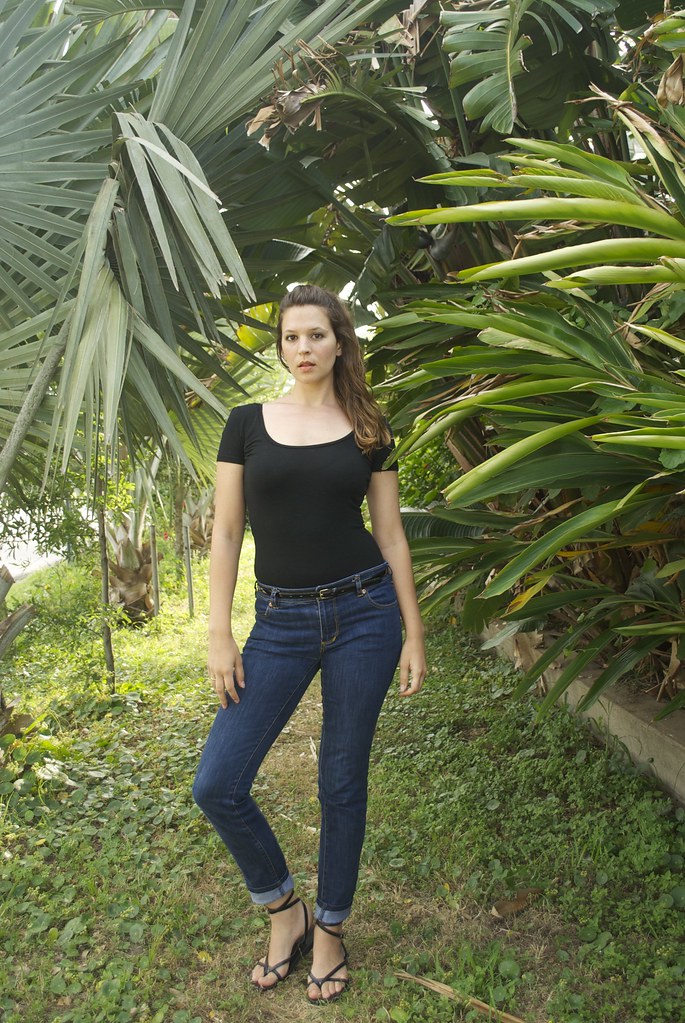
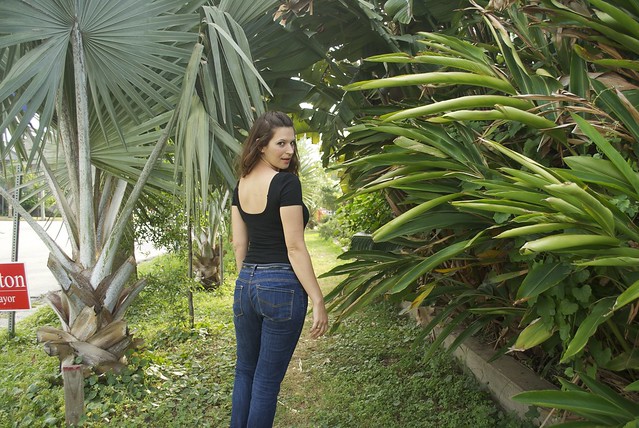
To say I was pleasantly surprised is a total understatement! You guys, I was stunned!! Like, pick-my-jaw-up-off-the-floor-stunned! Not only does this bodysuit hug in all the right places, but I swear it actually makes me look curvier through some sort of Heather Lou voodoo! 

Plus, it was a super fast sew with lots of different sleeve length/neckline options which makes the possible variations of this pattern virtually endless! I went with the scoop front and medium back so I could wear my regular bras with it, but still get a little sexy back action, and the short sleeves because summer is coming.

DSC_0033

I made the size 8, in boring, basic, black cotton lycra (I bought this stuff from Girl Charlee - it only took one yard!!) because I'm always looking to add basics to my wardrobe (and because I still wish I was a svelte ballerina). This fabric has great stretch and recovery, and was softer and drape-ier than I expected. I love the fit I got with it - tight, but not too-tight. I actually love the fit so much, I'm planning a couple of pattern hacks to turn it into some easy, feminine dresses for summer.

DSC_0022

Heather is such a clever minx and designed this pattern using self-fabric bindings for the neckline and leg holes. This gives a nice, clean finish, and the bodysuit hugs your bum without giving you that dreaded "quad-cheek" look. My bodysuit actually fits a bit differently through the hips and butt than what is pictured on Heather. I get a bit more butt cheek showing (I think this might be because my bodysuit is a smidgen more roomy in that area than intended). I'd post a picture, but it would be NSFW (wink).

DSC_0045

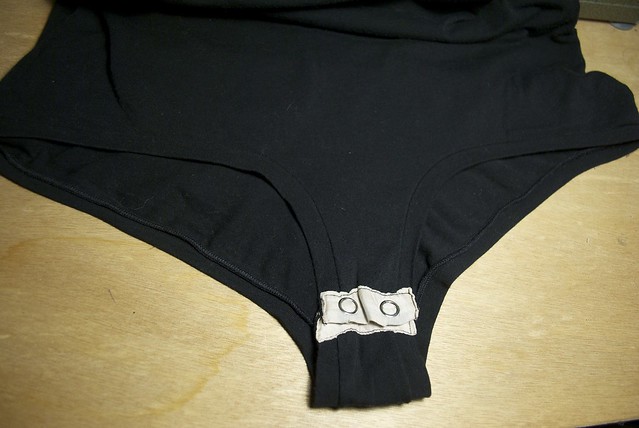
She also includes instructions for adding an optional snap crotch, which is freaking brilliant!! Not only do I not have to get nekkid every time I need to pee (which is a lot, by the by) but I also giggle at the thought that I'm basically wearing a giant baby onesie! Joy!!

However, I feel like I need to just come right out and say that my snap crotch turned out... fugly. Let's call a spade a spade here, folks. Blame it on the fact that I was sewing late, and fiddly pieces of silky fabric was just beyond my motor skills by that point, but whatever. Let's just say I'm glad that part is hidden where, literally, no one by myself will ever see it (and now the entire internet. crap.)

But heeyyy,  check out those nice, even bindings, whydontcha? I will be the first to admit that sewing with knits are not my strong suit, but Heather's awesome instructions for attaching the bindings resulted in what is quite possibly the best looking bindings I've ever stitched! So, hooray! 

DSC_0040

So far I've just worn my bodysuit as you see here, with my jeans, and I'll throw on a cardigan when I'm indoors. However I'm excited to try it with different skirts in my wardrobe. I think it will probably be most flattering with skirts that hit at my natural waistline.

Well, what do you guys think? Are you bodysuit lovers? If you're unsure about the look I definitely suggest you give the Nettie a try - she made a convert out of me!

xx

4.27.2014

flower power

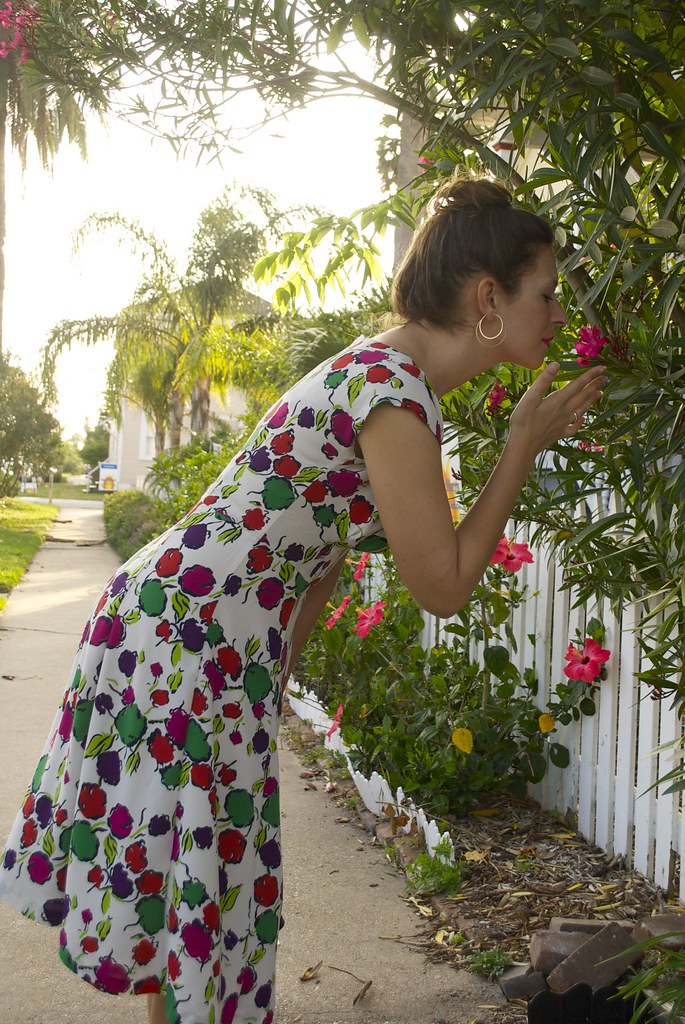
Mood Fabrics/Floral Silk/BHL Anna Dress

Well guys, spring has definitely sprung around these parts! And I for one could not be happier about it! This week also marks the end of what was a really busy couple of months for me at work, and I finally seem to have shaken off the respiratory infection that had been plaguing me (thanks antibiotics!) Yay!! So all in all, we're in high spirits around these parts!

What with the warming weather and more free time to actually enjoy it, I seem to have one thing and one thing only on my mind - silk dresses. Making them. Wearing them. Living in them for the next nine months... That and long, lazy, bike rides. Preferably paired together. At sunset. Sigh... paints quite a picture, doesn't it?

Mood Fabrics/Floral Silk/BHL Anna Dress

For this months Mood Sewing Network make I was irresistibly drawn to this gorgeous floral crepe de chine from Mood Fabrics online. Silk crepe de chine is one of my all-time favorite fabrics to sew with, and to wear. It has a bit more 'grip' than many of it's slippery silk counterparts, making it easy to handle, but it still has that lovely, fluid drape that you want from lighter weight silks.  And it's breathable, which is an absolute must in my hot and humid climate.

Mood Fabrics/Floral Silk/BHL Anna Dress

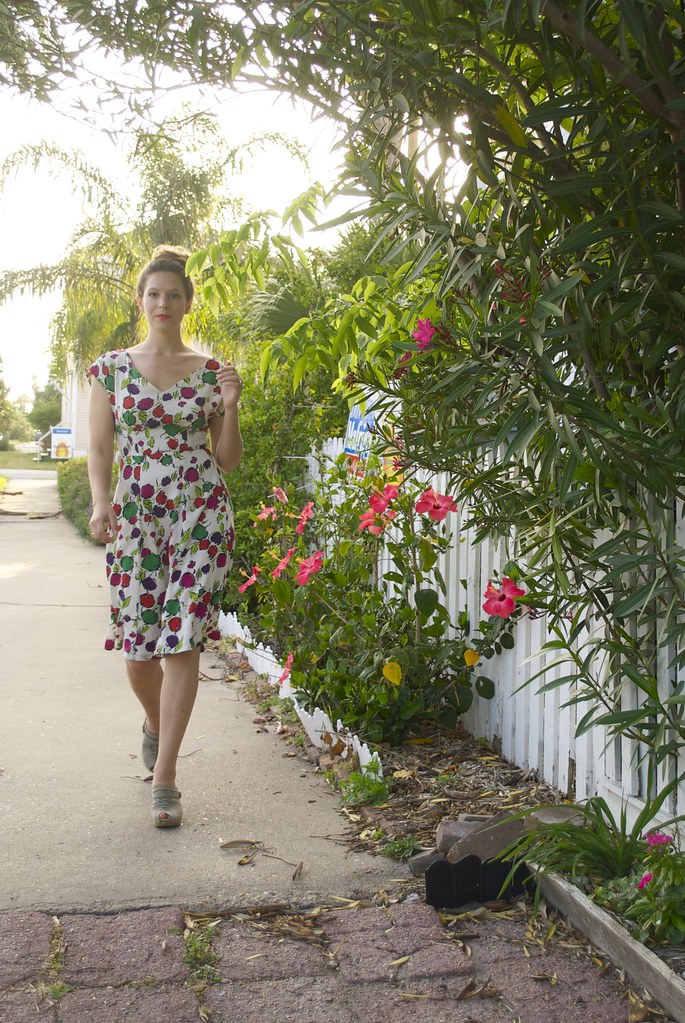
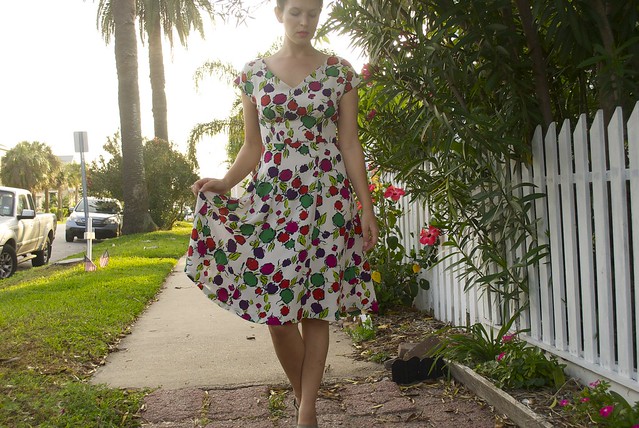
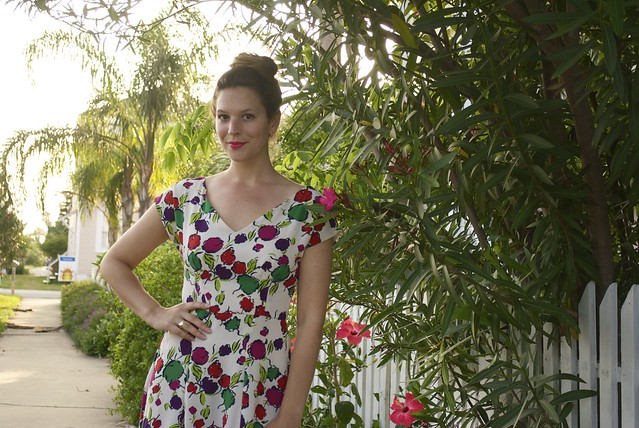
I absolutely adored the floral print of this fabric! It's so bright and playful, it made me instantly happy! I find the color palette to be sort of unusual and unexpected (magenta and poppy red, royal purple and inky black, viridian green and chartreuse... all on a soft, off-white background). It also reminded me a bit of vintage prints, but I couldn't decide what decade - 30's? 40's? 70's?? Maybe 70's-does-40's? (The consensus on the Mood blog was 70's-does-40's, which incidentally, is one of my favorite time period mash-ups!)  I don't normally go for a vintage look, but there was something so timelessly feminine about this print that was just calling me.

Mood Fabrics/Floral Silk/BHL Anna Dress

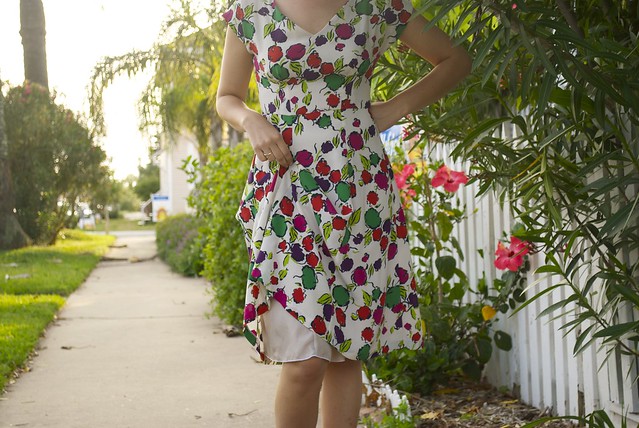
I thought it would be nice to pair this fabric with a pattern that also had a bit of a vintage vibe, without going totally overt, and felt like By Hand London's Anna dress totally fit the bill. I love this pattern - it's like all the best parts of being a woman rolled into one dress! This is my second time making the Anna dress (here's my first). For this version I opted for the v-neck and the shorter hem. However, rather than just chopping the pattern off at the knees, I kept the hem width of the maxi-version and adjusted the skirt panel pieces to compensate. This way I maintained maximum skirt swing-y-ness (very important for those warm breezes!)

Trust me on this one, this pattern hack sounds way more complicated than it actually was. I'm not saying that what I did was the right way to go about this - but, hell, it worked. Which is really all I care about. What I did was lay tracing paper over the skirt panel pieces, trace off the waist seam and grainline, and make a mark along the grainline the length that I wanted my new skirt pieces to be (I did 27 inches). Then I slid the tracing paper down, along the grainline, until my new hem mark lined up with the original maxi hem line, traced the maxi hem line and connected that to the waist seam, ignoring the original side seams. Done and done! 

Mood Fabrics/Floral Silk/BHL Anna Dress

One of the reasons I went with this silhouette and skirt length is because it's reminiscent of one of my all-time favorite handmade dresses, my purple linen Simplicity 1880. I love that dress. It's the dress I grab when I want to look pretty, and it's been my go-to dress for such a variety of occasions - weddings, parties, holidays, work events, and just regular old work days. That dress is a work horse. So I felt like it was time that I listen to my own closet and try to get more dresses like that in there! As I was sewing this dress up I could tell that it was definitely going to be giving my purple dress a run for it's money as my new go-to dress! I've already worn it to an opening at my gallery this past weekend and it was, as I suspected, perfect. It took me all the way through prepping for the opening (which entails buying assloads of beer, wine and ice, lugging it around and filling coolers, climbing up ladders to adjust lights, cleaning, hauling trash, etc. etc. etc...) to the opening itself, where I'm greeting people, serving wine, making chit-chat, and generally playing hostess. And you know what, I got so many compliments on this dress! She's a winner!!

Mood Fabrics/Floral Silk/BHL Anna Dress

I reinforced the v-neck with silk organza strips, which helped a little with gape-age, however there is still more gape than I would like. Perhaps I should have eased the v-neck to the silk organza a bit? Ah well - ya live, ya learn.

I also lined the entire dress with silk habotai, because the floral fabric was ever-so-slightly sheer. Silk habotai (or china silk) is a wonderful lining fabric, especially if you're like me and like to keep your silk dresses silky - inside and out! The habotai I used was from my stash, but Mood has an awesome collection online in, like, every color imaginable. And I don't know about the fabric stores where you live, but silk habotai at my local fabric store is sooo much more expensive than what they sell it for at Mood - that's including shipping, and there is much less variety. But probably the most economical source for silk habotai (and, really, any silk fabric) is Dharma Trading. Of course everything there comes in either white or black, but if you feel like getting crafty with some dye, you can make it any color your heart desires!

Mood Fabrics/Floral Silk/BHL Anna Dress

And because I always like to learn new tricks, even on patterns that I've made before, I decided to try my hand at using my machine's blind hem foot for the floral silk. Can you believe I've never used that little gadget before?! That's one of the reasons I love sewing - there's always something new to learn! I'm not totally sure if this type of hem was ideal for this type of skirt and fabric, but eh... it worked (moral of this post). Anyway, I love how clean the hem turned out, and it saved me so much more time than if I had hand-picked it myself. For the skirt lining I just used my serger's rolled hem function. I always feel like I'm cheating when I do this, but it's just so quick and easy, it's hard to resist!

Mood Fabrics/Floral Silk/BHL Anna Dress

Let's talk real quick about caring for silk garments. I feel like this is something (or maybe one of many things?) that always intimidates people from buying, sewing and wearing silk. You guys may have noticed that I sew with silk a lot, and, as I said, silk crepe de chine is my number one favorite fabric of all time. I wouldn't be sewing all these silk clothes if I wasn't actually wearing them, and with wearing your clothes, comes washing your clothes (unless, of course, that's not your thing, in which case, you do you...) For the record - I never go to the dry cleaners. I can't afford it, and I don't like all the icky chemicals. I wash all my silks at home. In the washing machine. The key is to prewash your silks the same way you intend to care for the finished garment. So I usually wash on cold and hang dry. Occasionally I'll throw my silk in the dryer (I did that for the habotai lining of this garment) and it works out just fine, but typically I won't continue to care for my finished silk garment this way. Although every so often one of my silkies accidentally ends up in the dryer, and it usually fares okay. In her recent post about silk jersey, Lauren noted that the color and sheen can dull a bit when you wash and dry your silks. This definitely can happen, though it's not too dramatic, and in my experience, this mostly occurs in the dryer, which is why I usually hang dry. But I'm all for throwing your silks in the dryer if that's more convenient for you, just make sure to do that when you prewash too!

And for any of you non-sewers out there, this is also how I care for store bought silk clothes as well - machine wash cold and hang dry. Silk is an amazing fiber, and not nearly as delicate as people think.

Well, there you have it! I can't wait to wear this dress on the balmy summer nights that I know are right around the corner! What sort of fabrics have you thinking of warm weather?