5.30.2014

black on black

Mood Fabrics Black distressed denim and black jersey tee

Hey everybuddy! I know these pictures look suspiciously a lot like my last post - but I swear it's all new makes! I feel like every year around this time I get the urge to make myself a new pair of jeans - and once I go down the jeans making route, well, it's basically a straight shot to Wardrobe-Basic-Ville!  After all, one can make only so many fun dresses before you're left standing in front of your closet on a random Tuesday morning, naked, with nothing to wear! (No? Only me?)

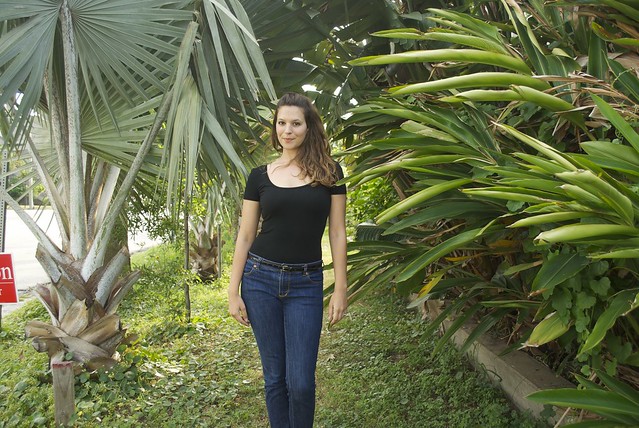
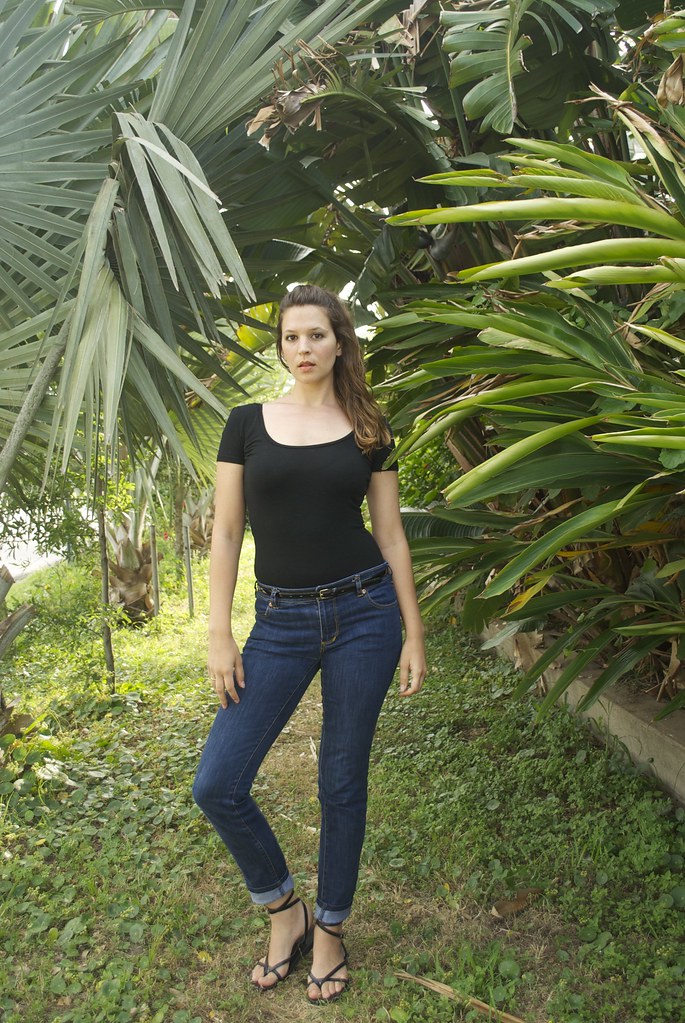
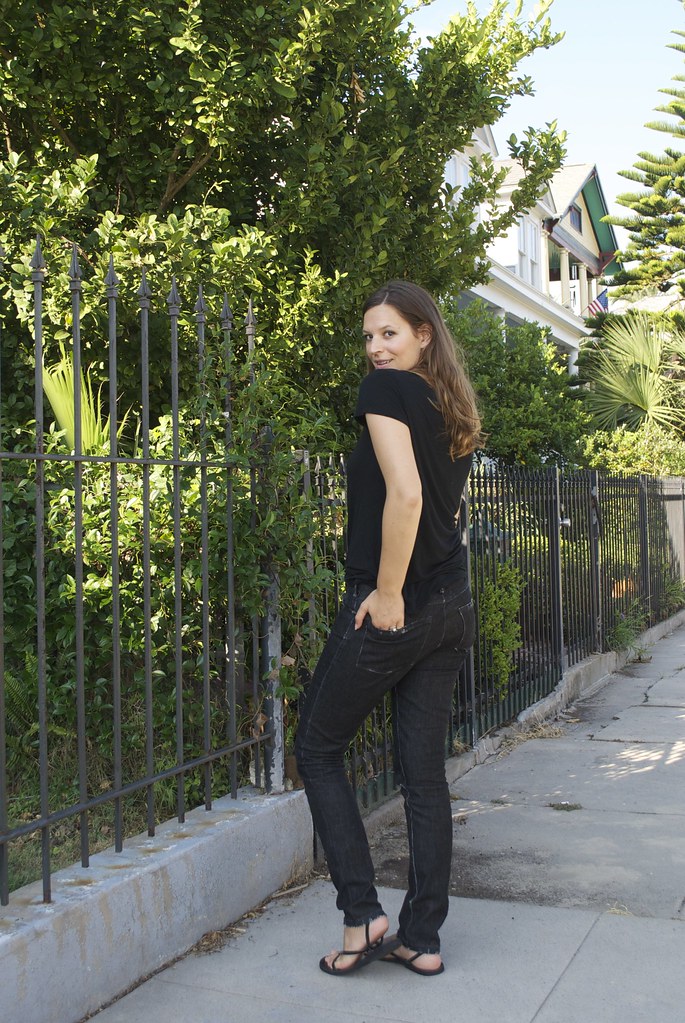
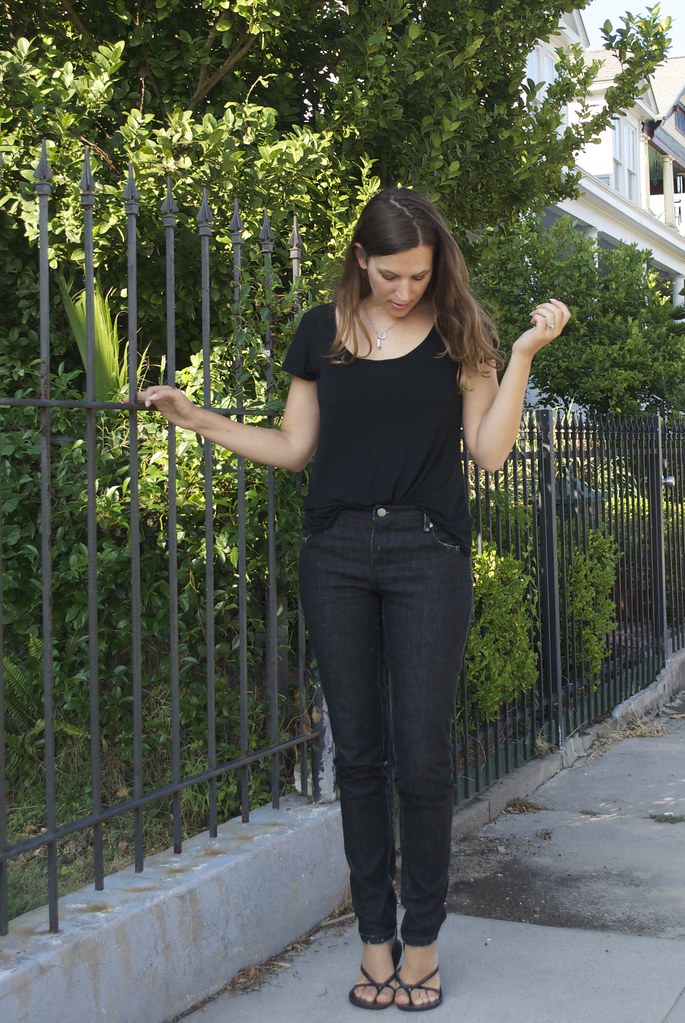
So for this months Mood Sewing Network make, I bring you the ever-so-humble jeans and a t-shirt combo - in all black. Because black is always the new black. This was mildly inspired by the fact that earlier this month I listened to Just Kids by Patti Smith on audiobook, read by none other than Patti Smith herself. Despite the fact that I was already pretty familiar with Patti Smith and Robert Mapplethorpe's story (I'm pretty sure it's a requirement for every art school kid), it was still a pretty engrossing read... er.. listen? And it definitely led me down a rabbit-hole of image searches where I became pretty obsessed with Patti and Robert's grungy, rock & roll style.

But let's talk about sewing!

Mood Fabrics Black distressed denim and black jersey tee

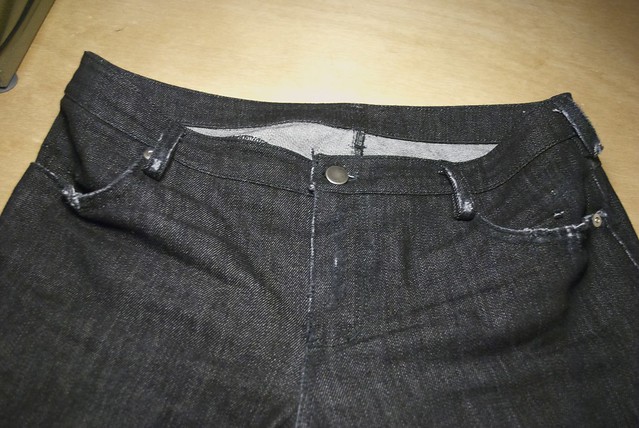
This is my fourth pair of handmade jeans (here, here, and the ones that started it all, here), and I swear they just keep getting better! For this pair I used a black, medium weight denim with a bit of stretch by Theory from Mood Fabrics online. Unfortunately this particular denim is now sold out, but I highly recommend the Theory denim. I've used it for one other pair of jeans and the stuff holds up well. I always like to order swatches of my denim before buying, because it's a bit hard to tell the difference online. That way I can pick out the weight, color, and amount of stretch I like best.  This denim had some stretch for comfort, but wasn't so stretchy that it didn't feel like denim, if you know what I mean. True confessions: I've actually been wearing these jeans for the past three days by the time I got around to photographing them, and the denim hasn't stretched out much at all!

Mood Fabrics Black distressed denim

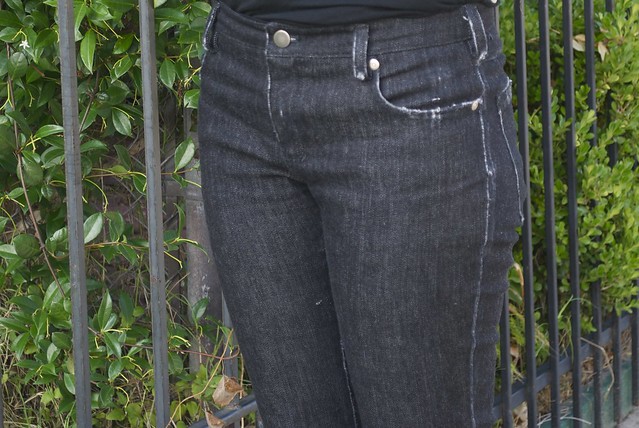
Also - distressing!!! Denim. Distressing denim. I feel like people generally fall into two camps when it comes to jeans: The Purists (I will take my denim raw, and dark, and made the way my forefathers made it) and The Fashion Followers (Colored denim?! Let's do it!! Printed denim?!?! Where do I sign up!! Denim so torn up and distressed it's practically a crime that their selling it?!?! Gimme some of dat!!!)(Also, I couldn't think of a better name for this camp, suggestions are welcome). And then there's those of us that fall in between. I appreciate some fresh raw denim, so stiff it'll chafe your thighs the first month of wearing, but every now and then I get envious of those cool kids with their store-bought denim all perfectly ripped and faded... 

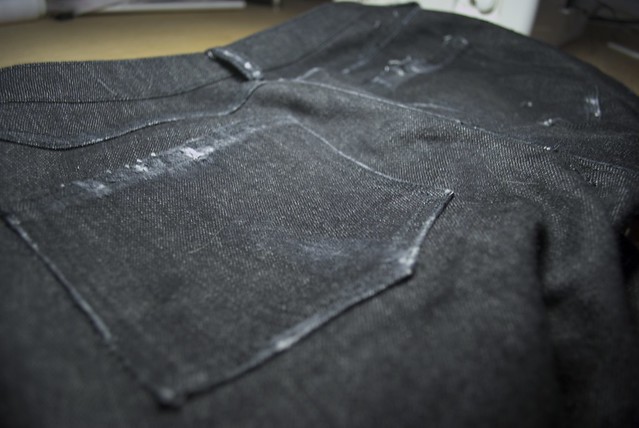
So I decided to try my hand at some light distressing of my own. After all,  distressing denim is just a fun embellishment! Obviously for the home sewer, industrial distressing techniques are a bit scarce, but you'd be surprised what you can do with a few basic tools. For my pair I used a hammer and a metal plate to hammer each seam, then I took a dremmel tool to the edges to wear them down and fray certain areas. It was great stress relief! You know, in case the yoga and meditation ain't working - there's nothing quite like destroying something to cure what ails 'ya! 

Mood Fabrics Black distressed denim and black jersey tee

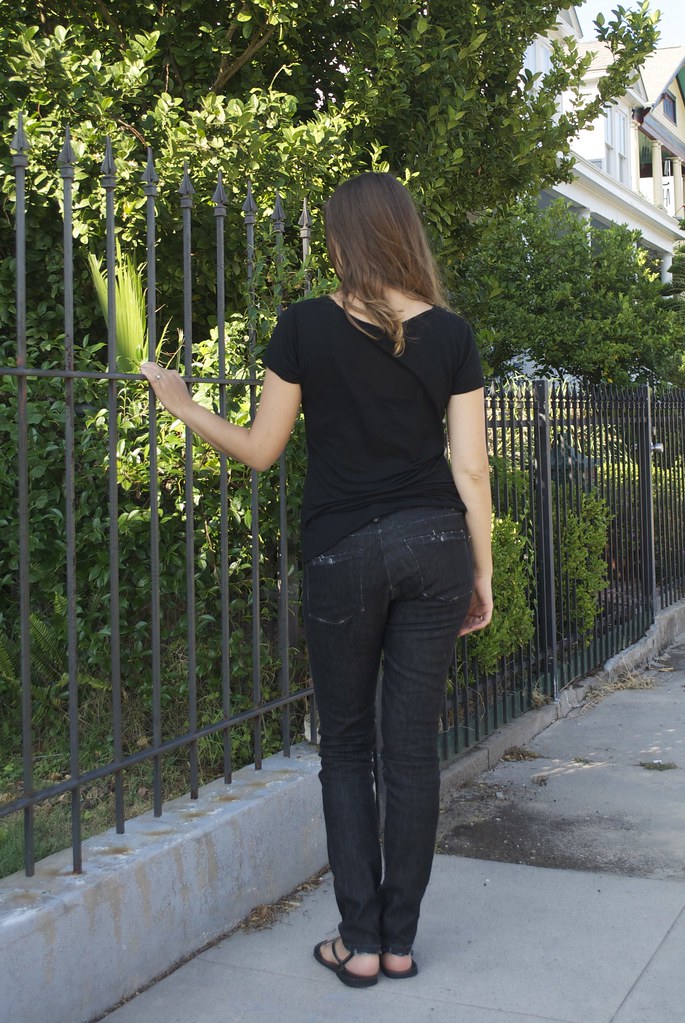
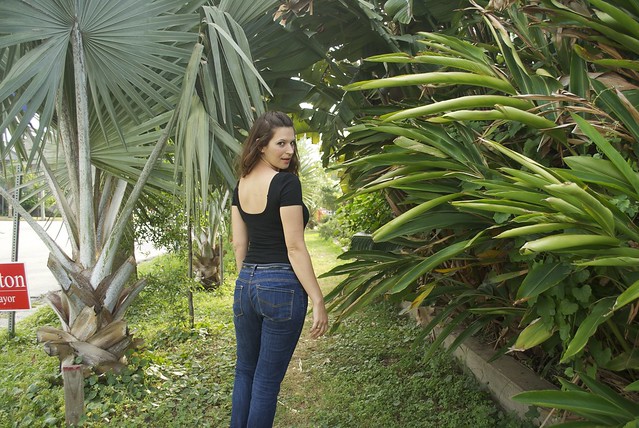
For the pattern I used my ol' reliable - the Built By Wendy pants pattern from SewU, which is so altered at this point that I should just call it mine. On my last pair of jeans that I made I had some issues with the dreaded leg twist (that spoiler of all jeans-making fun!) If you're not familiar, leg twist is when one or both legs ... well... twist! It's mildly irritating both visually, and physically for the wearer. It's often the result of inaccurate cutting or sewing, and seems to be very prevalent with jeans due to the twill weave of the fabric - which tends to have built in warp - or skew (according to my google searches). So this time I took a few precautionary steps to prevent this: 1) I traced and cut all pieces on a single layer instead of folded in half (this also results in greater fabric yield) and 2) I made sure that all the leg pieces were cut from the same area of fabric - meaning I lined them all up, going in the same direction, horizontally across the fabric. I actually remembered to take a picture while I was working to show you what I'm talking about:

My yardage was wide enough that all four leg pieces could be placed this way. This way if the twill weave was to skew, they would all skew together! Anyway, it worked! Nothing but perfectly straight seams here! If you want to read more about leg twist - this is a good source.

Mood Fabrics Black distressed denim

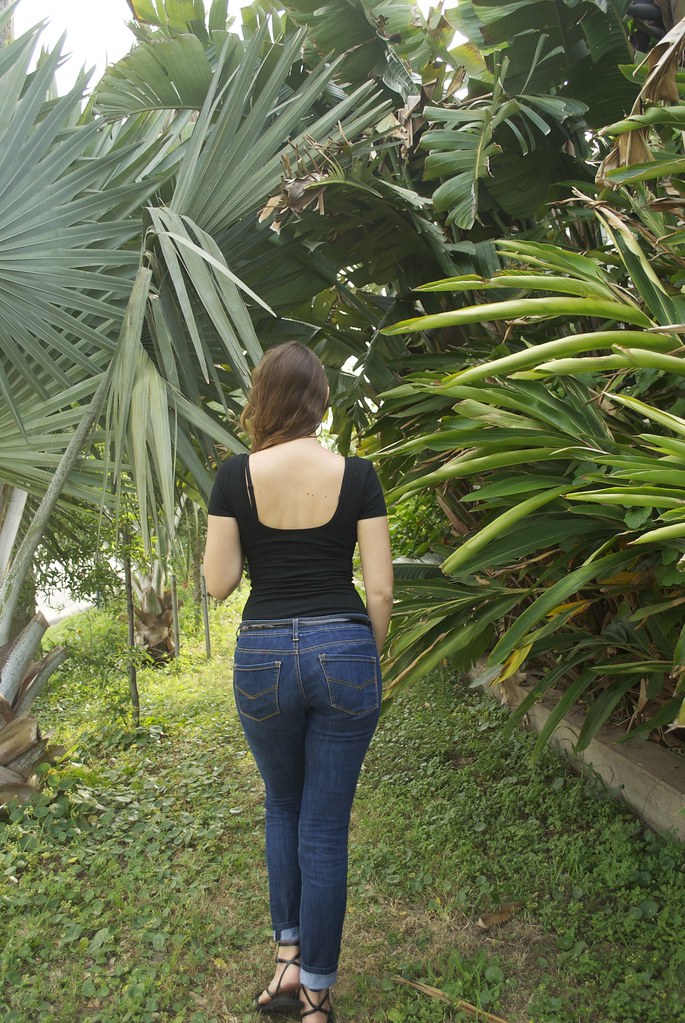
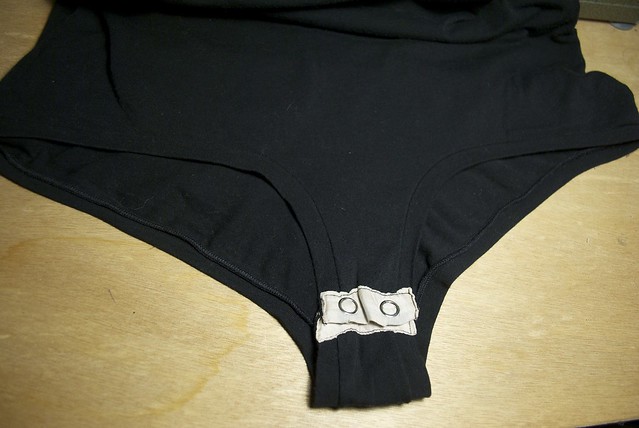
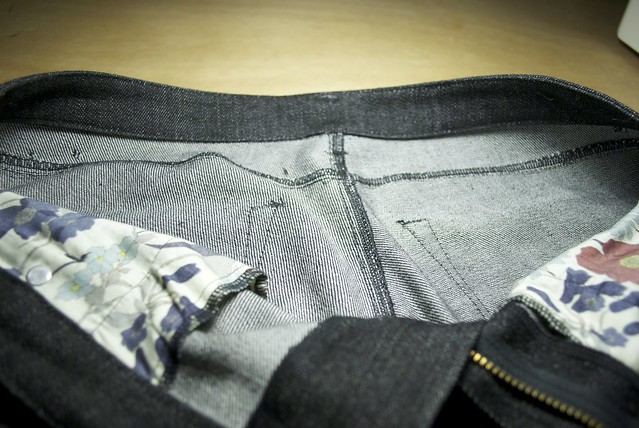
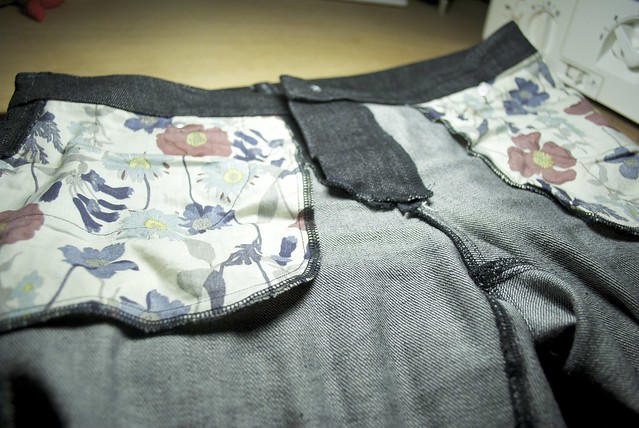
I realized I've never really shown you guys the insides of one of my pairs of jeans. Not that they're all that exciting, but I know how nosy all of us sewists are when it comes to construction! All of my topstitching was done in black topstitching thread, which unfortunately means that it's not super visible. This is a shame, because this just might be my best topstitching on a pair of jeans yet! Also, fun fact - I don't use a twin needle to do any of my topstitching. I've broken way too many twin needles during jeans sewing that I've just given up. I usually draw out my topstitching by hand, and use my chalk lines as a guideline.

I serged all the raw edges since this is stretch denim, and because I was too lazy to do flat felled seams. And the pocket lining is just some pretty floral fabric that I keep around for just such a purpose.

Mood Fabrics Black distressed denim
Mood Fabrics Black distressed denim and black jersey tee

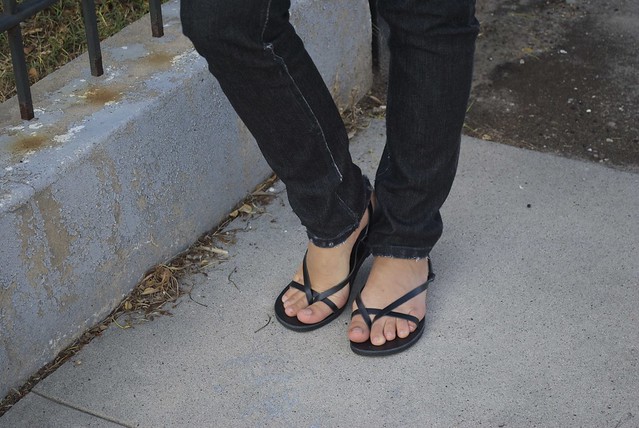
Because jeans sewing can be such a time-consuming project (especially if you're like me and only own one sewing machine - you're constantly changing out thread!) I wanted to pair it with an instant-gratification sew. And nothing says 'instant-gratification' to me quite like a knit t-shirt!

Mood Fabrics Black viscose jersey tee

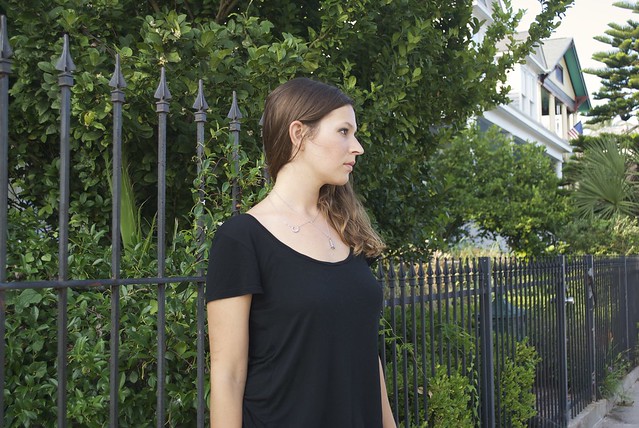
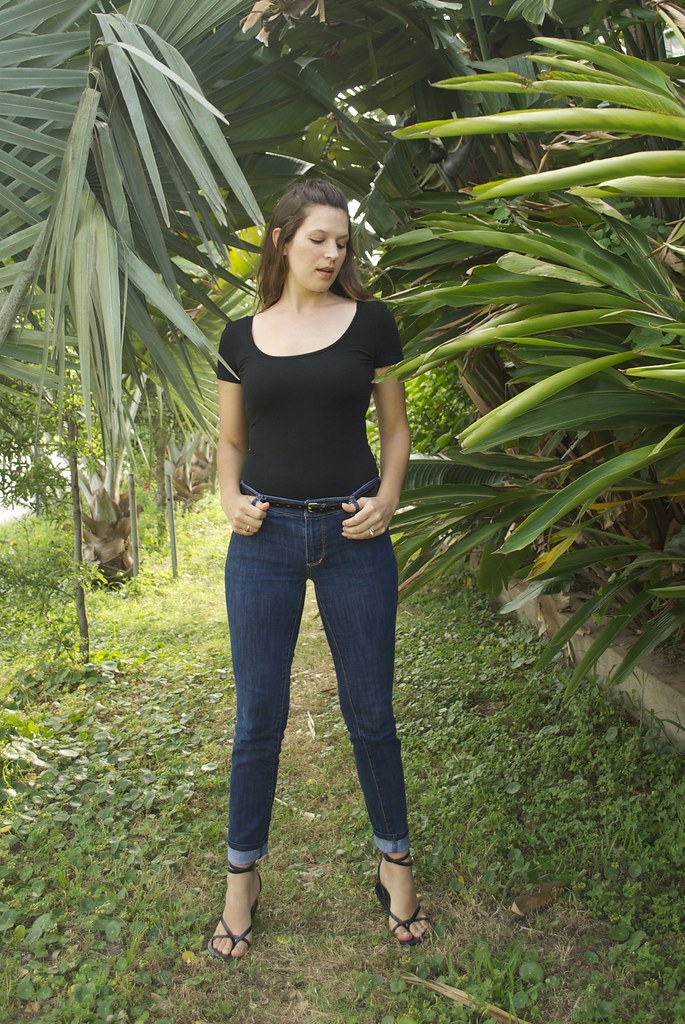
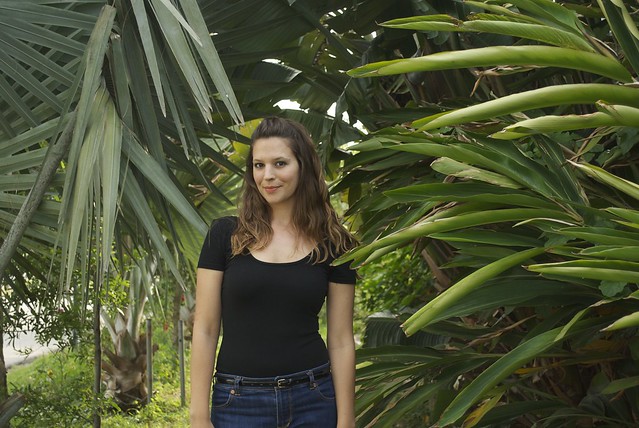
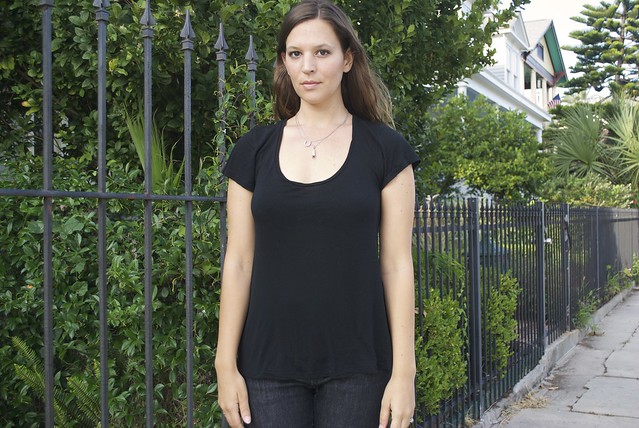
After seeing Heather Lou's super sexy version of Deer & Doe's Plantain Tee I decided I had to jump on that bandwagon. Also, free t-shirt pattern!?! Yes please! I used this drapey silk viscose jersey from Mood, and, man oh man, is this stuff ever luxurious to wear! Silky and smooth and light, with a lovely fluidity. Even though this pattern calls for a more stable knit, I felt like the drapey quality of this silk viscose would actually pair well with the subtle flared shape of the Plantain tee (and, also, I was copying Heather... duh... clearly I can't get enough of that girl). I stabilized the shoulder seams with a bit of clear elastic, and sewed all major seams on my serger. The sleeve and shirt hems were both simply folded under and finished with a double needle.

Mood Fabrics Black viscose jersey tee

And to thank you guys for putting up with another extra long post, I'll leave you with this gem:

DSC_0053

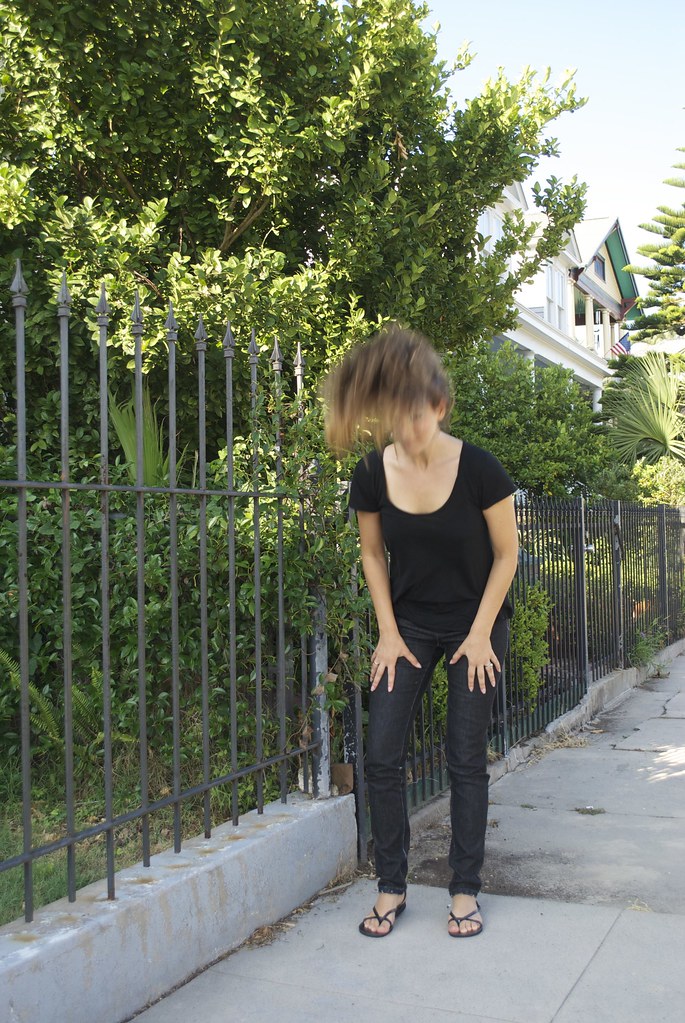
Not really sure what I was going for there! But ya know... I like to get a little crazy for the camera every now and then. And yes, this was in front of a stranger's house. A stranger who came home while I was taking these. I have no shame...

Well, anyway! I've been wearing both of these makes a ton since they came hot off of the sewing machine! I think that's a sign of a great basic! What about you guys - got any wardrobe basics planned for the near future?

xx

5.07.2014

ooohh nettie...

DSC_0024

You guys had to know this was coming.  There was no way I was going to let a pattern designed by one of my all time favorite people, and inspired by one of my all time favorite people pass my little ol' blog by!! Yes, this is the Nettie bodysuit from Closet Case Files.

DSC_0027

I'm sure a lot of you can relate to my rather sordid history with bodysuits. I believe I had some fun flowery numbers that I wore as a preteen in the grungy 90's (accompanied by an awesome choker, no doubt). But then full on puberty happened and I grew some boobs, and things just kind of changed all over and there was no way I was going to be caught dead in skin-tight anything!

Fast forward a few years, and some body-confidence-building later and I was ready to try bodysuits again. I had a job as a bartender at a questionable corner bar in Philly and relied heavily on my male customers for tips (hey, it ain't glamorous, but it's the truth!) So I bought one of those American Apparel bodysuits and wore it with mini skirts. To this day I regret that look! That bodysuit somehow managed to hug me in all the wrong places!

So after that I just sort of assumed that bodysuits were better left to the preteen set, and the svelte ballerinas among us. No harm, no foul.

DSC_0028

That is, until I met Nettie. When Heather told me she was making a bodysuit pattern I admit I was skeptical as to whether it would be for me or not, because, as I said, I'd been burned before! But because I have implicit trust in Heather, I went for it.

DSC_0037

To say I was pleasantly surprised is a total understatement! You guys, I was stunned!! Like, pick-my-jaw-up-off-the-floor-stunned! Not only does this bodysuit hug in all the right places, but I swear it actually makes me look curvier through some sort of Heather Lou voodoo! 

Plus, it was a super fast sew with lots of different sleeve length/neckline options which makes the possible variations of this pattern virtually endless! I went with the scoop front and medium back so I could wear my regular bras with it, but still get a little sexy back action, and the short sleeves because summer is coming.

DSC_0033

I made the size 8, in boring, basic, black cotton lycra (I bought this stuff from Girl Charlee - it only took one yard!!) because I'm always looking to add basics to my wardrobe (and because I still wish I was a svelte ballerina). This fabric has great stretch and recovery, and was softer and drape-ier than I expected. I love the fit I got with it - tight, but not too-tight. I actually love the fit so much, I'm planning a couple of pattern hacks to turn it into some easy, feminine dresses for summer.

DSC_0022

Heather is such a clever minx and designed this pattern using self-fabric bindings for the neckline and leg holes. This gives a nice, clean finish, and the bodysuit hugs your bum without giving you that dreaded "quad-cheek" look. My bodysuit actually fits a bit differently through the hips and butt than what is pictured on Heather. I get a bit more butt cheek showing (I think this might be because my bodysuit is a smidgen more roomy in that area than intended). I'd post a picture, but it would be NSFW (wink).

DSC_0045

She also includes instructions for adding an optional snap crotch, which is freaking brilliant!! Not only do I not have to get nekkid every time I need to pee (which is a lot, by the by) but I also giggle at the thought that I'm basically wearing a giant baby onesie! Joy!!

However, I feel like I need to just come right out and say that my snap crotch turned out... fugly. Let's call a spade a spade here, folks. Blame it on the fact that I was sewing late, and fiddly pieces of silky fabric was just beyond my motor skills by that point, but whatever. Let's just say I'm glad that part is hidden where, literally, no one by myself will ever see it (and now the entire internet. crap.)

But heeyyy,  check out those nice, even bindings, whydontcha? I will be the first to admit that sewing with knits are not my strong suit, but Heather's awesome instructions for attaching the bindings resulted in what is quite possibly the best looking bindings I've ever stitched! So, hooray! 

DSC_0040

So far I've just worn my bodysuit as you see here, with my jeans, and I'll throw on a cardigan when I'm indoors. However I'm excited to try it with different skirts in my wardrobe. I think it will probably be most flattering with skirts that hit at my natural waistline.

Well, what do you guys think? Are you bodysuit lovers? If you're unsure about the look I definitely suggest you give the Nettie a try - she made a convert out of me!

xx

4.27.2014

flower power

Mood Fabrics/Floral Silk/BHL Anna Dress

Well guys, spring has definitely sprung around these parts! And I for one could not be happier about it! This week also marks the end of what was a really busy couple of months for me at work, and I finally seem to have shaken off the respiratory infection that had been plaguing me (thanks antibiotics!) Yay!! So all in all, we're in high spirits around these parts!

What with the warming weather and more free time to actually enjoy it, I seem to have one thing and one thing only on my mind - silk dresses. Making them. Wearing them. Living in them for the next nine months... That and long, lazy, bike rides. Preferably paired together. At sunset. Sigh... paints quite a picture, doesn't it?

Mood Fabrics/Floral Silk/BHL Anna Dress

For this months Mood Sewing Network make I was irresistibly drawn to this gorgeous floral crepe de chine from Mood Fabrics online. Silk crepe de chine is one of my all-time favorite fabrics to sew with, and to wear. It has a bit more 'grip' than many of it's slippery silk counterparts, making it easy to handle, but it still has that lovely, fluid drape that you want from lighter weight silks.  And it's breathable, which is an absolute must in my hot and humid climate.

Mood Fabrics/Floral Silk/BHL Anna Dress

I absolutely adored the floral print of this fabric! It's so bright and playful, it made me instantly happy! I find the color palette to be sort of unusual and unexpected (magenta and poppy red, royal purple and inky black, viridian green and chartreuse... all on a soft, off-white background). It also reminded me a bit of vintage prints, but I couldn't decide what decade - 30's? 40's? 70's?? Maybe 70's-does-40's? (The consensus on the Mood blog was 70's-does-40's, which incidentally, is one of my favorite time period mash-ups!)  I don't normally go for a vintage look, but there was something so timelessly feminine about this print that was just calling me.

Mood Fabrics/Floral Silk/BHL Anna Dress

I thought it would be nice to pair this fabric with a pattern that also had a bit of a vintage vibe, without going totally overt, and felt like By Hand London's Anna dress totally fit the bill. I love this pattern - it's like all the best parts of being a woman rolled into one dress! This is my second time making the Anna dress (here's my first). For this version I opted for the v-neck and the shorter hem. However, rather than just chopping the pattern off at the knees, I kept the hem width of the maxi-version and adjusted the skirt panel pieces to compensate. This way I maintained maximum skirt swing-y-ness (very important for those warm breezes!)

Trust me on this one, this pattern hack sounds way more complicated than it actually was. I'm not saying that what I did was the right way to go about this - but, hell, it worked. Which is really all I care about. What I did was lay tracing paper over the skirt panel pieces, trace off the waist seam and grainline, and make a mark along the grainline the length that I wanted my new skirt pieces to be (I did 27 inches). Then I slid the tracing paper down, along the grainline, until my new hem mark lined up with the original maxi hem line, traced the maxi hem line and connected that to the waist seam, ignoring the original side seams. Done and done! 

Mood Fabrics/Floral Silk/BHL Anna Dress

One of the reasons I went with this silhouette and skirt length is because it's reminiscent of one of my all-time favorite handmade dresses, my purple linen Simplicity 1880. I love that dress. It's the dress I grab when I want to look pretty, and it's been my go-to dress for such a variety of occasions - weddings, parties, holidays, work events, and just regular old work days. That dress is a work horse. So I felt like it was time that I listen to my own closet and try to get more dresses like that in there! As I was sewing this dress up I could tell that it was definitely going to be giving my purple dress a run for it's money as my new go-to dress! I've already worn it to an opening at my gallery this past weekend and it was, as I suspected, perfect. It took me all the way through prepping for the opening (which entails buying assloads of beer, wine and ice, lugging it around and filling coolers, climbing up ladders to adjust lights, cleaning, hauling trash, etc. etc. etc...) to the opening itself, where I'm greeting people, serving wine, making chit-chat, and generally playing hostess. And you know what, I got so many compliments on this dress! She's a winner!!

Mood Fabrics/Floral Silk/BHL Anna Dress

I reinforced the v-neck with silk organza strips, which helped a little with gape-age, however there is still more gape than I would like. Perhaps I should have eased the v-neck to the silk organza a bit? Ah well - ya live, ya learn.

I also lined the entire dress with silk habotai, because the floral fabric was ever-so-slightly sheer. Silk habotai (or china silk) is a wonderful lining fabric, especially if you're like me and like to keep your silk dresses silky - inside and out! The habotai I used was from my stash, but Mood has an awesome collection online in, like, every color imaginable. And I don't know about the fabric stores where you live, but silk habotai at my local fabric store is sooo much more expensive than what they sell it for at Mood - that's including shipping, and there is much less variety. But probably the most economical source for silk habotai (and, really, any silk fabric) is Dharma Trading. Of course everything there comes in either white or black, but if you feel like getting crafty with some dye, you can make it any color your heart desires!

Mood Fabrics/Floral Silk/BHL Anna Dress

And because I always like to learn new tricks, even on patterns that I've made before, I decided to try my hand at using my machine's blind hem foot for the floral silk. Can you believe I've never used that little gadget before?! That's one of the reasons I love sewing - there's always something new to learn! I'm not totally sure if this type of hem was ideal for this type of skirt and fabric, but eh... it worked (moral of this post). Anyway, I love how clean the hem turned out, and it saved me so much more time than if I had hand-picked it myself. For the skirt lining I just used my serger's rolled hem function. I always feel like I'm cheating when I do this, but it's just so quick and easy, it's hard to resist!

Mood Fabrics/Floral Silk/BHL Anna Dress

Let's talk real quick about caring for silk garments. I feel like this is something (or maybe one of many things?) that always intimidates people from buying, sewing and wearing silk. You guys may have noticed that I sew with silk a lot, and, as I said, silk crepe de chine is my number one favorite fabric of all time. I wouldn't be sewing all these silk clothes if I wasn't actually wearing them, and with wearing your clothes, comes washing your clothes (unless, of course, that's not your thing, in which case, you do you...) For the record - I never go to the dry cleaners. I can't afford it, and I don't like all the icky chemicals. I wash all my silks at home. In the washing machine. The key is to prewash your silks the same way you intend to care for the finished garment. So I usually wash on cold and hang dry. Occasionally I'll throw my silk in the dryer (I did that for the habotai lining of this garment) and it works out just fine, but typically I won't continue to care for my finished silk garment this way. Although every so often one of my silkies accidentally ends up in the dryer, and it usually fares okay. In her recent post about silk jersey, Lauren noted that the color and sheen can dull a bit when you wash and dry your silks. This definitely can happen, though it's not too dramatic, and in my experience, this mostly occurs in the dryer, which is why I usually hang dry. But I'm all for throwing your silks in the dryer if that's more convenient for you, just make sure to do that when you prewash too!

And for any of you non-sewers out there, this is also how I care for store bought silk clothes as well - machine wash cold and hang dry. Silk is an amazing fiber, and not nearly as delicate as people think.

Well, there you have it! I can't wait to wear this dress on the balmy summer nights that I know are right around the corner! What sort of fabrics have you thinking of warm weather?

4.01.2014

summery separates

Mood Fabrics White cotton brocade separates

Hi everyone! Wow, I can't believe it's April already... time is really flying by! I had a very busy March - both at work and in the sewing sphere, and, perhaps most importantly, I had a birthday! I am now the ripe old age of 29! 

This month's make for the  Mood Sewing Network was a bit of a challenge. Literally. We were given the task to choose a designer and make a completely unique look inspired by their 2014 spring runway collection. I was pretty psyched about the concept - and also a little nervous! It felt a bit like being back in school and having to problem solve my way through an assignment. How do you make a look that hearkens to a designer, yet doesn't directly copy them, and also maintains a sense of your own individual style? Tricky stuff indeed, my friends. However, choosing a designer was a total no-brainer for me. Rachel Comey is probably the only designer who I continue to keep tabs on, no matter what, and I've had a long standing girl-crush on her for, literally, years. I love her collections, I love her shoes, I loved her patterns for Vogue (hint hint... could we get more of those please??) Like this one... and this one...


Comey's spring collection was really all over the place. Above are a few of my favorite looks from it (you can view the whole collection here). Crazy, tattered denim culottes? Check! Lace getups that are both seductive and frumpy? Check! Velvet slip dresses reminiscent of the 90's? Check! Psychedelic swirly printed sweatshirts? Check, check, and more check!! Really, it was hard to come away with a cohesive statement from this collection, but that's also what made it so great to work with - it allowed for a lot of freedom of interpretation.

Mood Fabrics White cotton brocade separates

In the end I decided to create a look that was maybe a bit more feminine than what Comey was showing, but I think it would still fit into her collection with ease.  I tried to focus in on a few key elements from a few different looks - the fabric of a piece here, the midriff baring there, skirt lengths, layering and accessories...

Mood Fabrics White cotton brocade separates

I used this white cotton brocade from Mood Fabrics online store to create this crop-top and pencil skirt.  As soon as this fabric arrived I knew I had made a good choice. It was almost identical to this textured, white fabric that appeared in Comey's collection:


This cotton is more ivory than white and has an almost slub-like texture to it, and a very pretty, subtle sheen.  It's 100% cotton, but has a generous amount of width-wise give, which made it perfect for this sort of curve-hugging silhouette.  It was super easy to work with, as cottons often are, but it did fray something awful, so I was very careful not to handle the cut pieces more than necessary and definitely made sure to enclose all my raw edges.  I fully lined both the skirt and the top with white cotton batiste, which I love as a lining for warm weather clothing.  It gave a nice sturdiness to both of these pieces, while also adding much needed opacity.

Mood Fabrics White cotton brocade separates
Please excuse that attention-whore of a bra strap... always trying to steal the show...

I used the top portion of By Hand London's Georgia dress for the crop-top, simply adding a back button placket so I could get it on and off. This was a really great way to test the fit of this pattern, without committing to the whole dress. I simply lopped the pattern off at the waist notch, then added an additional inch for a hem.  I did have to make a few adjustments to the bust cups - mainly taking out some of the volume from the bust apex. Now that I've got the fit figured out (mostly at least... I could still tweak away...) you can bet that I'm dreaming up other versions of this dress! 

The skirt is Burda 117 which I liked because it has the perfect mix of high-waisted, long-hemmed, body-hugging silhouette, and includes a back vent (an absolute must for this type of skirt). Of course I still had to take it in some sort of ridiculous amount through the side seams to get the kind of fit I wanted, but all in all that's an easy adjustment to make.

Mood Fabrics white brocade separates
You can see the texture of the fabric a bit better in these close ups
DSC_0020Mood Fabrics White cotton brocade separates 
One thing that is definitely for certain - Sonja and I have totally been drinking from the same crop-top + pencil skirt kool-aid this spring! If that's not a sign that this trend has arrived, than I don't know what is!  You heard it here first folks - crop-tops and pencil skirts are so. right. now. If I'm being completely honest, I kind of can't believe I not only decided to make a crop-top, but then photographed  myself wearing it and posted it on the internet!! I can honestly say that I have never worn a crop-top before in my life! Not being blessed with abs of steel (more like abs of marshmallow) I always thought it was a look that I couldn't pull off, but I think the proportions of these pieces really help make this outfit more flattering.

Mood Fabrics White cotton brocade separates

Also (true confessions) I actually had the best of intentions of making another Tessuti Tokyo jacket in denim to go along with this outfit. I was even planning on distressing the hems and pockets, like my girl Rachel Comey. However my plans were utterly foiled when I was struck ill mid-month with... well I'm not quite sure, but I've been calling it consumption which pleases the Victorian Gothic in me, and also the plague, which suits the Medieval Mystic in me. In fact, I can still be found hacking out my lungs most nights! So, alas, the denim Tokyo jacket got put off and instead I donned my beloved shibori dyed Tokyo jacket, since I thought Rachel (yeah, we're on a first name basis... in my head) would approve. 

Also, how do you like my new clogs?? I'm in looooovvveeeeee!!!!!

Happy spring everyone!

xx

2.26.2014

a winter coat just in time for spring

Mood Fabrics wool & leather coat

Hi Ya'll! I'm very excited to show you my newest make for the Mood Sewing Network! I know everyone is clamoring for spring, and the last thing you want to look at is another reminder that it's still, alas, winter, but bear with me here because I'm really excited about this coat! Get ready for a looonnng post and picture overload! (P.S. if you want the short version, head on over to the MSN post!)

DSC_0009

I know I didn't do a big post about my goals for 2014, but that doesn't mean that I didn't make any goals! For instance: learn to knit in 2014. check! make better use of your time and be more productive in 2014.... erm.... check minus?? Anyway. You get the point. Well on that list of goals was "make a coat in 2014". (check!!) This wasn't so much an aspirational goal as much as it was a 'this-is-getting-ridiculous' kind of necessity goal. See, when I moved to Texas I got rid of all my winter coats. A bit drastic, I know, but you gotta understand, for a girl from the northeast, Texas winters felt like a joke. At first. Then they started to feel cold again. Also, I bike to and from work everyday.  The past two years or so I have started collecting an odd assortment of winter weather layers, that consist primarily of a $10, thin, unlined, nylon, rain jacket procured from the local sporting goods store (the kind that folds up into a tiny pouch), an aztec print poncho/blanket type thing (shown here) from some cheap, trendy store (this was pre-sewing days) that I tend to wrap around myself like a giant muffler, an array of hoodies, some gloves picked up from the drugstore for $1.99, and now, my hand knitted hats. As you might imagine... it's not the most flattering look.

This year, I decided it was time to step up my outermost layer of clothing. No more being confused for a homeless person! (Although I will miss all the extra change people throw at me... just kidding... that never happened...)

Mood Fabrics wool and leather coat

This is one of those makes where I'm not really sure which came first, the fabric or the pattern. Or perhaps it all just miraculously happened in one, giant, big-bang-like, divine-intervention-esque, stroke of inspiration. But for the sake of keeping things coherent, let's start with the fabric. I actually spotted and fell in love with this Oscar de la Renta wool coating from Mood Fabrics' online store before I became a Mood Sewing Network blogger.  I even asked for, and received, the necessary yardage to make a coat as a Christmas present (thanks Mom and Dad!!) It's basically my dream coat fabric. It's double faced, so it has a gorgeous weight to it, and it's plenty warm for the southern winters I'm dealing with.  And I just think the large-scale, salt and pepper herringbone has such a luxurious texture to it.

Mood Fabrics wool and leather coat
DSC_0013

I really wanted to use this fabric to make a coat that felt both architectural and soft. I know that seems like a contradiction - but trust me, it can exist! I decided to use Vogue 8933 for the pattern, because I loved the large, dramatic collar, and the asymmetrical front.  Also, this was a relatively un-fussy pattern, perfect for my first go at making a coat. I made a size 10 based on the finished garment dimensions (always wise to use the finished garment dimensions when working with a Big Four pattern company!) The one thing that I was sort of bummed about when it came to this pattern was the sleeves. The pattern uses a regular, straight, one-piece sleeve. Since I wanted this coat to feel softly tailored I felt like a two-piece sleeve would just be a more elegant option. So I used the one-piece sleeve as a base to draft a two-piece sleeve. I used this Threads tutorial.  It worked pretty well, although if you do this, I strongly recommend making a muslin (or two, or three) just to be sure that all your markings line up and the sleeve hangs correctly.  I ended up having to move where my seamlines fell, and taking out an odd little chunk of fabric out of the underarm. Drafting sleeves are basically my nightmare, but in the end I think these turned out all right.

DSC_0029

And speaking of sleeves, since this Oscar de la Renta wool has such a gorgeous texture, I thought it would be fun to really highlight it with an opposing texture for the sleeves. You can disagree, but I'm pretty certain that this nubby wool paired with this buttery soft black leather is like the 'chocolate & peanut butter' of the textile world - tactile soul mates. I bought this leather hide, and let me tell you, it was a bargain! I feel like the quality was great and I got a great amount of square footage for the price. I still have a nice, hefty amount left over (hmm... what to use it for....?) plus, shipping was fast. After working with leather a few times now I'm starting to get a nice feel for it. It really isn't a complicated material to work into your sewing, and I, obviously, highly recommend it. I was thinking of putting together a post of a few of my 'tips' (if you want to call them that... it's definitely not anything official) for working with leather... would anyone be interested in that?

DSC_0028

Since I was on a roll with making this coat as much of a sensory delight as one can make a coat, I decided to throw another oh-my-god-I-can't-stop-touching-it fabric into the mix: silk charmeuse.  I'm not going to lie, I completely stole this idea from some other brilliant and fabulous sewists (namely Lauren and Erica). It just looked so incredibly ... what's the word ... rich! And since it's always fun to add a bit of 'over the top-ness' with linings, I opted for this lovely magenta silk charmeuse - although I might call it fuchsia rather than magenta. I like that it adds just a touch of "Dynasty" to the coat, without  going full blown Joan Collins.

DSC_0004DSC_0001

It's been awhile since I made a garment that required so much hand stitching.  I had to brush off my technique from my red jacket days (remember those days.... oh how time does fly...) Granted, I didn't go to nearly the extent that I went to on that red jacket, but there was still a nice amount of fell stitching and catch stitching involved.  And, hence, lots of getting caught up on the most recent season of 'Downton Abbey' (is it just me, or is that show getting even more ridiculous plot-wise?) Anyway, I attached the lining to the collar by hand, because that pivot point was driving me insane on my machine, and also attached the sleeve lining to the coat lining by hand because... well I just wanted to.  The bottom hem of the coat and the lining hang free from each other, so each raw edge was finished separately, pressed up and catch stitched in place. There are little thread bars that hold the lining in place at the side seams. You can also see my little leather hanging loop that I threw into the collar of the coat. I'm so pleased with this little touch! 

Mood Fabrics wool and leather coat

I debated adding a back vent to the jacket. At first I thought this might be a nice 'tailored touch', like the two-piece sleeve. However in the end I decided against it. Since the front has such a wide split, the coat doesn't need it functionally, and visually I felt like a back vent might break up the bottom hem too much. And since it didn't meet the criteria for form or function that idea got ousted. I think this was a good call.

DSC_0038

Since I was trying to maintain some softness with the fabric, I didn't go full tilt with the tailoring. I used fusible horse hair canvas in the facings, and to reinforce the pocket openings, and underlined the leather sleeves with cotton batiste. I also constructed a back stay from the cotton batiste... aaanndd.. that's really it! I think because this wool is double faced it already has a bit more heft than single ply fabrics and I didn't want the coat to get too bulky, or stiff and lose the drape of the collar.

DSC_0003

The coat is closed by a series of coat snaps, sewn on in the very last step. In a world where we go all swoony over a perfectly executed bound buttonhole, this is certainly not the sexiest of coat closures, however it is very functional, and I even sort of dig the final look. A little additional hardware never goes amiss in my book. And while we're on the subject of hardware - am I not-so-secretly regretting not adding  some tough zippers to the underarm seam of my leather sleeves?  Yes. Yes I am. Hindsight you guys...

IMG_1124

I realized that I didn't get a great picture of the coat all buttoned up when I did my photo shoot, so I had Nick quick snap this iphone photo of me.  As you can tell from the majority of my photos, I love the way this coat looks open with the oversize collar doing it's own dramatic thing, but it's nice to know that should I feel a chill creeping at my neck I can button myself, literally, all the way up to my eyeballs!

DSC_0021

Phew!! Long post, you guys! Thanks for sticking with me all the way to the end! In conclusion: I'm incredibly excited about this coat! It feels great to finally have some outerwear that reflects my personal style.  Truthfully, I probably won't get a chance to wear it this year, since spring is already making itself felt down here in the south.  However, I know I will be immensely grateful for this coat come next winter! Is anyone else doing a little 'out of season' sewing?

And how pretty is this fog we've been getting in Galveston? So moody... Can anyone spot the little orange kitty that was keeping me company while I was shooting these photos?

xx