Showing posts with label colette patterns. Show all posts

8.01.2014

it's not easy being green

Mood Fabrics Geometric Embroidered Linen Skirt

I'm sorry, I really couldn't help myself with this post title. I know it's lame, but then again... shhh.. don't tell anyone... I'm kinda lame!

Anyway! Hiya friends! Welcome to August. Time, man.... it's flying. I had a pretty wonderful July, if I do say so myself (and I do). I got a nice long visit in with my family in PA, doing nothing but lounging by the pool, reading alll the mystery novels, having looong chats with my Mom, and catching up with my sister, one of my two brothers, my Daddy-o, and playing with my little nieces and nephews (for as long as my energy would allow). Sometimes there's just nothing like family to recharge you and make you feel centered again. Although Nick always says that every time I come home from visiting my family I revert to being a little kid again. Eh... what can you do? Once the baby of the family, always the baby of the family!
Mood Fabrics Geometric Embroidered Linen Skirt

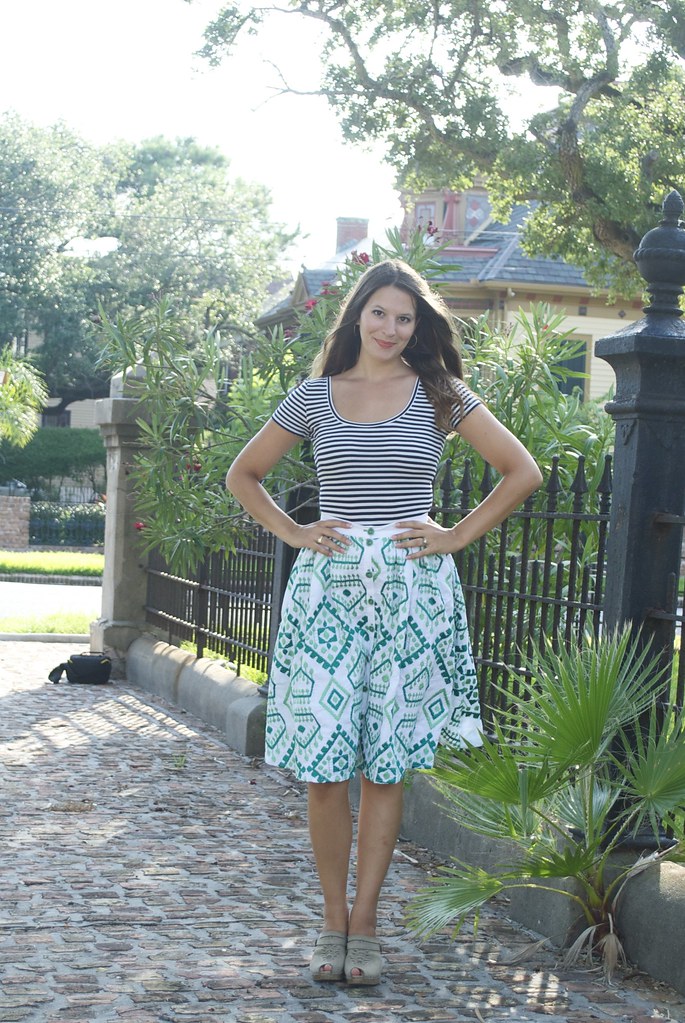
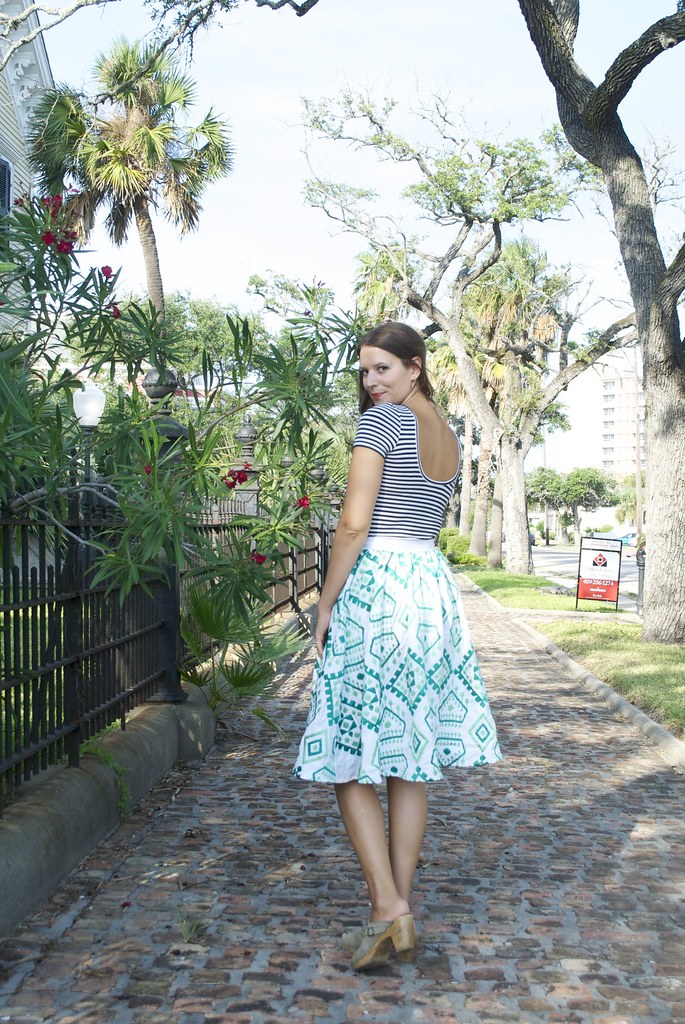
Oh you wanted to talk about sewing! How silly of me! Yes, well this is my July make for the Mood Sewing Network, and I'm pretty stoked about it. The fabric for the skirt is this Ultramarine Green Embroidered Linen, and it's delicious. I almost didn't click 'buy' on this fabric because, quite frankly, I'm not a huge fan of the color green (had it been red, there would have been no hesitation). I mean, besides in nature. Obviously. I think my anti-green sentiments stem from my painting days when I discovered that Phthalo green (similar to this 'ultramarine' hue in the skirt) is an evil, evil color that does not play well with the other colors. It is a color bully, squashing out all the colors with a more delicate chemical makeup. And it doesn't occur in nature. So I kept it well and good away from my palette, just like I do with bullies in real life. 
Mood Fabrics Geometric Embroidered Linen Skirt

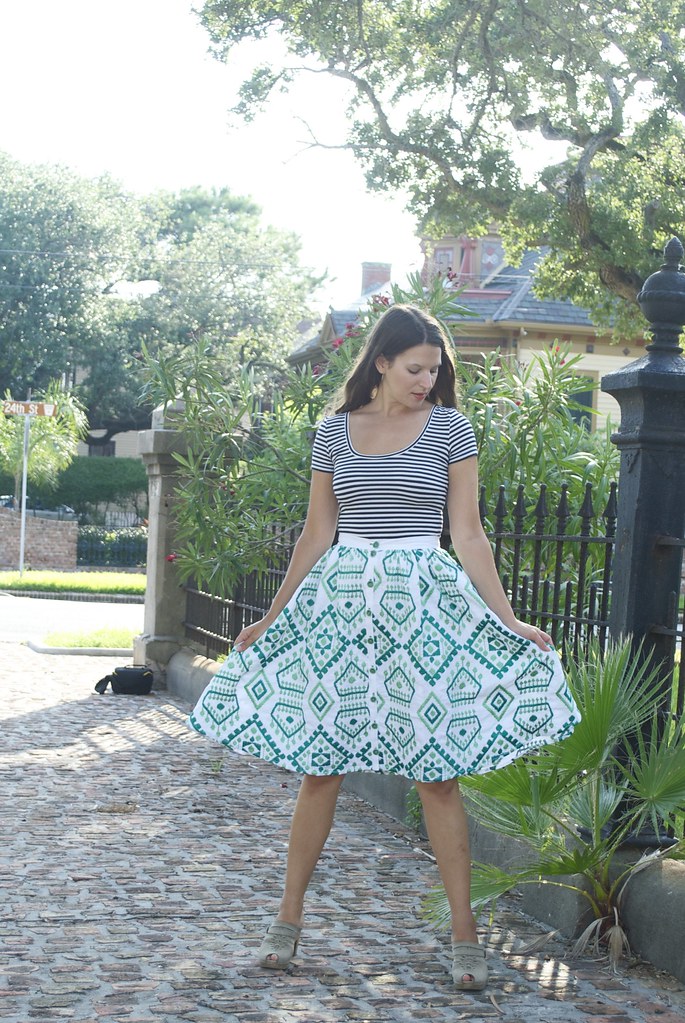
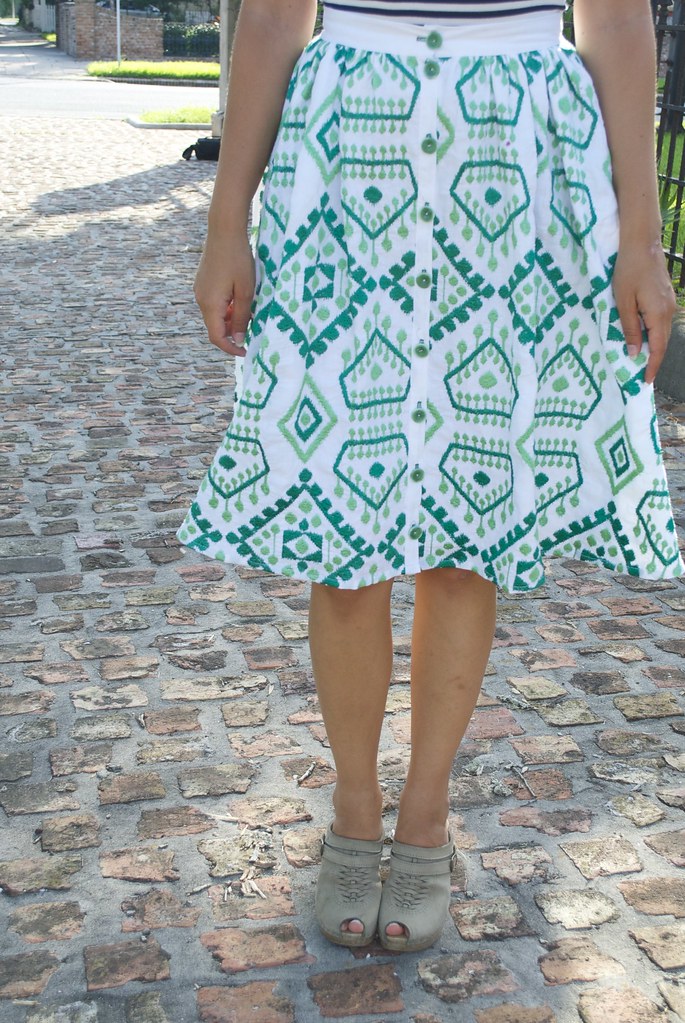
Now that you understand my completely rational bias against green, let's talk about how this fabric won me over. Because it did. Completely. First of all - it's linen, the fabric of summer. Second of all - it's embroidered, which means it's full of both visual and textural candy. And finally - that print!! What would you call that print? Tribal? Aztec? I'm pretty down with Mood's description of it being simply 'geometric'. But whatever it is, I think it's pretty fantastic. So fantastic that I embraced it's green-ness and grabbed a couple yards to call my own. I actually had an immediate idea that I wanted to make it into a full skirt. I felt that with the embroidery and the print it would have a really lovely gypsy/bohemian/70's vibe when worn as a full skirt.
Mood Fabrics Geometric Embroidered Linen Skirt

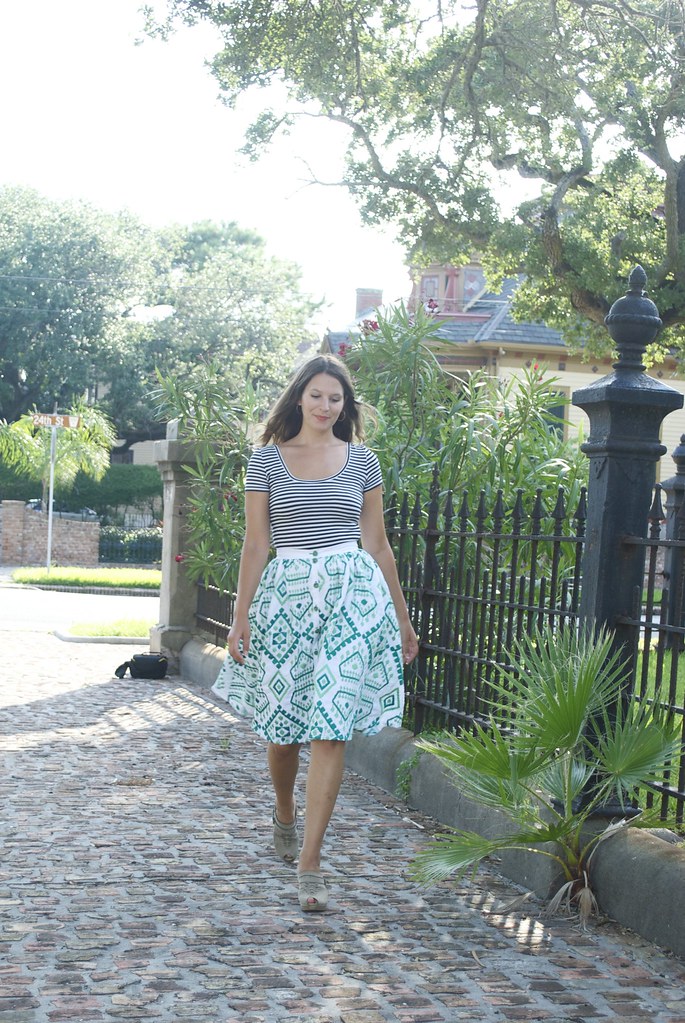
I used Colette's Zinnia skirt pattern, view A, for the pattern. I haven't made something from Colette in ages. I guess for awhile it just felt like their styles weren't speaking to me, but I've already discussed how I feel like my style has been changing recently.  Anyway, it was nice to revisit this beloved indie brand.  Zinnia is a really straightforward skirt, definitely great for a beginner. It has an a-line shape and a gathered waist with a front button placket. I always feel a bit like a cheater making 'beginner' or simple patterns, but that feeling only lasts for a minute or two.  In reality, I just choose patterns that feel right stylistically, not based on skill level. And a gathered, full skirt is, yes, easy to sew, but it's also a classic that never goes out of style.
Mood Fabrics Geometric Embroidered Linen Skirt

I'm a bit embarrassed to admit that I didn't even consider print matching until I was well into cutting out my pattern pieces. Thankfully I had just cut out the back skirt piece, and one half of the front before I stopped and was like, "Oh shit, yeah, this could be one hell of an eyesore if I don't do some print matching!" So I made the minimal effort of making sure that the horizontal bands of the print lined up across the front (true confessions: I thought I did a better job with matching up the print at the center front, but I forgot to take into account that the button placket would eat up some of the print. Whoops.) 

This linen took a little bit of finagling to get everything working right. After I pre-washed it and hung it to dry, the embroidered areas shrank up a bit, leaving the wide, plain, white, linen selvedges a bit wavy. I steamed it and pressed it, but the shrinkage was done. I had planned on using the plain white selvedges for the waistband and button placket, but now they were all buckled. In the end I just cut them away from the embroidered area and gave them a good press to restore their shape, and cut my pattern pieces from them that way.  It all worked out, as you can see. 
Mood Fabrics Geometric Embroidered Linen Skirt

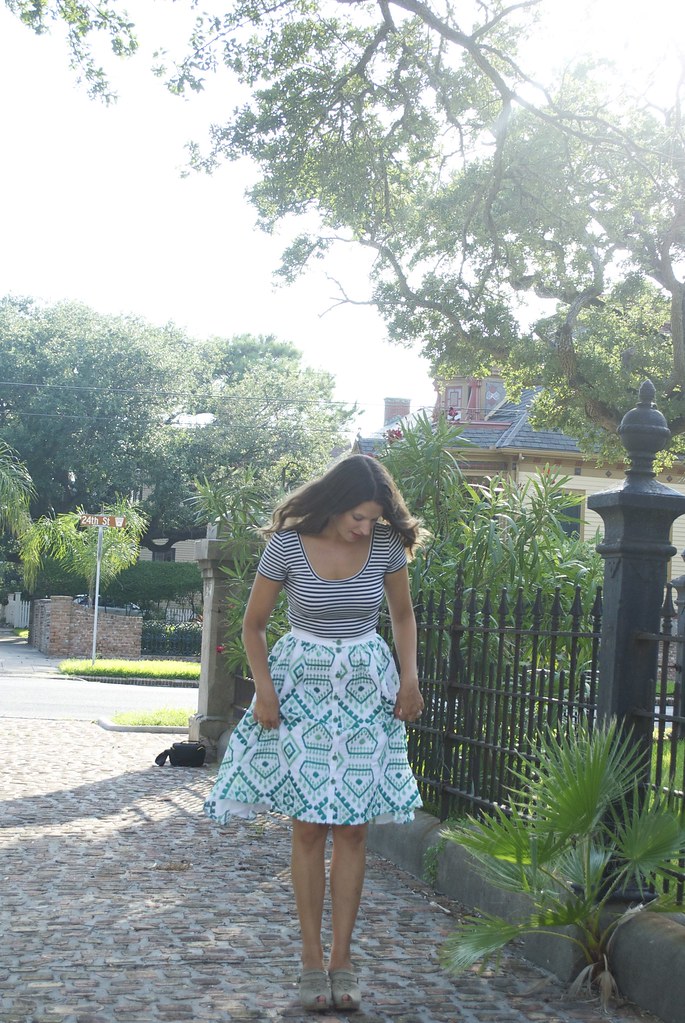
The linen was also slightly sheer, so I decided to line it with some white cotton lawn I had in my stash. I debated doing this, because the embroidered linen was also quite heavy and could get pretty thick in places, and I didn't want to add to the bulk of the gathered waist.  However I'm glad I went for it. It really gives the skirt some good support, and it's completely opaque, which makes getting dressed much easier (no digging around my unmentionables drawer for light colored undies, or, god forbid, a slip). The Zinnia pattern doesn't include instructions for lining this version, however it was really easy.  I just cut the skirt pieces out of the cotton lawn, minus about an inch in length. I sewed up the side seams and hemmed it before doing anything else.  Then I simply sewed the linen and the lawn as one layer when I created the button placket and the button band, enclosing the lawn along the center front, and allowing the rest of the hem to hang free.  Gathering the two layers of fabric was a bit touch and go, but it worked out just fine, and after some serious trimming, the waistband is pretty much bulk free!

Those of you that follow me on instagram know that I had a helluva time choosing buttons for this skirt. I bought two sets of buttons, the jade green plastic ones you see here, and also a set of bamboo buttons. Being genuinely stumped myself I took a poll of just about everyone I know - Nick, my Mom and sister, all of instagram - to see which they preferred, and the consensus was overwhelmingly pro-green! Who knew so many people like the color green?!? Of course I still wasn't totally sold, and delayed my decision making until the last minute, when I finally rationalized that these green buttons really were a perfect match with this fabric, and the bamboo buttons are more likely to go with some future fabric/project down the road. So practicality wins the day.
Mood Fabrics Geometric Embroidered Linen Skirt

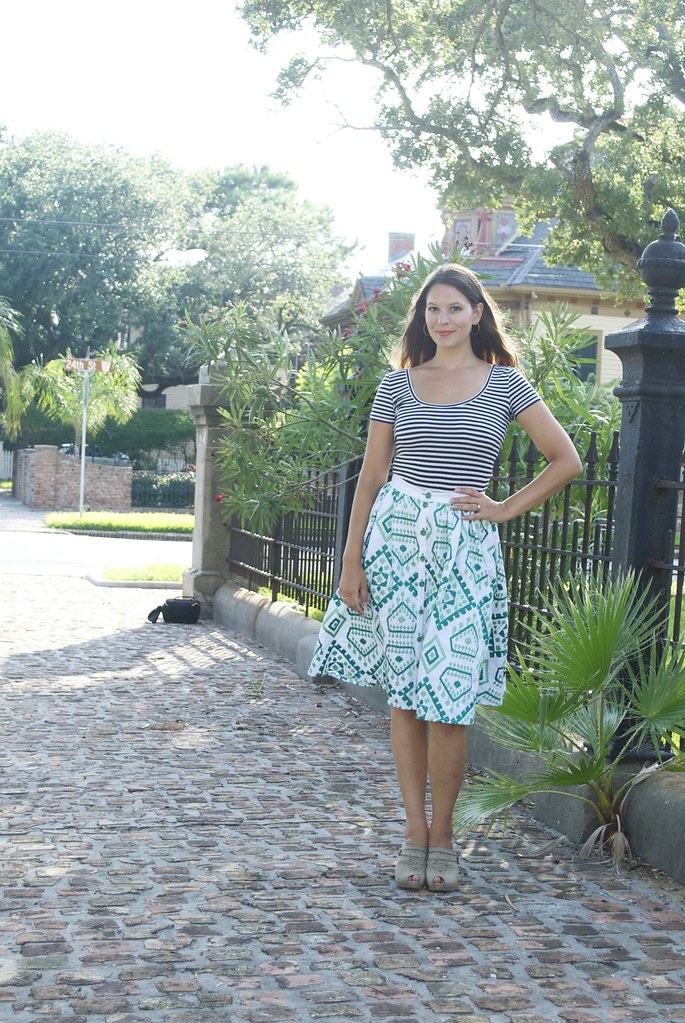
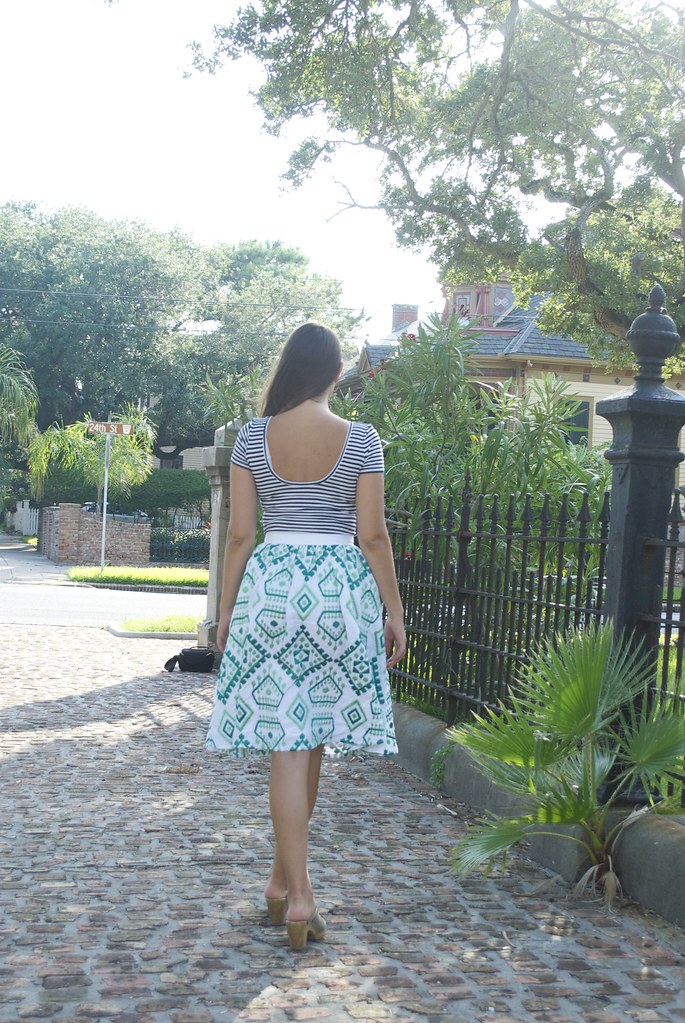
This striped top is also a new make. It's another of Closet Case File's Nettie bodysuit, made up in some navy and white striped rayon-y knit that I picked up at a Houston fabric joint. This summer has really been the season of Nettie's for me.  I actually have another Nettie hack all made up that I've been wearing out and about that I need to photograph and write a post about.  This bodysuit was a seriously quick make.  I honestly made it - from cutting to hammering on the crotch snaps - in one evening after work.  I even stopped to eat dinner somewhere in there.  And that's just one of the joys of sewing a knit with a pattern you know works.   This may also just be one of the best looking knit sewing jobs I've ever done.  The neck and leg bindings look ace, the stripes match up on the sides, and kinda on the sleeves too! The insides were all sewn on the serger, and the sleeves were hemmed with a twin needle. For the snap crotch binding I used self fabric interfaced with non-stretch fusible interfacing.  It worked much better than trying to handle a slippery, silky fabric, although it was a bit thick when it came time to hammer in my snaps.  Next time I might just interface some lightweight woven fabric and see how that works.
Mood Fabrics Geometric Embroidered Linen Skirt

I've really been gravitating to this silhouette of a skin-tight bodice paired with a full skirted bottom.  It's a classically feminine look that just nails it 90% of the time.  However I'm always a bit wary of how I put this look together because I think it can read too '50's housewife' for me.  That look works for plenty of women, but it just looks silly on me.  I think the print mixing of this outfit, and the type of prints used, help the whole outfit feel more modern and bohemian than June Cleaver.  At least that was my aim! 

Well, my lovelies, I think that was plenty of words for this post! I have a few more summer makes planned over the next couple of weeks, so I should be back soon!

xx

6.26.2012

unselfish sewing

DSC_0005

hey there, handsome...

we just came back from a long weekend on the east coast where we attended a friends wedding in long island, ny.

but let's flash back to the sunday before our thursday flight, shall we?? there i am, contemplating what to wear - my birthday dress? my bombshell dress? do i try and make something new?? do i wear one of the few rtw dresses i own? hmm hmm hmmmmm. decisions decisions decisions. (i ended up with my ikat dress - packs well and is oh so accommodating to buffets...)

DSC_0010

i'm roused from my self-absorption for just long enough to realize that my husband is staring into the portents of his side of the closet (which curiously keeps getting smaller and smaller... weird...) with a furrowed brow. i ask him what he's going to wear. he responds that he's thinking of wearing a short sleeve collared shirt i made him last year (never blogged) with a tie. hmmm....

readers, i'm not a big fan of fashion rules, and i am definitely no expert in men's dressing, but i just wasn't convinced that a short sleeve shirt and a tie was appropriate for an evening wedding. turns out my husband wasn't totally convinced either.

DSC_0011

and that was how i convinced him to take me fabric shopping.

i realized it was high time i sent a little sewing love to my biggest supporter, and my all around favorite person. it didn't hurt that his birthday was last week either!

with truly record speed (if i do say so myself) i whipped out this modified long sleeve negroni. i bought the negroni pattern last year when i made a short sleeve shirt for nick's (my husband) birthday. i knew that the convertible camp collar style of the negroni wouldn't suit him for, but i felt like i needed the hand-holding that colette patterns is so good at.  so using peter's excellent tutorial i made the necessary changes to the negroni pattern to give it a button placket front, collar stand and regular collar.

DSC_0008

DSC_0006

the fabric was some unmarked checked stuff that was wonderfully light weight, soft and mysteriously resistant to wrinkles. while pressing the seams i got a whiff of that tell-tale 70's basement smell that told my that there was some polyester lurking in those fibers. but my husband doesn't mind - and really, for a cotton/poly blend (my guess) its pretty darn breathable.

i'm not going to say that its the finest example of men's shirt sewing. there's some awkward turns and pivots and a curiously "off" cuff (but just the underside, so no one sees it). i also made one of those spectacularly idiotic blunders that only i can make when sewing to a deadline - after attaching the collar stand and collar and topstitching the whole thing to boot, i realized that i was sewing the shirt inside-out! at some point - perhaps when attaching the back yolk - i got myself all turned around and the plackets were on the inside of the shirt! head slap!! there was much unpicking of tiny stitches. and cursing. lots and lots of cursing.

but i do feel that next time i do it - without the pressure of a deadline - it will (hopefully) go smoother. and nick likes it. and thats what matters most.

DSC_0016

i love you, nick. happy birthday.

xx


4.28.2012

feeling zen-like

not one of my most inspired haiku's (pfft!! as if i have haiku standards!!) but still... hiya haiku! nice to see ya!

that title is a lie. but ya know, whaddyagonnado? sometimes you just need to tell yourself those little white lies. "feeling globular" just doesn't inspire normal human functioning, does it? but "feeling zen-like" well! now we're talking... see! talking! human function! where was i??

i'm back! i've managed to make it through my stressful april and i'm now seeing the light on the other side which is may! please be good to me may! please oh please oh please!! it was actually a bit of a challenge to stay away from the computer. in the little bouts of free time i've had over the last 2 or 3 weeks i've had to remind myself to limit my computer time. turn the thing off. step away from the mouse. its for your own good. this didn't always work since i was also determined to stay up to date on my blog readers (i don't know what it is, but an overflowing reader makes me more stressed out than an overflowing email inbox!)

but this self-imposed blog break doesn't mean that i haven't been thinking about sewing or blogging. au contraire!! part of the break was to help me organize my thoughts and get some action plans made up for the upcoming months. chief among these was preparing for me-made-may and the colette spring/summer palette challenge.

so where am i with all of this? hmmm. well when i say "organize" i mean "form coherent thoughts" so... don't get your hopes up...

lets start with me-made-may shall we?

my "mmm" oath reads a little sumpin like this:

i, sallie of sallieoh.blogspot.com, sign up as a participant of me-made-may '12. i endeavor to wear one self-made article of clothing, and to mix and match said articles of clothing to the best of my ability, each day for the duration of may 2012.

so here's the tizzy - i have a pretty good self-made wardrobe built up at this point. its not great, but it does get a lot of wear. i plan on building onto this wardrobe (particularly my summer wardrobe) throughout the month. so that should be fun. but what i really want to get out of this challenge is a chance to remix my current wardrobe. i think by setting the boundary of having to wear a self-made article of clothing every stinking day i might be forced to get a wee bit creative. also, this is a chance for me to show off some of the things i've made before i started this blog - which are all generally poorly sewn but for some reason i love them. so that should be fun! stay tuned!

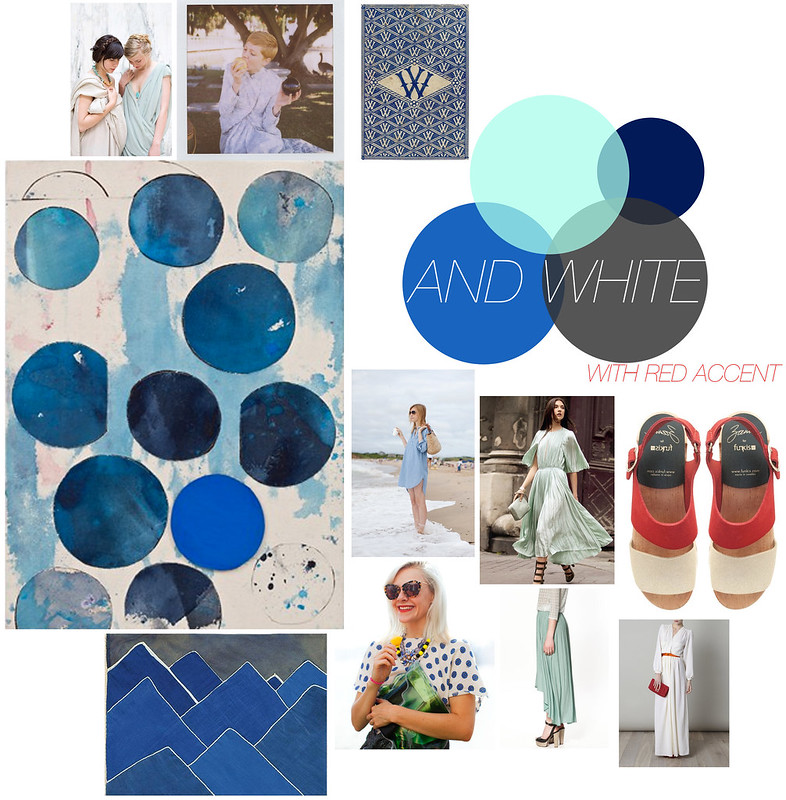
now! the colette spring/summer palette challenge! i approached this a bit different than i did for the fall one. in the fall i picked some images that were inspiring me and then tried to fit my fabric/garment choices around that. this time i tried to pay attention to what fabrics i was being drawn to and edit them to find a coherent theme, curating patterns to go along with them in the process. and this is what i came up with:


what can i say? i'm feeling blue! maybe its my yearning for some beach time - or something else, but i'm really craving cooling hues.  also, as a sort of continuation of my mini spring wardrobe, i'm also really trying to incorporate more prints into my wardrobe along with some classic solids. prints are the spice of a wardrobe's life, in my humblest of opinion, and so far my closet is like the cafeteria at a retirement home...bland.

i'll check back in soon with a more complete rundown of my plans and patterns and such and such! also, i have a newly finished garment to show off that i'm trying to get photographed either today or tomorrow - aaaaand  the me-made-may madness starts this tuesday!! ya'll are gonna get so sick of me...

till then,

xx

4.11.2012

breaking bad


the time has come. i always knew that april was going to be a doozy of a month for me. and now that its here.... well. its a doozy!

and so the time has come, my friends, for me to take a short blog break. alas! do not fret over my absence! for i only leave for to doeth the thingseth that needeth to get done. eth.

cough. see what being strung out does to me?? it makes me talk in bad made up 15th century melodramatic speak!! and it also makes me write sentences like that last one! (get a grip sallie! get a grip!!)

okay but for realz here. april is a busy month for me at work (and i haven't done my taxes yet!!!!!!!!!!! h&r block please stop emailing me because its making me stress ooouuuutttttt!!!!) and while i really like to pretend i'm one of those superwomen who get extra motivated by a full schedule and can do things like get to the gym at 5am (gym??! who's that?) in reality i just shut down and become a mushy slushy thing with two eyeballs peeping bewilderingly around me. yes. that is an accurate description. no i'm not exaggerating.

so things will be pretty quiet around here for the next week or two. my usual mode of operation is to just go all m.i.a. on you and then reappear and be all like "sorry!!!" but this time i decided to give you fair warning and be proactive about it. (see, self, i can be proactive about something!)

in the meantime, i am actually working on some sewing. i just started my final rachel comey pattern, v1170, which is a tricksy little pattern, but i'll give full details on that when i finish it!

and in other sewing world news... i've decided to participate in me-made-may 2012! i think may will be a much quieter month than april and i think i can handle the challenge.


i, sallie of sallieoh.blogspot.com, sign up as a participant of me-made-may '12. i endeavor to wear one self-made article of clothing, and to mix and match said articles of clothing to the best of my ability, each day for the duration of may 2012.

i'll be outlining my goals for the challenge closer to may.

also! did you guys see all the new colette patterns?!? i'm sure you did. and did you see that they're hosting a spring/summer palette challenge!!? i loved the fall challenge and since spring here has seriously been a blip on the ol' radar i've already been turning my thoughts to summer sewing. i think this will help me focus and edit my plans which have been a bit erratic.

well, lets close out this post and get this blog break started. final questions:

what do you do when you feel like your life is out of balance?

will you be participating in me-made-may? and if so, what are your reasons?

whats your favorite new colette pattern? mine's hazel.

and from the department of random - what do you think of hats? i've been really craving some hats lately...

well friends, i'll see you on the flip side...

xx


2.06.2012

red to the nth degree


lets just get one thing straight: i didn't, but i probably should have failed every mathematics class i ever took after the point where it wasn't just numbers anymore. you know, like when they decided to throw in letters too (because, what? numbers aren't abstract enough??!?). so the fact that i pulled that math reference out for the title of this post is testament to the surfacing of some deep seeded memory i have long been trying to repress...

good. glad i got that off my chest.

now where was i? oh yes! heeeyyyy look at these red pannntttssss!!! pretty shmancy eh?

these bad boys are the result of all my clover tutorials and my second pair of pants made using the colette clover pattern. in the tutorials i showed you some of the changes i made to the pattern to give them more of a trouser look. this included giving them a front zip fly, side pockets and back welt pockets. i may have accidentally reshaped the leg of these while i was sewing them up, too.

i may or may not have been about to fall when this picture was taken...

so i probably won't ever wear my red jacket and my red pants together in real life, but it was just too good of a photo opportunity to pass up. especially considering that, you know, valentine's day (shhhh) is creeping up on us.

i always feel a little bad for valentine's day because for the most part, once you're an adult, its like, expected for you to hate valentine's day (but i think maybe secretly we all sort of love it - ha!) i've never actually celebrated valentine's day - except with my parents (love you!) but i always think about doing something. does anyone have any suggestions for some non-cheesy but still maybe goofy and fun things to do on valentine's day?


one of the changes i made to this pair of clovers was to cut all my waistband pieces, including my interfacing and facing, on the bias. one of my readers, elle, left a comment on one of my tutorials advising me against this. i seriously considered not doing it (i take the advise of more experienced sewers veerrrryyy seriously) but it was something i have seen on many ready to wear pants and so i was pretty curious (plus i had plenty of extra fabric should something go wrong). it must work somehow. well i'm very happy to report that my bias cut waistband went in without a hitch! and i am so glad i did it! the little bit of extra stretch compensates for my muffin top quite comfortably, thankyouverymuch!

cutting and sewing things on the bias makes me quite nervous - so i'm a bit reticent to give any advise on sewing a bias waistband - but i will say that checking the direction of your bias matters. make sure all your seams are sewn with the bias going in opposite directions. i also think it helped that i was using a really sturdy sew in interfacing (hair canvas) and a really sturdy cotton for the facing - which didn't have much give, even on the bias.


i know it seems slightly crazy that i'm wearing a sleeveless shirt at the beginning of february - even i thought it was too cold to take off my jacket when i set off to take these pictures today. but then i heard on the radio that it was 65 degrees (F)! and i felt silly for being cold and wondered where my northeast blood went to!

i really wanted to pair this coral shirt with my red pants. its the sort of color combination that seems like it shouldn't work - but when you actually put them together its quite lovely. the pairing makes me feel very modern yet feminine - and maybe a touch springy?

i finally feel like i might be at the end of my rope with my "fall/winter" sewing. i'll be spending the next few days gathering some inspiration for future projects, and though i can't quite believe it, gearing my thoughts towards warm hot weather dressing.

if you'd like to check out my clover tutorials - you can find them all on my tutorial page.

xx


2.02.2012

tutorial: fun with clovers - part four


well hey there! my sincerest apologies on the delay in getting this last leg of the clover tutorials up - but i assure you i have perfectly good reasons. this past weekend was a rather momentous one at work and i spent the early part of this week just recovering. then once i finally got my sewing pants back on - wouldn't you know - i ran out of thread!! now this may not seem like a crisis to anyone else but, i live on an island people. the closest joanne's is 30 minutes away and my husband and i are a one car household. picking up sewing supplies isn't just something you do on your way home from work. it requires planning and strategizing...

okay, now i got my excuses out of the way... lets get back into our clover adaptation. as promised, i have the final installment of the clover metamorphosis ready for you. today i will cover how to sew your pockets and finish your waistband to complete your stylish and svelte trouser look.

enough with the dilly-dallying! lets begin with the pockets!

you should have four pocket pieces - two that follow the line of your pocket opening and two that follow the curve of the hip. for this tutorial's sake, we are going to call these two pocket pieces the "top pocket" and the "bottom pocket" . i'm sure they have some official term - like "pocket bag" and "pocket facing" or something but since i'm not totally sure what those terms are i just made up my own - you hip to my jive? picking up what i'm putting down? smelling what this rock is cooking? good. let's move on.


1. isolate your bottom pocket pieces. if your pockets are made from a different fabric than the body of your pants you may want to create patches for the bottom pocket pieces so the contrasting fabric doesn't show. or you can make the contrasting fabric part of your design - in which case skip this step. but if you don't want your pocket fabric to show - make a patch out of your fashion fabric that is longer and wider than your marks for where your pants will line up with the pockets. finish the edges of the patches by zig zagging, pinking, or overlocking. all my seam finishes will be done with my overlocker (serger). sew the patches onto the bottom pockets, lining up the outer edges and top corner.


2. lay your top pocket pieces, right sides together, on top of your pants. align the pocket opening and match up the dots. pin in place and stitch.


3. clip the curve of your seam allowance (if applicable) turn the top pocket to the inside of your pants and press. when you turn the top pocket, pull it so about 1/8 of an inch of the pants fabric pulls to the inside, this will make the pocket fabric less obvious when/if your pockets pull when you sit/walk etc.


4. topstitch your pocket opening about 1/8 of an inch away from the edge. for a more "jeans" look, topstitch again 1/4 inch away from your first row of stitching.


5. with your pants facedown, pin your bottom pocket to your top pocket, aligning all edges and marks. its super important that you accurately line up your marks along the hip and waist because this will affect the fit of your pants. stitch the pockets together along the inner edges and finish the edge. there's no need to finish the top or side edges since those will get encased in the seams. baste along the top and side to hold your pockets in place during the rest of construction.

note: if you don't have a serger and are looking for a more professional looking way to finish your pockets, tasia did a great tutorial a while back on finishing your pockets with a french seam. this tutorial also gives some great thoughts on other pocket related matters - like reinforcing your pocket opening.


and there you go! you totally have pockets on your pants! from here you will want to continue constructing your pants, sewing your pants backs together and sewing your inseam and outerseam. something to note at this point - because we sewed the front pieces together when we constructed our fly, you may want to construct your pants a little differently than the instructions in the clover pattern. i think its easiest to proceed as follows:
  • sew your pants backs together at the center crotch seam
  • if you're putting in welt pockets or any sort of back pocket, do it now
  • sew your pants fronts to the backs at the inseam - starting at the center of the crotch and working down each leg separately. for a more casual look - topstitch this seam.
  • if you are going for the jeans look you may want to topstitch your crotch seam
  • sew your pants fronts to the back at the outerseam.
lets pickup at the waistband.


materials you will need:
  • your almost completed clover trousers
  • all your waistband pieces - one back piece and two front pieces plus facing pieces that should be interfaced (i'm using hair canvas that was left over from my red jacket)
  • a hook and bar closure
  • a button (optional)
  • scissors, thread, etc.
  • your belt loops (optional).
i made my belt loops by folding a piece of bias cut fabric in half and sewing about 1/4 inch from the folded edge. then i trimmed the seam allowance and turned it and cut it into six 3 inch long pieces. there are so many different ways to make belt loops - this is just how i did it this time - i did it differently on my denim trousers - but this worked pretty well for me.


1. lay your waistband pieces right sides together. pin together at the side seams and stitch. press seams open.


2. lay your waistband facing pieces (with interfacing) right sides together. pin at the side seams and stitch. press the seams open.


3. lay your waistband facing pieces right side up. lay your belt loop pieces on top of the facing pieces at even intervals, measuring the spaces in between to make sure they are evenly spaced. lay your waistband right side down on top of the facing, sandwiching the belt loops in between. pin in place along the top edge and stitch.


4. trim down and grade the bulk in the seam allowances. turn right side out and press. either understitch the facing or topstitch the waistband 1/4 inch from the edge. i decided to topstitch my waistband - i don't really have real a reason for this, i just liked the way it looked! i also felt that it stabilized my bias cut waistband (more on that later).


5. hold your waistband facing and belt loops out of the way and pin just your waistband to your pants, right sides together. match up all points - but especially the side seams. stitch.


6. trim down and grade the seam allowances in the waistband. trim down your extra zipper tape at this time. you can just cut through the zipper teeth. press your seam allowance towards the waistband.


7. okay. this is where my instructions get a bit vague. i ended up doing things very differently this time than i did the first time so i was sort of figuring it out as i went along. sorry!

anyway. find your hook and bar pieces. i'm using the kind that you push through your fabric rather than the sew on kind just because i think they are sturdier. i decided not to do an extended tab closure on these pants just because i wanted a cleaner front - but you can make an extended tab closure by simply... well... extending your waistband! wherever you want your tab to stop - measure in 1/2 inch from there and that will be where you will put your hook. the hook will go on the overlap of the waistband. the bar will go on the underlap. follow the instructions on your hook and bar packaging to insert them correctly.


8. finish each edge of your waistband by trimming your waistband facing down (either even with your fly edge, or where you've extended your waistband tab to). fold the extra waistband fabric around the cut edge of the facing. pin in place. you can either topstitch this fabric down - or i prefer to finish this bit by hand, using a draw stitch or fell stitch for a nice clean edge.

note: if you've topstitched your waistband - like i did - you may find yourself ripping out a few of your stitches. its no biggee, just re-topstitch once you get everything into place. or do as i say and not as i do and leave about an inch unstitched at either end of your waistband and just finish the topstitching after this step.


9. finish the inside of your waistband facing. there are a lot of great ways to do this. you can turn the edge under and topstitch it down, or "stitch in the ditch". one finish i've always admired was a bias trimmed edge. it always looks fantastic - though i've never quite got the knack down. my preferred method - because i might be a crazy person - is to finish the waistband by hand. i turn the edge under and fellstitch it in place. i did this on my denim pair as well, which have got a lot of washing, drying, and wearing, and the handstitching has held in place beautifully.

here is a tutorial on the colette website where sarai shows you how to finish the clover waistband with bias binding. you will have to adapt it a bit since we're dealing with a front fly, not a side invisible zip.


10. final step! press everything in place and fold your belt loops over your waistband. pin them firmly in place and bar tack them in place. this is easiest if you extend your belt loop just past your waistband, so you're actually sewing your belt loop onto the body of your pants. you can trim down the extra bit on the inside if you want.

on my denim clovers i actually sewed the belt loops into the waistband when i attached the waistband to the pants - but honestly, while this seems like it would work well - they kind of pulled weird at my waistband and i wasn't totally happy with the result. so i did it this way this time and i like the results much better.


and there you have it! fully refashioned clovers! phew! is anyone else exhausted?

i want to point out a few things before we're done - just some lessons learned that i'd like to pass on:

first, i didn't do a button and buttonhole on these pants because i didn't have enough room - but typically if you are doing an extended tab closure you'll want to do a button on the opposite side to hold everything nice and neat.

second, i only did the one hook and bar on my closure - this works quite well, but i wish i had put two hook and bars, one on top of the other.

now all you have to do is hem your pants - and of course model them! it might just be me, but i kind of think the clover pattern gives good butt....

if you missed the earlier clover tutorials you can find them here:

xx